How to Create Church Website: Tutorial for Beginners
How to create Church website? If you are assigned the task to create a church website and you are wondering to how to do it, then you are at right place. Solutions provided in this tutorial for beginners is what you need. This tutorial for beginners on how to Create a Church Website will shed some light on how to build church website from scratch step by step, and will also give you a little glimpse of building it through a free church theme. So let us begin with it.
How to Create a Church Website? Tutorial for Beginners
Being online in order to increase your reach has been a common practice these days. Even religious bodies such as churches have also started following it since it can serve various purposes. Hence, Creating a website for your church can serve multiple purposes as well. Imparting knowledge regarding the history of the church, timings of sermons being organized by the church, the location, types of services and other information, be it anything, a church website can serve all such purposes. The popularity has even led to the availability of dedicated WordPress plugins for such websites which is also discussed in the latter part of the post.
In this tutorial for beginners, you will learn the steps to how to create a Church website by having a glance at the following key points:-
- Selection of an open-source CMS to build your website, here in this article I will go with WordPress.
- Create WordPress Theme from scratch.
- Customize it, for example, with the help of WordPress plugins.
- Export and Upload your website.
To demonstrate the process of building a church website, I have selected my favorite, WordPress. So here we go…
Steps to Create Church Website in a few minutes
In this article I will show you how to build your Church Website using an efficient, intuitive and professional website builder, TemplateToaster to create your own website. To understand the following steps better, you must first download and install TemplateToaster on your PC. It even comes with an unlimited free trial. Using which, you can decide without much confusion if or not this builder suits you. So, just get the things ready quickly as we will now be proceeding towards the actual steps to how to create a Church website.
Step 1: Set up a WordPress Environment
Now we need to install the XAMPP and WordPress on your PC. So, let us carry out the WordPress and XAMPP installation and then return to this article. Note: If you already have registered your Church’s Domain Name and hosting you can directly install WordPress there with a single click instead of installing XAMPP and WordPress on your local PC.
Since you might’ve been through with the WordPress set-up procedure, along with the TemplateToaster website builder, I assume that you are now ready for commencing the actual website building procedure.
Step 2: Start Designing your Church Website Theme
You might want to have an overview of this tool before actually using it to build your website. Having a thorough understanding of this website builder will surely add up to your knowledge. More so, it will assist you in grasping the steps more clearly.
Let’s now walk through the designing process which consists of the following steps:-
Basic Layout
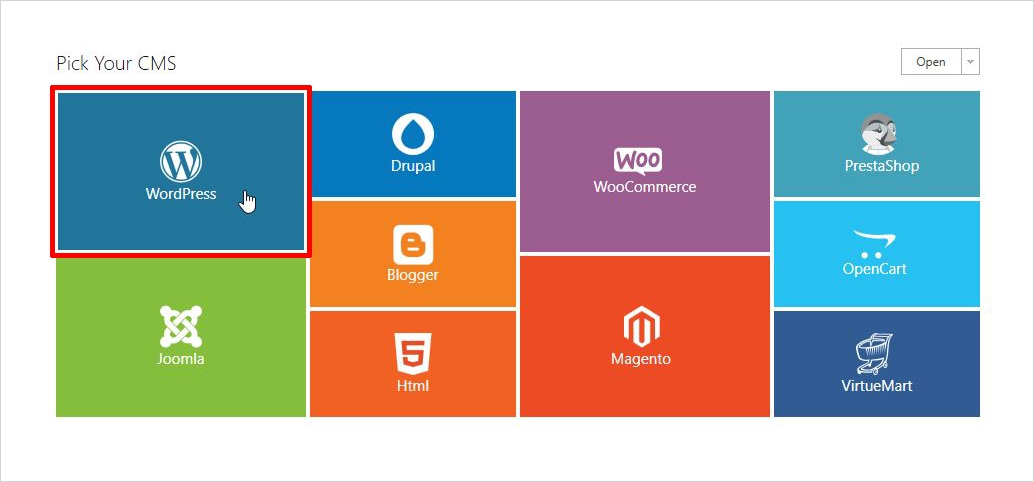
- As soon as you launch the TemplateToaster offline website builder software, you see the screen containing various different CMS icons. Among them, I am opting to select WordPress as my website platform.

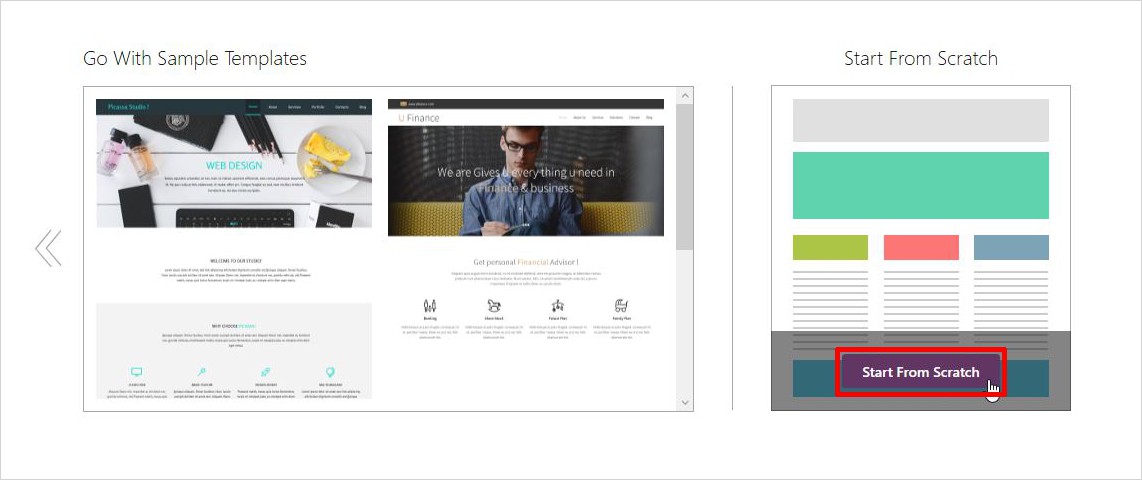
- After selecting WordPress, you will come to a screen where you will find options to either design your own website from scratch or choose a pre-designed one. You can easily find beautiful free church themes among its catalog of free WordPress themes.
- Since this article is regarding “How to”, so instead of choosing a pre-defined theme, we choose to start from scratch. Clicking on “Start from scratch” leads you to the main UI screen of TemplateToaster as shown below in which theme creation for WordPress is in process.

- The first customization pop-up that appears is that of colors and typography which enables multiple functionalities. You can modify different components in your theme such as color, fonts, etc.


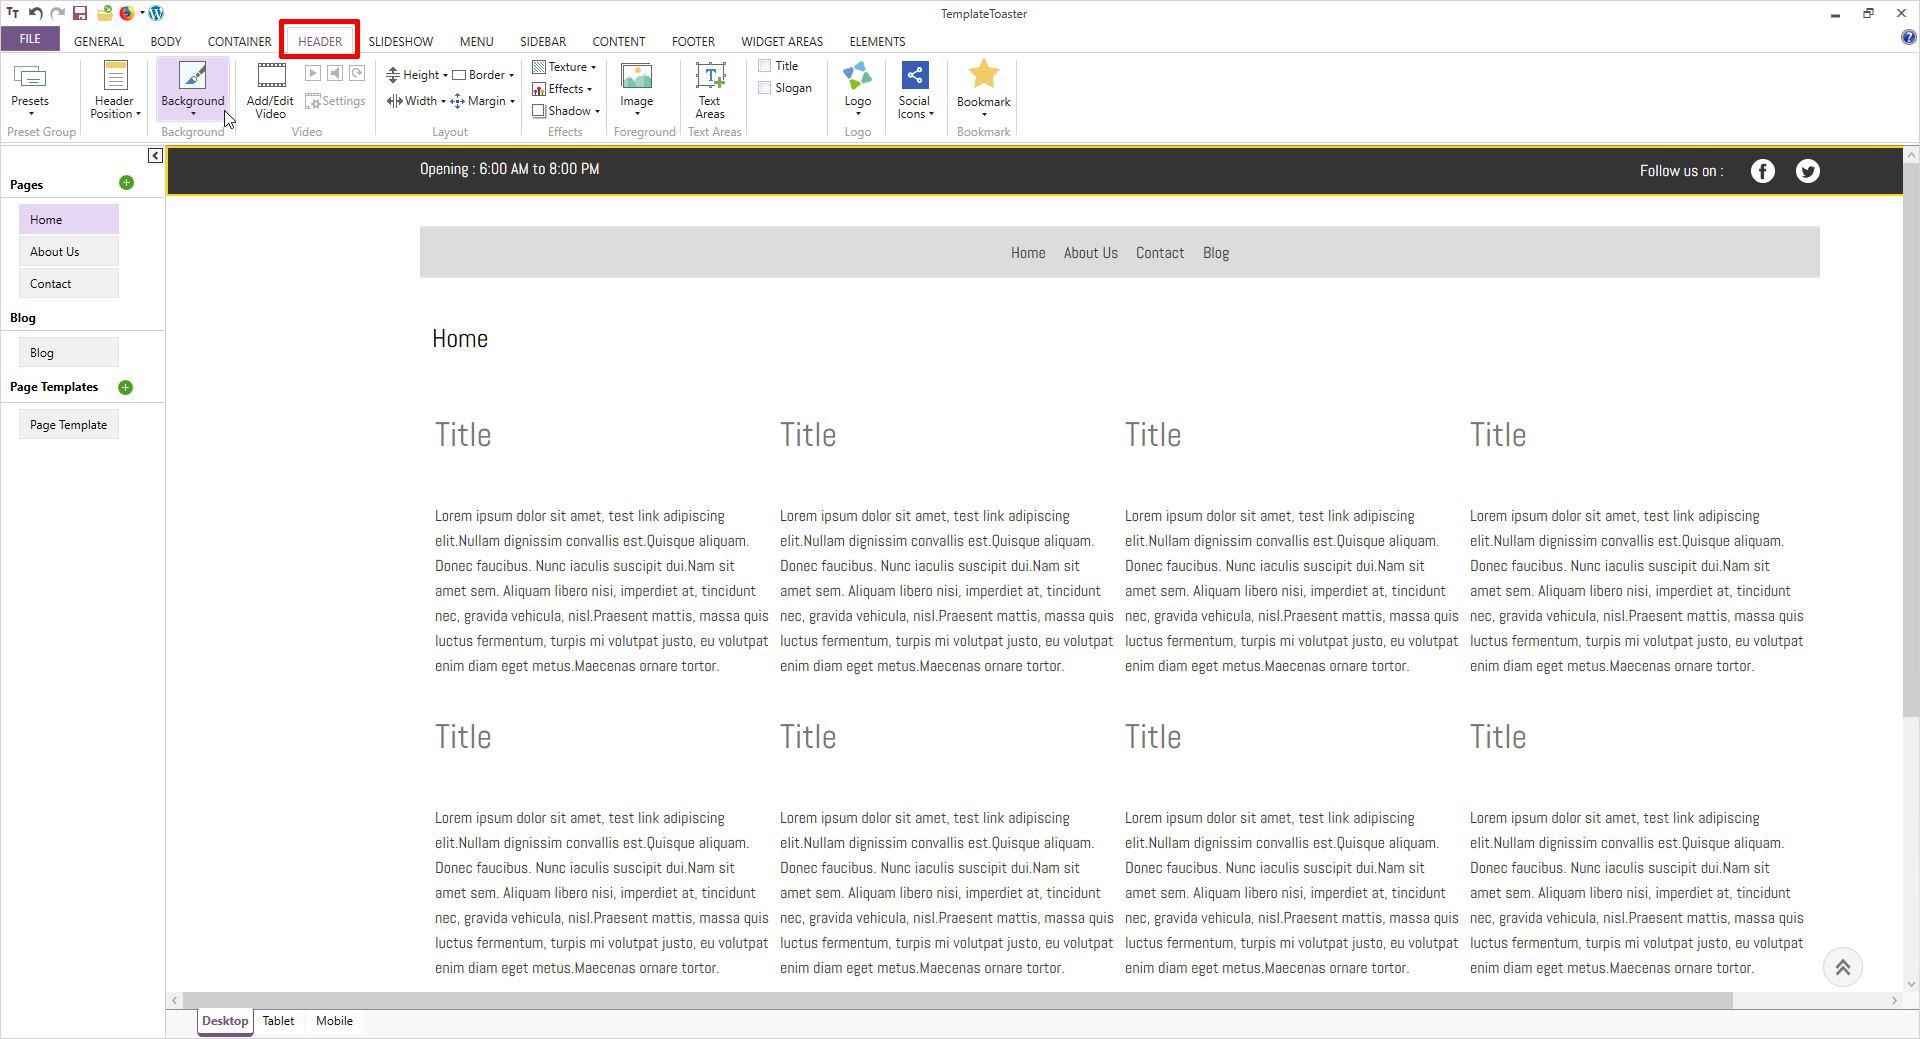
Step 3: Design / Customize a Header
- You can modify the header position under the header tab which is generally the first thing to be done. I will now take you through other customizations.
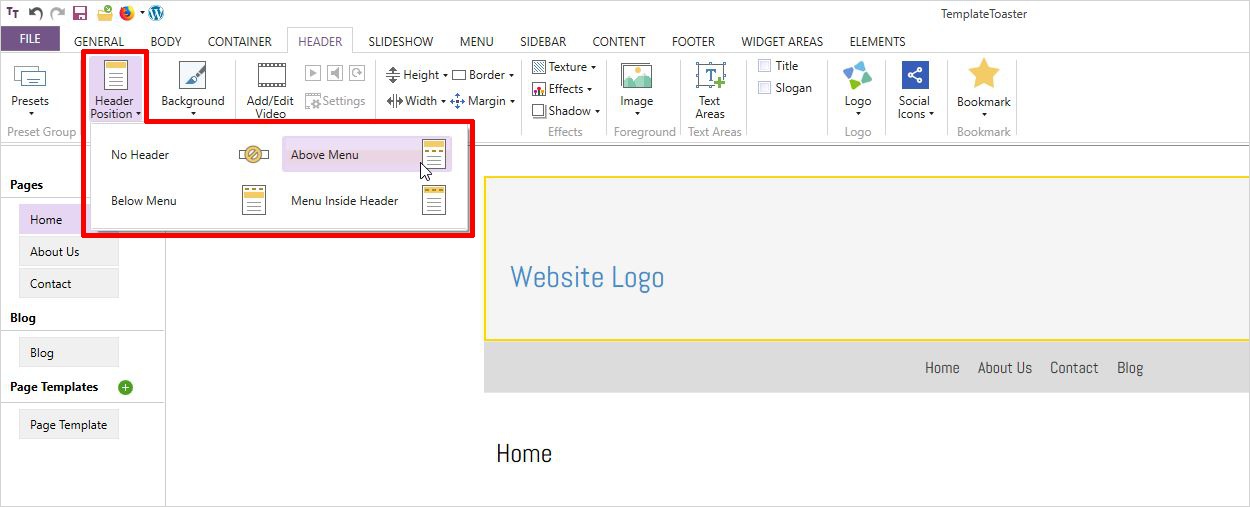

- Here you can customize the Header by setting the background color, height, width, margin, padding, texture, and image.

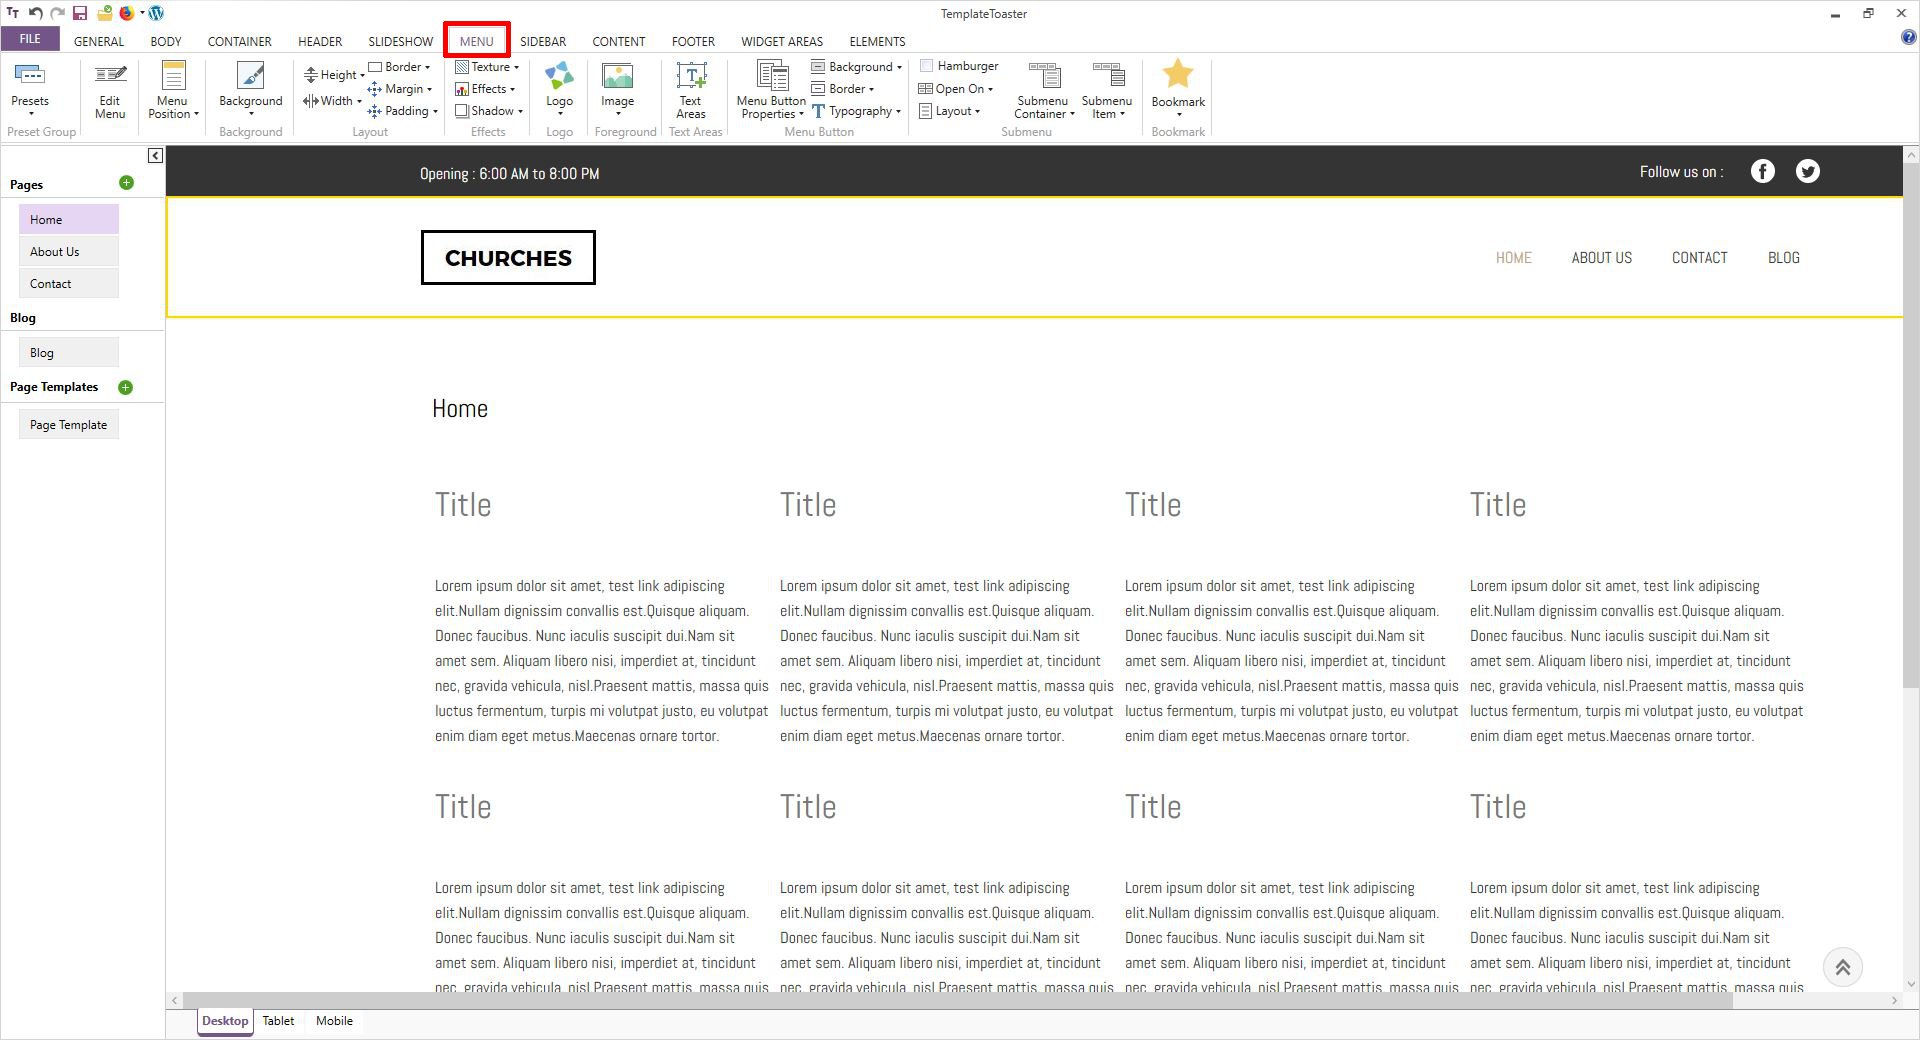
Step 4: Designing the Menu
- Click on the “Menu” button above in the toolbar. It will, in turn, allow various modifications such as background color, border color, and thickness along with various other menu related parameters. You can set the alignment, position, etc.
- Moving on, you can also set a logo. You can have a logo that you like from the stock logos. Since you are making a church website you might have already designed a logo of your own as well. The best part is that you can upload that logo easily.

- Similarly, as per the requirement, you can make other changes since this is a very intuitive tool to use.
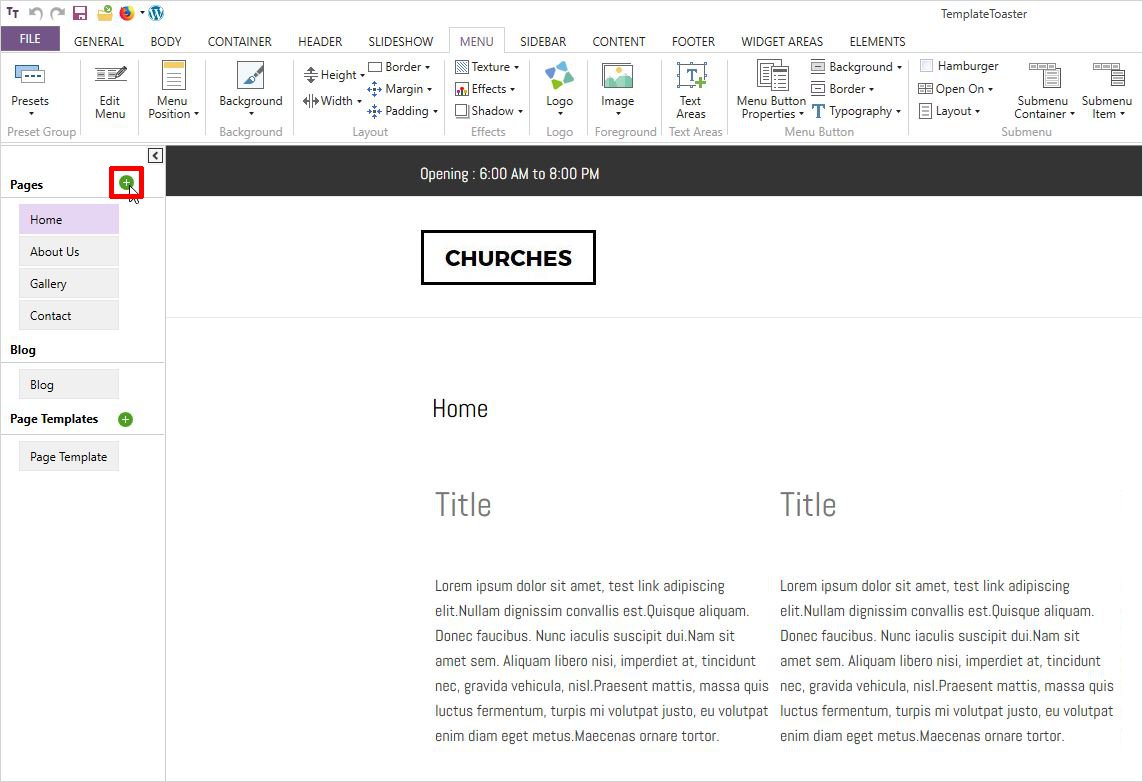
Step 5: Add Pages to Menu Pane
- When you look towards the left side of your window screen, you will notice a horizontal bar. That is the control area to add/modify the pages on your website.
- You can add/rename/delete and carry out similar other menu functionalities in this bar. You can easily discover their usage. However, I will tell you here about some of the basic functions like adding or renaming a page.
- To rename a page, simply double click on it, which will make it editable. You can then type in the field name such as “location”, “sermons”, “denominations”, or any other field related to your church website.
- To add a page, you can either click on the “+” icon and add a page or right-click and select “Add Page”. Furthermore, on right-clicking on any of the fields, different functions appear which are intended for a different purpose, such as for creating a child page.

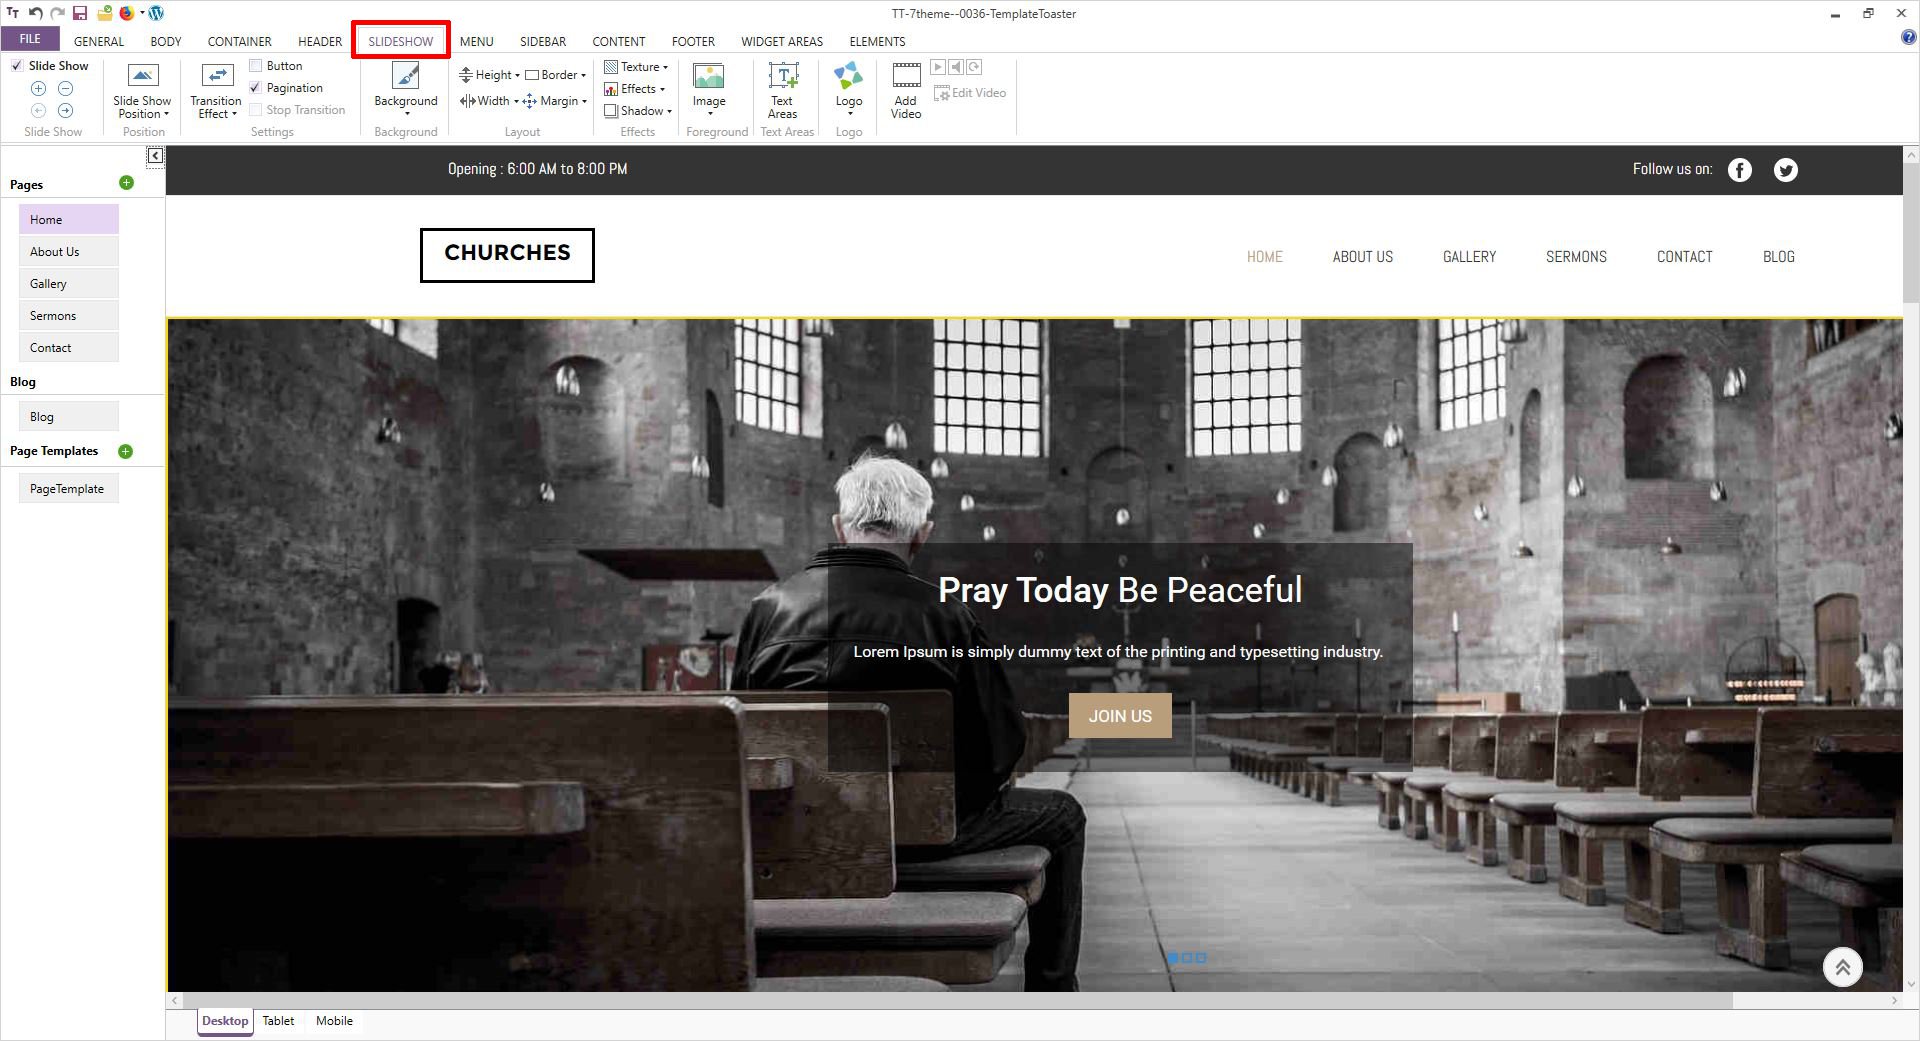
Step 6: Include a Slideshow to your Website
- In the toolbar at the upper region, click on the “Slideshow” tab. Clicking on it will show you another bar below it with a set of different functionalities associated with slideshow.
- You can apply different changes such as Background Color, Background Image, etc to your slideshow. The function buttons for these modifications can be found right on the bar below the slideshow tab.
- Further, you can also carry out functions like changing the position of your slide, applying different transition effects, etc. The buttons for carrying out these functions are clearly provided on the bar.
- You can add multiple slides and impart different functionalities to them to make a slideshow for your church website.

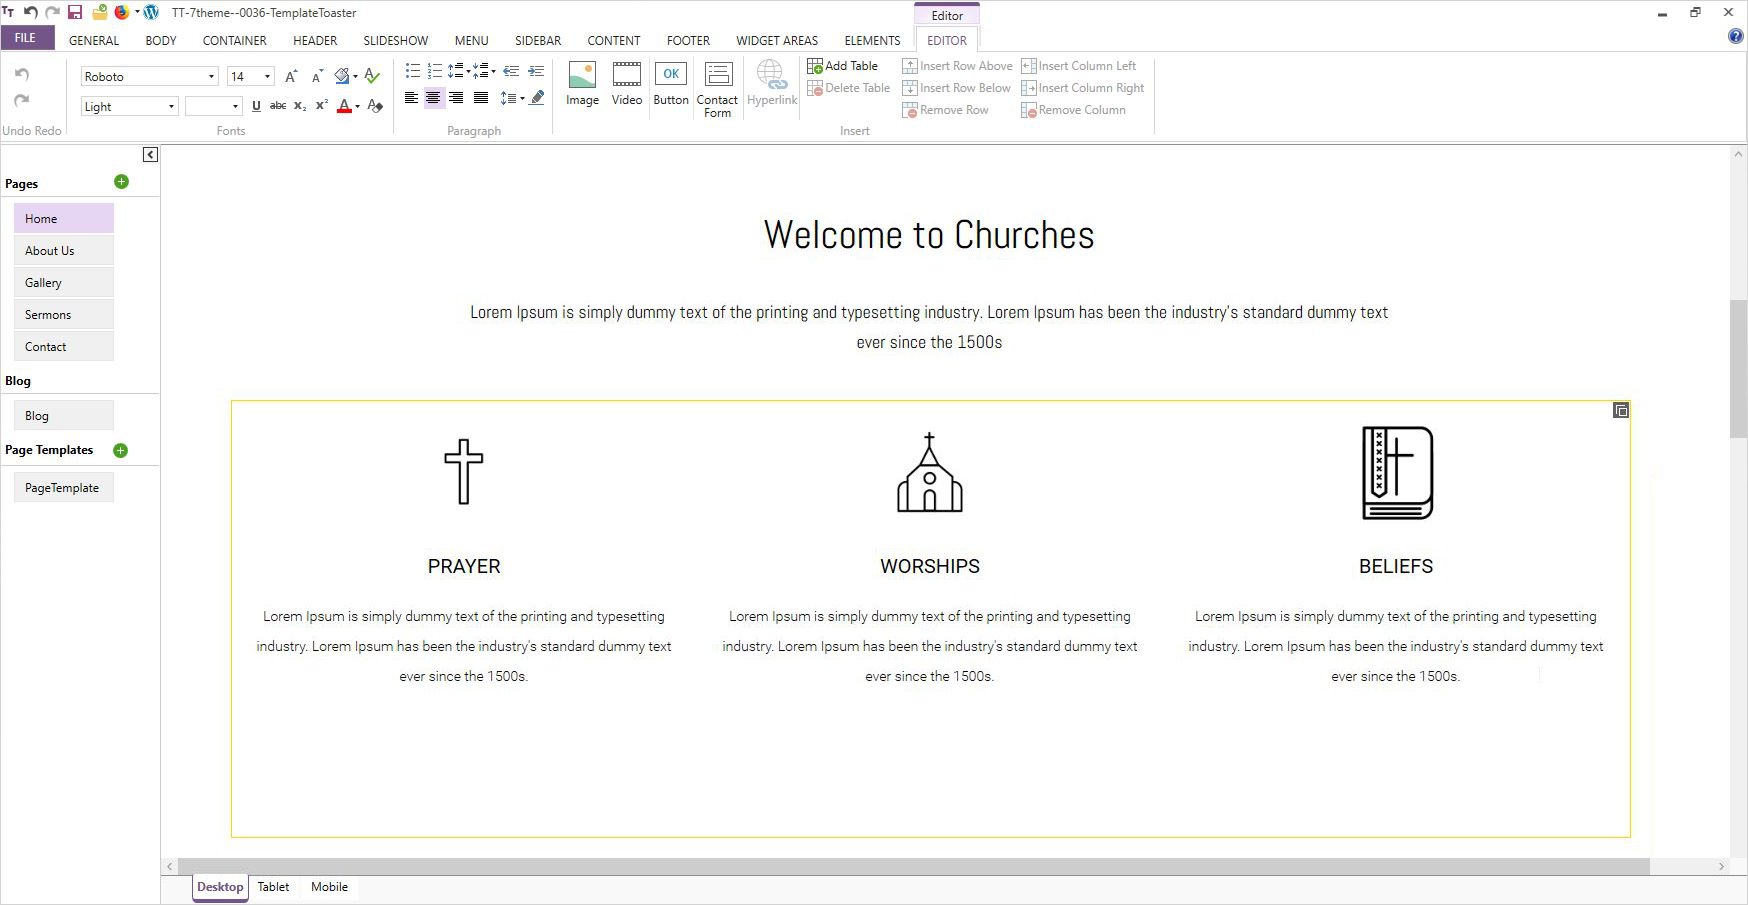
Step 7: Editing the Content / Designing the Content Page
With the ability to carry out modifications with the content, you will now edit which you can call as the main body of your website.
- On the toolbar, you will find a bar named “Content”. Clicking on it opens a sub-bar that opens many options for you.
- You can then carry out modifications like adding/decreasing the number of rows and the columns with the help of appropriate functional buttons given in the sub-bar that opens after clicking on content.
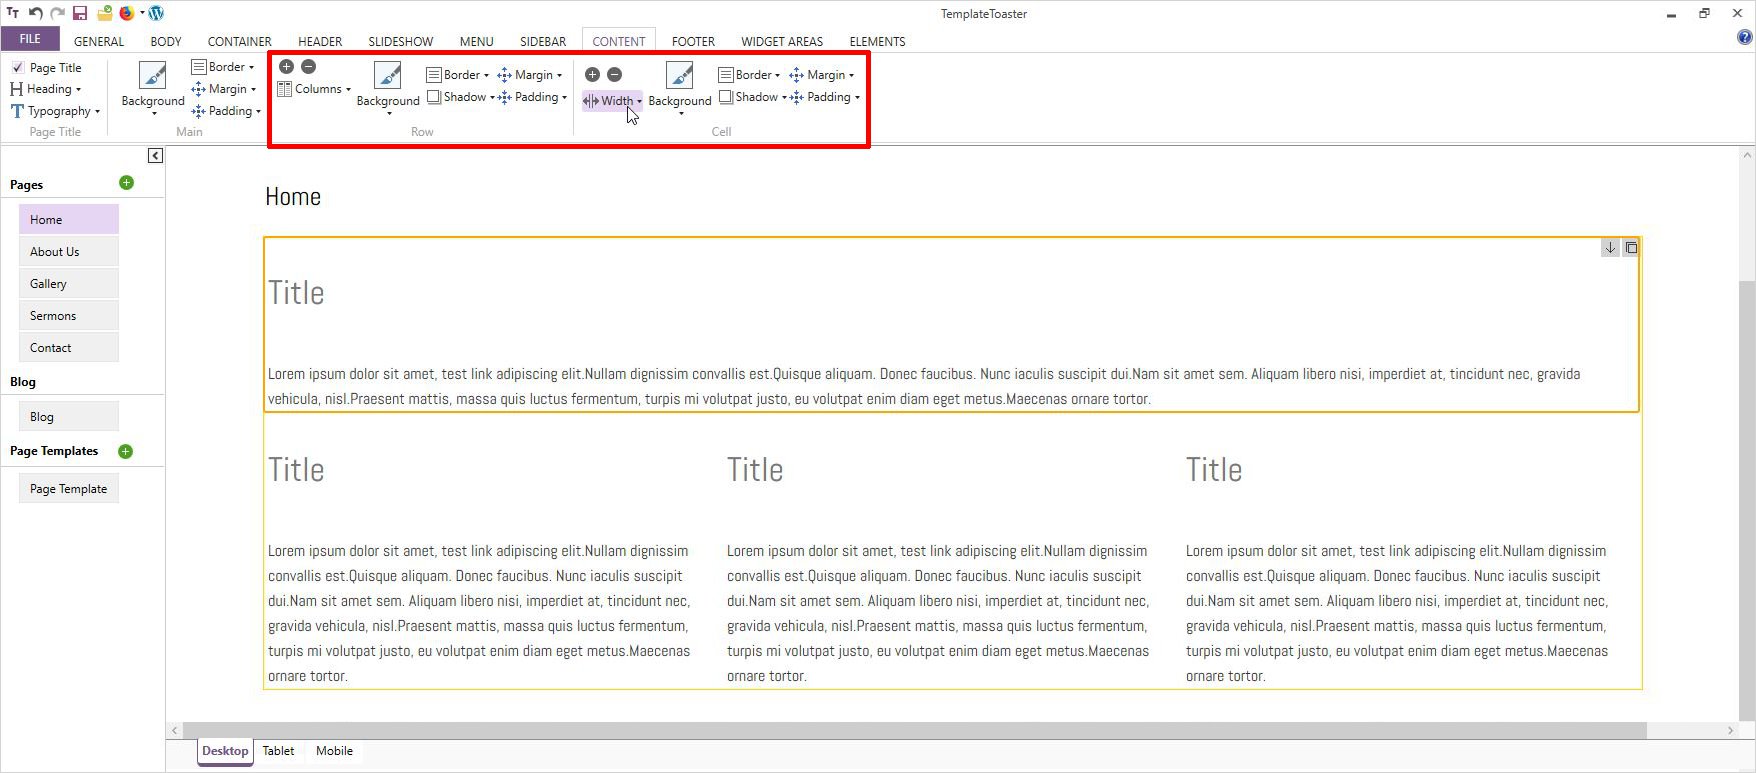

- You can also change the content for a background image, a color, etc. For the textual part also you can easily perform changes with a simple double-click.

- To add or remove the number of rows or columns, you can use + or – present alongside the row and column option respectively.
- Similarly, you can navigate to different pages of your website via the sidebar and edit their content as well.
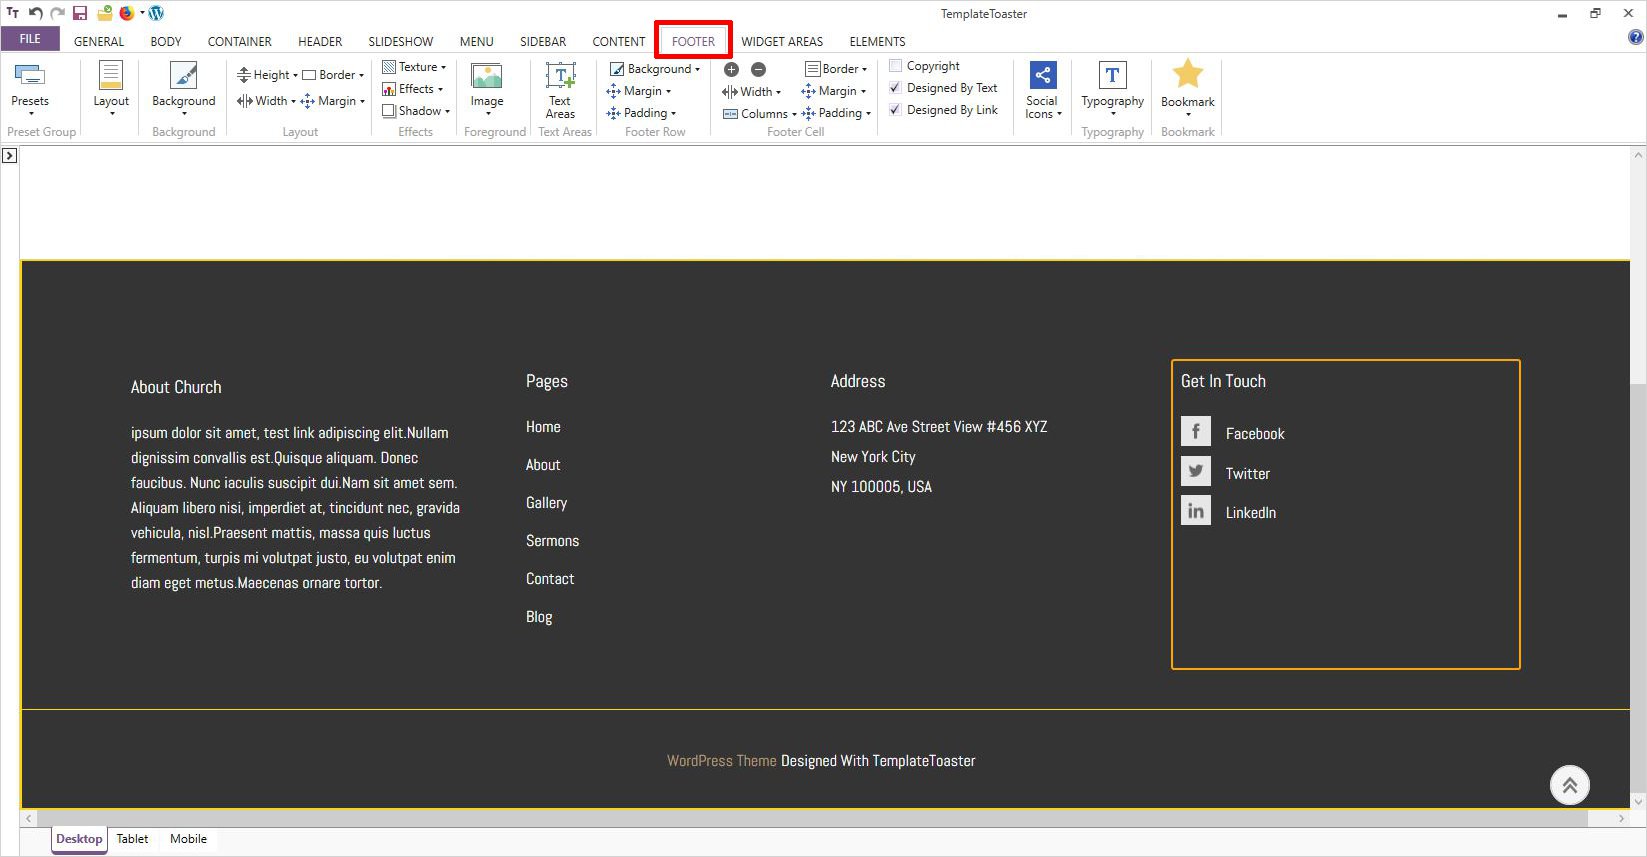
Step 8: Designing the Footer
- Here you can create a beautiful footer for your theme. And you can add features like social icons, address, copyright information and customize it however you like.

Above mentioned points are some of the primary things to be carried out in designing a church website. Apart from these, TemplateToaster has a plethora of other functionalities and features as well which can prove very helpful in designing a church website. You can carry out a lot of theme customizations as per the requirement of your church website such as editing the footer, general customizations, placing widgets, and many more.
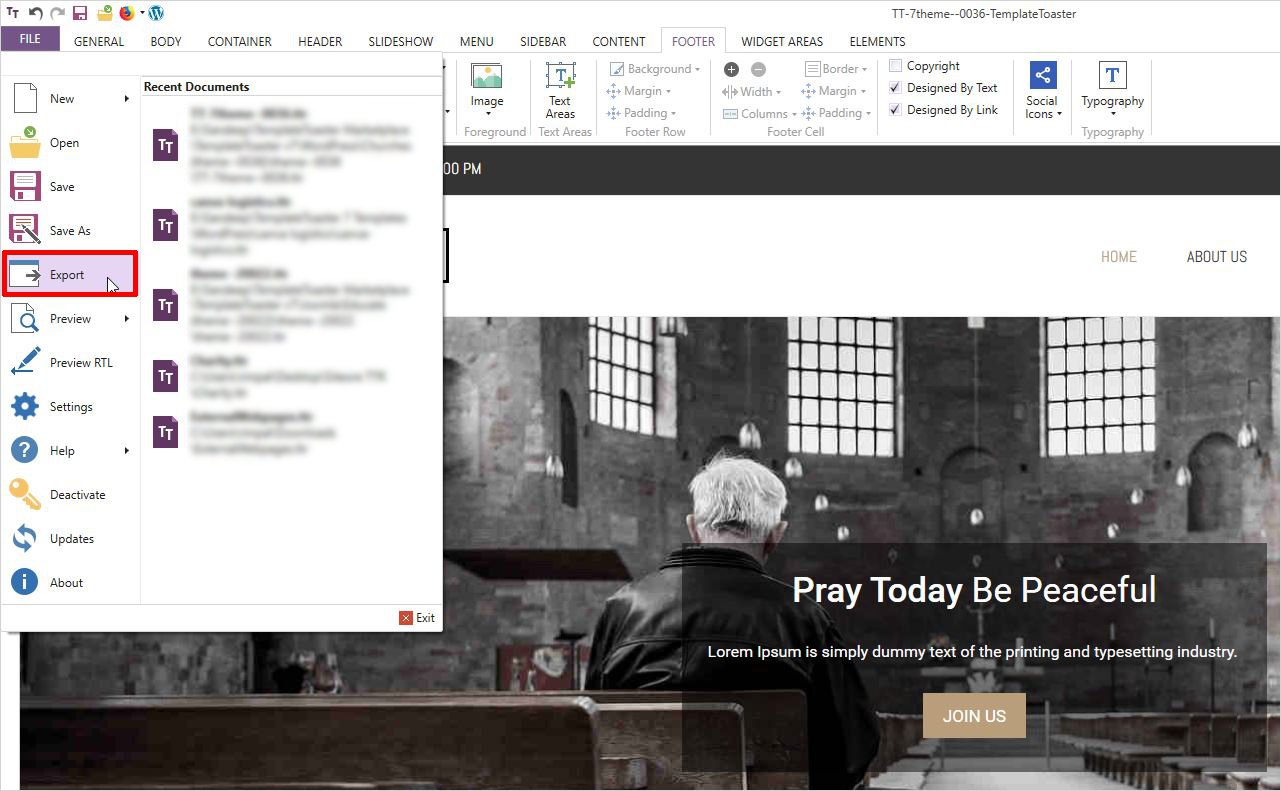
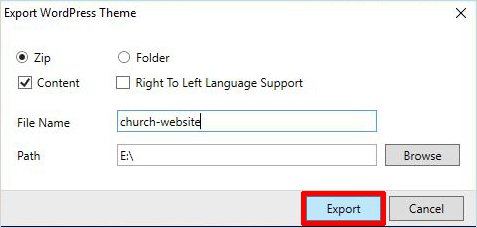
After your church theme is completely designed and ready, you can finally export it by executing the following steps:
File → Export → Specify Path and your File Name → Click on Export.
Upload your Church Theme to WordPress
Since your church website design is ready by now, the next task that remains is uploading it to WordPress. To accomplish the task, we will have a look at the steps below:
- Export your Church theme to a specific location first.

- Log into your WordPress dashboard
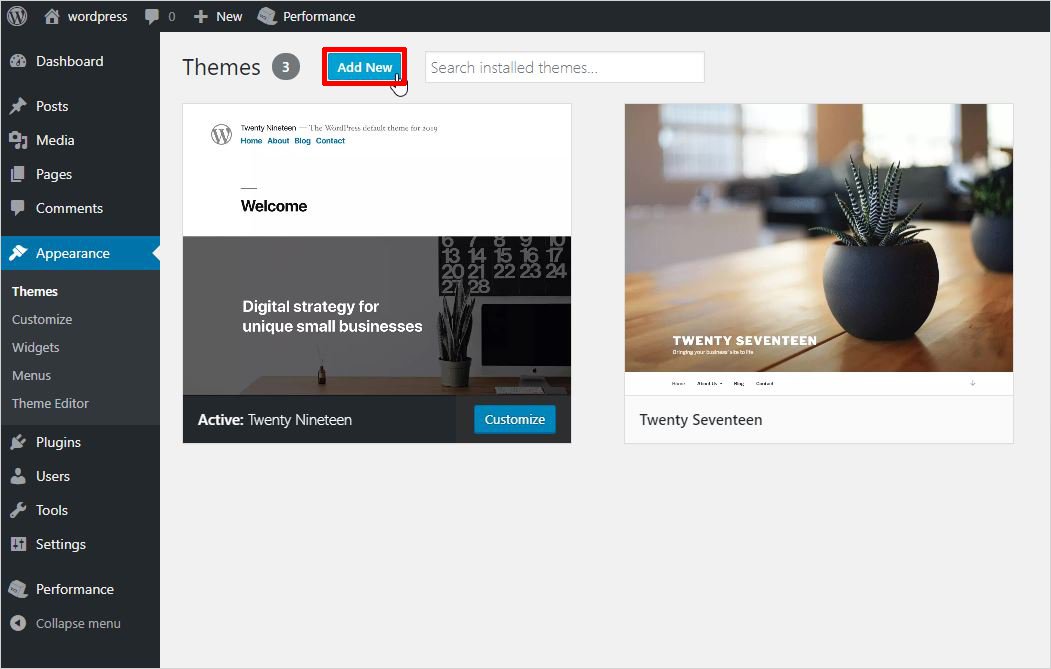
- Go to the left sidebar and click on “Appearance”.
- Next, follow Themes → Add New → Upload → Browse

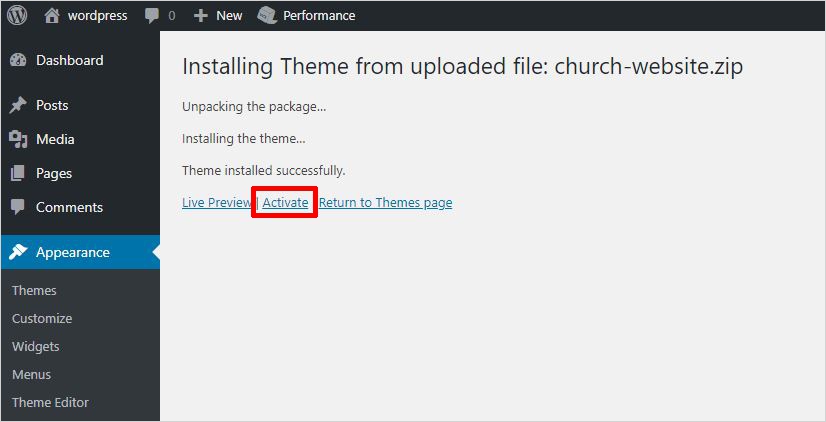
- Clicking on browse will open a pop-up window from where you can select your church-theme to upload.
- Click on Install now and then click “Activate”.

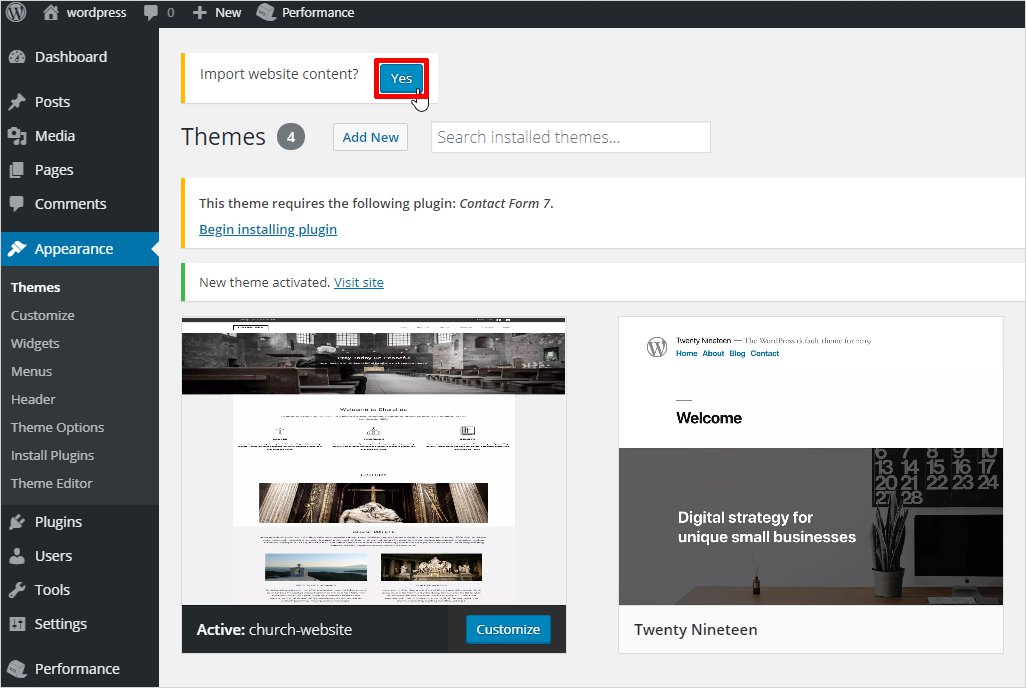
- Once you activate it, you shall see a message “Import Website Content?” click on the “Yes” option to import the content and continue.

Create a Church Website & add functionality with dedicated Plugins
After the website is ready, you may add some additional functionality with additional free WordPress plugins. WordPress offers various church website plugins that are dedicated especially for church-related websites. Here, I have enlisted some of the popular ones:
-
Church Content – Sermons, Events and More – This five stars rated WordPress plugin is a widely known church plugin that provides an interface for managing sermons, events, people and locations. Provided by churchthemes.com, it is very suitable for the church – centric post types and websites.
- Church Admin – Use of this WordPress plugin makes your church website more functional. It does so by allowing you to have features like a “sermon-podcast”, “small groups”, “sessions”, “calendar”, “ministries”, etc. Its developers have kept it open source in order to allow the user to make changes according to his/her website’s requirements.
- wp-church-donation – It is another church-website related plugin built for facilitating the donation process on any church website. With this tool, you can add any number of payment gateways as its functionality is expandable.
- WP Church Center – This is another very useful tool for making additional useful customizations to your existing church-website/theme. It can provide unlimited cards to inform your members and make it easy for them to get involved, signup, or get more services.
-
Church Community Builder Core API – This very useful church-website plugin is designed to carry out the synchronization of your church data to WordPress custom post types. you may also learn how to create a WordPress page template, create a WordPress child theme and create a one-page website.
Now, you are ready to create Church website
Concluding the tutorial, I hope you found all the information useful in order to create a church website. Undoubtedly, WordPress is an immensely popular choice for developers due to its vast additional advantages. A wide variety of church-plugins available in WordPress can assist you in developing the right type of church website that will suit your purpose well. If you have any doubts or queries please feel free to drop in the comments below, I will do my best to solve them as soon as possible.
Build a Stunning Website in Minutes with TemplateToaster Website Builder
Create Your Own Website Now
I am now 72 and an amateur in the computer support. I handle a church website made by someone else using HTML but wanted to add some features and give it a new look using wysiwyg. This article really helped me a lot. Thanks for sharing.
Is there any plugin to publish sermons online if somebody miss it ?
The above mentioned Church Content plugin is also for managing sermons and events etc.
You should try it. It is a good plugin.
Do you know any donation plugin for a church website so people can donate money to the site ?
Also let me know how to implement it.
Thanks.
Hey Mark! You can try GIVEWP – Donation and fundraising plugin. It is the most supported donation plugin for WP.
Thanks for letting me know. Really helpful
Hey Bob! You can use https: / / wordpress. org/plugins/sermon-manager-for-wordpress/ this Sermon Manager plugin for publishing sermons online.
Thanks Jennifer for mentioning. The plugin works very fine.
Thanks for the plugin, It works very fine.
The plugins mentioned in this article are really good.
Thanks for sharing the post!
Wow! This is really the exact post i was looking for.
Thank you very much.
Do you know any good logo maker to design logo for my church website?
Church admin plugin mentioned in the list is very helpful. Totally worth it.
Please somebody recommend me some good church website WordPress templates.
Church Templates for WordPress are available in TemplateToaster WordPress templates. you can download them for free
Thanks for the insightful post 🙂
I am really impressed by the WP Church Center plugin mentioned in the article. Their service is very good and also fast.
true, the WP church center plugin is a good one
All the plugins mentioned in the software are great. My website get going great because of them. Thanks for sharing the post.
Yeah right, all the plugins are great and very useful.
Ya, all the plugins are must have plugins for a church website.
I have made a Church website with WordPress in localhost environment, and getting some error in uploading on live server. Please help me.
What kind of error is there? Please elaborate.
This is a good and very insightful post, Helped me made my first church site.
I want to have a banner ad for upcoming sermons or weddings on the top of the home page, how can i do that?
Please recommend me any plugin to send email notification to the people for upcoming sermon session.
You can maintain your email marketing using any CRM or MailChimp.
Thanks for your reference.
Hello there, Can I make updates in a website after uploading it online?
Yes Robin, you can make changes in TemplateToaster website builder after exporting your theme.
Thanks for sharing the post! TemplateToaster looks amazing, definitely gonna try it.
Very helpful post. Was looking for this information
Do you guys have any video tutorial for the same too?
Everything has mentioned very clearly. It is really amazing.
Hey there, what type of color combination and style should I use for a religious website? Simple or creative?
Hello there, please suggest me a good WordPress theme for Church-related website?
You should Churches WordPress Theme by templatetoaster
Can I make blogger theme in TemplateToaster for church website?
Very clearly explained. Thanks for the post!
All links to download templates sent to me email are not working.
Can I make such similar template with html?