How to Update XAMPP : The Beginner’s Guide

Being a developer myself I know the importance of XAMPP in local development and testing. You would find numerous reasons to love XAMPP except for the update part. There isn’t any one-click option to update the XAMPP, rather you’ll have to follow a series of steps. So, let’s get into the arena to understand how to update XAMPP.
Here at TemplateToaster website builder blog post, I will show you how smoothly you can update XAMPP. You just need to follow these simple steps to achieve a cleanly updated XAMPP, having all the required files configured flawlessly.
When you have an old version of XAMPP or you see your XAMPP folder bloated with a lot of undesirable and obsolete stuff, then you should understand that it’s the time to update XAMPP. And that’s where this post will help you consummate that.
Why Update XAMPP?
This can be a tricky question that why update XAMPP. Or to be sure whether you actually need to update XAMPP or not. Well, the primary reason to update XAMPP is to make it compatible with the newer version of PHP. Since XAMPP doesn’t update automatically and if you are using it for so long then there is a probability that you must be using the old version of PHP even now. However, the other reason to update XAMPP is that you need to make sure that the PHP version used during the testing and on the live site should be the same. As you may know XAMPP is the best way to create websites locally before uploading them to your live server.
So, let’s now start the process to update XAMPP without losing any data. Here is the rundown of the process that we will be taking up.
Action Wrap-up
- Take the backup of your website files
- Export the database
- Uninstall the previous version of XAMPP
- Install the latest version of XAMPP
- Tweak PHP settings
- Restore the website files and database
If you follow the described instructions I assure you that the entire update activity will go smoothly. So let’s get things underway!
Backup Website Files
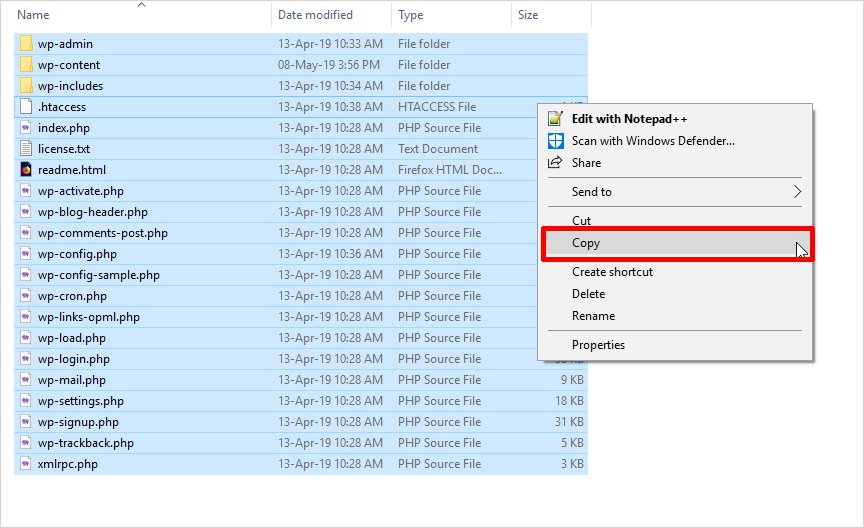
You would find all the website files under \xampp\htdocs\ directory. However, if you’re having more than one WordPress installed, then you will have a subdirectory for each installation. Now, to take the backup, create a new folder and copy the files in it which you want to keep. You can directly copy all the files in the new folder.
Export Database to Update XAMPP
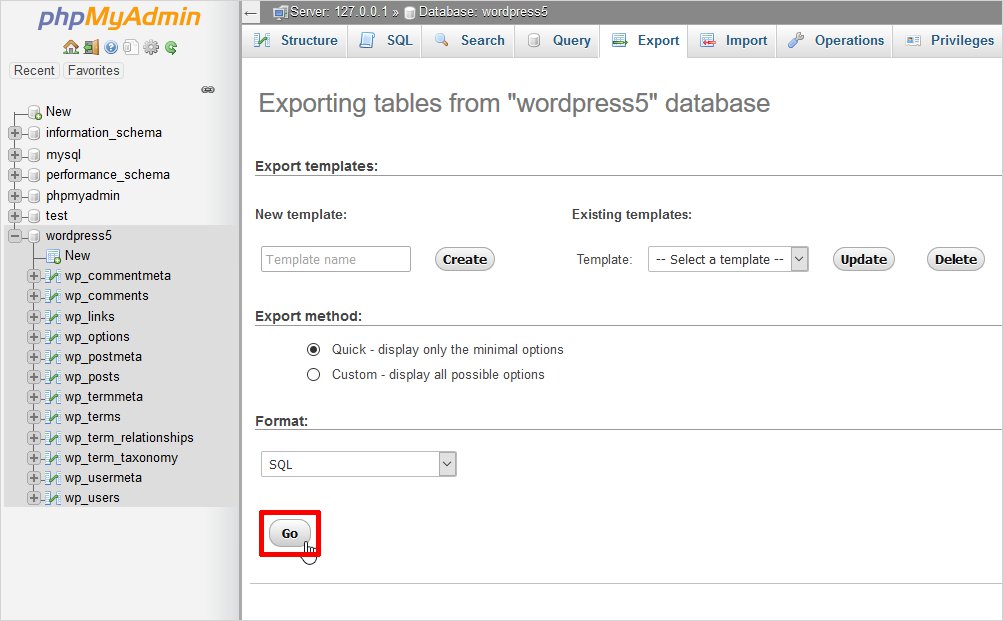
Switch to XAMPP control panel i.e. phpMyAdmin – run it. You can access the phpMyAdmin however you like. The most common ways to initiate phpMyAdmin are:
- Click on the Admin in the MySQL row in the XAMPP control panel.
- Use the “http://localhost/phpmyadmin” link in the browser.
- Click on the link that appears in the XAMPP dashboard.
It’s completely your choice how you wish to export the data. You can either export the complete data in single SQL files or you can export the entire data individually.
You may find exporting the entire data in a single SQL file an easy option. But exporting a big size file at once may likely to run into errors while importing the data to new XAMPP installation. While choosing the latter option may consume a little more time as compared to the first option but it is less prone to errors while importing it to new XAMPP.
Uninstall the Previous Version of XAMPP
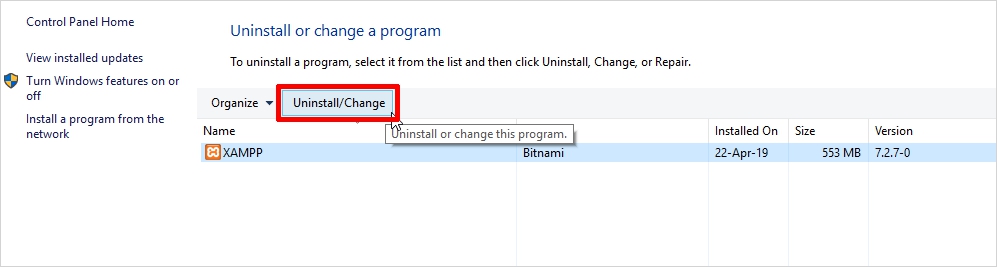
Next step is to uninstall the earlier version of XAMPP. Make sure you have taken the backup of each required file because uninstalling XAMPP will remove everything. And if you haven’t backed up the files then you will lose them forever. After checking all the things be double sure that you have taken the required back up and you are ready for the uninstall. Now stop the MySQL and Apache web server and now uninstall XAMPP from control panel.
Install the Latest Version of XAMPP
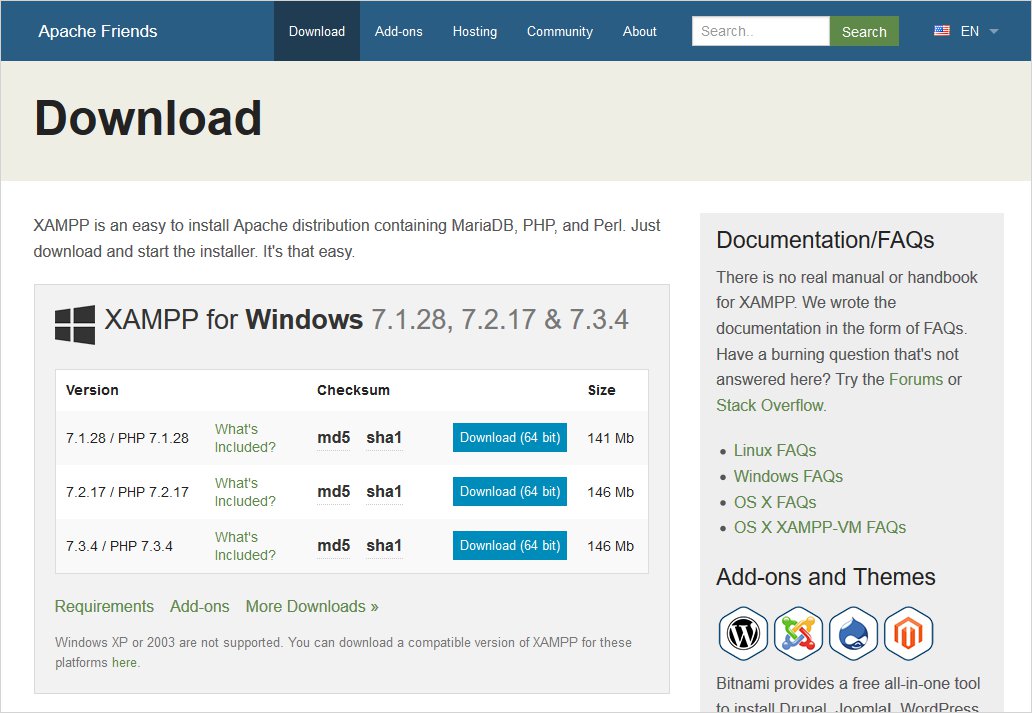
Since you have uninstalled the former version of XAMPP, so now install the new version of XAMPP. If you are wondering how to install XAMPP then consider reading this post. Here in this article we have discussed to how to install WordPress and XAMPP locally. Go to the official link www.apachefreinds.org and decide upon the version of XAMPP you wish to install and get it set up on your machine.
Update XAMPP: Tweak PHP Settings
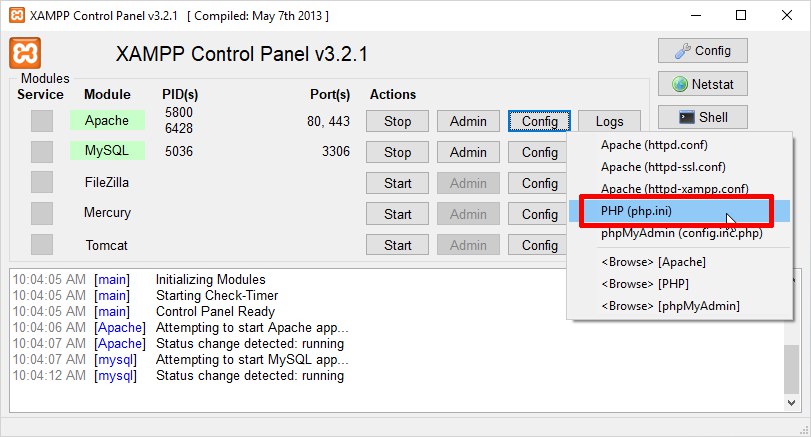
When you install XAMPP on your computer, it comes pre-loaded with PHP settings. These settings are quite restrictive in nature. These restrictions will come in your way while working with WordPress. And the process to install WordPress is easier too. So, before you get ahead, making PHP adjustments are recommended. You can make the following adaptations by increasing the values for the following attributes. And they are:
- Upload_max_filesize, memory_limit, post_max_size
- Max_execution_time
Though you can make these adaptations directly by going to \xamp\php\php.ini and perform whatever adjustments you like.
Restore the Files and Import Databases
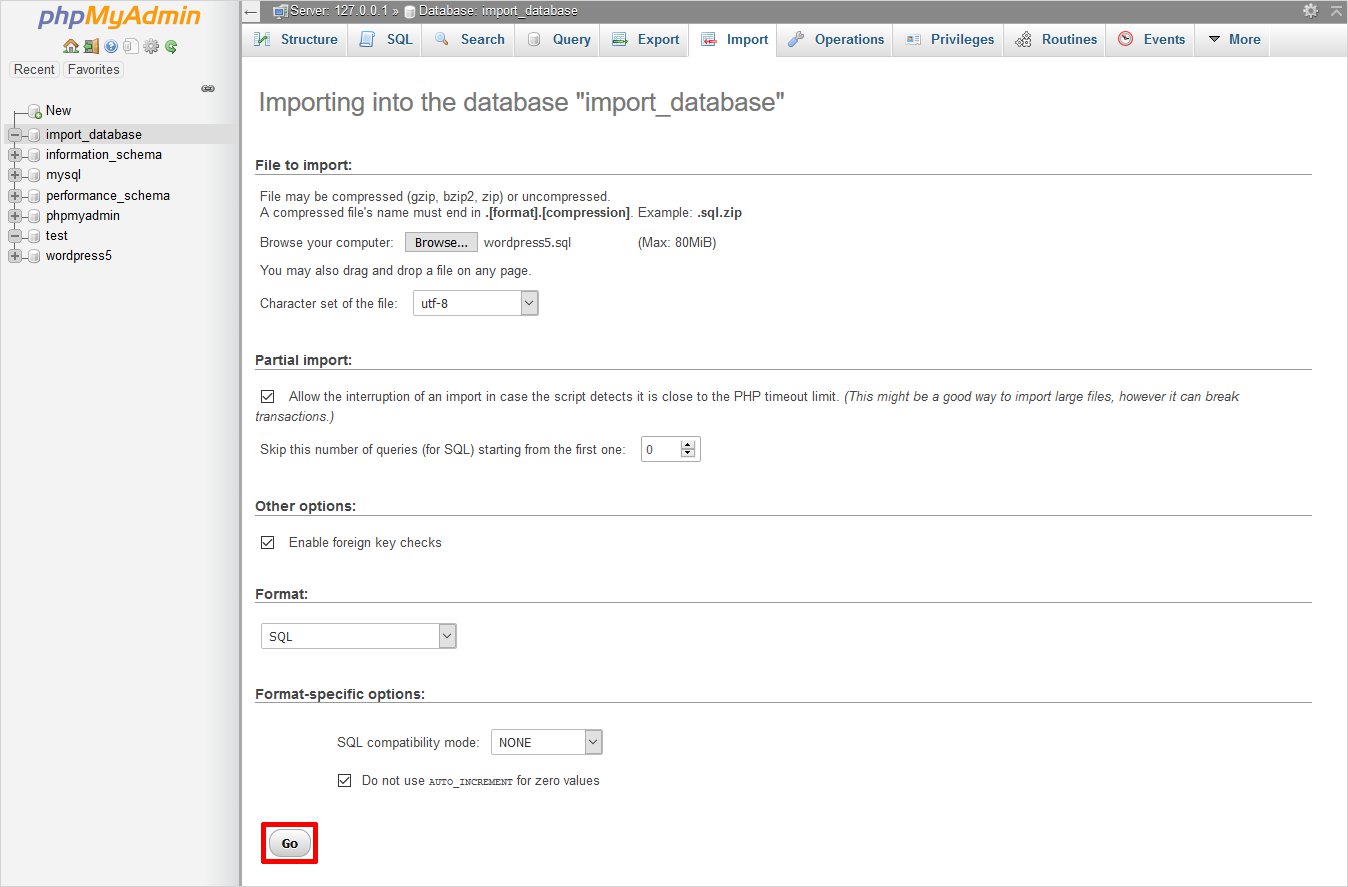
It’s a simple task. Just copy the folder and files you recently backed up and simply paste them into your new \xampp\htdocs\ folder. If you think simply by copying the files and folder will let you start testing, then it doesn’t work that way. Since you haven’t imported the database yet, you need to do that first. Therefore, it is required to import the SQL file or XAMPP exported files.
Voila!! Your XAMPP is updated now. Happy upgrading!!
Wrapping Up
As you are reading to how to update XAMPP means you are designing websites locally and here I would like to recommend you one of my favorite Offline Website Builder Software.
Well, that’s all you need to do to update XAMPP. You can use this post as a road map to upgrade XAMPP with minimal efforts. Make sure things like backing up critical files, deleting the previous version, and making changes to PHP settings are done carefully. All these imperative actions are to be executed cautiously in order to avoid any hitch along the way. Make sure everything is aligned and configured properly. And don’t forget to share how did the XAMPP update go (I hope it will run smooth). What errors, if any, did you come across while updating XAMPP and how did you able to handle them? Let me know in the comments below.
Build a Stunning Website in Minutes with TemplateToaster Website Builder
Create Your Own Website Now