Simple Ways to Make Your WordPress Site Accessible

Web site accessibility has been a lingering issue on the Internet for quite some time. However, with several laws in the US pushing website accessibility as a primary feature in public and private web entities, it has affected the Internet on a wider scale.
Accessibility has been proven to be beneficial to websites, public or businesses alike. Certain sites were slapped with legal complications, like this court case of a visually impaired handicap versus a luggage company. This also creates a positive PR for your website; social responsibility is a desirable trait that often gets a nod from the online community.
On the other hand, it positively affects your website’s search engine rankings as well. Website accessibility is good for SEO, as making your website accessible requires you to input text that can be read by screen readers and web crawlers alike.
It improves usability for the handicapped and non-handicapped. It also broadens your market reach. In the UK alone, since 2015, the number of disabled adults who had used the internet in the last 3 months has increased by 6.8% to 8.6 million in 2016. Imagine reaching out to 8.6 million more visitors and prospective buyers!
The disabled may be a minor group, but there’s strength in their numbers. Here at Templatetoaster WordPress theme builder and WordPress website builder see the following simple tweaks that will help your website gain more followers as you make your site accessible to all:
Add ALT text to your logo (and other images in the site)
[box title=””]
<div class=“wpcmsdev-box”>
<div class=“box-content”>
<img width=”348″ height=”186″ src=”http://i0.wp.com/www.example.com/wp-content/uploads/2011/07/meta-box.png?fit=348%2C186″ class=” wp-post-image” alt=”Meta Box”>
</div>
</div>
[/box]
SEO requires you to do this already. The general rule in accessibility is to apply ALT text to images that convey information. Use the ALT text to describe what the image is about.
If the image is only used for decorative purposes, you can leave the ALT text empty so as not to disrupt the screen reader. If you’re using an image as a link, provide an ALT text as the screen reader will read the filename in its absence.
Adding an ALT text to your logo helps a disabled user to know what website he is currently in. Adding ALT texts to your images in the site guides the screen reader and the disabled user through the website.
Place ARIA Landmarks
Basic landmarks, also known as ARIA landmarks, help in identifying specific parts of a page. With ARIA, you can give meaning to a specific part of a page, thus enabling the user to know what part of the page he is in. Plus, this makes it easier for the disabled to navigate through the site with the use of a keyboard.
There are a lot of ARIA landmarks, but in this simple guide, we will introduce three ARIA landmarks that you can easily implement in your website:
a) Main
b) Navigation
c) Search
Search for the elements on your page that contain the (a) main body of the content, (b) main navigation of your site, and (c) your site search.
Afterwards, add the appropriate landmark role attribute to each. Affix <code>role</code> and its corresponding ARIA landmark.
[box title=””]
<div class=“wpcmsdev-box”>
<div class=“box-content”>
<main class=”main container clearfix” role=”main”>
<nav class=”site-navigation right” role=”navigation” aria-label=”Primary Navigation”>
<form method=”get” class=”searchform” action=”http://www.example.com” role=”search”>
</div>
</div>
[/box]
Enhance Focus on your site
Using the Tab key in navigating through the site has been widely used by disabled sighted users. In this blog, using the Tab key is also operational. Try it for yourself!
You can use this nifty bit of code in your CSS to help in adjusting focus:
[box title=””]
<div class=“wpcmsdev-box”>
<div class=“box-content”>
a:focus {
outline:1px solid red;
background:yellow;
}
</div>
</div>
[/box]
Properly Use Headers on Content
Headers play an important role with screen readers. They help determine the structural hierarchy of a document. Sometimes, screen readers only read out these headers. Generally, H1 is reserved for page titles, H2 for major headings, and H3 for subheadings.
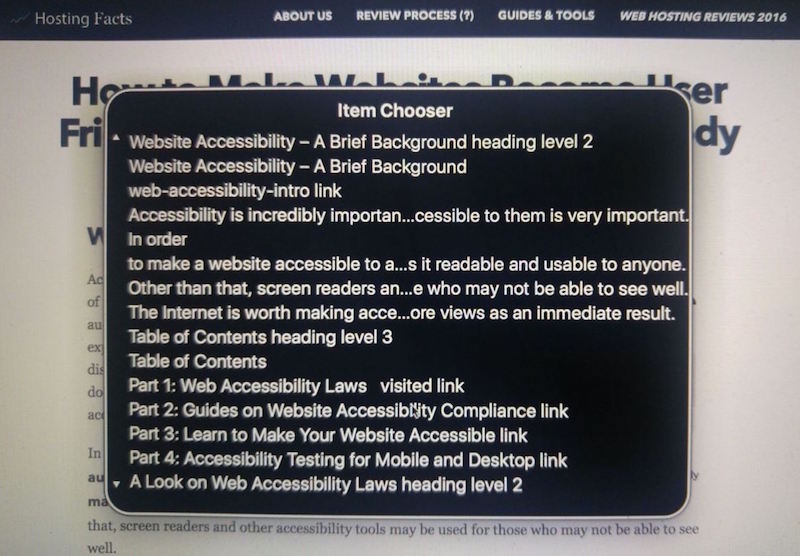
This is how the Item Chooser looks like on VoiceOver for Mac OS X. Take note how they note the heading levels and used it to structure the article.
Improve Fill Up Forms
Forms are tools for converting traffic into leads. To guide users with screen readers, you can help tag important, required parts of the form. Check out this sample contact form.
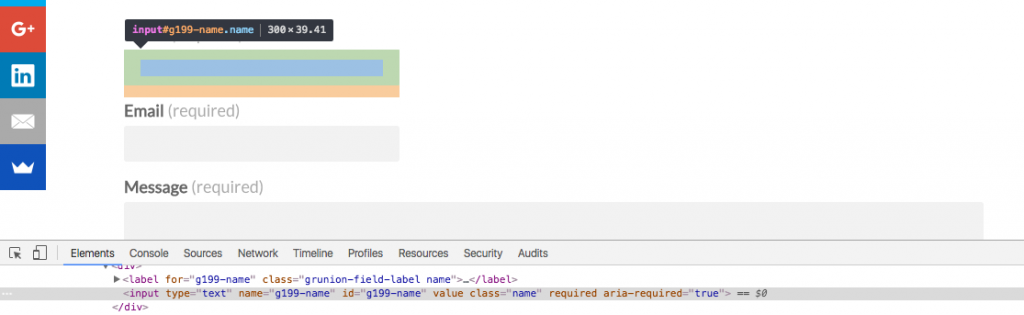
Tag required form fields to help screen readers determine and read out required form fields. Take a look at this example via Mac OS X’s VoiceOver:
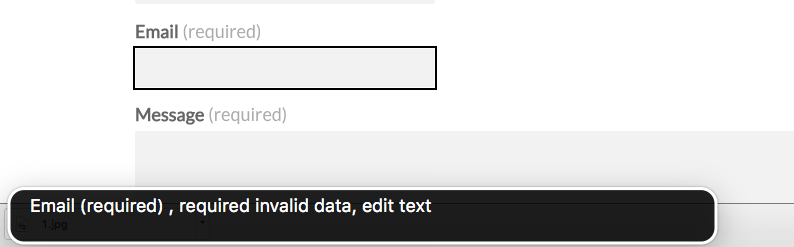
Add this to the form field that’s required:
<code>aria-required=”true”</code>
Example:
[box title=””]
<div class=“wpcmsdev-box”>
<div class=“box-content”>
<input type=”text” name=”g199-name” id=”g199-name” value=”” class=”name” required=”” aria-required=”true”>
</div>
</div>
[/box]
These are just some of the ways on how to make your website accessible. Website accessibility does not end at these simple steps. The main content is your primary concern and making sure that your website’s code doesn’t hinder screen readers. Accessibility hasn’t been a big issue as of late, but with WordPress moving forward with accessibility, there’s no doubt that we’ll see this as another trend rising on its own pace.
[call_to_action color=”gray” button_icon=”download” button_icon_position=”left” button_text=”Download Now” button_url=”https://templatetoaster.com/download” button_color=”violet”]
Create Responsive WordPress Themes in minutes using TemplateToaster website builder
[/call_to_action]