How to Create PrestaShop Theme – A Beginners Tutorial

Do you aspire to create a convincing PrestaShop theme for your online store to make a valuable impact on your business? Well, this tutorial will guide you on how to create PrestaShop theme in no time.
If you are a newbie who is going to create PrestaShop theme for the first time, consider this post. I will show you two quick methods with examples to create PrestaShop theme with ease.
Here at Templatetoaster offline website builder software is the quick view about what I bring for you in “How to Create PrestaShop Theme” post. And the opportunity to directly access the section where you might find yourself shaky at. These are two quickest ways to create a stunning PrestaShop theme.
PrestaShop is one of the well-known open source e-commerce solution to create an online store. Unlike WordPress, PrestaShop is somewhat complex. But you do not have to worry about this because this tutorial is all about making your PrestaShop theming experience as easy as possible. You can check what is new in PrestaShop 1.7.7.2?
1. Create PrestaShop Theme by Coding it Yourself
When you want to create a PrestaShop theme, the best practice is to use the Starter Theme as your foundation theme.
Download the Starter Theme
1. Download Starter theme from https://github.com/PrestaShop/StarterTheme
Modify Your Theme
2. Copy and paste all files from the Starter Theme to your empty theme directory. Now modify it and build your own theme. PrestaShop installation ➡ Themes ➡ Create your Custom theme folder ➡ Paste all the files from a starter theme
Rename Your Theme
3. Rename Theme folder ➡ config ➡ theme.dist.yml to theme.yml and edit it according to your theme’s name.
name: testtheme                     (Theme folder name)
display_name: Test Theme             (Theme display name)
version: 1.0.0
author:
name: "PrestaShop Team"
email: "[email protected]"
url: "http://www.prestashop.com"

meta:
compatibility:
from: 1.7.2.0
to: ~
Organize Files
4. Delete all files inside Theme folder ➡ _dev/css and customize css files as per your requirement. Theme folder ➡ assests ➡ css ➡ theme.css
#header {
    text-align: center;
}
.header-nav {
    background-color:#333;
    margin-bottom: 50px;
    padding-top: 10px;
    padding-bottom: 10px;
}
.header-nav > * {
    vertical-align: middle;
}
.cart-preview .body {
    padding: 12px;
    font-size: 14px;
}
.menu ul {
    margin: 0;
    padding: 0;
}
.header-top {
    margin-top: 50px;
    margin-bottom: 20px;
    background:#222;
    text-align: center;
}
.menu {
    float: none;
}
.menu > ul > li > a {
    background-color:#333;
}
.menu a, .menu a:visited {
    text-decoration: none;
    color:#FFF;
    font-size: 1em;
    padding: 10px 15px;
    display: block;
    background:#333;
}
.header-top::after {
    clear: both;
    content: none;
 }
.product-miniature {
    max-width: 350px;
    text-align: center;
    }
a.add-to-cart, a.add-to-cart:hover {
    color:#FFF;
    padding: 8px 15px;
    background-color:#222;
    font-weight: bold;
    text-transform: uppercase;
    font-size: 14px;
}
.price {
    color:#F0544A;
    font-size: 18px;
    font-weight: bold;
}
.variant-links, .product-price-and-shipping {
    margin: 10px 0;
}
#footer {
    background:#F3F3F3;
    color:#222;
    text-align: center;
    padding: 30px;
    margin-top: 50px;
}
Embed Your Custom JavaScript and CSS
5. For changing the head section of the theme or to embed the JavaScript and stylesheet you need to follow the following the steps. Go to theme folder ➡ Templates ➡ _partials ➡ head.tpl example code to add custom js and css file
{block name='stylesheets'}
{include file="_partials/stylesheets.tpl" stylesheets=$stylesheets}
{/block}

{block name='javascript_head'}
{include file="_partials/javascript.tpl" javascript=$javascript.head vars=$js_custom_vars}
{/block}
PrestaShop Template Structure
6. Prestashop follows smarty hence follows a particular template structure so all the template files must be created under templates folder. Some of the template files for a specific purpose are here:
- index.tpl :- This template file is for the Homepage purpose.
- checkout/cart.tpl :- This template is used for the Detailed Cart.
- checkout/checkout.tpl :- This template file is for the Checkout Process.
- catalog/product.tpl :- This template is used for the Product Page.
- catalog/listing/product-list.tpl :- This template file is for Product List Page.
To Modify Home Page HTML Layout
7. The default layout of the home page. To modify default layout of home page you need to modify layout file as follows:
Prestashop installation folder ➡ themes ➡ your theme folder ➡ Templates ➡ layouts ➡ layout-both-columns.tpl
This file contains html code for your page body and if you want to modify the content then consider this file.
Modifications can be done at any time to this layout. You can modify the content block or sidebar or any other module as per your needs.
Similarly, you can override modules CSS, templates in order to customize your theme in a particular module folder.
Now you’re ready with the basic theme and if you want to customize it further as per your needs, then you need to embed the custom code to the CSS file. And that requires you to have the sound knowledge of HTML, CSS, and JavaScript.
This is how you can create PrestaShop theme with Starter Theme. If you want to skip this complex coding part then go through the other option to create a PrestaShop theme in no time. And the best part, you do not need any coding skills. You can also read about best PrestaShop hosting providers.
Such a relief! Isn’t it?
Let’s begin with it.
2. Create PrestaShop Theme With TemplateToaster ecommerce website builder
TemplateToaster is a wonderful PrestaShop Theme Maker software. I am sure after using this software you won’t look elsewhere. Following are steps you need to follow to create your PrestaShop theme.
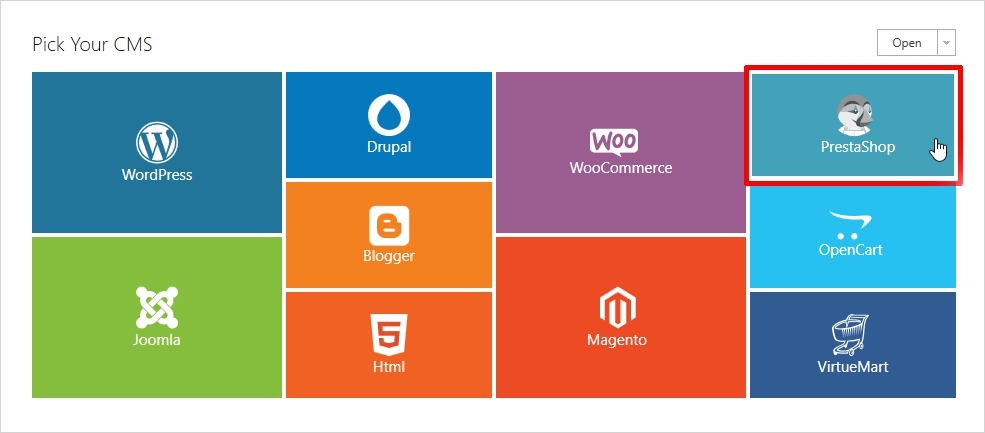
1. Choose a Platform
Download and install TemplateToaster on your computer. And the first screen you’ll see will look like the following one. And you have to select ‘PrestaShop’ from here.
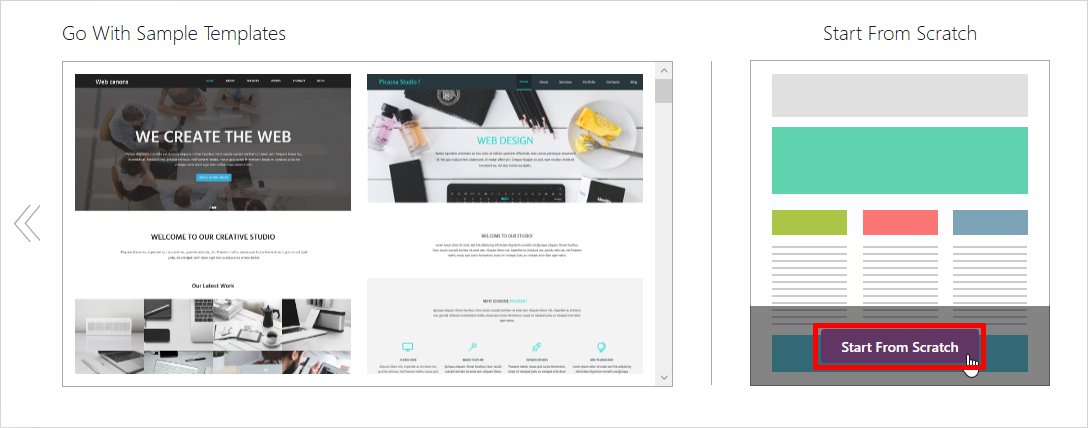
Once you select the CMS, you will see another window where you will have to choose the designing option. If you want to modify one of the pre designed PrestaShop Theme choose the left option or if you want to ‘Start designing your PrestaShop Theme from Scratch’ then choose the right option. To give you the clear idea I am choosing Start from Scratch.
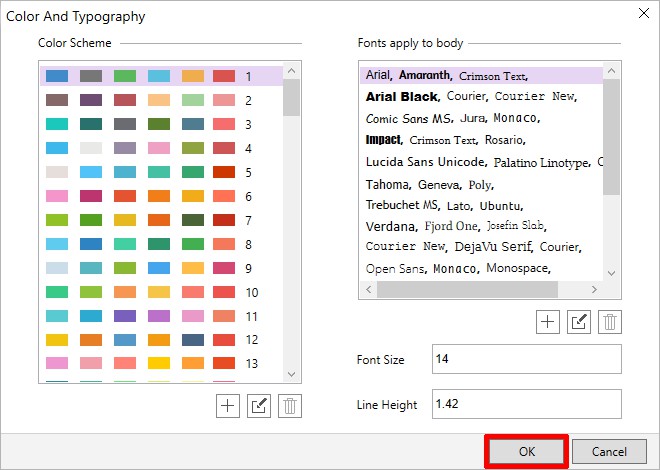
Select Color and Typography from the given color and typography options to set color and font style. Now, click ‘OK’ to move further.
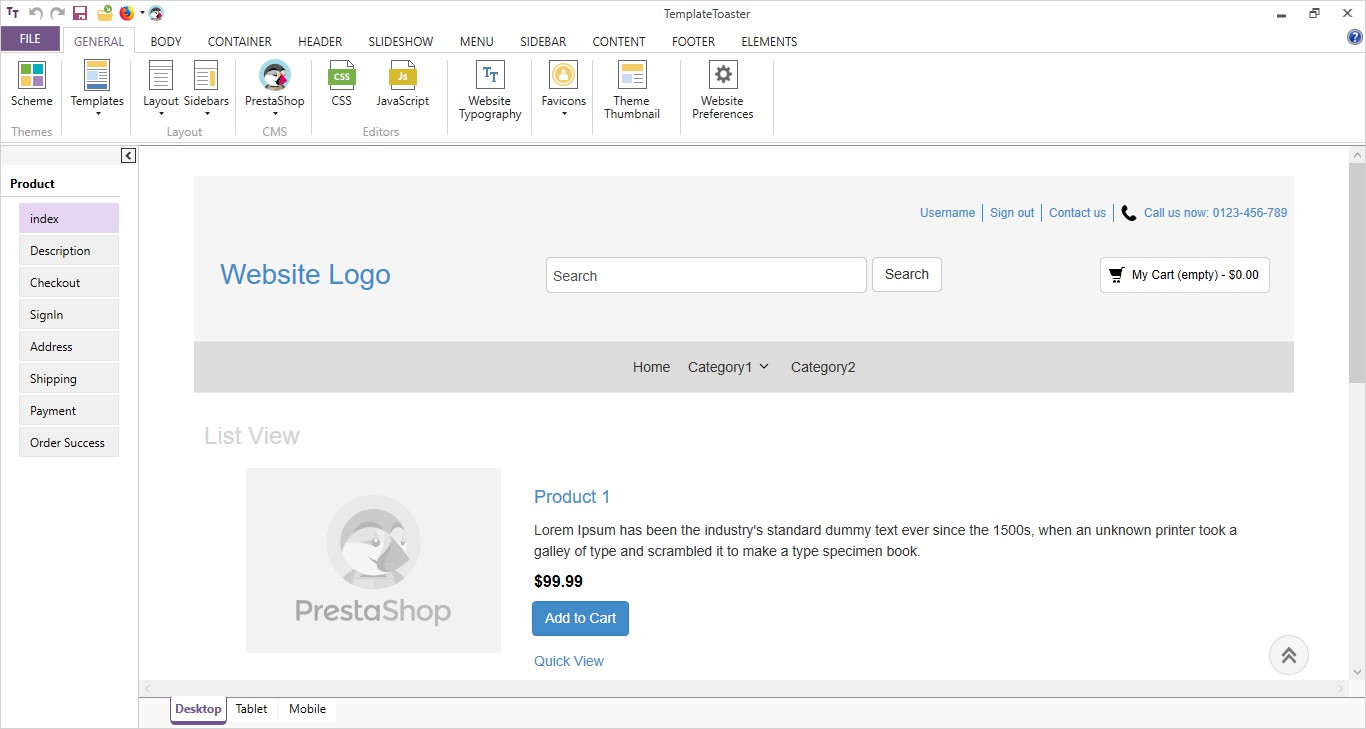
After you click OK, you will see the Main Interface of the theme as shown in the screenshot below.
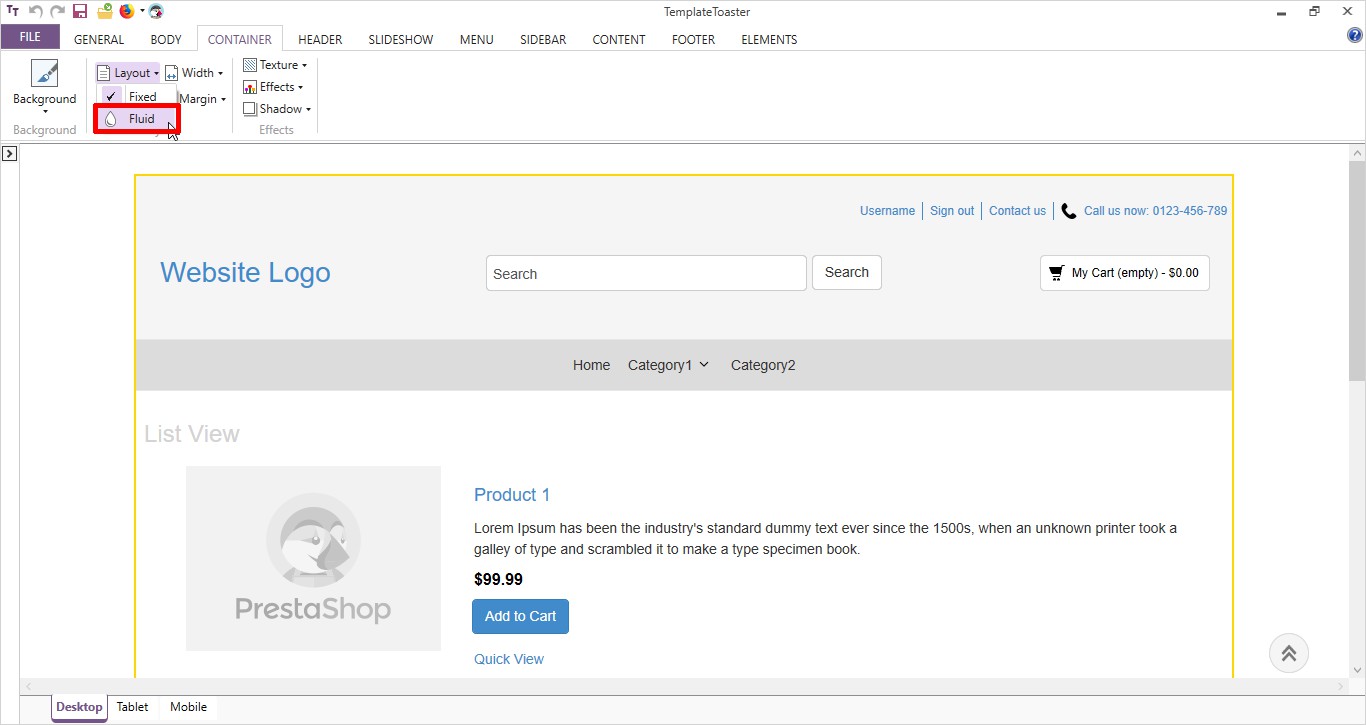
2. Select a Layout
Now select the Layout for your PrestaShop Theme. There are two options Fixed and Fluid, choose whatever fits in your requirements. I am choosing Fluid. CONTAINER ➡ Layout ➡ Fluid
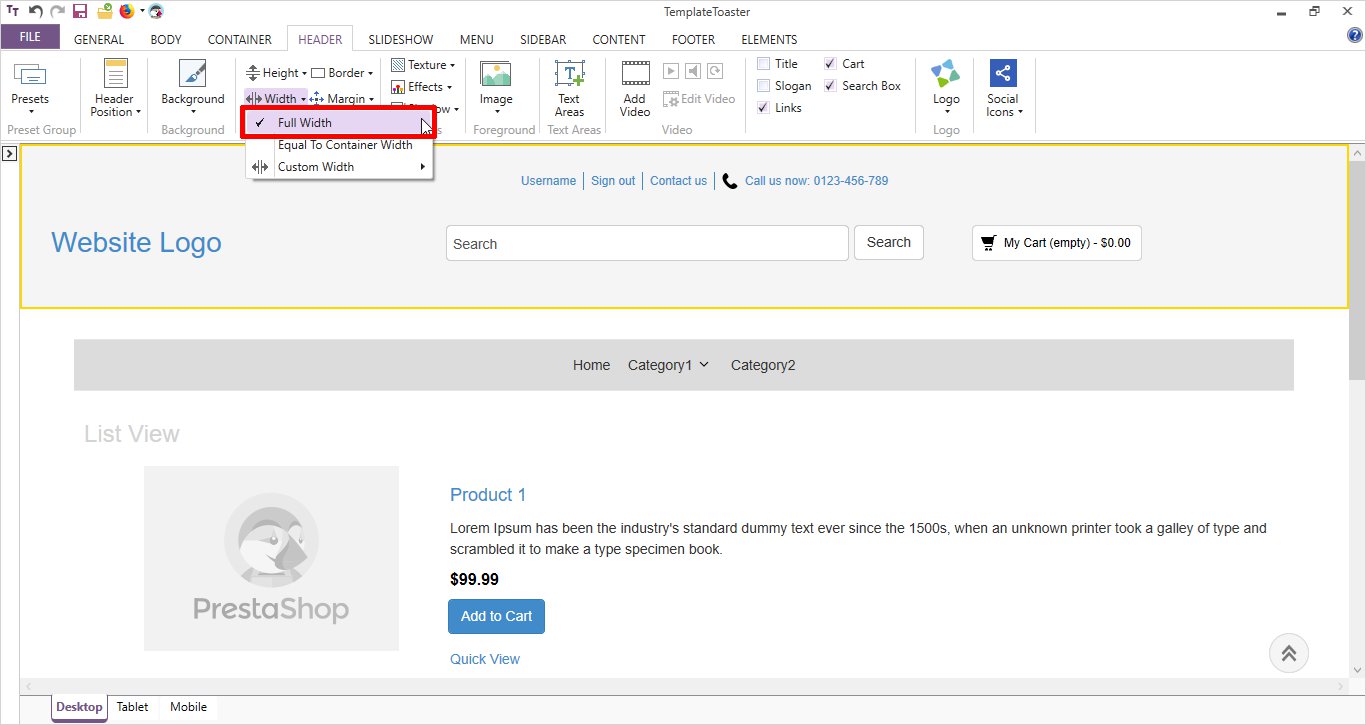
3. Design the Header
You can set your Header width as much as you want to. Simply go to the HEADER ➡ Width ➡ Full Width like shown below.
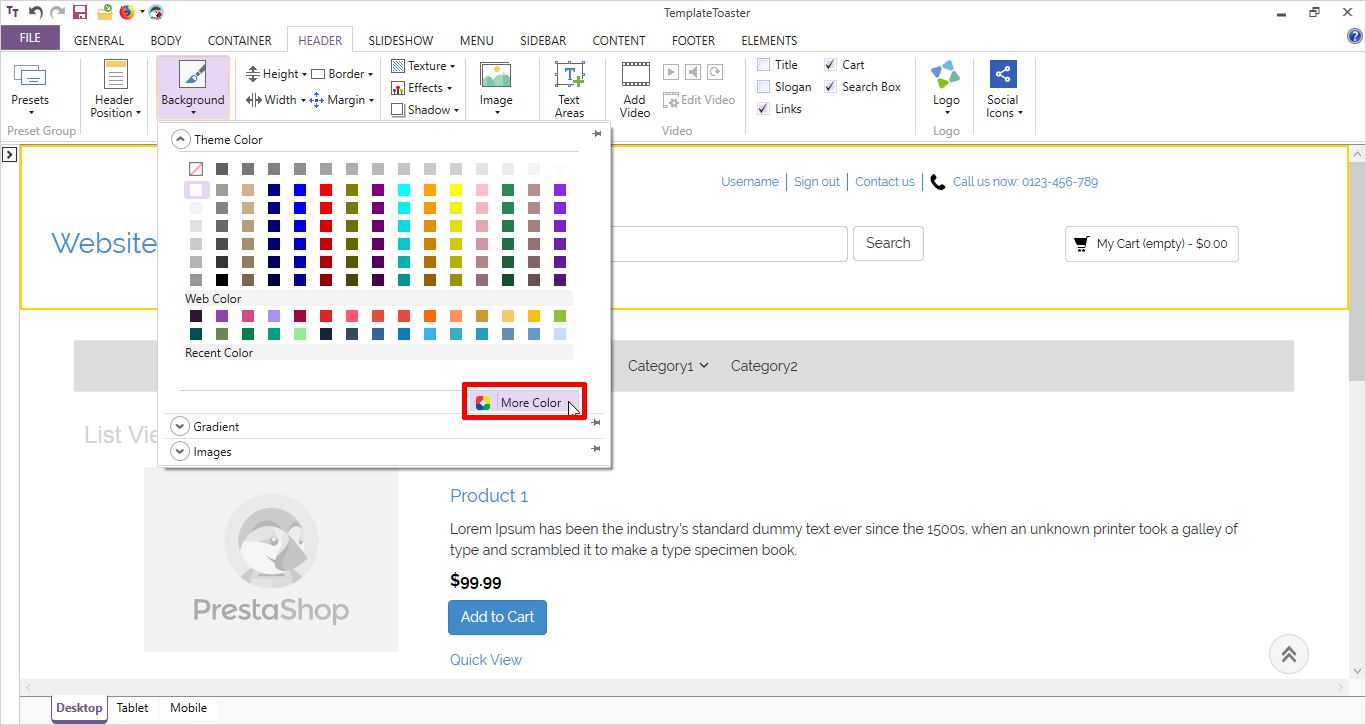
You can choose color, gradient color or image as per your requirements from the given option and make your header as vibrant as you want. HEADER ➡ Background ➡ More Colors.
Now design the Logo for your PrestaShop theme. Go to HEADER ➡ Logo ➡ Browse. You can choose any image from the gallery or you can use your own custom image by clicking on the Browse option as displayed below.
![]()
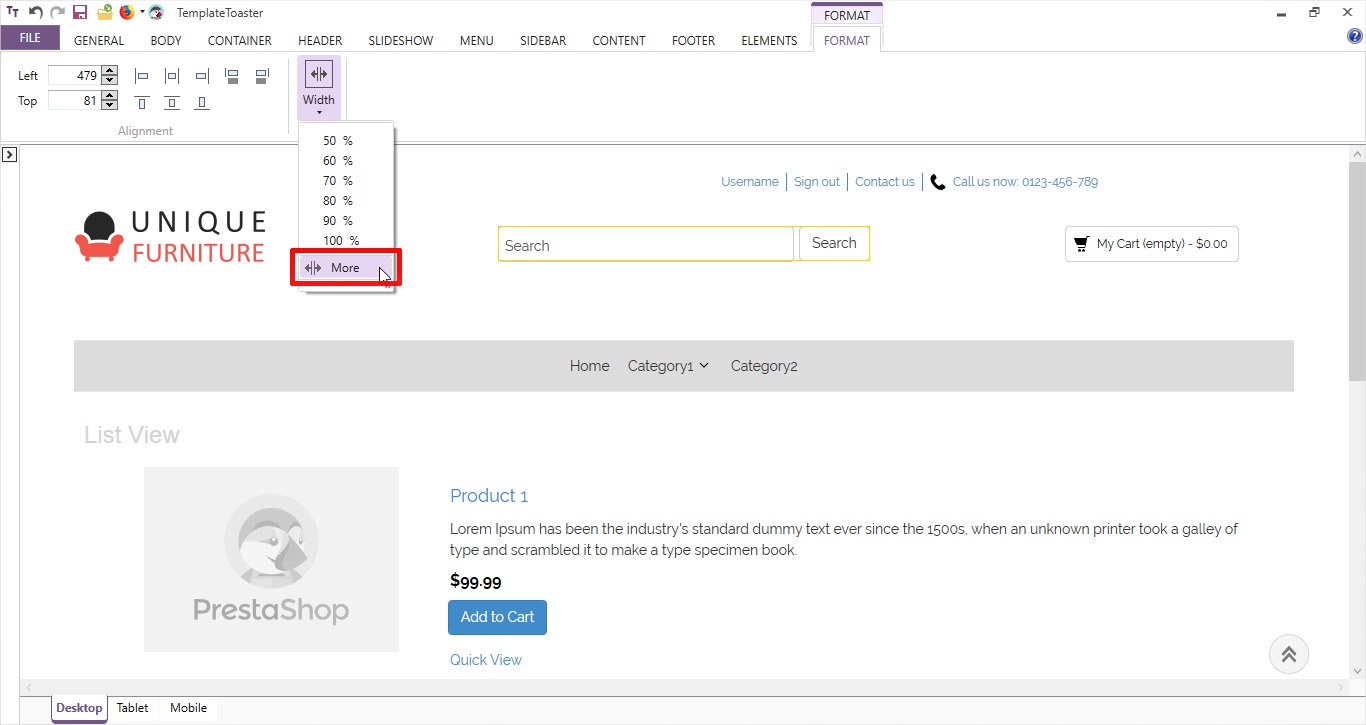
Now set the width of the search bar that you want to display on your header. FORMAT ➡ Width. You can set the required percentage anything up to 100%.
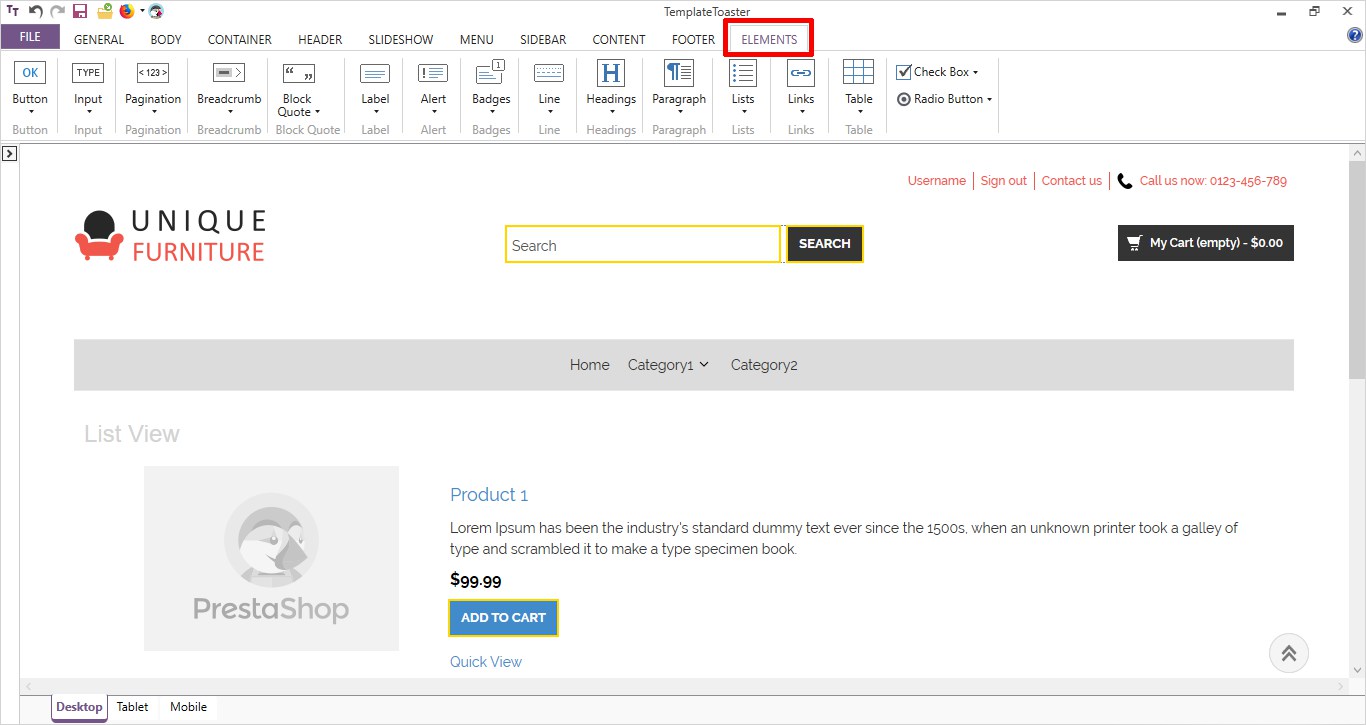
Now fix the style for the elements placed in your header through the Element Tab.
4. Design the Menu
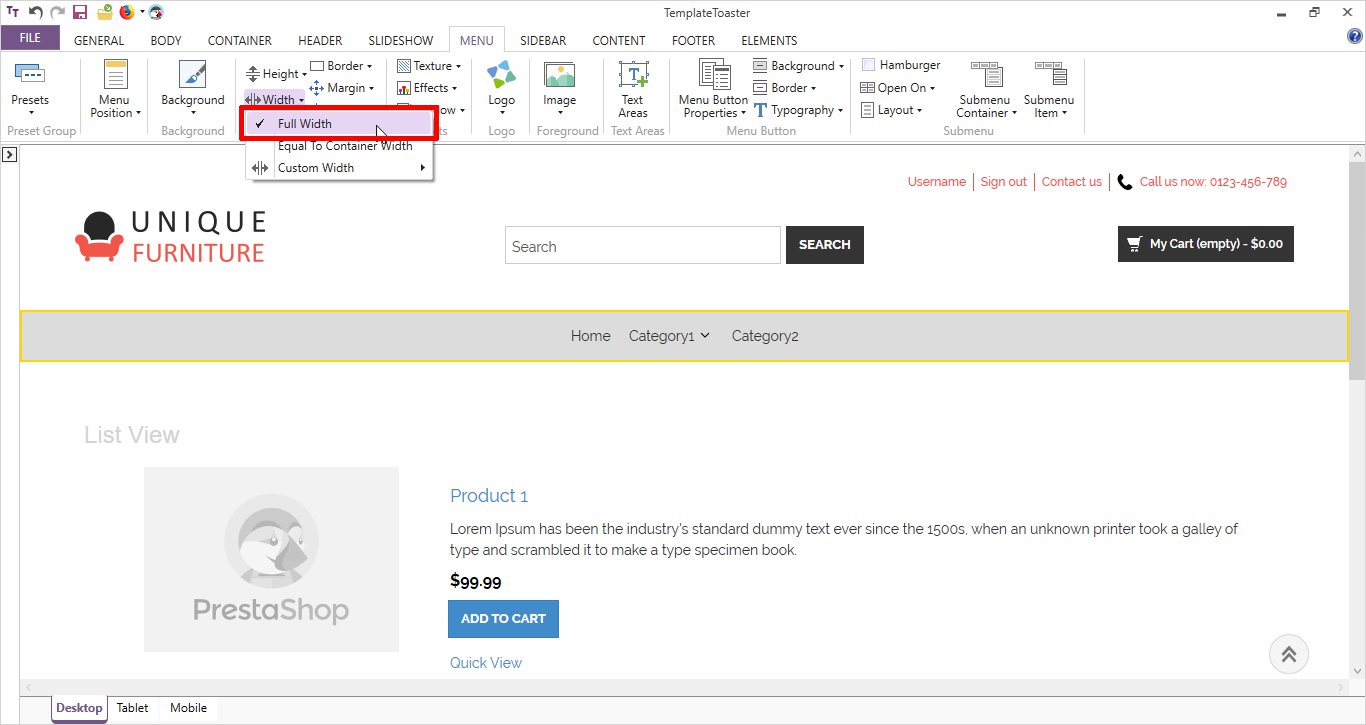
From the numerous available options design your Menu. Choose any option and create a Menu or a Hamburger Menu or Submenus, adjust Width and Height of the menu as you like. MENU ➡ Width ➡ Full Width
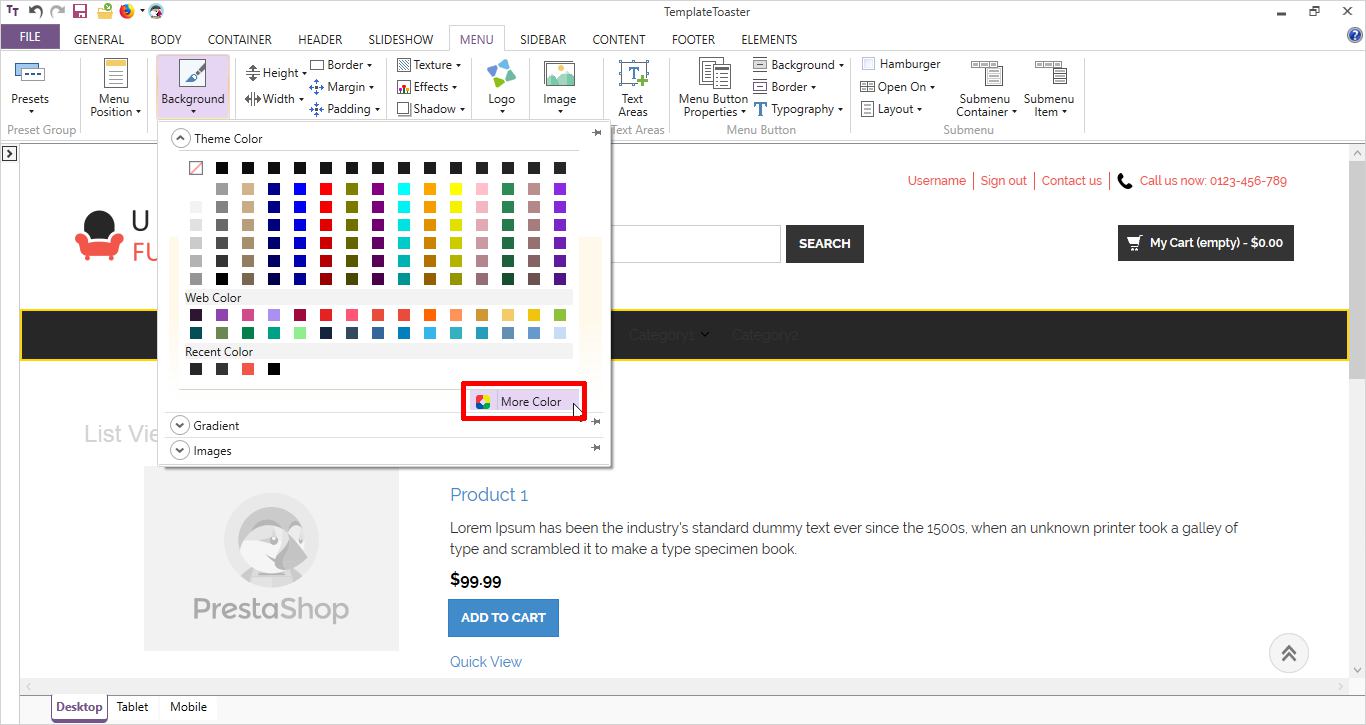
You can create a colorful menu by choosing the background color of your choice from the available options. Go to MENU ➡ Background ➡ More Color and you are done.
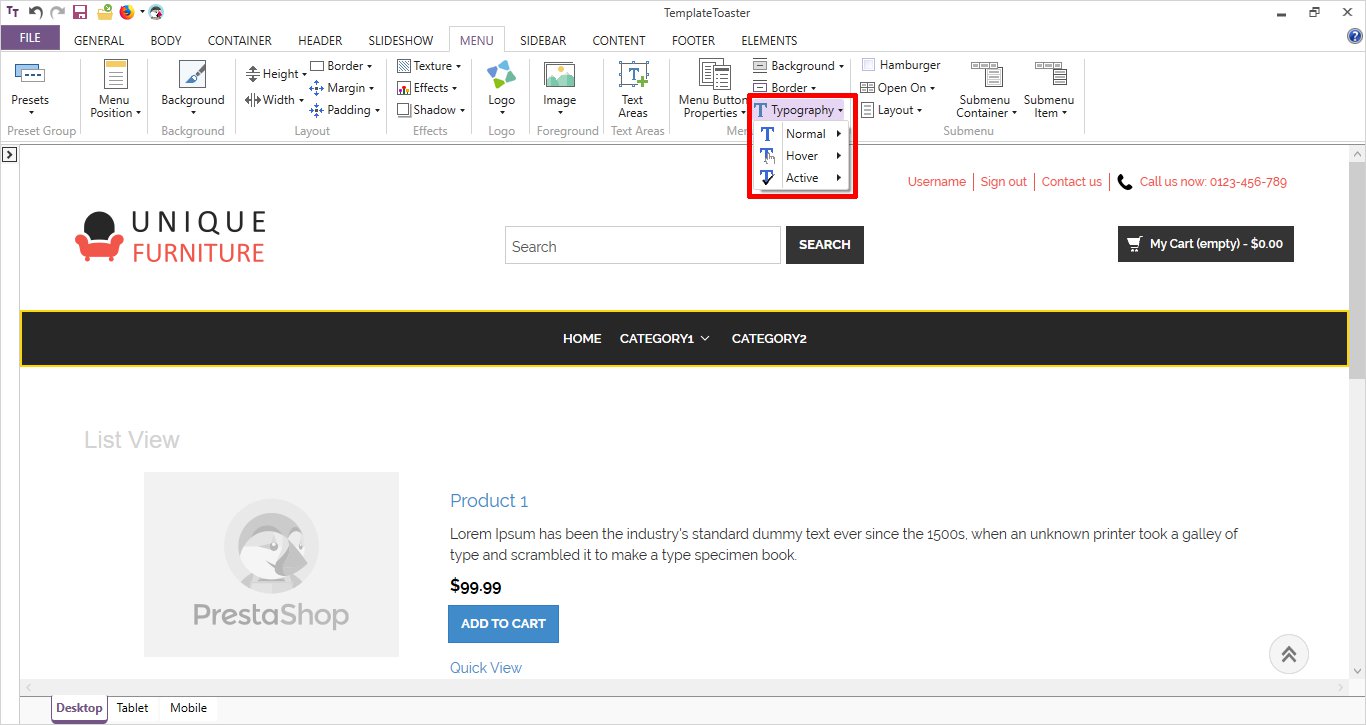
To select the typography for the menu elements just to go to MENU ➡ Typography ➡ Normal/ Hover / Active. Choose whatever style you like, from the given options.
5. Design the Slideshow
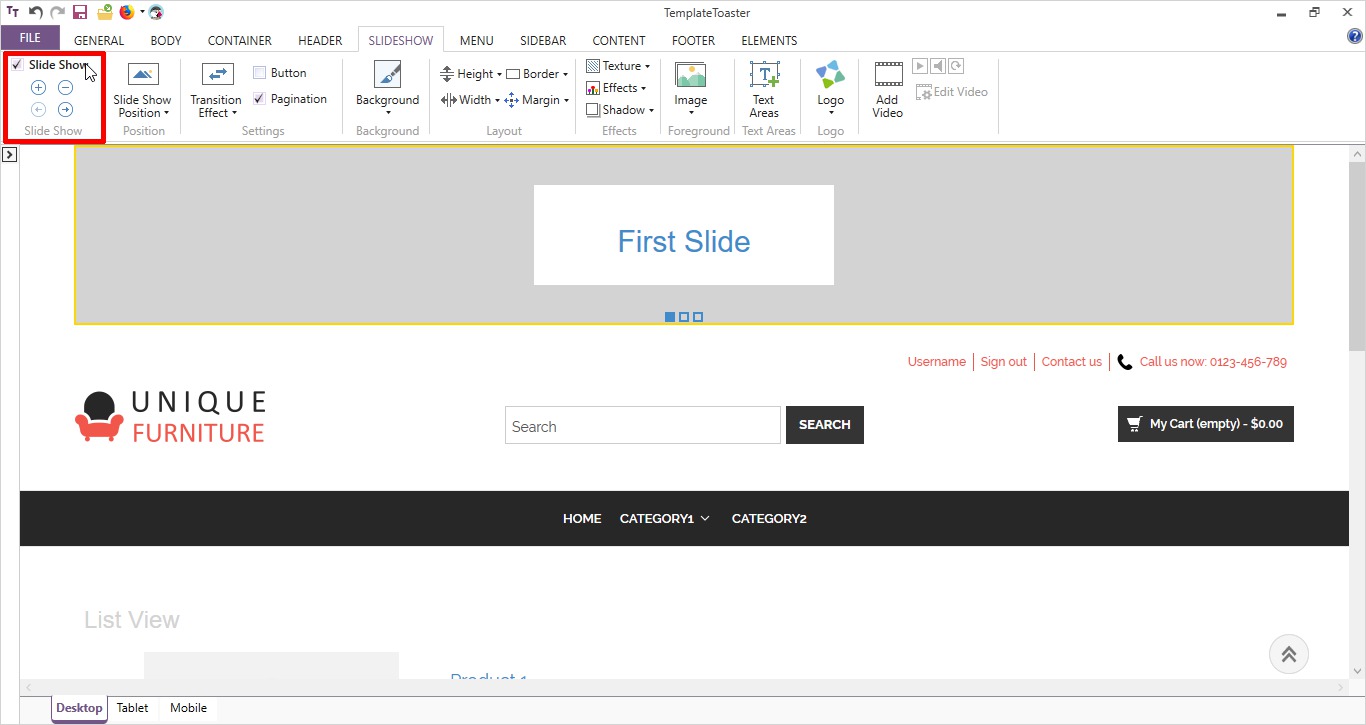
You can design a stunning slideshow with the help of available options. You can also add videos to your Slideshow. Just check in (✓) the slideshow option in the SLIDESHOW.
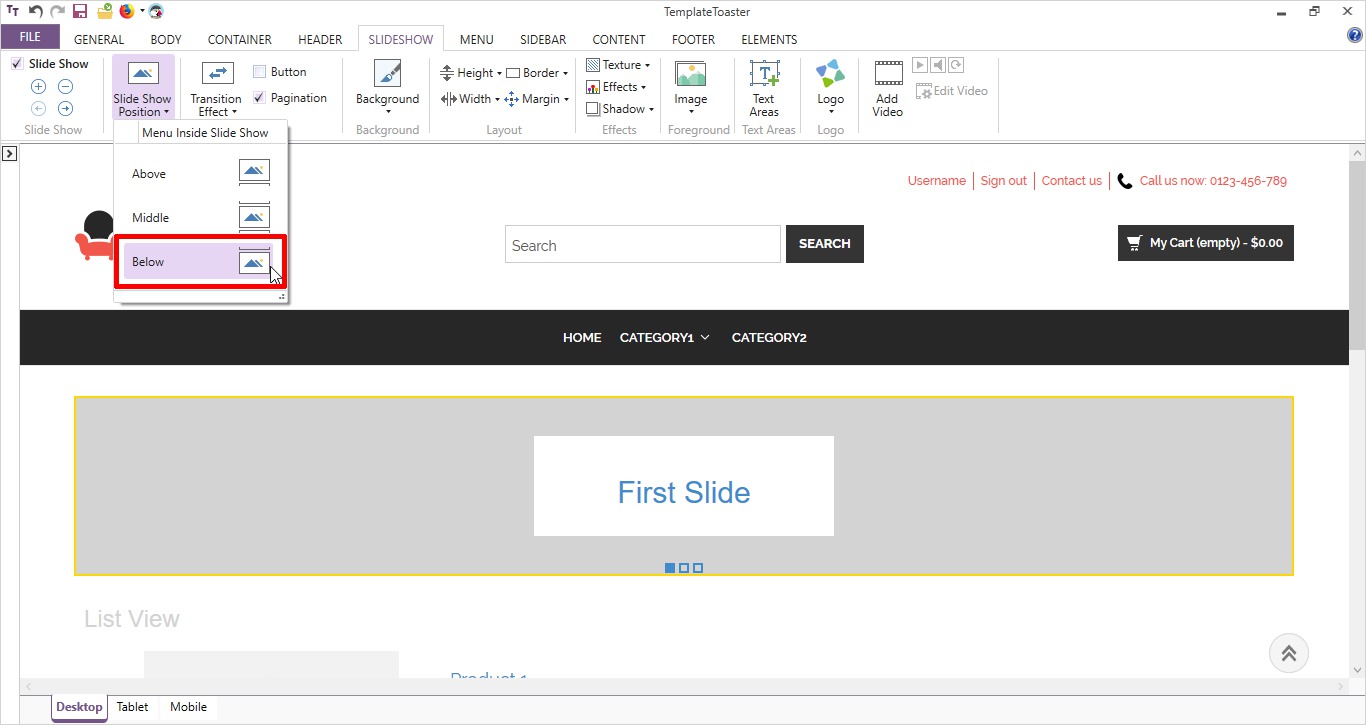
Set the position of a slideshow with respect to the menu like SLIDESHOW ➡ Slideshow Position ➡ Above / Middle / Below as shown below.
Now set the width of the slideshow. SLIDESHOW ➡ Width ➡ Full Width. However, you can choose the ‘Equal to container width and custom width’ options as well.

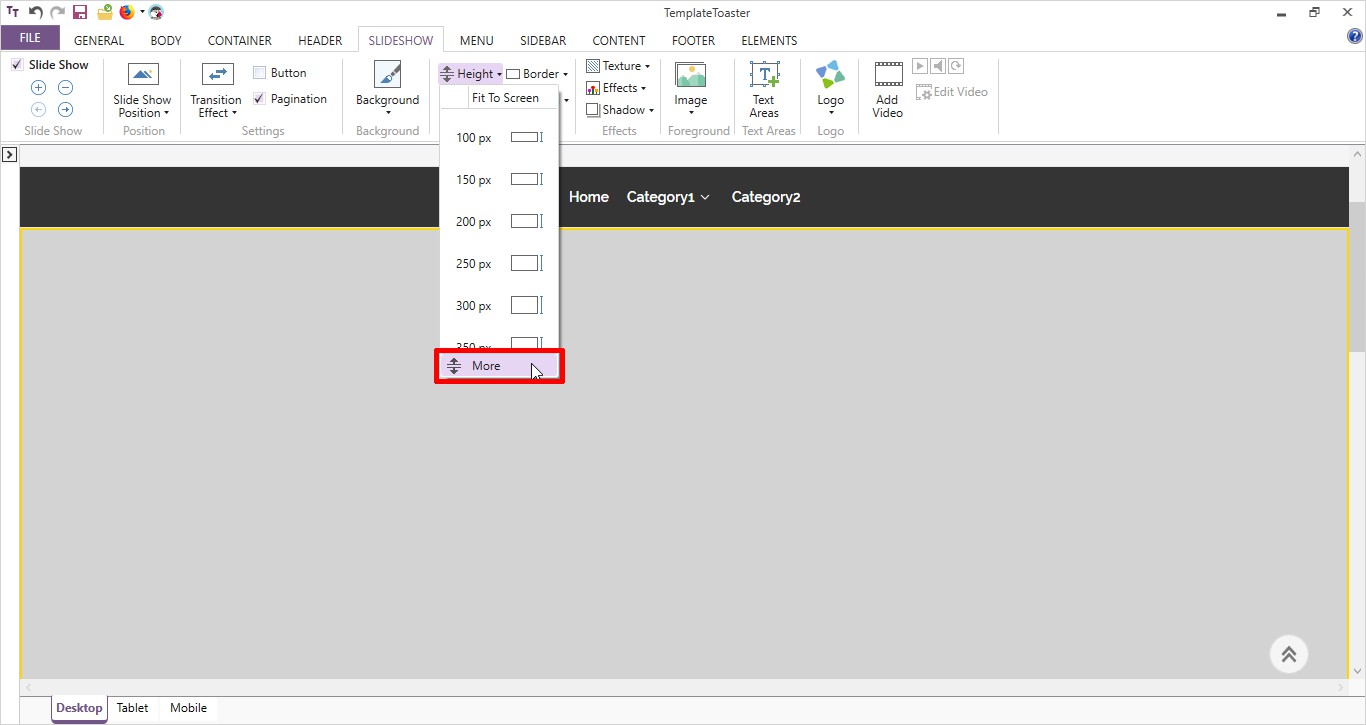
You are free to set the Height of the slideshow. SLIDESHOW ➡ Height. Starting from 100px to 350px. And by choosing the More option you can select the custom height for your slideshow.
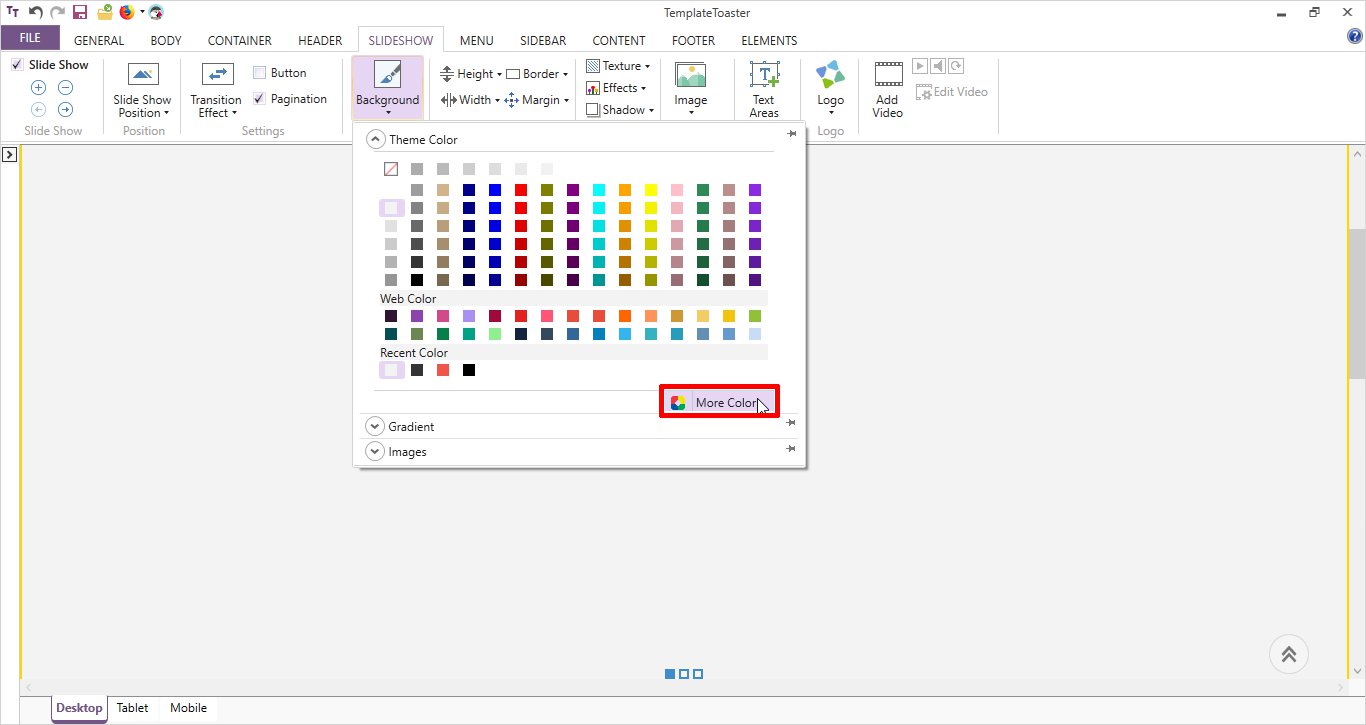
Time to set the background color for the slideshow. Go to SLIDESHOW ➡ Background ➡ More Color.
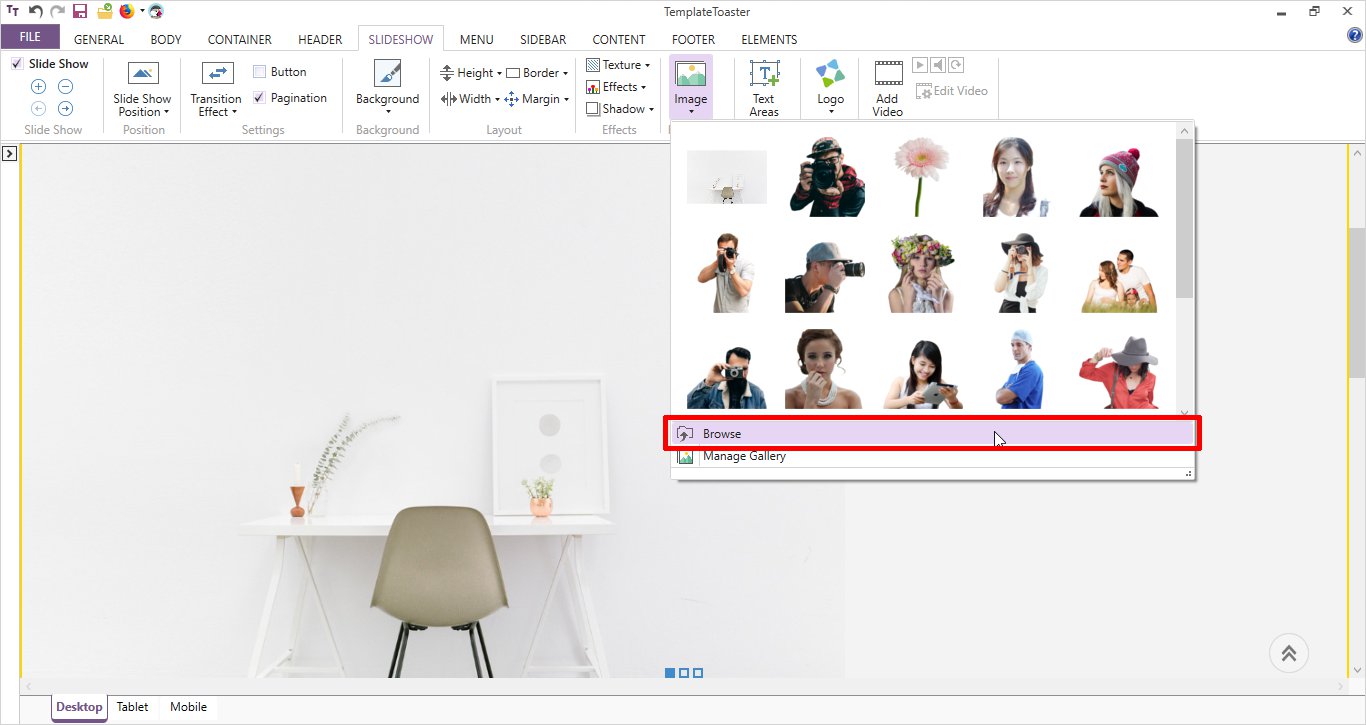
Selecting Foreground image for your slideshow is very easy. Simply go to SLIDESHOW ➡ Image ➡ Browse. There are many images available in the gallery but you can also select your custom image by clicking on the Browse option displayed below.
Now choose the content area in your slideshow. SLIDESHOW ➡ Text Area.
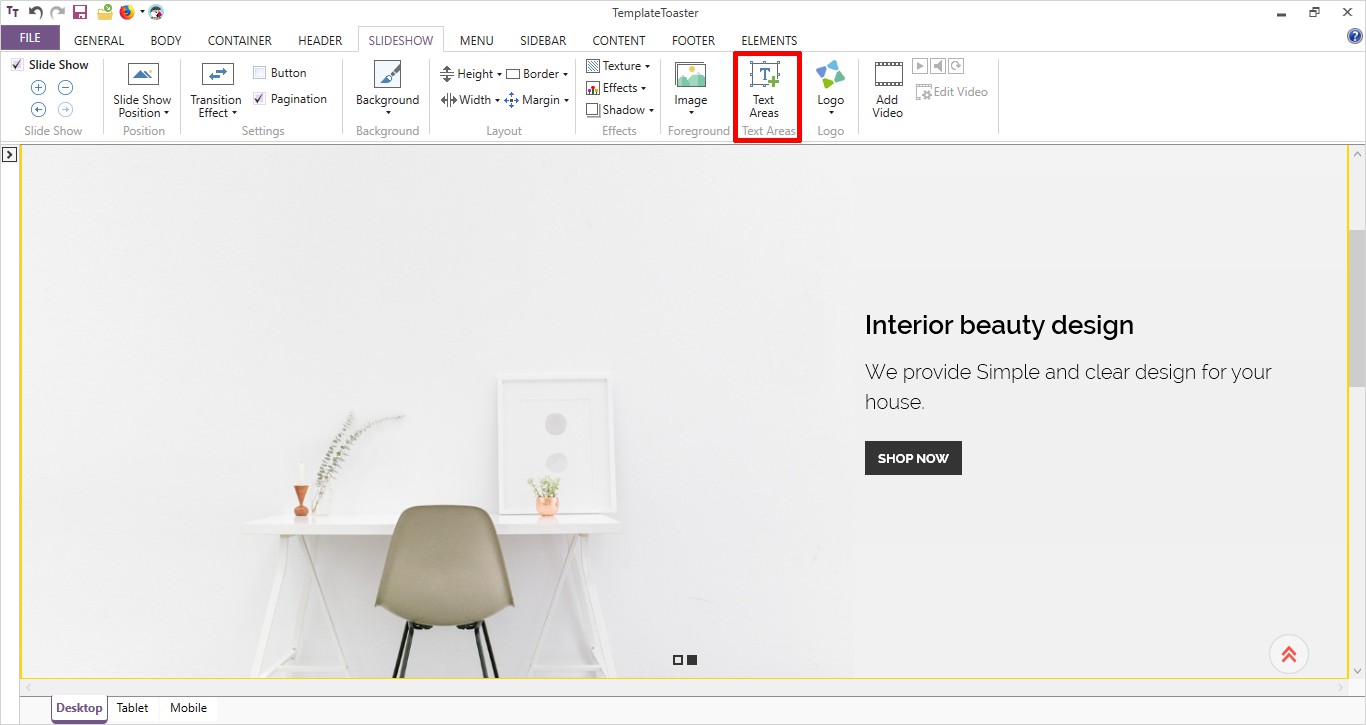
The slideshow is all done!
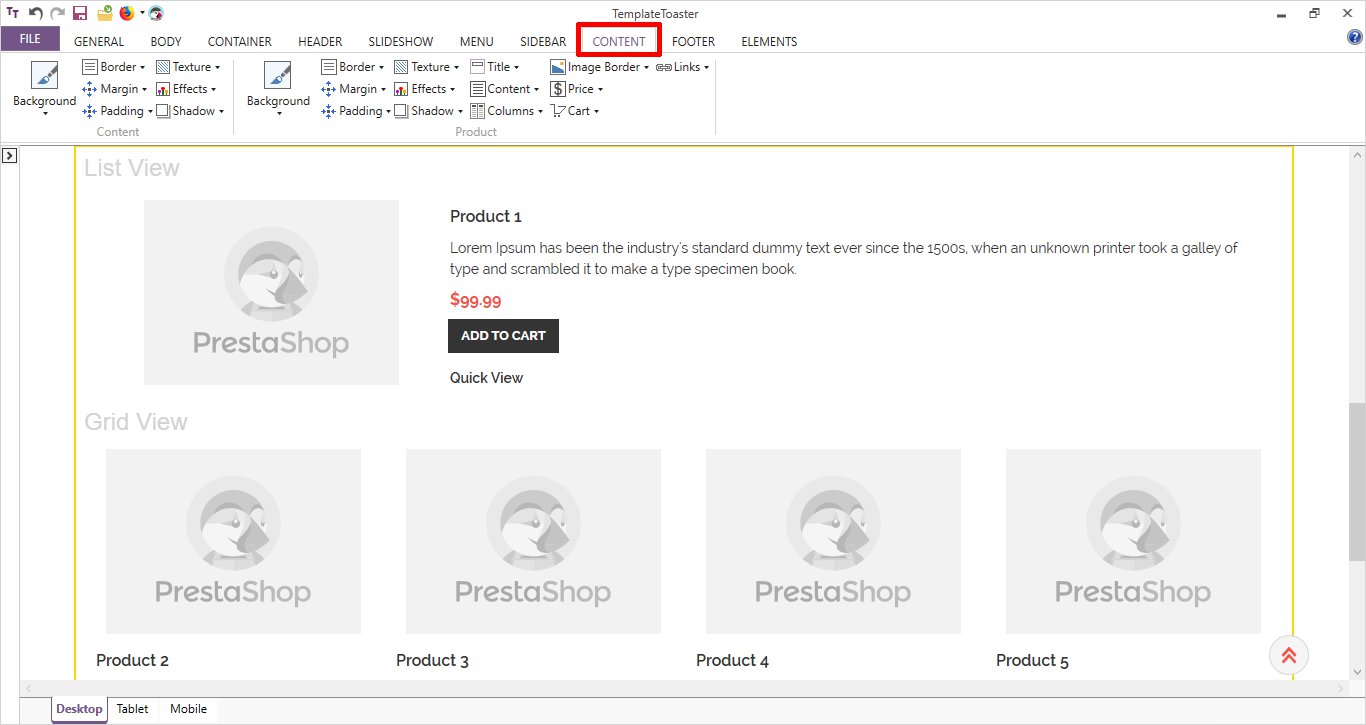
6. Design the Content (Main Area)
Manage your main content here from the Content Tab. You can set the different style options for your content and your product to be shown on the main area.
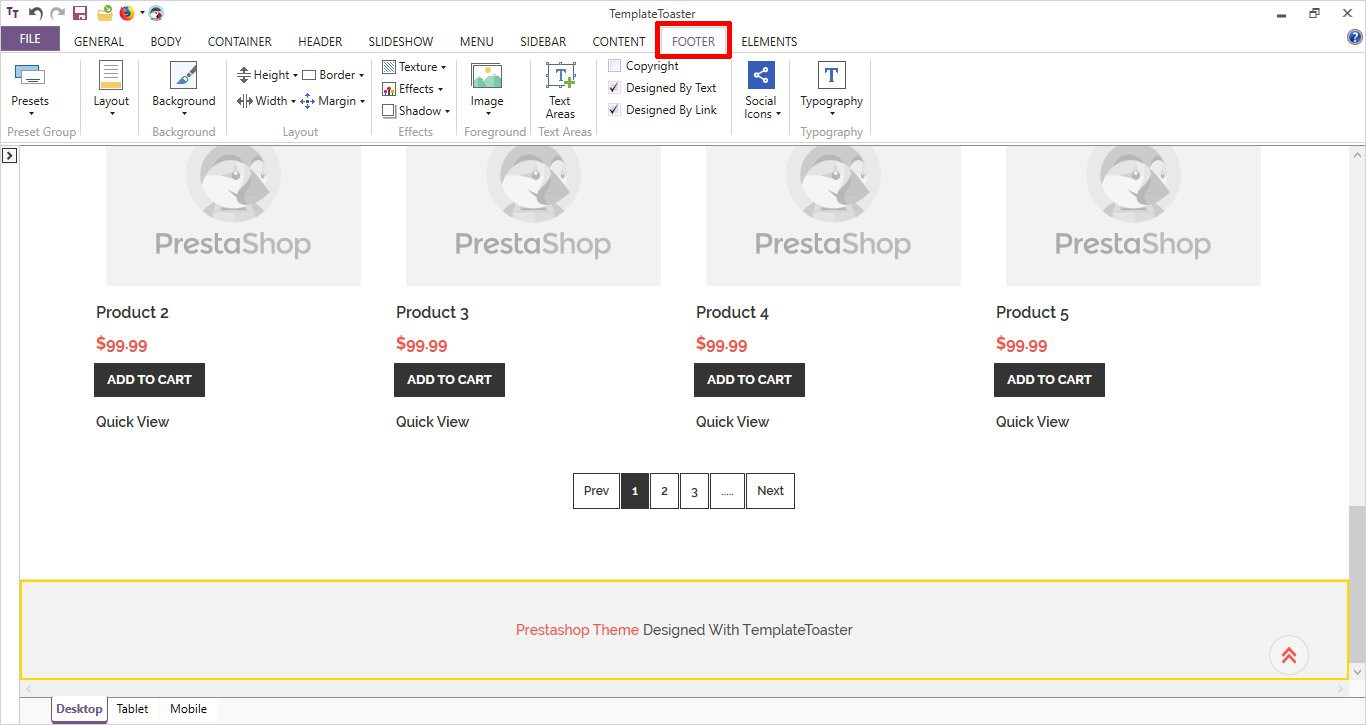
7. Design the Footer
Design a Footer now. Various given options like set a Background Image, Foreground Image, Layout, Effects, Text Area, Typography, Social Icons etc. will give you an effective footer.
Once you are ready with the theme, you need to export your theme. And to export the theme follow the given steps.
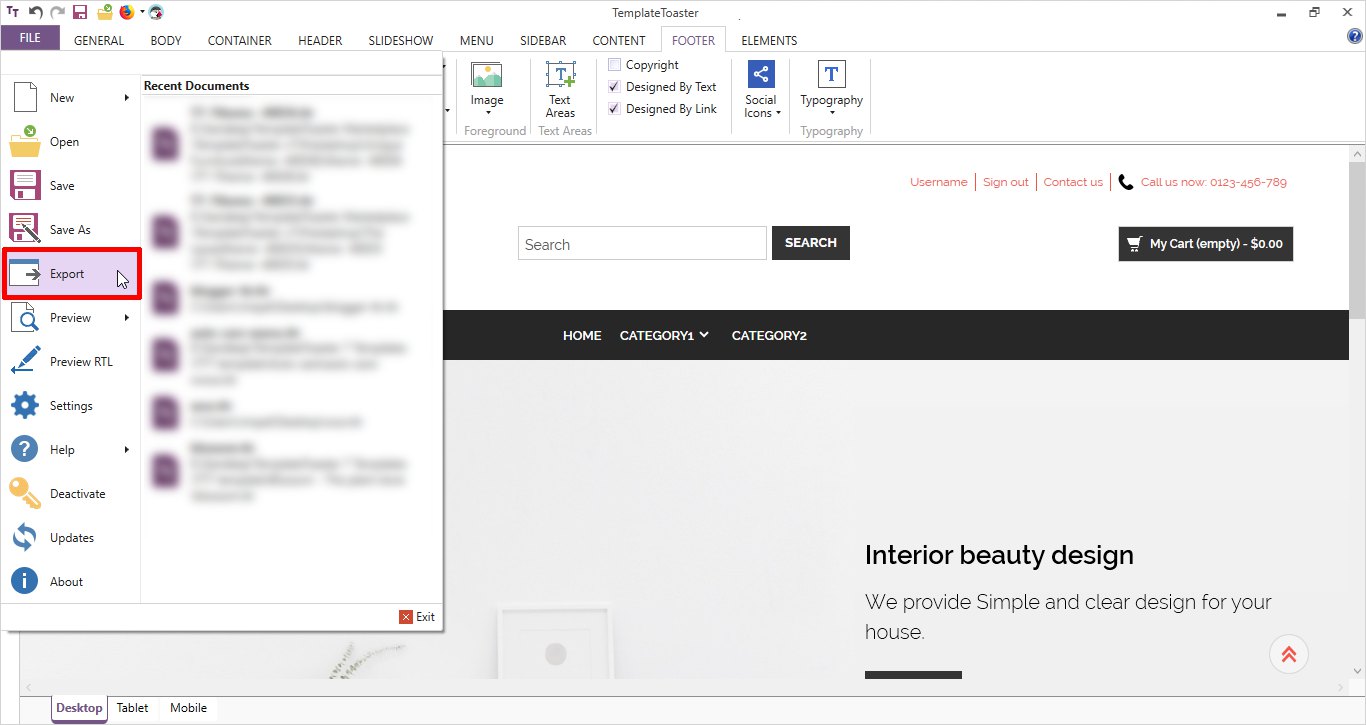
8. Export the Theme
Go to FILE ➡ Export
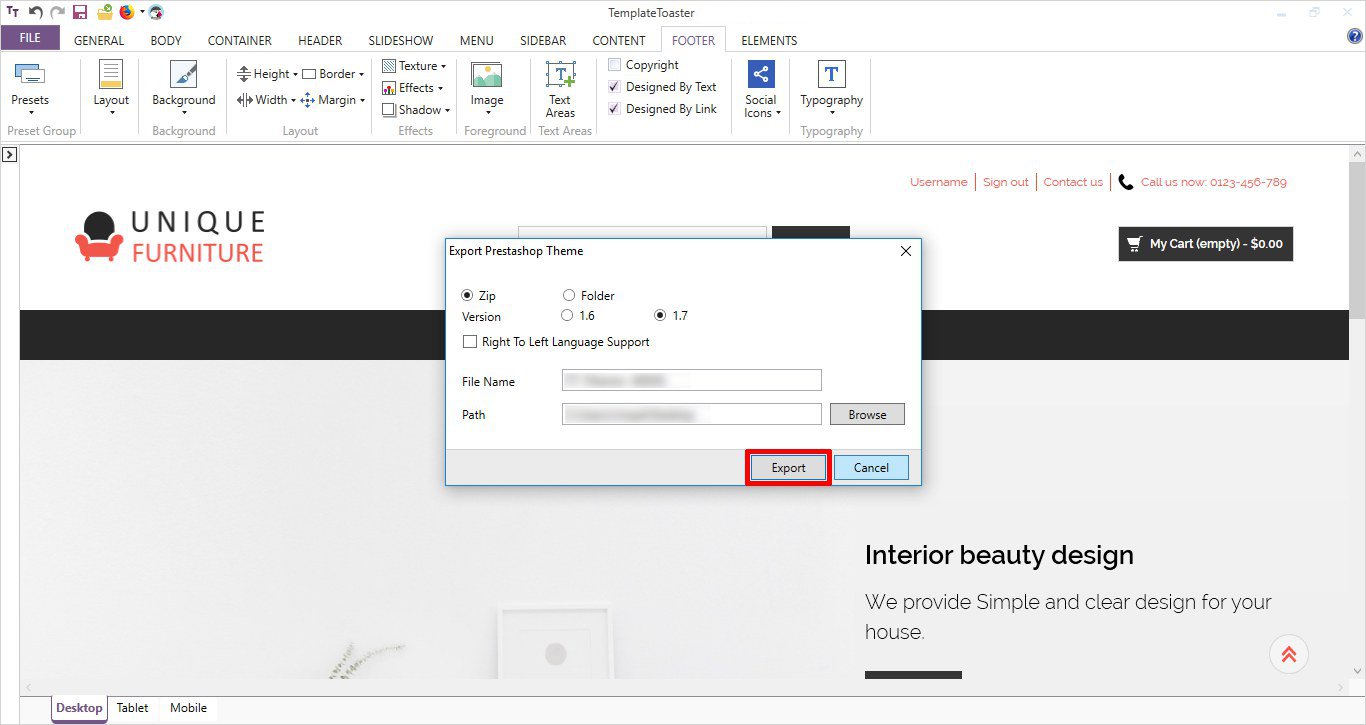
You will see a dialog box. You can either export this theme for PrestaShop 1.6 or 1.7 version, select one and click the Export Button.
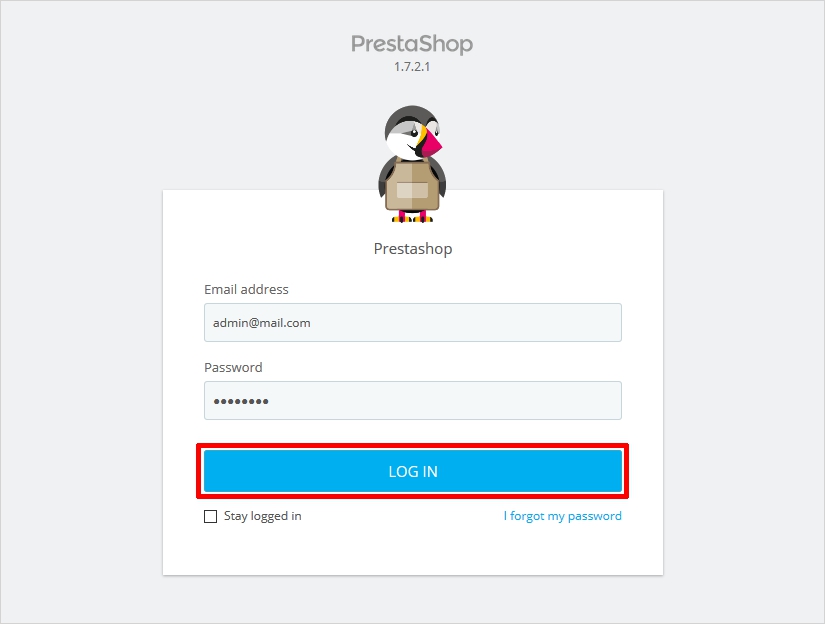
Install the Theme
Now open the PrestaShop Dashboard by entering the required credentials.
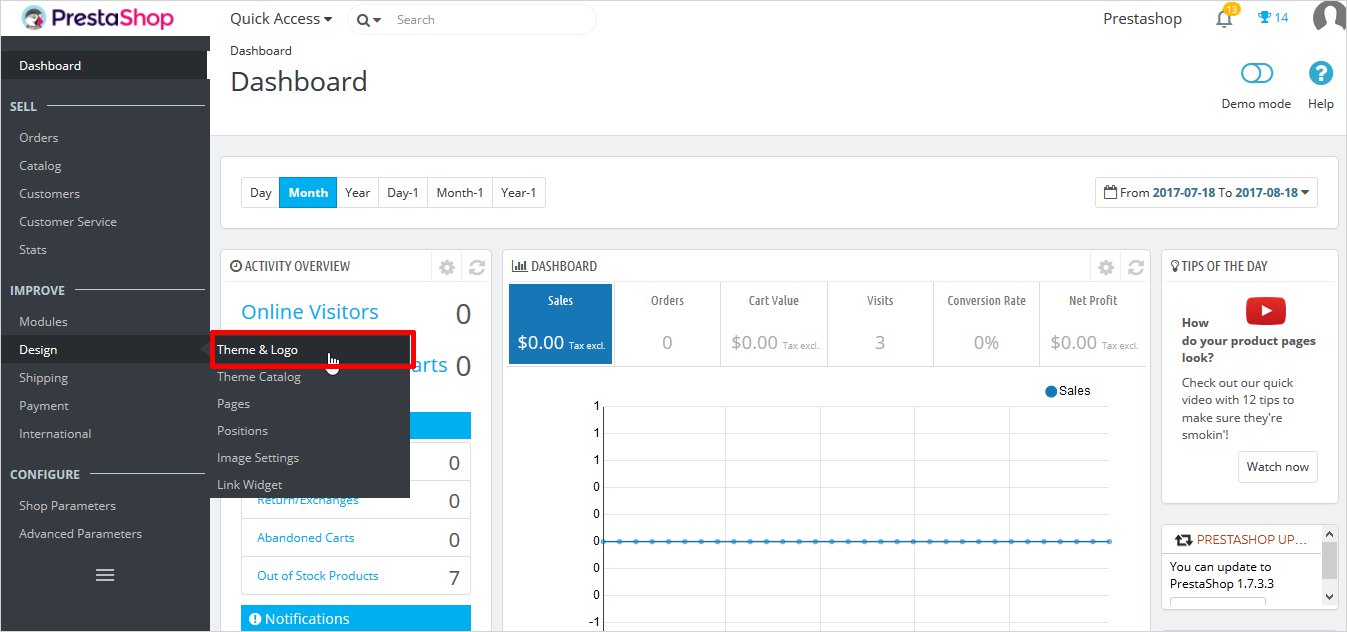
You will be launched to the PrestaShop Dashboard where you have to select the Dashboard ➡ Design ➡ Theme & Logo.
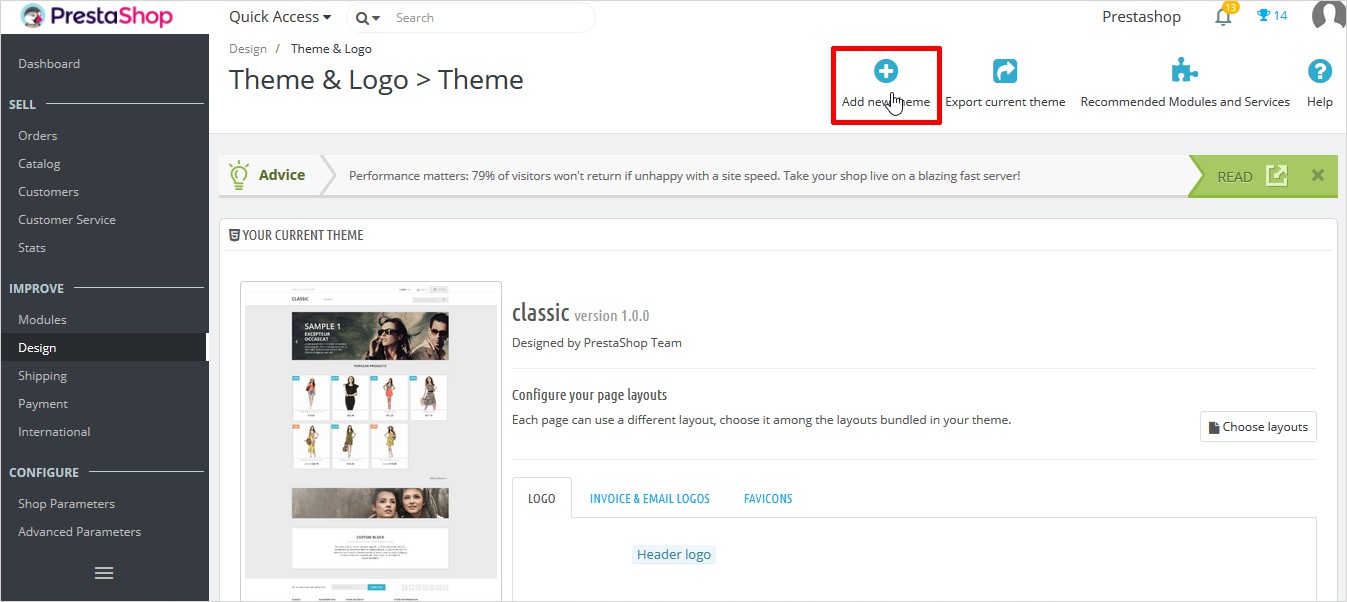
Now in the Theme & Logo window choose the Add New Theme option.
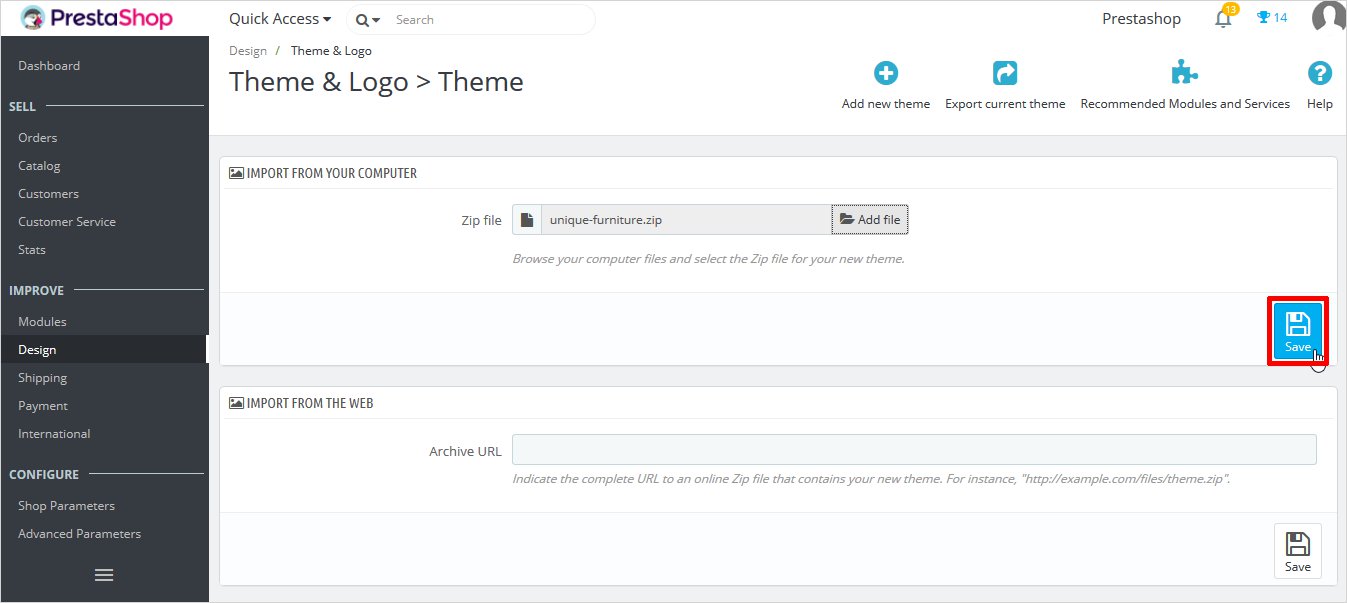
Now select your zip file here and click on the Save button.
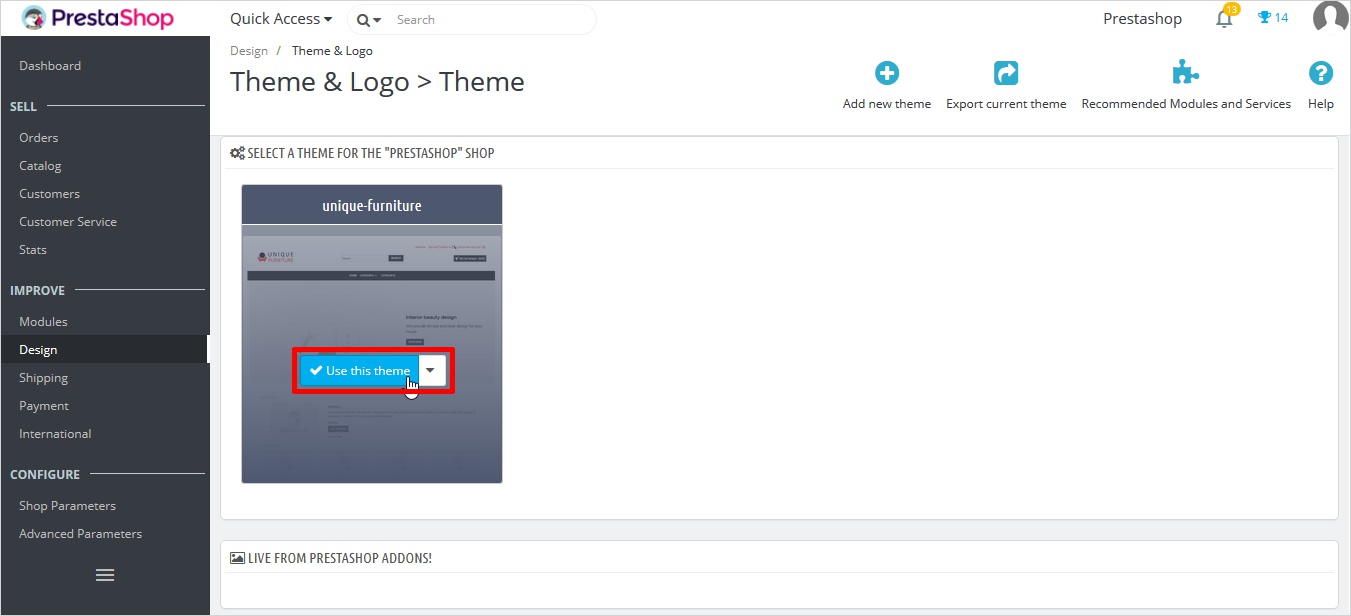
Your theme will be selected and click on the ‘Use this Theme’ option.
Here choose the Header Logo and click to Add File button.
![]()
And finally, click on the Save button.
![]()
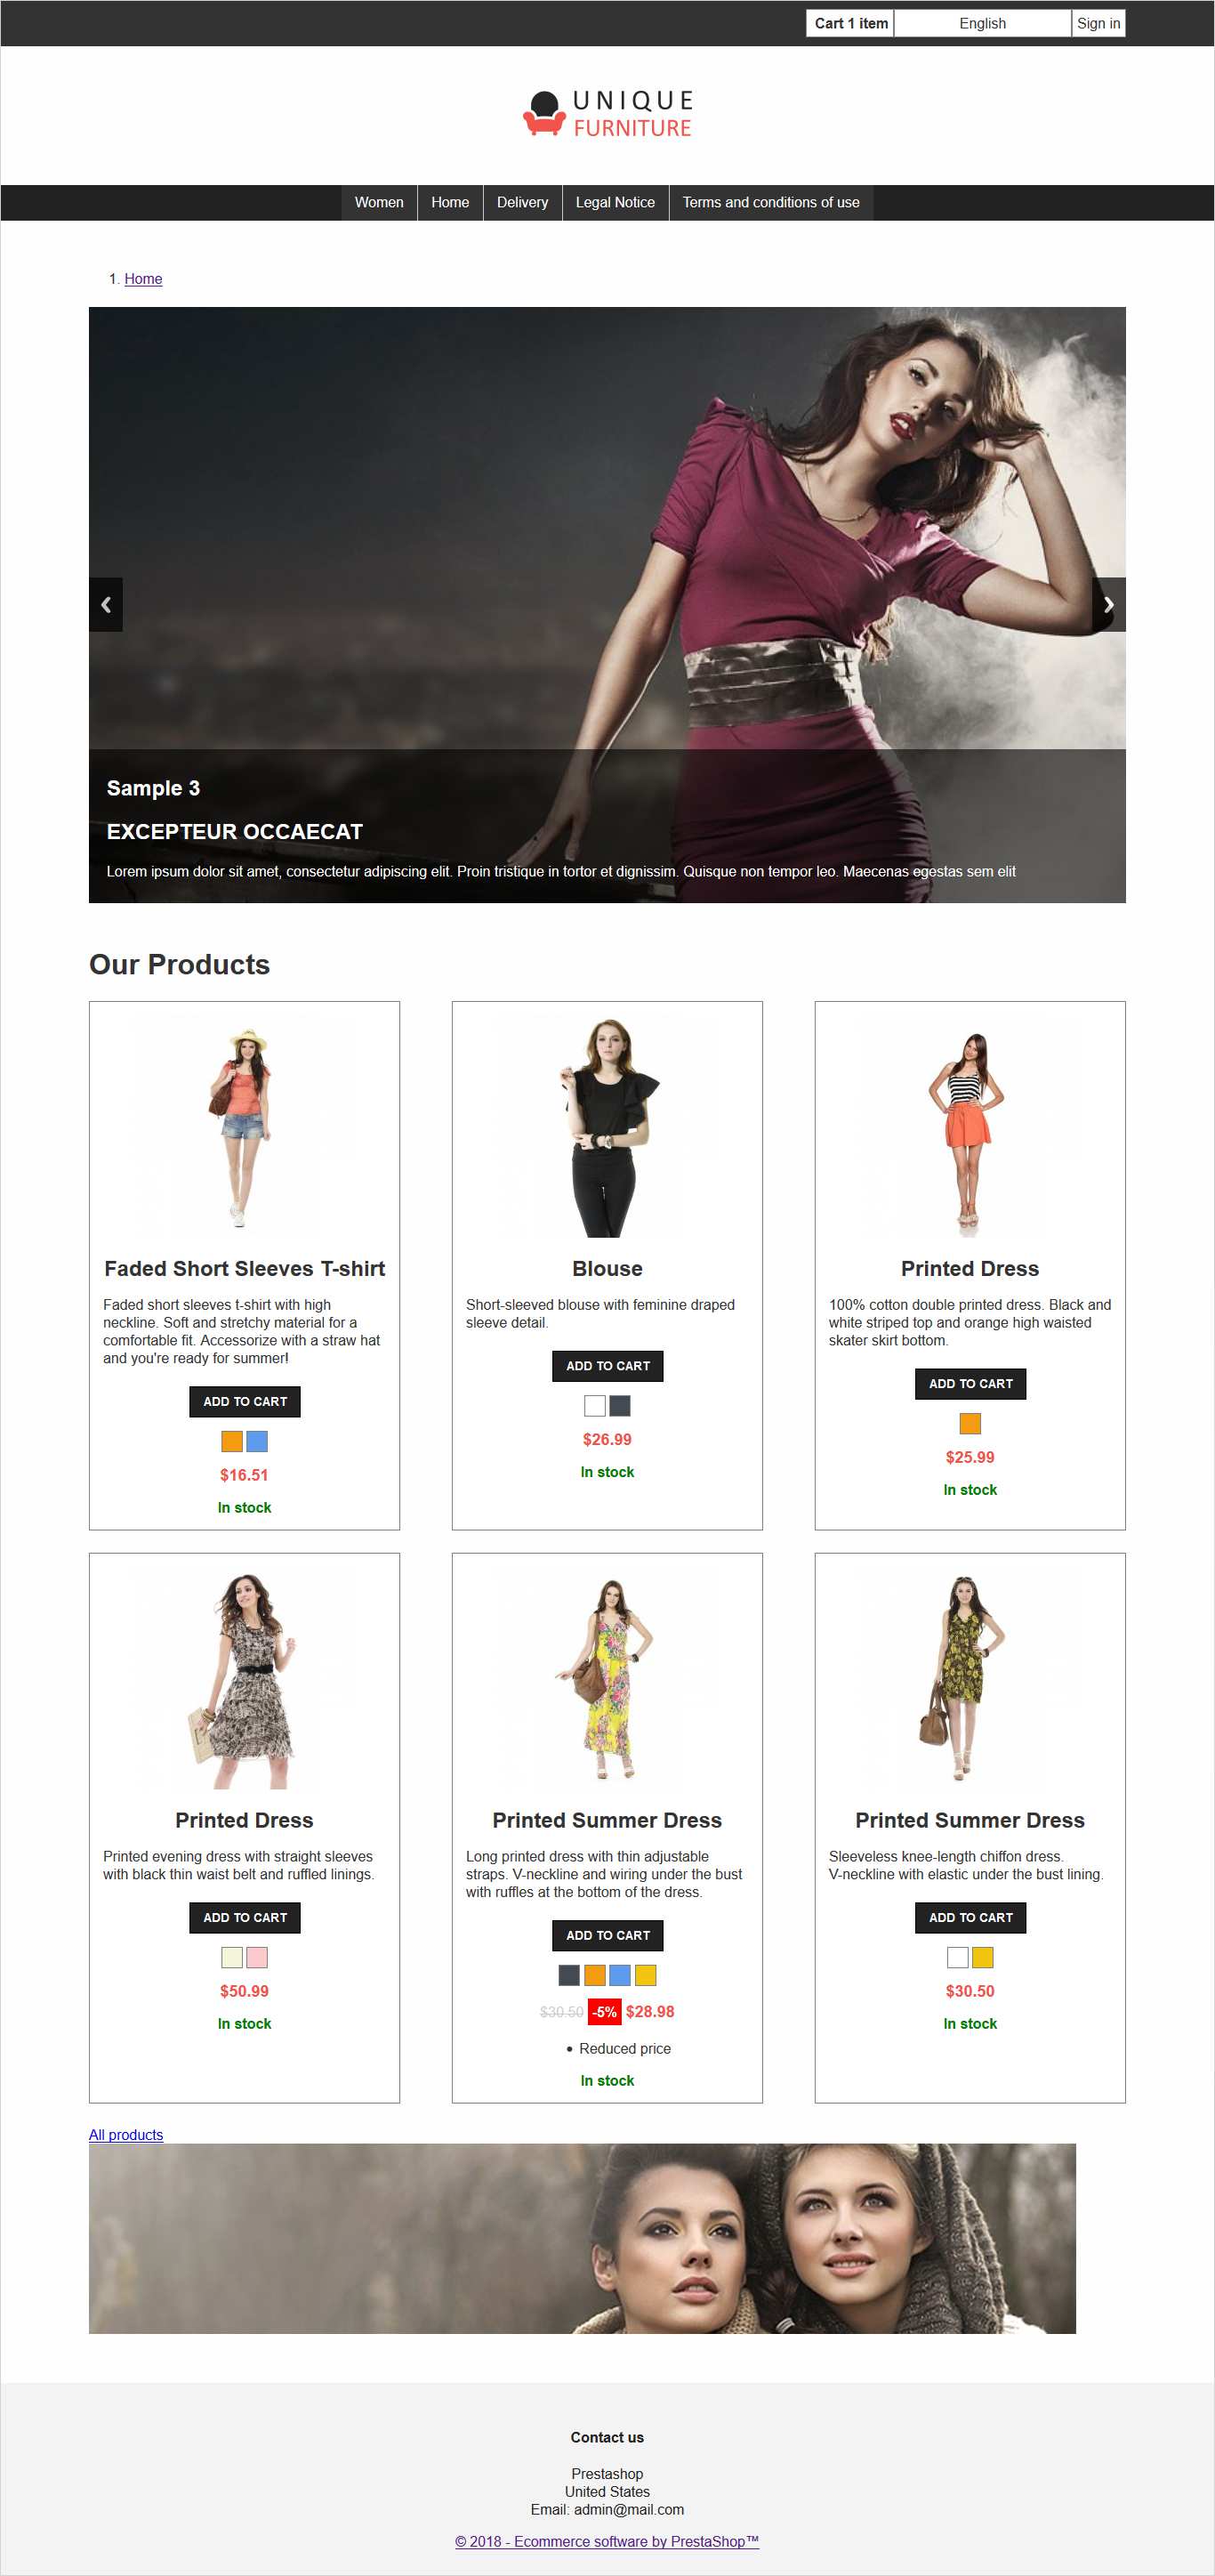
There you go! Your beautiful PrestaShop theme is all set to rock. Make most of it.
Voila! Your PrestaShop Theme is Ready Now
Well, this brings us to the end of this post. Now that you have both the methods in your hand, select the one which entices you more. But I’m sure you will agree with me on one thing that TemplateToaster is certainly the best software to create PrestaShop theme with. You will also find How to migrate from PrestaShop to WooCommerce and free Prestashop themes at Templatetoaster.
Your Turn
If you have any query concerning this post or you need some help in any of the methods while creating your PrestaShop theme just drop a comment below. And I will get back to you with the solution as soon as possible.
Keep checking this space for latest updates. Happy Theming!
Build a Stunning Website in Minutes with TemplateToaster Website Builder
Create Your Own Website Now
This a wonderful information. Thanks for sharing
i don’t really understand this step : Delete all files inside Theme folder ➡ _dev/css and customize css files as per your requirement.
Theme folder ➡ assests ➡ css ➡ theme.css
Nice detailed article.
Is prestashop provide security for payment system?
How to create open cart theme without coding?