Add Mega Menu in WordPress Site: Step-by-Step Guide
Integrate/add mega Menu in WordPress site to enhance its visual appeal and observe the increase in the user engagement. It can potentially improve your website’s navigation and boost the conversion rate of your site.
Here, at TemplateToaster Website Builder Blog, I always try to help you improve your website and increase your conversion rate. Today in this guide, I am going to explain to you how to add a mega menu on your WordPress website step by step using a Plugin from scratch.
What is a Mega Menu?
Mega Menu is an enhanced form of website’s menu, which allows to display menu items in a tabular form in menu. Mega menu if a necassary thing if your are running a very big site or an eCommerce website.
Some of the WordPress themes or templates come with an inbuilt and integrated Mega Menu. However, if your theme or template does not have an integrated mega menu then you can integrate it by yourself. I am going to explain to you how to integrate a Mega Menu into your WordPress site using a plugin. Let’s get started!
How to Add Mega Menu in WordPress Site Using a Plugin
Installing the Plugin

Before you get started, start with installing the Plugin. I will recommend you the Max Mega Menu plugin because I personally like using it on my website as well. It offers unlimited features to make your mega menu appear more interactive and pretty. Go to your admin panel and log in by entering your Username and Password. Now go to your WordPress Dashboard → Plugins → Add new. Search and locate ‘Max Mega Menu’ and click on Install Now. Then, activate the plugin when the activate button appears.
Steps to Add Mega Menu in WordPress Site
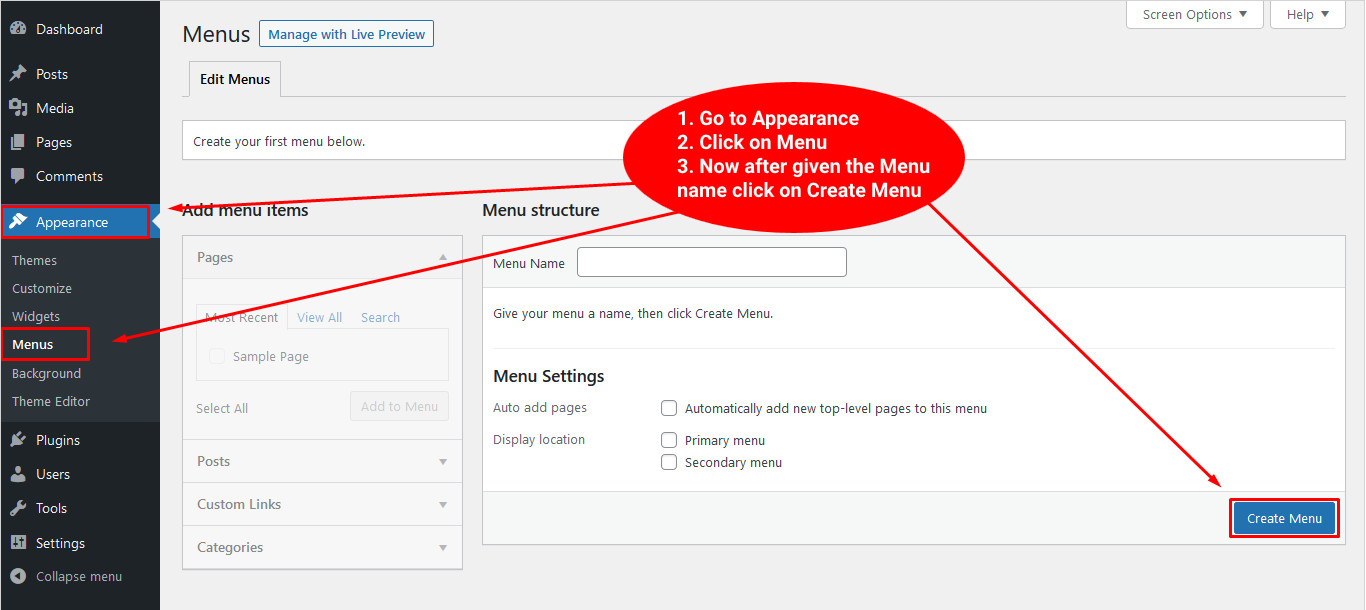
Step 1: First of all, start with creating a menu layout. Go to your WordPress Dashboard → Appearance → Menus. Then click the Create Menu button as given below;
Step 2: Now, select the menu location of your header. It is the default menu of your WordPress site and often has a Display Location area, like ‘Primary Menu’, ‘Top’, ‘Top Menu’ etc.
Step 3: In case you don’t have a default menu location, then you can select one using the following steps.
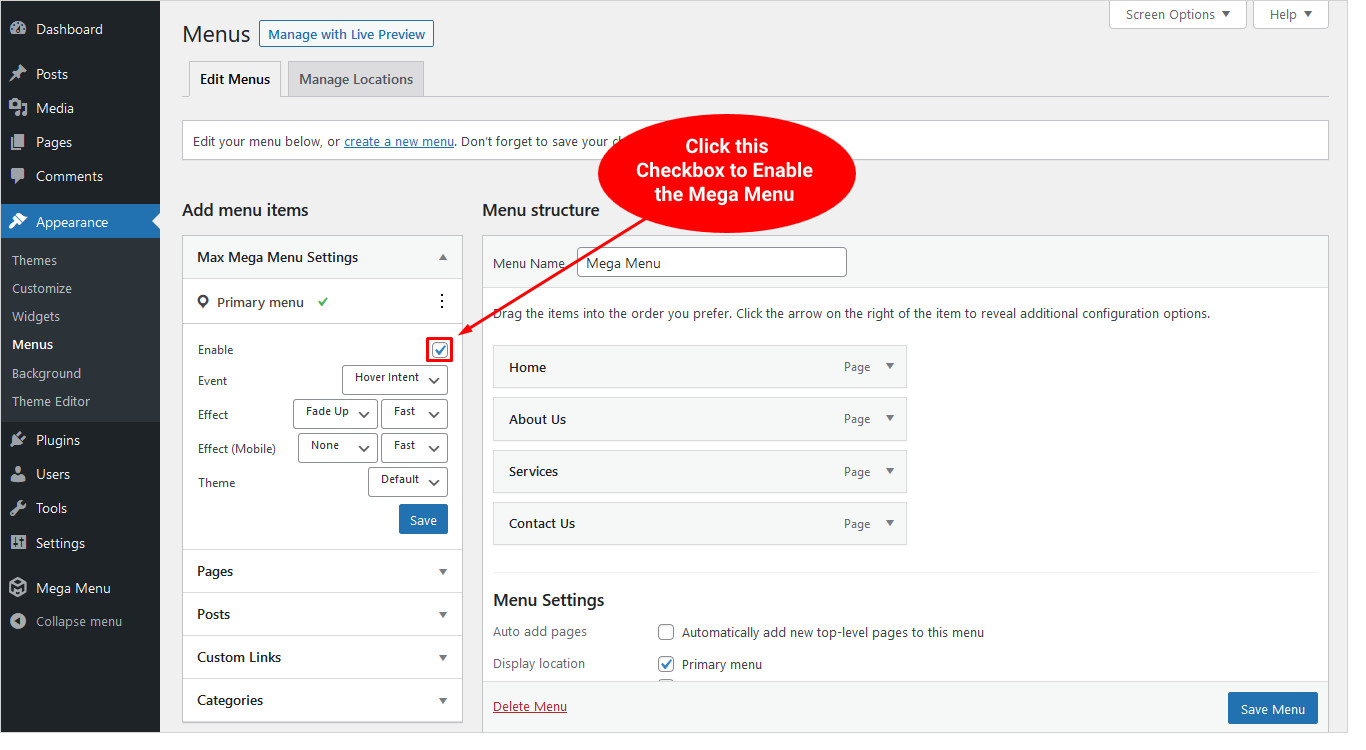
- Find the Max Mega Menu settings box on the left
- Check the Enable box
- Click save
WordPress Mega Menu Default Settings
Now, locate the Max Mega Menu plugin in the Dashboard’s left sidebar and click on Max Mega Menu.
Stick to the default setting, it will work best for your website. However, you can make a few changes like changing the color of the menu to match the color palette of your WordPress theme’s navigation menu container. This is important or else it will look out of the place. To find the color code used in your theme, you can use the inspect tool by right-clicking your mouse in your browser. Once you manage to get the color hex code, paste it into a text file or sticky note for later use. Now, go to the Max Mega Menu settings page and click the Menu Themes tab and then click the Menu bar section. Here you can paste that color hex code to match it with your templates or theme’s color palette. Let’s move to the next part to create a theme for the mega menu.
Creating a Theme for the Mega Menu in WordPress
The next step is to create a theme for the menu that will allow you to define the styling and behaviors of the menu-powered navigation bars. Go to Appearance → Menus and then add top-level items to your navigation. After that, check the box under Max Mega Menu Settings to enable the mega menu on the menus screen.
Now, you will have to hover on a menu item and you will see a “Mega Menu’ button appearing on the menu tab. You can add any WordPress widget to your mega menu and enter the number of columns you want to display. After you are done customizing the settings, save your preferences by clicking the Save button. Close the popup to see the mega menu in action. If you want to create a WordPress theme you use WordPress theme builder or WordPress theme generator and get free WordPress themes. Check out the best WordPress website builders.
Adding Mega Menu in WordPress Site Using TemplateToaster
If you have used TemplateToaster for creating a website, or you are new to it, then knowing this would be really helpful. No matter if you are using any pre-designed WordPress theme from TemplateToaster or you are creating a theme from scratch. Both ways adding a mega menu is painless. Simply follow the below-given steps and add a mega menu to your website.
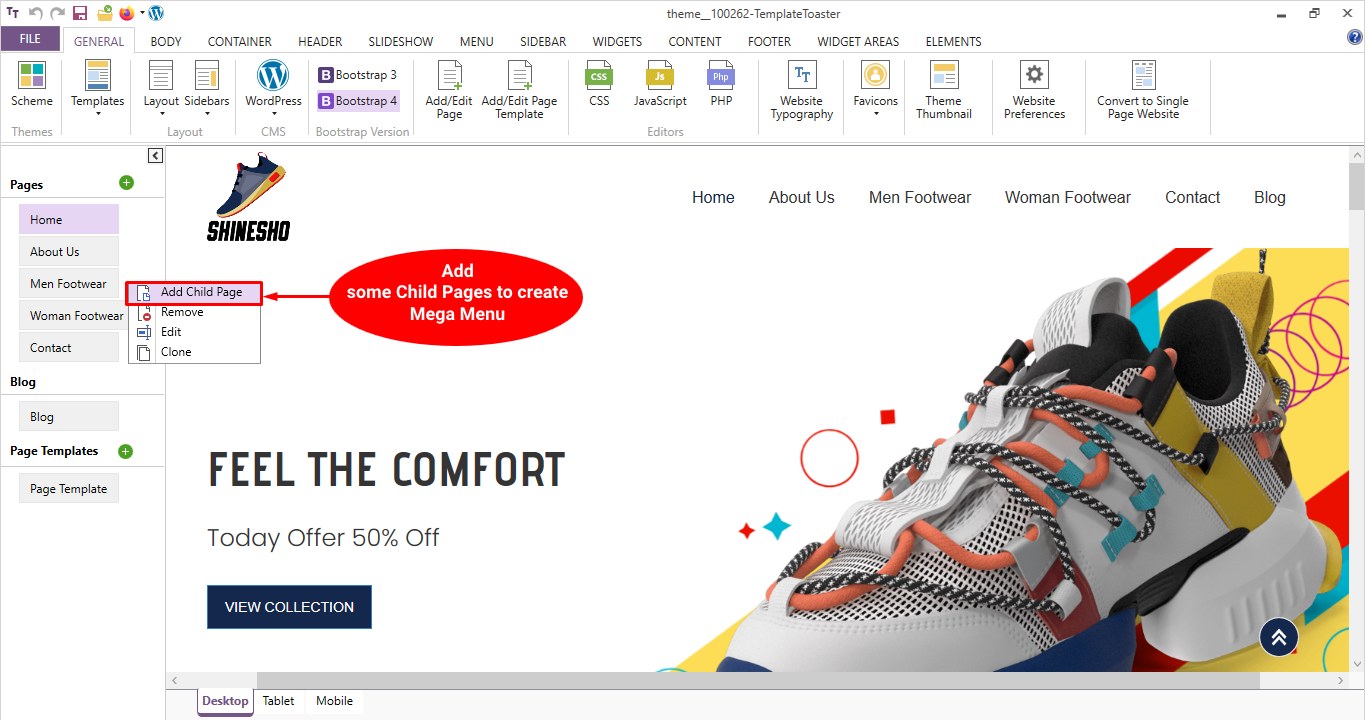
Step1: Click on the Ellipsis
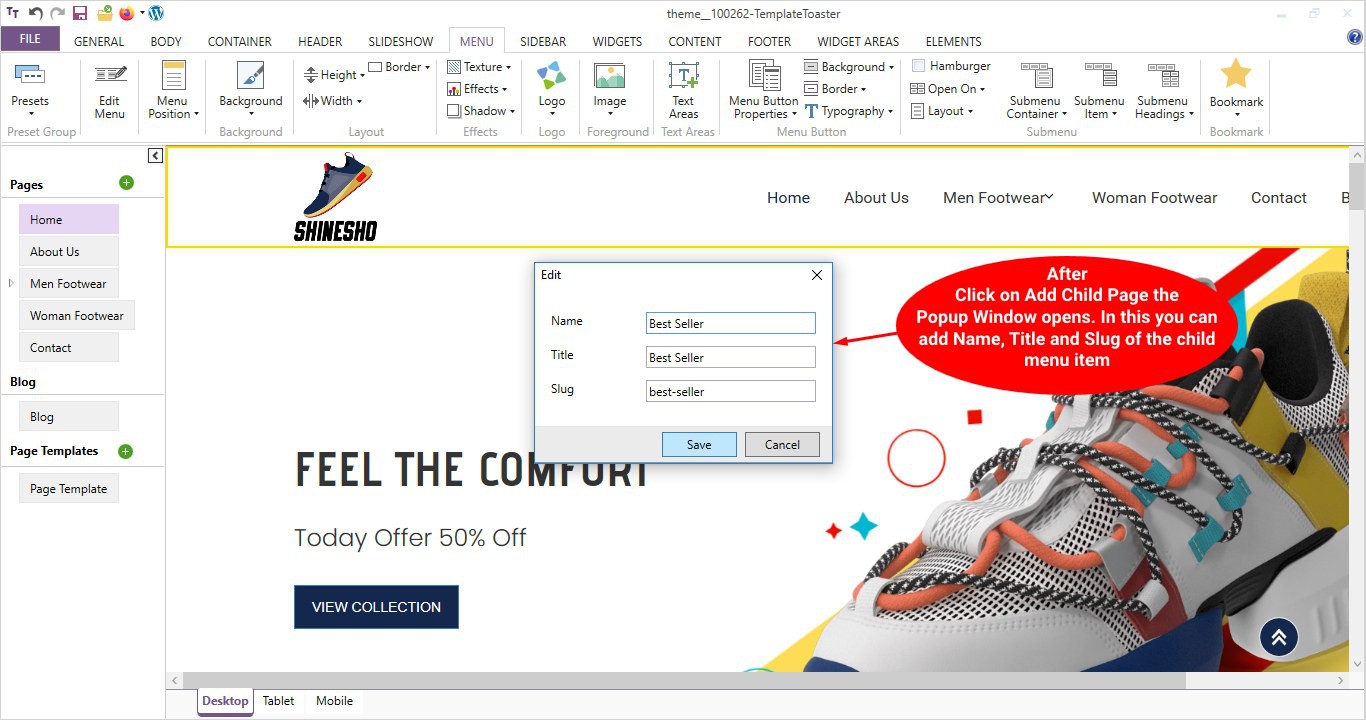
You should see ellipsis with the options present in the left side panel. Once you click on it you shall see some other options such as Add Child Page, Remove, Edit, and Clone. Here you need to click on the Add Child Page option.
And you shall see another wizard where you are required to add Name, Title, and Slug as shown below. Add lots of pages this way.
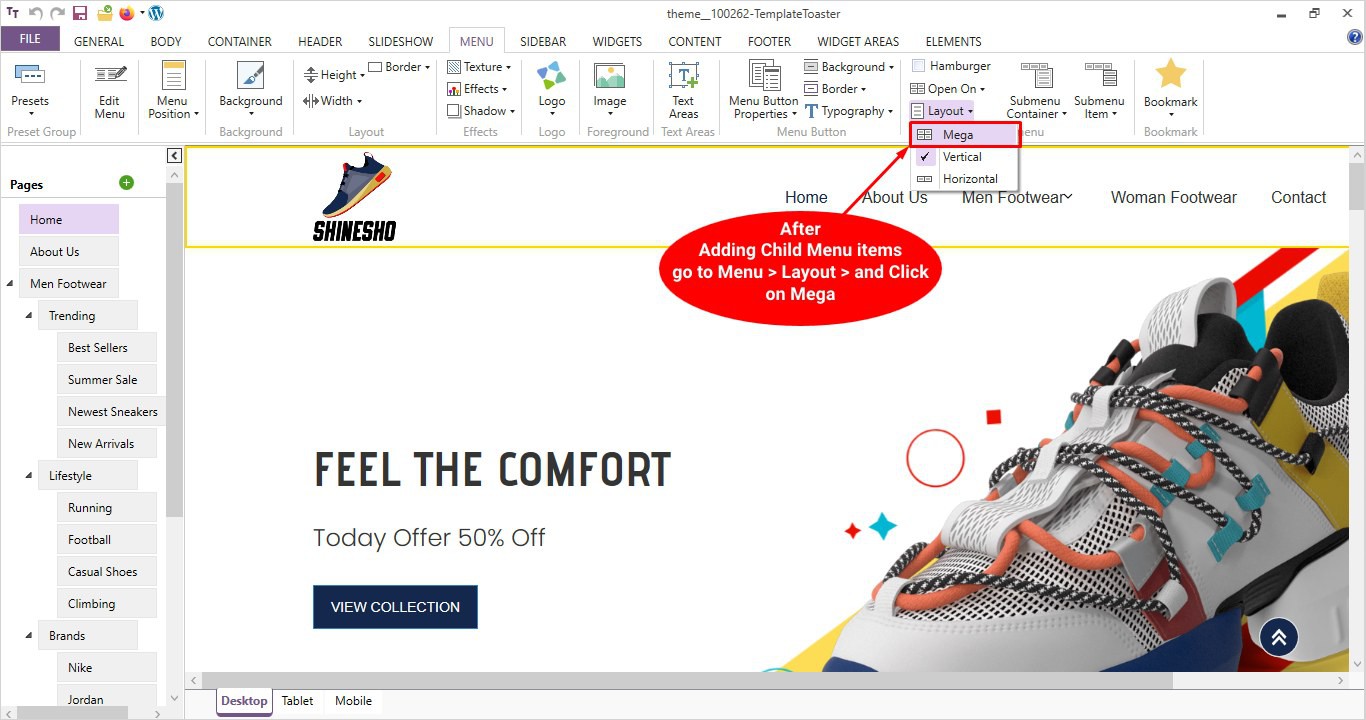
Step 2: Go to the Menu Option
After adding child menu items, you need to go to the Menu, then Layout, and finally click on Mega. Go to the Menu → Layout → Mega.
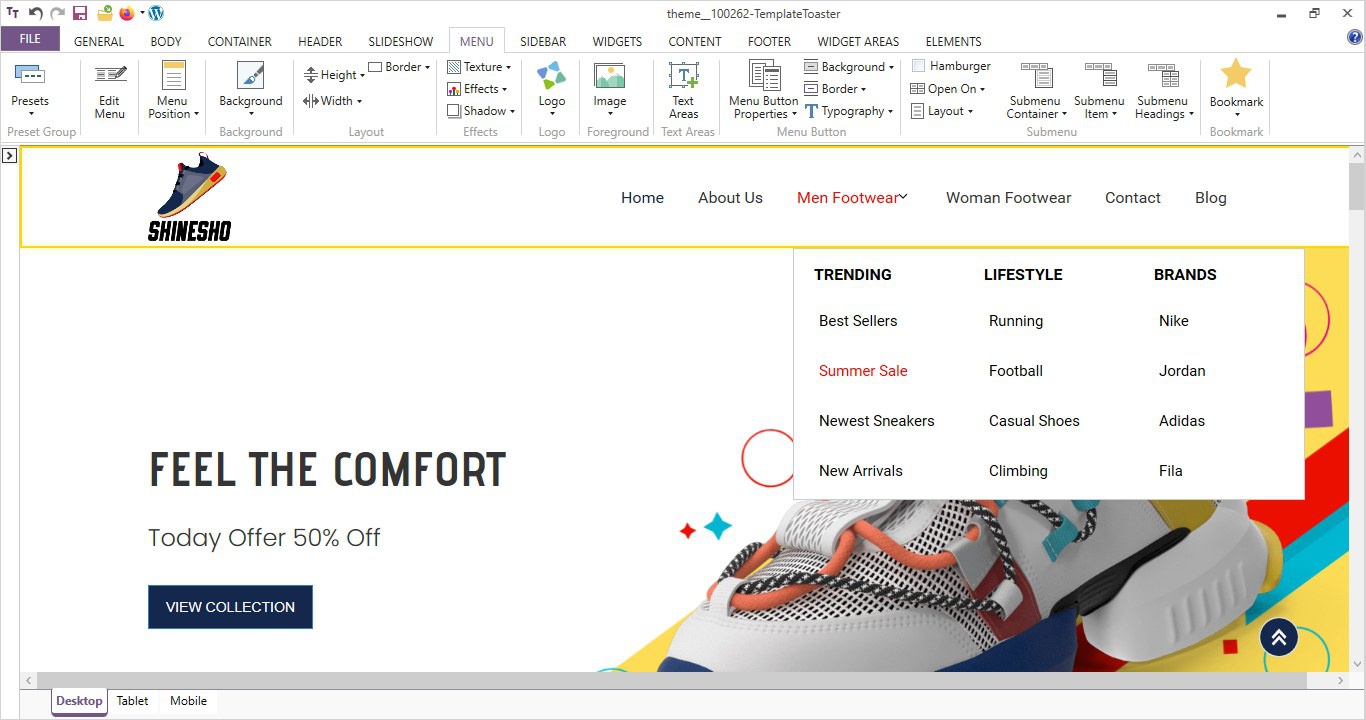
This is how your final Mega Menu should look like.
Adding Mega Menu in WordPress Site: Final Verdict
Yes, you have finally built your first mega menu on your WordPress site successfully. There are a lot of things you can add to your Mega Menu to make your website look more appealing and interactive. I hope this tutorial helped you learn how to add a mega menu to your WordPress site. You may also want to see our tutorial on How to Change a Password in WordPress and how to Remove Malware from a WordPress Website. For more such tutorials, keep visiting the TemplateToaster blog regularly. Comment below your thoughts and queries, I’d love to hear.
Build a Stunning Website in Minutes with TemplateToaster Website Builder
Create Your Own Website Now
This is so chock of useful information.