How to Create VirtueMart Template – Tutorial for Beginners

Do you want to create a VirtueMart Template for your online store? This detailed tutorial will guide you on how to create VirtueMart template from scratch without coding.
However, there are several ways to create a VirtueMart template from scratch but I will discuss the two intuitive ways to create VirtueMart website. The basic and the first method is a manual method and the other method is the automated method with the help of VirtueMart Template Creator Software.
Here is the quick recap of the tutorial “How to create a VirtueMart template”. Here at Templatetoaster website builder, I will show you the easiest ways to create VirtueMart Template.
VirtueMart is an open source e-commerce platform created as an extension of Joomla Content Management System (CMS). As you know in order to create your online store with VirtueMart functionalities, you will require a fully functional Joomla website.
1. Create VirtueMart Template by Coding yourself
As the name specifies that the manual method includes the hand coding. If you are going to create VirtueMart website all by yourself then you must have a good command over HTML, PHP, and MySQL. If it seems a herculean task to you, then the following explanation will be a great help for you. Just follow the steps and your VirtueMart website will be ready in a very short time.
Following are the basic required files that you will need to create a fully-functional website.
- The templatedetails.xml file
- The index.php file
- The style.css file
Step 1. The templatedetails.xml file
The templatedetails.xml file is an important file. It contains the basic metadata required by the Joomla to display and offer it as template option in the background. It also includes the metadata about the author and the other related details.
add theme folder → templatedetails.xml
<?xml version="1.0" encoding="utf-8"?>
<extension version="3.1" type="template">
<name>custom-template</name>
<creationDate>2018-07-04</creationDate>
<author>John Doe</author>
<authorEmail>[email protected]</authorEmail>
<authorUrl>http://www.example.com</authorUrl>
<copyright>John Doe 2008</copyright>
<license>GNU/GPL</license>
<version>1.0.2</version>
<description>Custom Template</description>
<files>
<filename>index.php</filename>
<filename>templateDetails.xml</filename>
<folder>css</folder>
</files>
<positions>
<position>breadcrumb</position>
<position>left</position>
<position>right</position>
<position>top</position>
<position>user1</position>
<position>user2</position>
<position>user3</position>
<position>user4</position>
<position>footer</position>
</positions>
</extension>
You can easily copy the above-given code and paste it into your templatedetails.xml file and modify the credentials accordingly.
All the files to be used in the code are need to mentioned in the <files></files>. And the folders to be used are required to be mentioned under <folder></folder>.
Step 2. The index.php file
The index.php file is the main file which manages the content of your website. It contains the mixture of code which will be delivered as PHP code.
add theme folder → index.php
<?php defined( '_JEXEC' ) or die( 'Restricted access' );?>
<!DOCTYPE html>
<html xmlns="http://www.w3.org/1999/xhtml"
xml:lang="<?php echo $this->language; ?>" lang="<?php echo $this->language; ?>" >
<head>
<jdoc:include type="head" />
<link rel="stylesheet" href="<?php echo $this->baseurl ?>/templates/system/css/system.css" type="text/css" />
<link rel="stylesheet" href="<?php echo $this->baseurl ?>/templates/system/css/general.css" type="text/css" />
<link rel="stylesheet" href="<?php echo $this->baseurl ?>/templates/<?php echo $this->template; ?>/css/template.css" type="text/css" />
</head>
<body>
<div id="container">
<div id="header">
<jdoc:include type="modules" name="top" /> Header information</div>
<div id="sidebar_left" class="float">
<jdoc:include type="modules" name="left" />
</div>
<jdoc:include type="modules" name="top" />

<nav id="ttr_menu" class="navbar-default navbar">
<div id="ttr_menu_inner_in">
<div class="ttr_menu_element_alignment">
</div>
<div id="navigationmenu">
<div class="navbar-header">
<button id="nav-expander" data-target=".nav-menu" data-toggle="collapse" class="navbar-toggle" type="button">
<span class="sr-only">
</span>
<span class="icon-bar">
</span>
<span class="icon-bar">
</span>
<span class="icon-bar">
</span>
</button>
</div>
<div class="menu-center collapse navbar-collapse nav-menu">
<jdoc:include type="modules" name="Menu" style="none"/>
</div>
</div>
</div>
</nav>
<jdoc:include type="component" />
<jdoc:include type="modules" name="bottom" />
<div id="sidebar_right"class="float">
<jdoc:include type="modules" name="right" />Right sidebar</div>
</div>
</body>
</html>
The above-written lines of code are showing an HTML document which consists of two sections i.e. head and body. The head section has the information about our document whereas, the body section has the code which is utterly important to manage the layout.
Step 3. The style.css file
This style.css file is used to style the web page. You need to add all the styling of your template here in this file.
theme folder → css → style.css
html
{
margin:0!important;
}
body
{
text-align: left;
}
#sidebar_right
{
border-right: 1px solid black;
float: left;
width:18%
}
#sidebar_right
{
border-left: 1px solid black;
float: right;
width:18%
}
#header
{
text-align: center;
height: 50px;
}
h1
{
font-size: 35px;
color: #AAA;
text-align: center;
}
and your very basic Virtuemart Template is now ready.
2. Create VirtueMart Template With TemplateToaster
Here are the steps to create your Virtuemart Template with an automated builder called TemplateToaster. With each and every step you will realize that TemplateToaster Virtuemart Template Builder has given you the best solution and has saved you a lot of time and efforts. Let’s start with it.
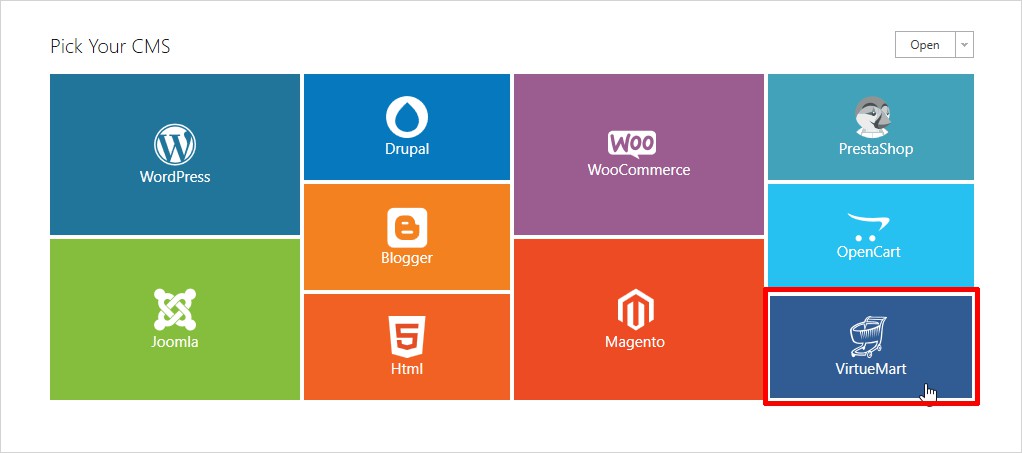
Stage 1: Choose the Desired CMS
Install TemplateToaster in your computer and open it. Now the very first screen you will get to see will look like the one shown below. You need to choose a CMS which you want to make your theme with, select Virtuemart.
Now, the next step is to decide whether you want to modify a pre designed Template or Start designing from Scratch.

You can set the different font style, size, and color for your theme. From the Color and Typography section, you can easily choose the desired color and typography for your theme and click OK to go on.
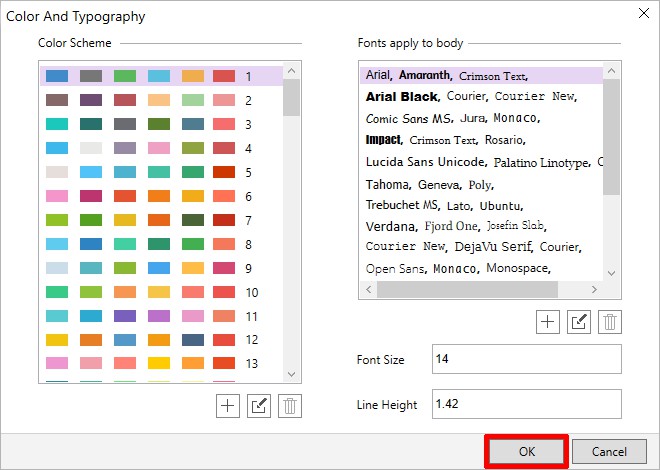
As soon as you click on the OK button you will see the main interface of the theme.
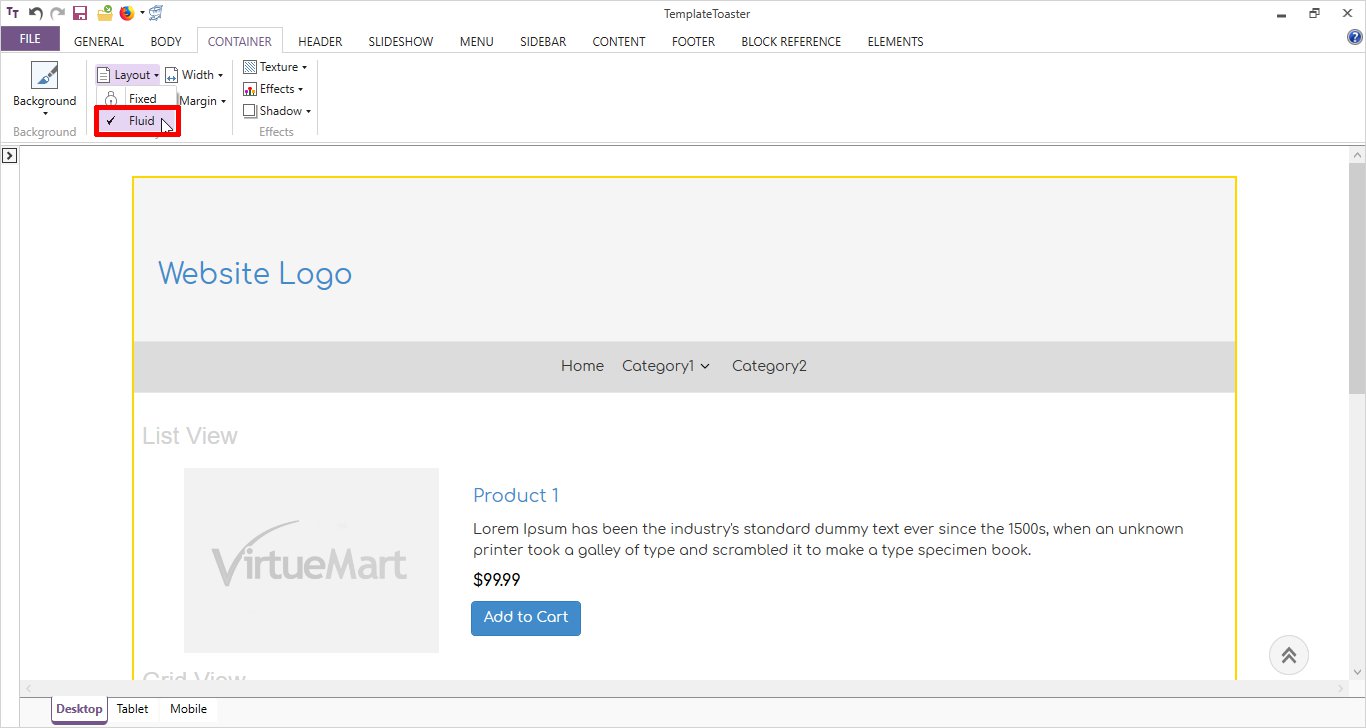
Stage 2 : Layout Selection
Now, choose the layout which you want to set for the web page. There are two choices Fixed and Fluid to choose from. I am going with Fluid.
CONTAINER ➡ Layout ➡ Fluid
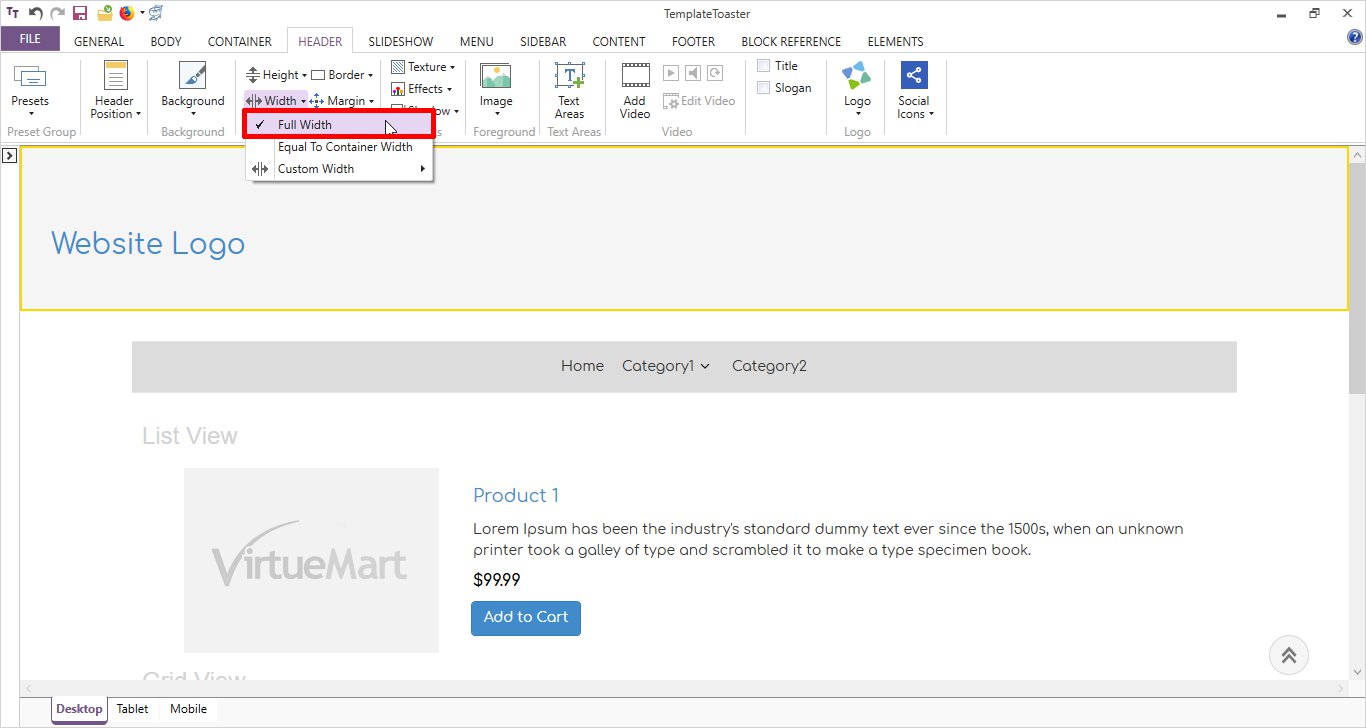
Stage 3: Design your Header
Design your header your way. Setting the header width is super easy with two clicks.
HEADER ➡ Width ➡ Full Width
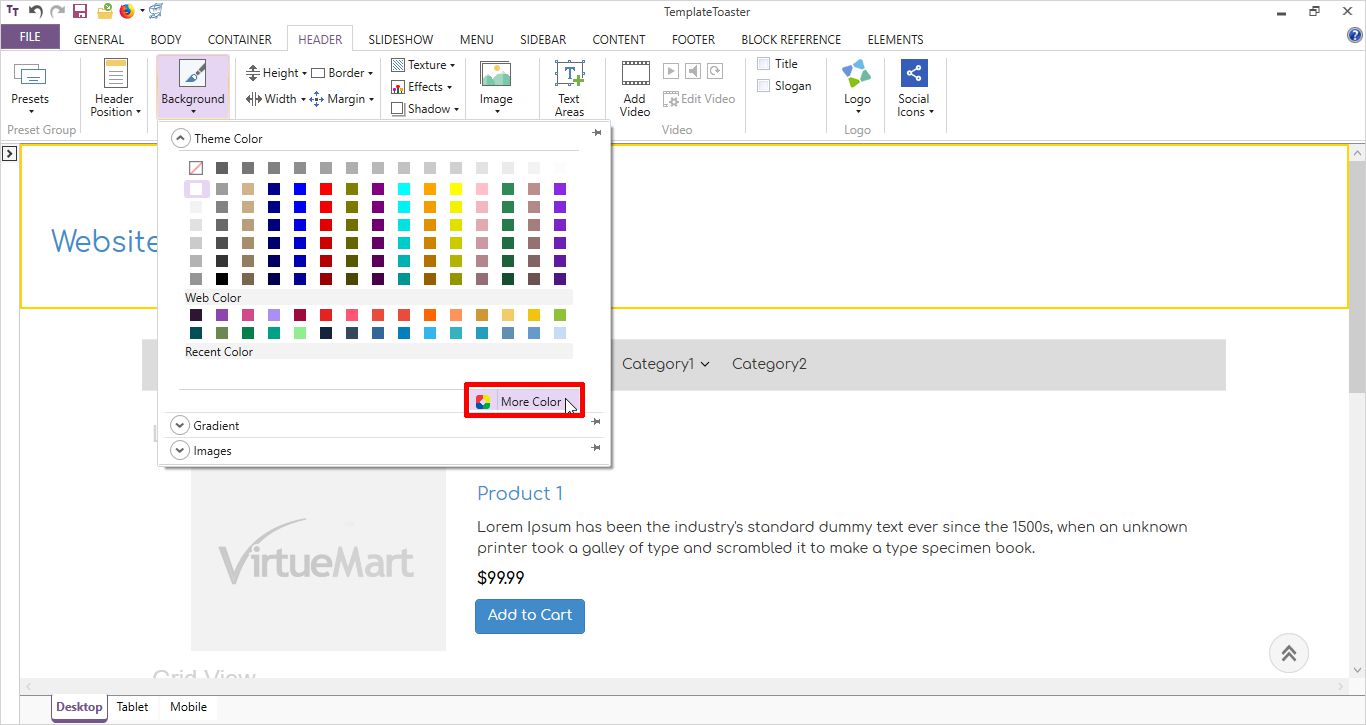
You can set any color or image of your choice as the background of your header. If you don’t like any given color then you can browse for more.
Your logo is your identity so, choosing the appropriate logo is a must. Choose the one from the gallery and if you want you can browse for more option.
HEADER ➡ Logo ➡ Browse
![]()
Once you have selected your logo you can easily align it as per your requirements. The placement of the logo, adding a link to the logo, alignment; left, top, layout; width, height, angle (Rotate) everything is just so easy to achieve.
![]()
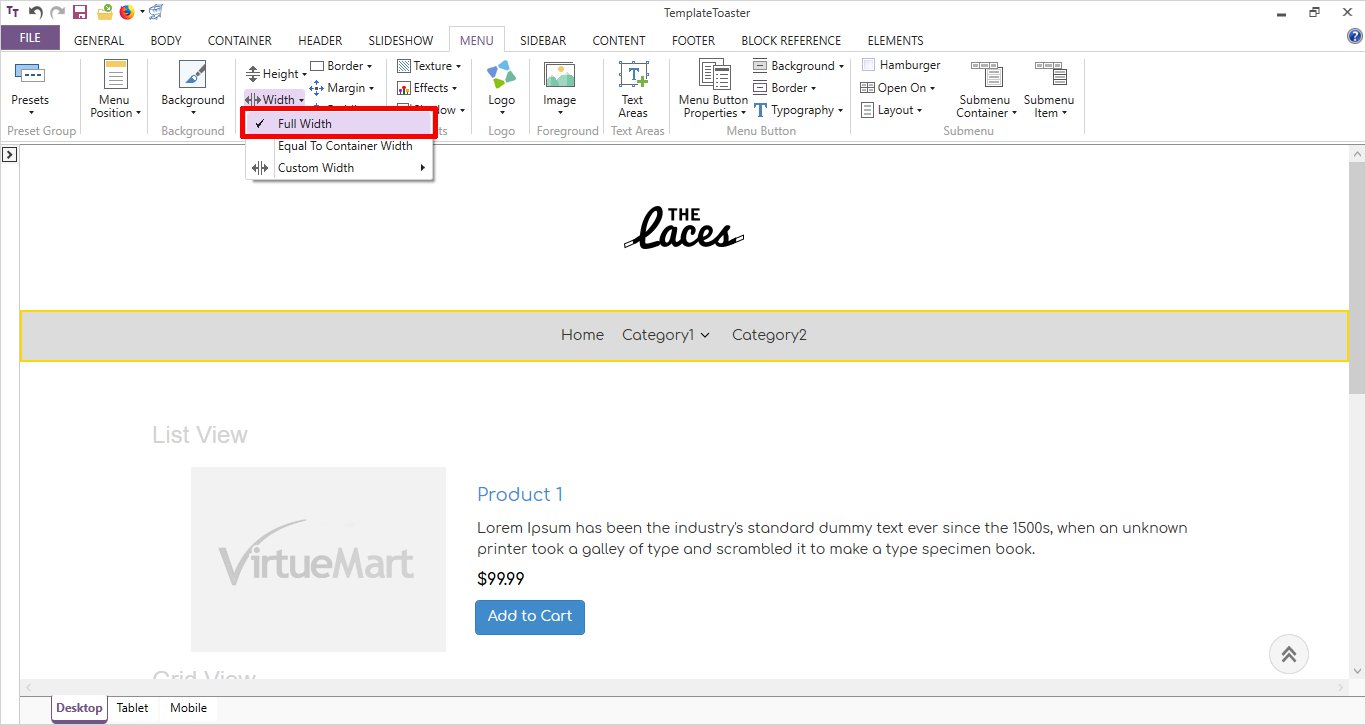
Stage 4: Craft Your Menu
Craft your simple to navigate, menu with beautiful options. Set the width of the menu with the full width option.
MENU ➡ Width ➡ Full Width
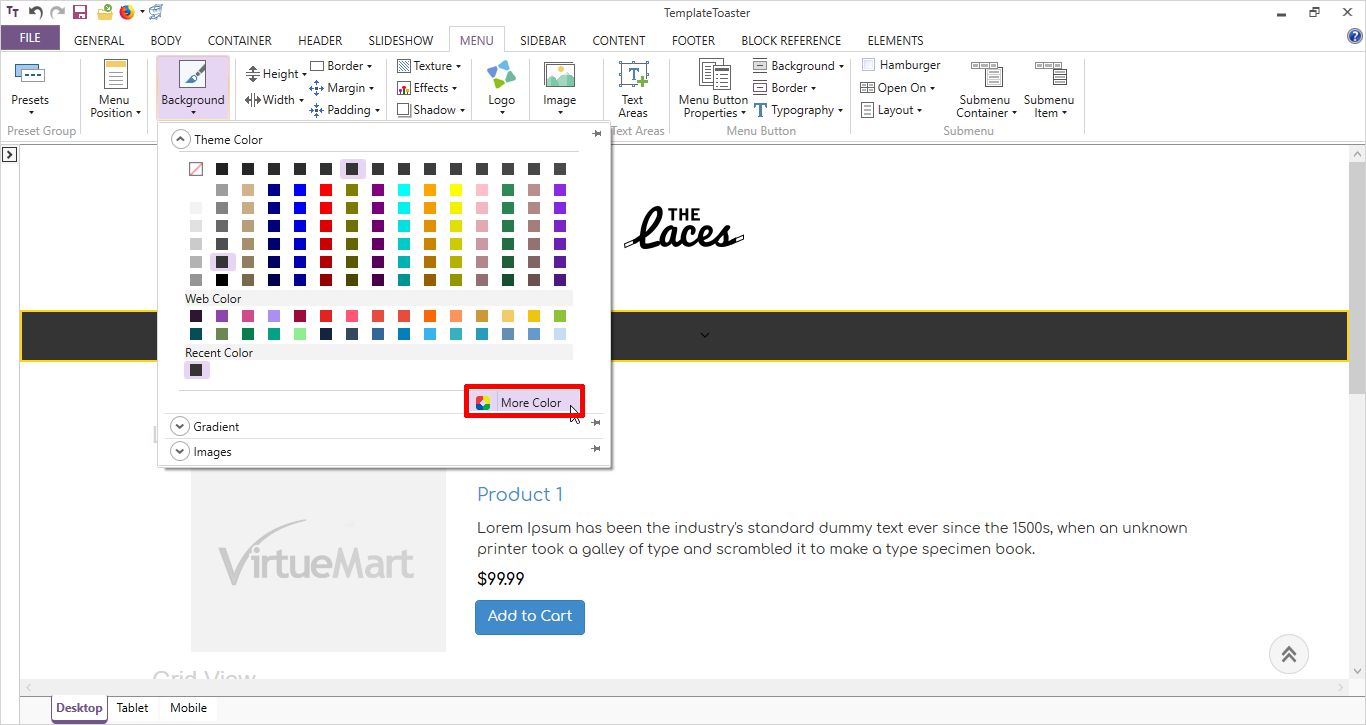
Set background for your menu. Your background can be any color or any image. The browsing option gives you the facility to modify your menu as desired.
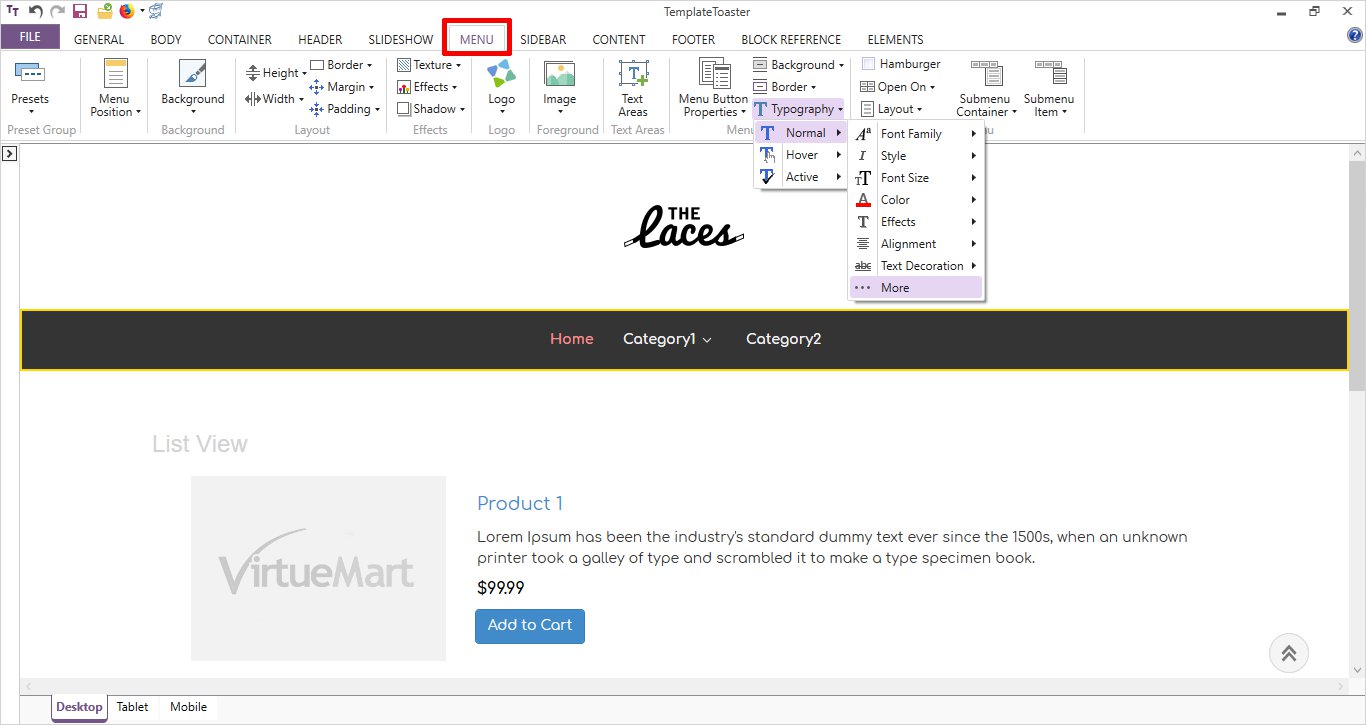
Decorate your menu items with the list of given styles. Stylizing options like setting typography for your items, colored text, beautiful effects, alignment and much more.
MENU ➡ Typography ➡ Normal ➡ Style / Color/ Effects/ Alignment / Decoration and More…
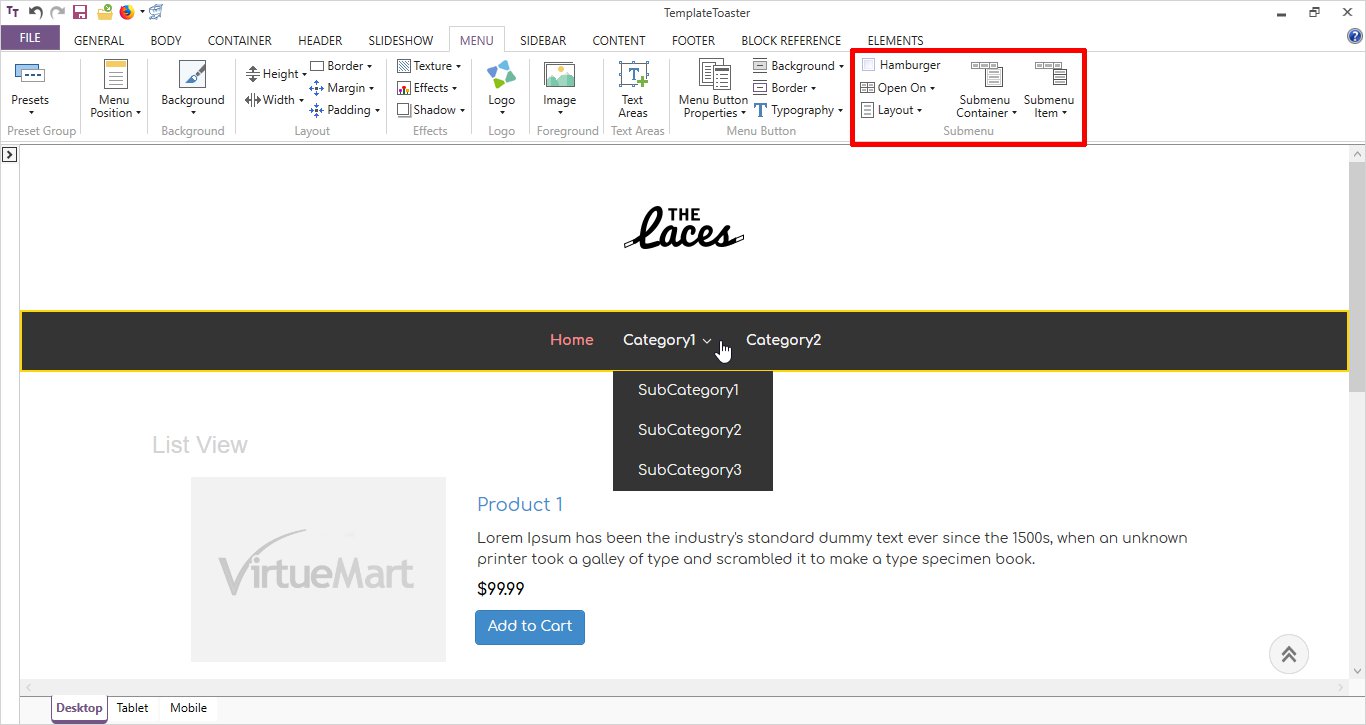
As you are creating your online store so you can require submenus, hamburger menu to give more easy accessibility to your users. And TemplateToaster gives you all.
MENU ➡ Submenu ➡ Hamburger / Open On / Layout / Submenu Container / Submenu Item
Stage 5: Slideshow Creation
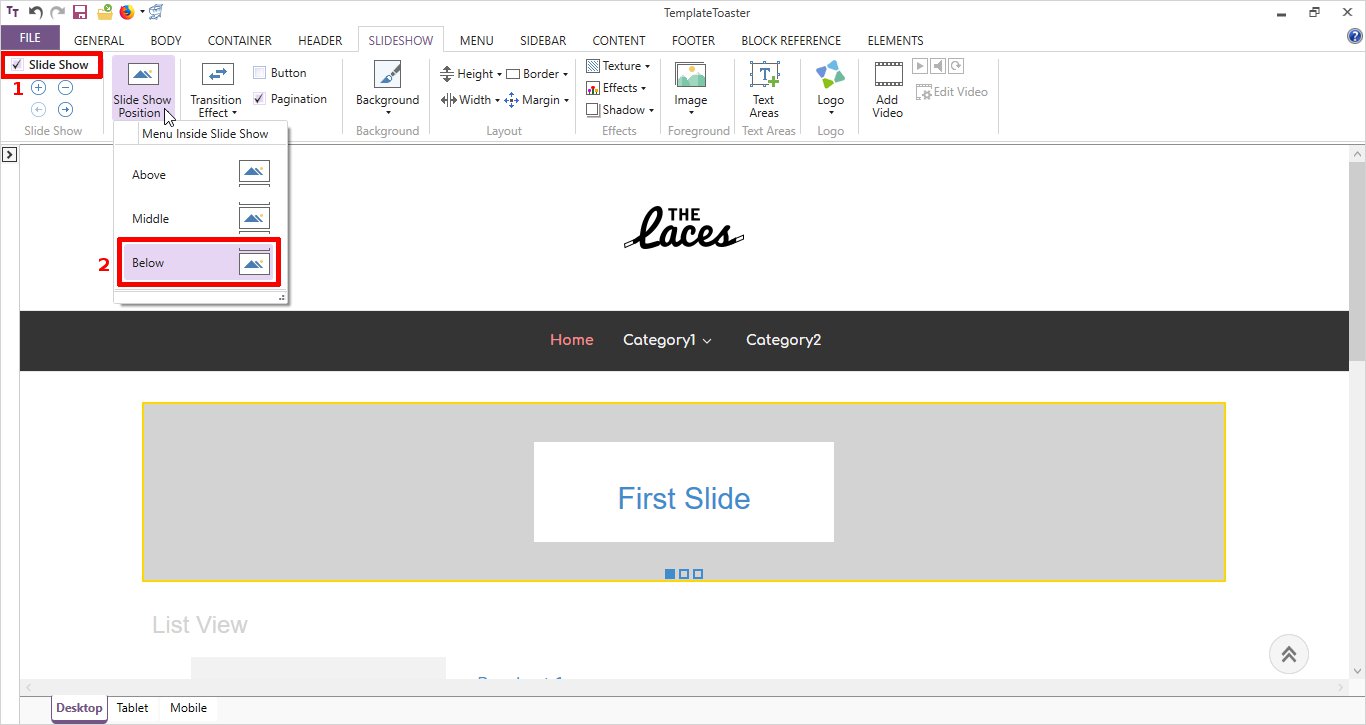
Adding a slideshow to your website is no more a big task now. You just need to check (🗸) the slideshow option. And now set the position of your slideshow, like where you want it to be shown below the menu or above the menu or in between the header and menu.
SLIDESHOW ➡ Slideshow Position ➡ Above / Middle / Below
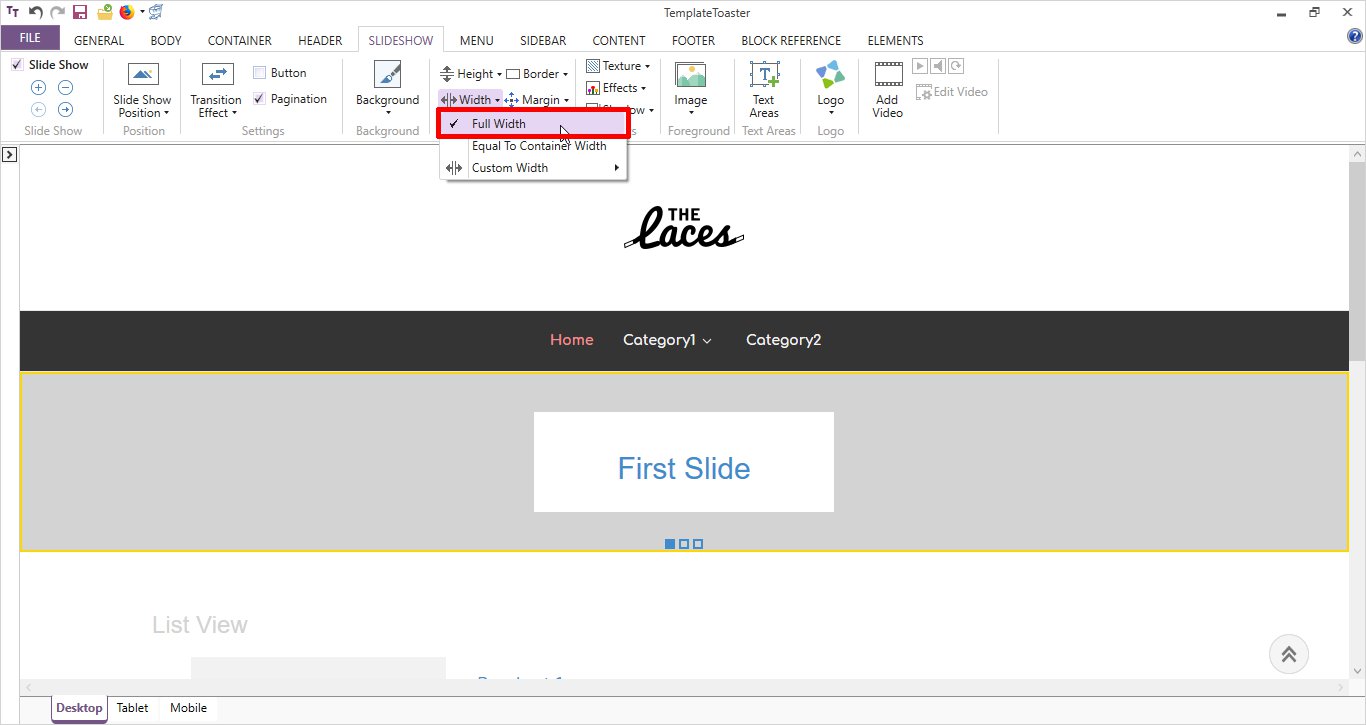
Now, set the width and the height of your slideshow. You can give it a required height and width as per your design.
SLIDESHOW ➡ Width ➡ Full Width
SLIDESHOW ➡ Height ➡ 100 px up to a custom height
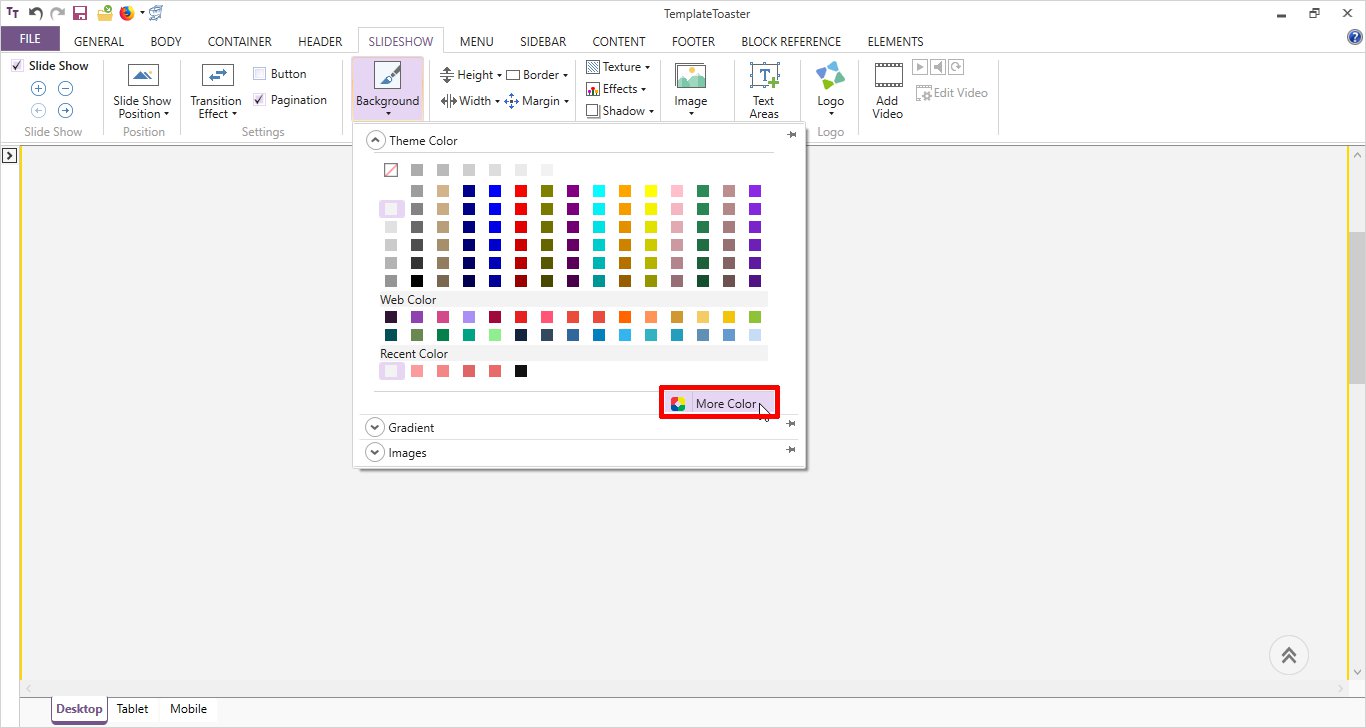
What else can give you the best opportunity to beautify your slideshow than a background image or color? Choose the best color from the given color palette and if you want more colors, then go to more color option.
SLIDESHOW ➡ Background ➡ More Color
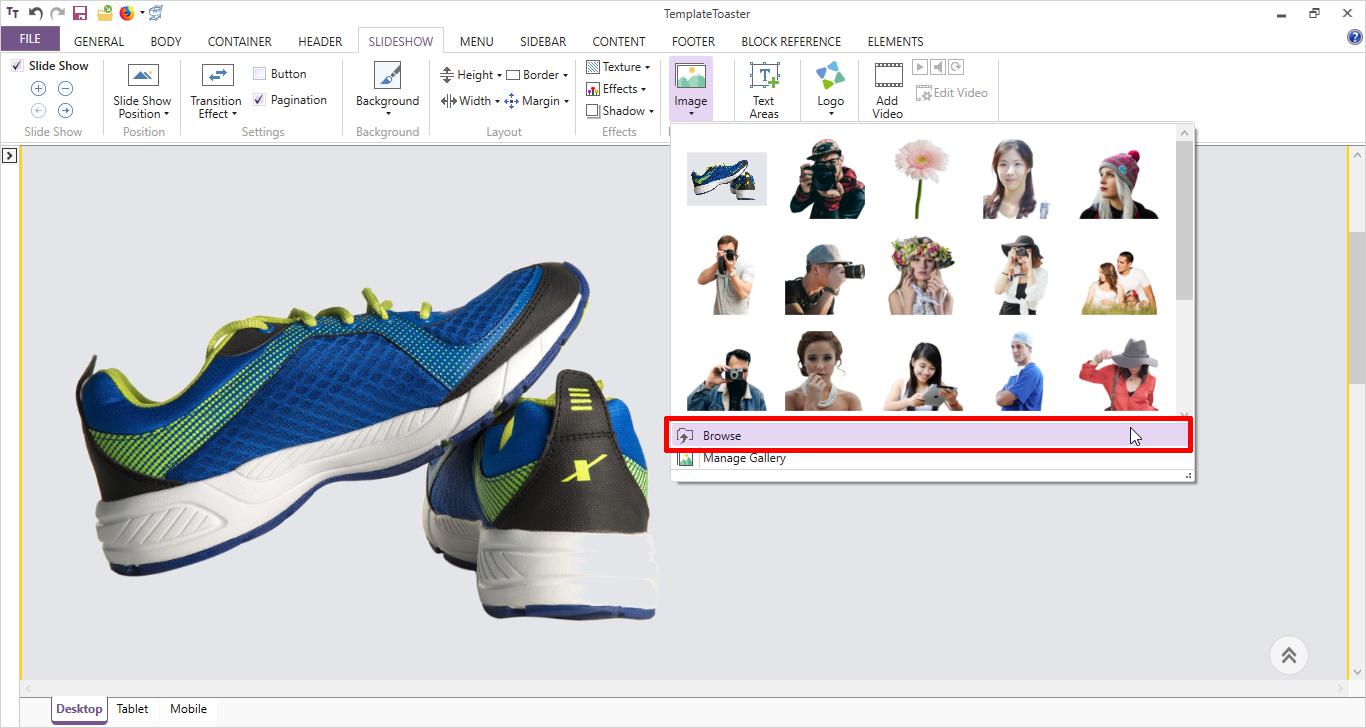
You can add any foreground image to your slideshow. If you like an image from the gallery you can choose, otherwise you can select any custom image also, just by clicking on the browse option.
SLIDESHOW ➡ Foreground Image ➡ Browse
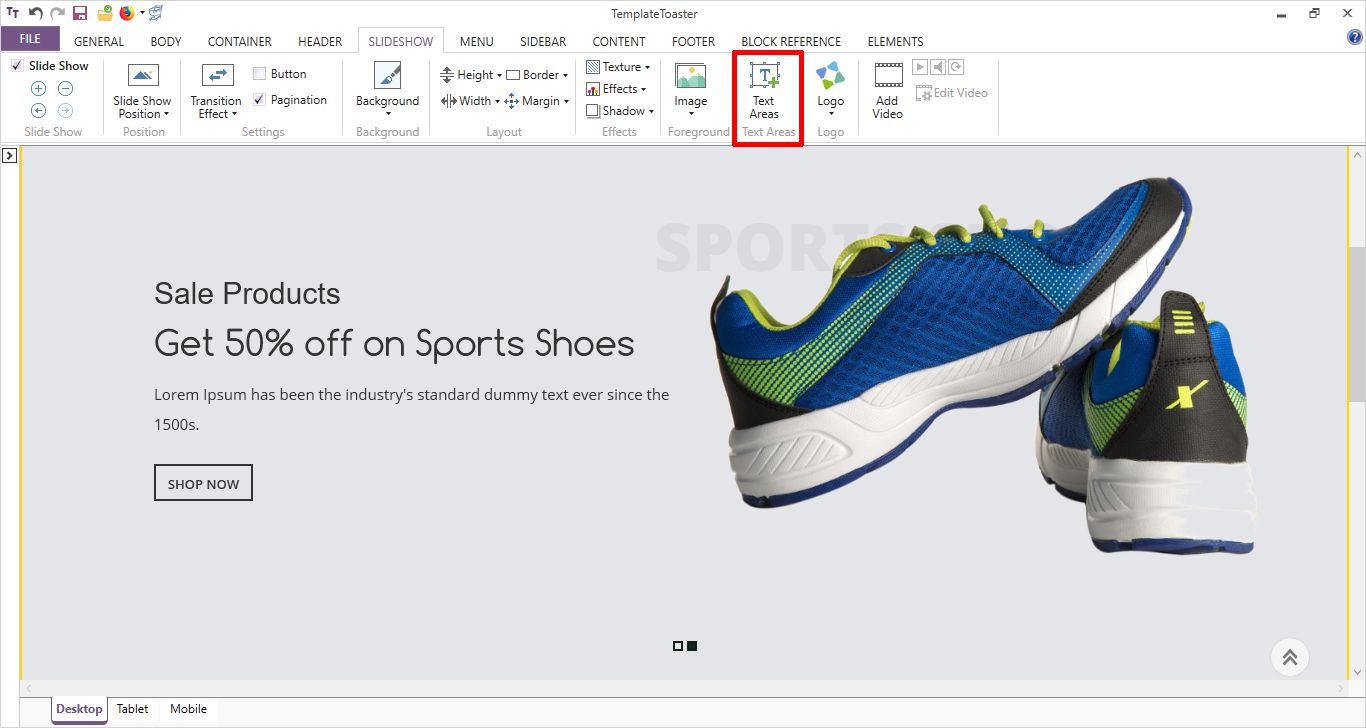
You can add text to the slideshow. There is an option for that too. Place your text anywhere in the slideshow.
SLIDESHOW ➡ Text Areas
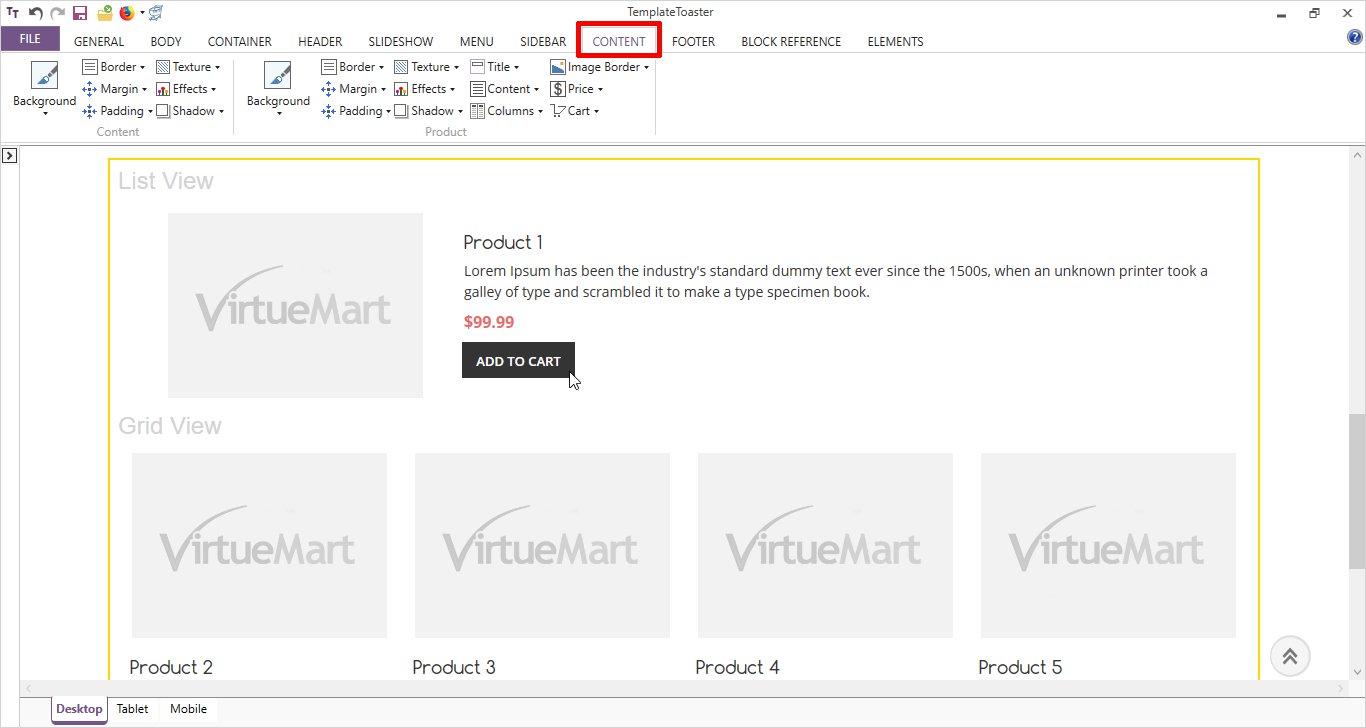
Stage 6: Stylize your Content
Embellish your content with various available options like margin, padding, title, content, columns, image border etc. and elevate the impact.
CONTENT ➡ Select Option of Your Choice
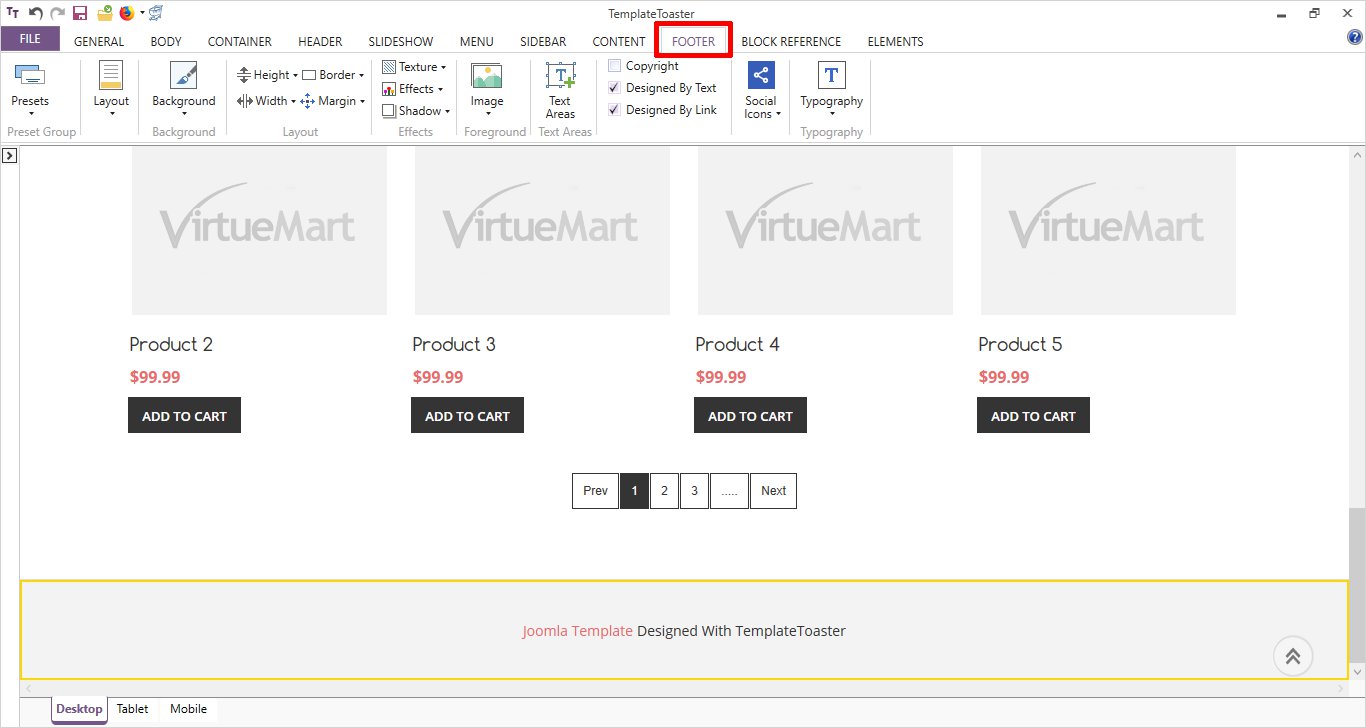
Stage 7: Create a User-friendly Footer
Adding a footer to your website is really easy. You add any relevant information in your footer.
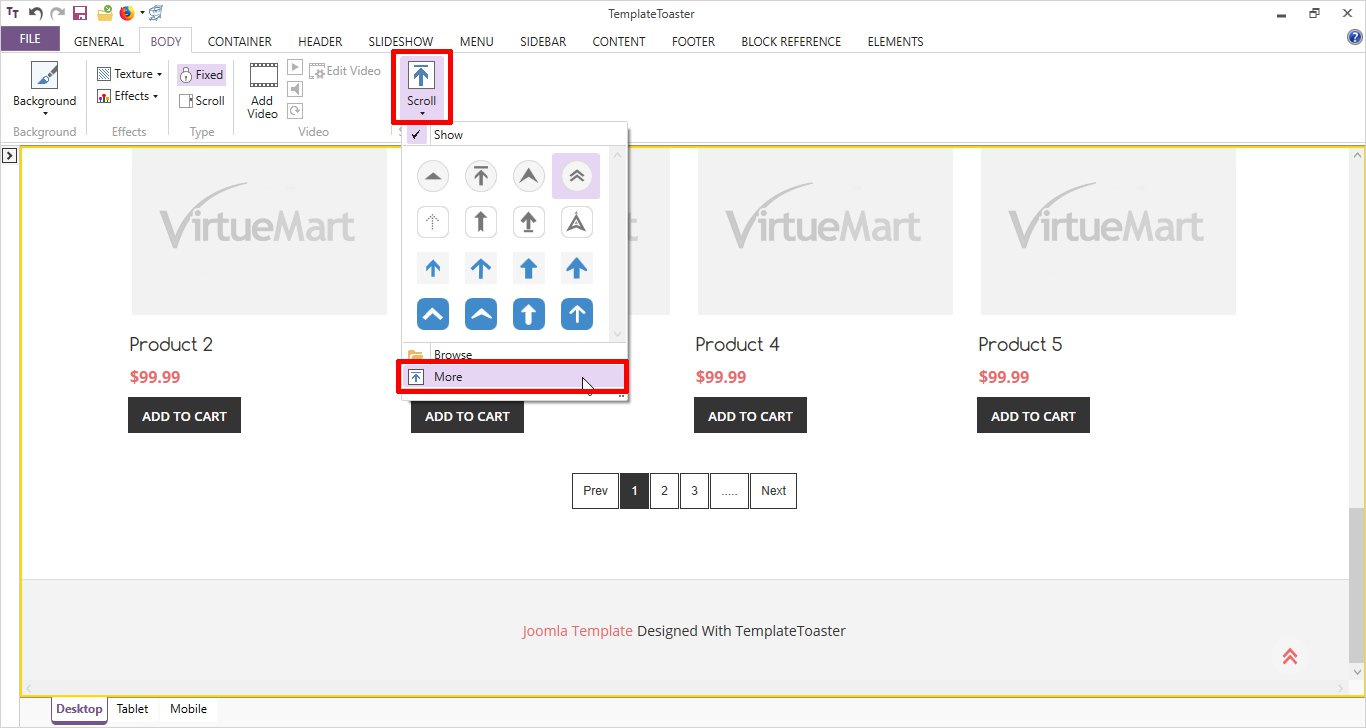
Stage 8: Scroll to Top
The scroll to top option is also there. The scroll option will take the user directly to the start of the web page. Choose from the various scroll icons from the gallery. If you have some custom icon for your scroll, you can select that also by clicking on the more.
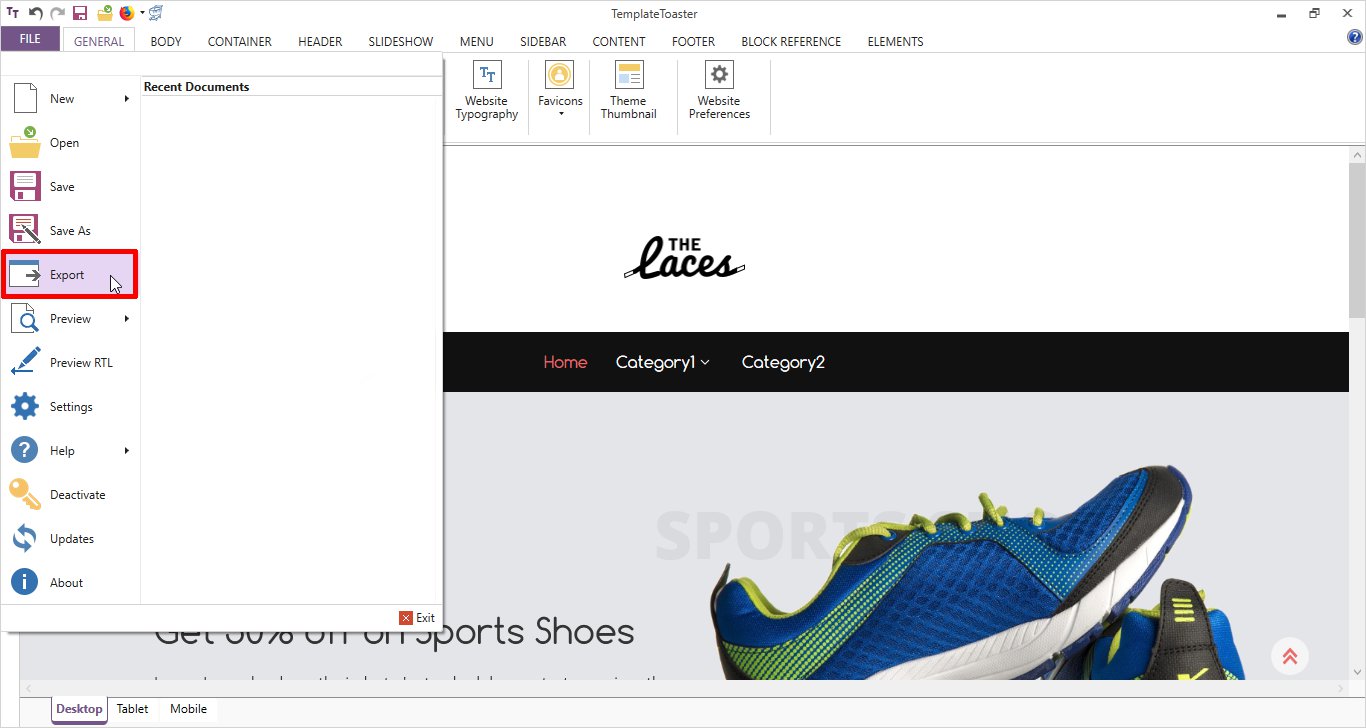
Stage 9: Time to Export
Now, that you are ready with your template, it’s time to export it. It won’t even take much of your time.
GENERAL ➡ Export
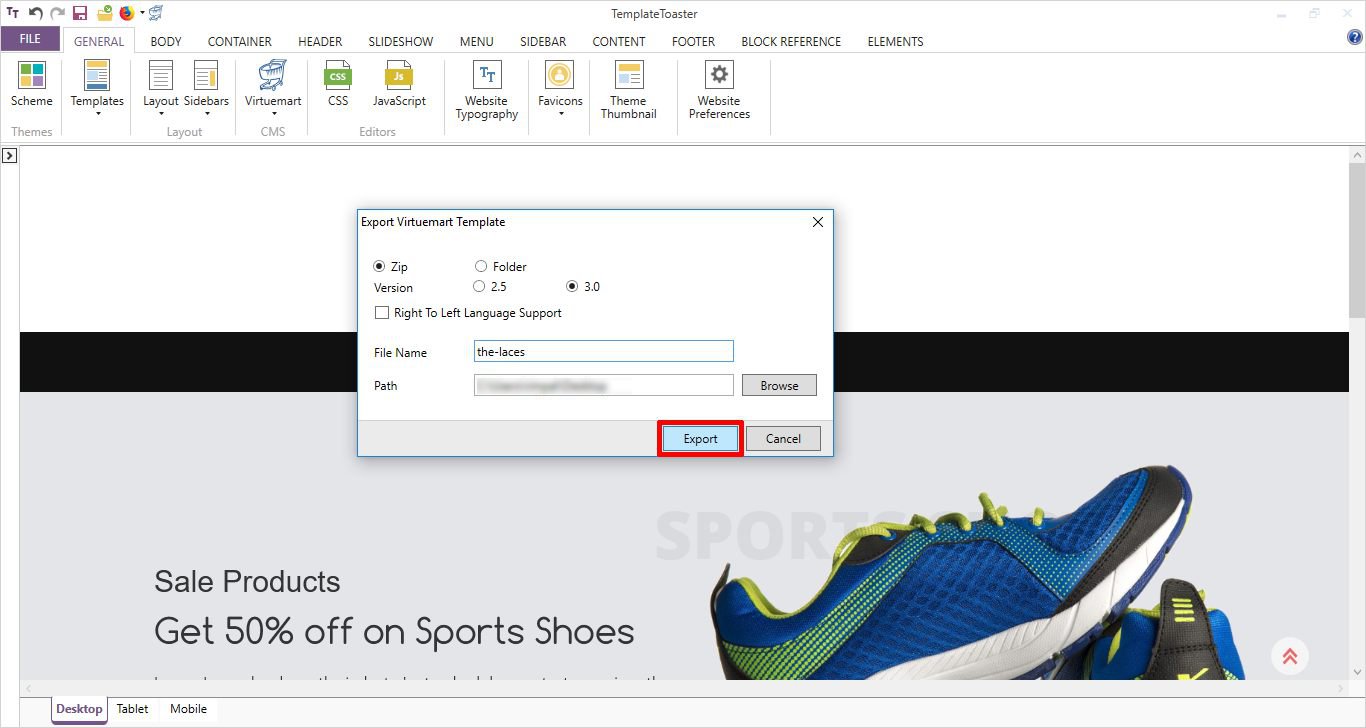
Now you will see a dialog box where you have to select the file name and the path and then click on the export button.
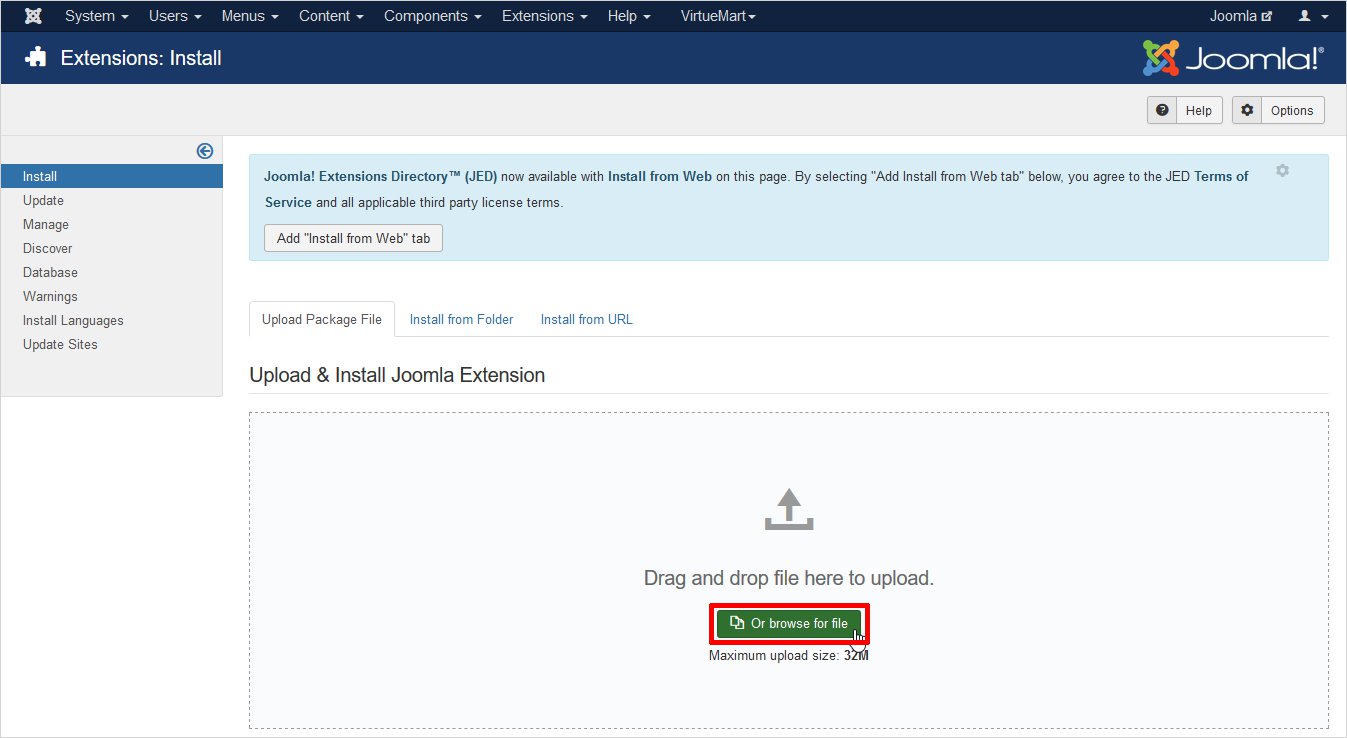
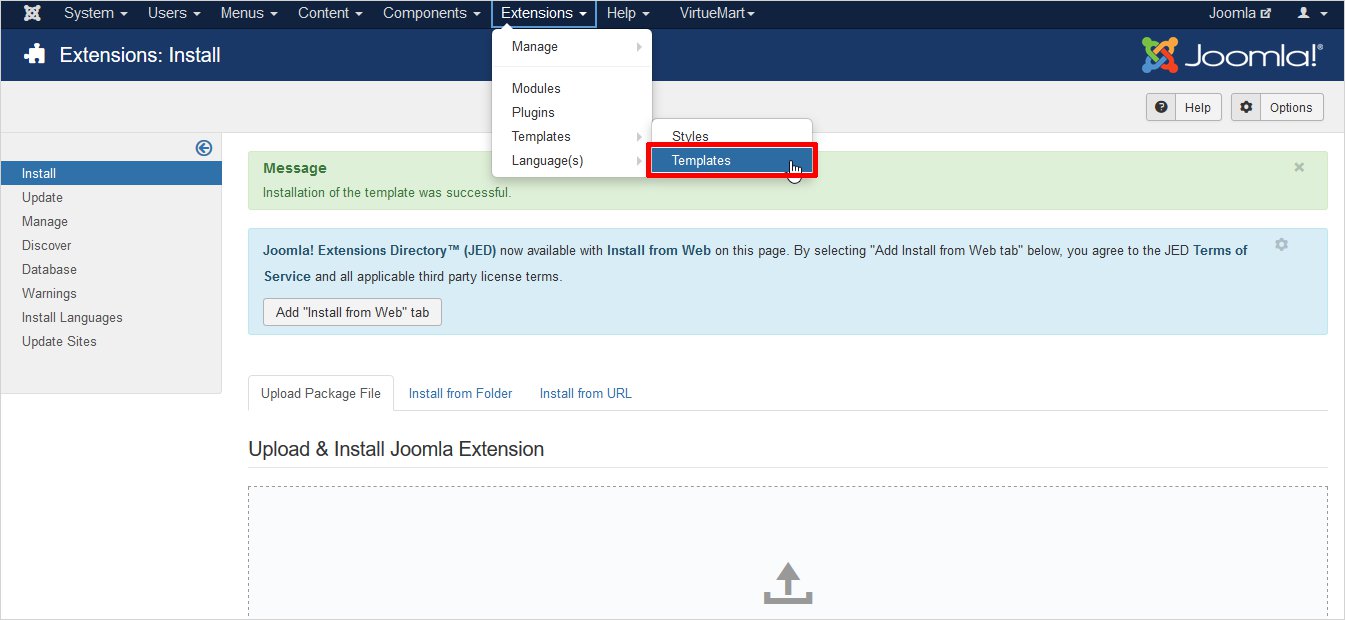
Now, go to the Joomla Dashboard and log in by entering your credentials. First, go to the install extensions.

Once you click on the install extensions, another window will open. And here you have to browse your template file to upload.
In the other window the success message saying “Installation of the template was successful” will be shown. And from here you have to go to the…
A Template: Styles (Site) window will be opened now and now you have to select your template and set it as a default template. Here I will set the TemplateToaster created template as the default one.
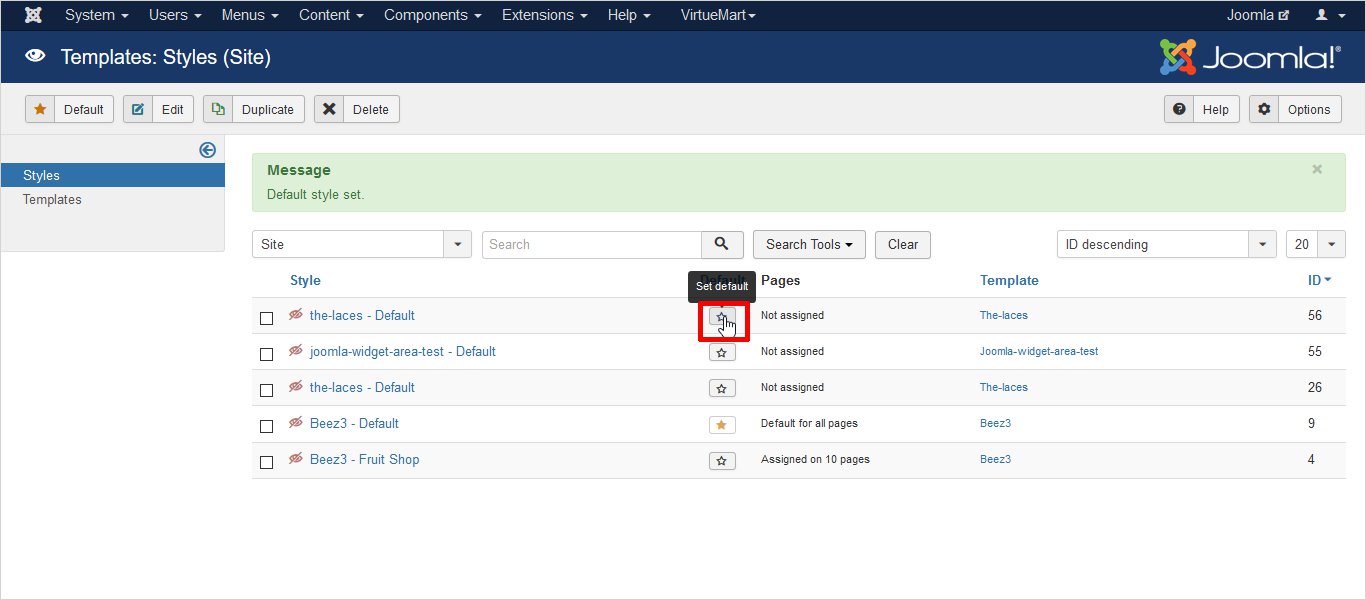
There you go… It has set your template as a default one and you can kick-start your online store.
So, Enjoyed making VirtueMart Template?
I am sure by now you must have made your choice of method, to create VirtueMart template from scratch. Both the ways are easy, but the only complication is, you require a better understanding of basic languages in case of manual coding. While, you can rely on the VirtueMart template maker software, under the automated method. Check free virtueMart templates.
If you find any difficulty at any stage whether manual or automated method just leaves a comment below and I will get back to you with every feasible solution. And don’t forget to share your experience with me…
Build a Stunning Website in Minutes with TemplateToaster Website Builder
Create Your Own Website Now
WoWow nice software
That is a really helpful article for me, thanks for posting such an informative article.
All steps have mentioned very clearly in this article. Beginners can get help from this article, I really appreciate it.
I am using The index PHP method to install Virtuemart, this method seems a bit easier.
It is very easy to install Virtuemart with the help of template toaster, every step has mentioned very clearly in this article.
We can add all functionality in better way with the help of virtual mart for making an e-commerce website.