How to Install OpenCart Manually: Step by Step Guide
If you are new to OpenCart and struggling with the installation process, then this post is for you. Here at TemplateToaster offline website builder software blog I will guide you on how to install OpenCart step-by-step.
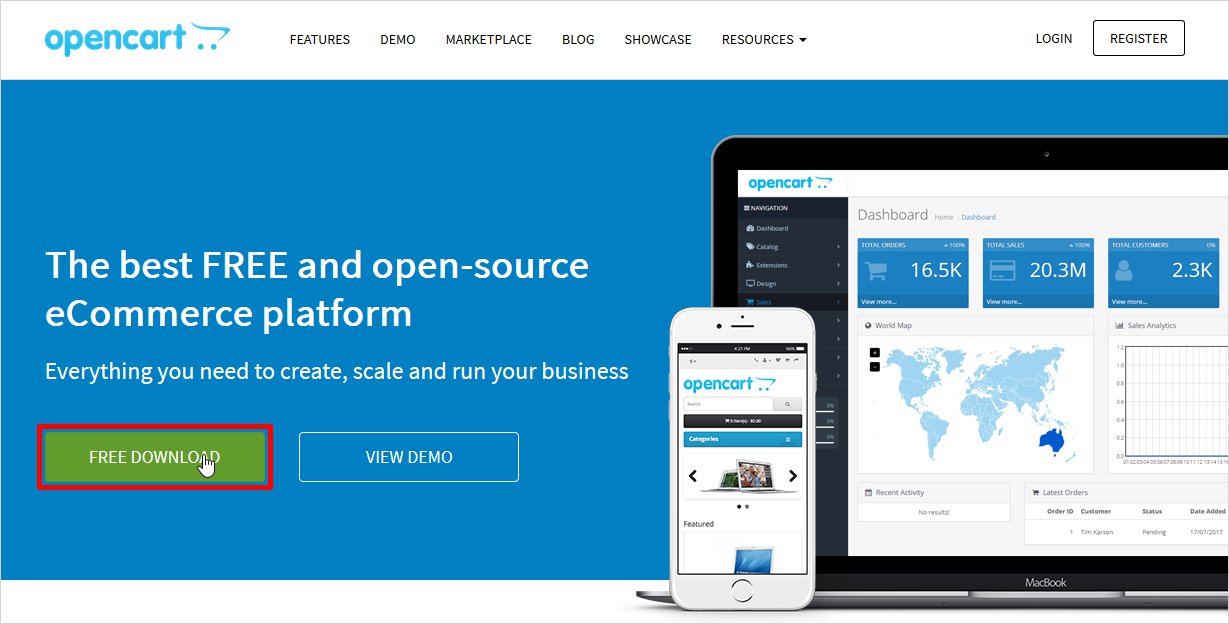
OpenCart is a free and open-source eCommerce platform built with PHP and MySQL. It is one of the popular eCommerce solutions to create an online store. It has a user-friendly interface with tons of themes and plugins to support its functionality. You can choose from the pre-built theme according to your business requirement to start with.
There are many hosting providers, who make it easy for users to install OpenCart with an easy one-click option. However, the manual method is also not that difficult. And in this post, I will walk you through the process of setting up your online store using OpenCart with simple installation steps. So, let’s get started! What is opencart?
How to Install OpenCart 3.0
Step 1: Download OpenCart
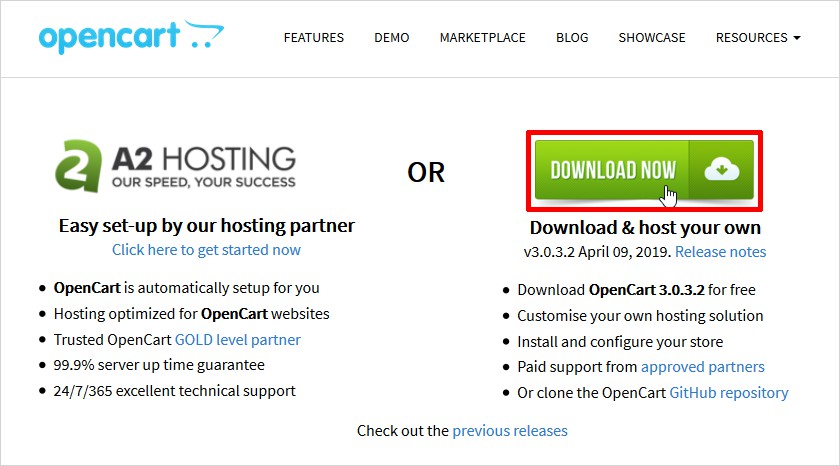
First and foremost you need to download the latest version of OpenCart from its official website.
Step 2: Install OpenCart
After you click on the Free Download button, you will see two options; First the easy set-up option with their hosting partner. And second, download the OpenCart and host it on your own. I will choose the second option here so we can explore further related steps.
Step 3: Unzip the folder & paste the content in the new folder
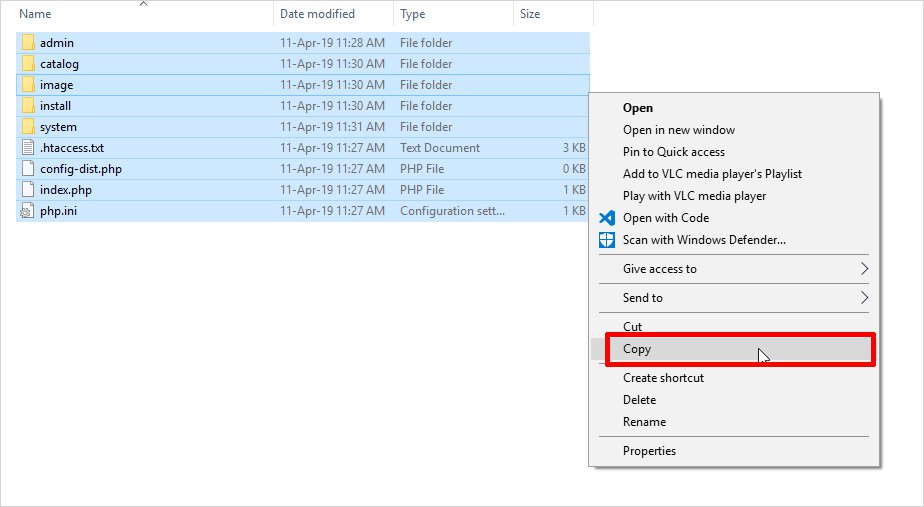
Next, you have to unzip the content. Copy all the files from the Upload folder which is present in the downloaded Opencart folder. Go to the directory XAMPP →htdocs and then to the folder where you wish to copy the unzip content in. In case you are going to install OpenCart on your Linux hosting server you need to upload these files and folders to public_html folder on your hosting account.
And now create the database. Go to the Localhost → phpMyAdmin → New → Create Database. In case you are going to install OpenCart on your Linux hosting server you need to click phpMyAdmin from your cpanel page, rest instructions will remain the same.
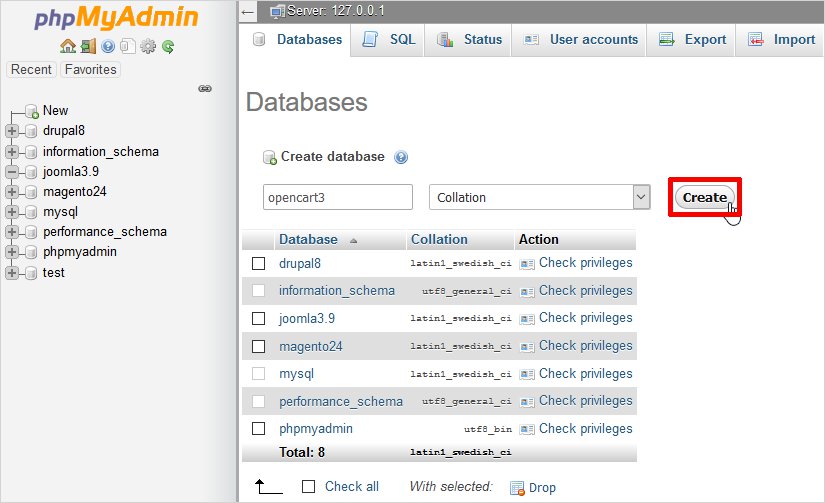
Note: opencart3 is the name of the database which we have created. You can name it whatever you like.
Step 4: Run Installation Wizard
Now open the link to go to the localhost/opencart3 or wherever you uploaded the OpenCart files in a web browser and you will see the installation wizard.
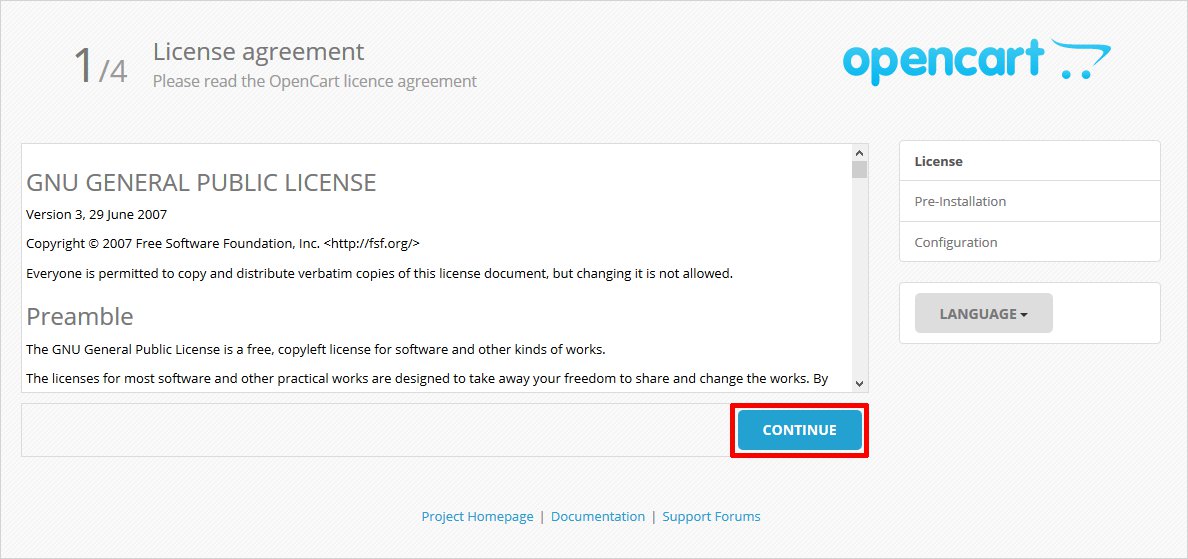
Step 4.1: OpenCart Installer Page
This is a license agreement page, read all the general instructions if you want, before you hit the ‘Continue’ button to continue.
Step 4.2: Pre-Installation Page
On this pre-installation page make sure you see all the green tick mark for every section before moving further. In case you see a red mark for any section, please go back and make the required changes. Especially if it is showing you the missing and unwritable status for file permissions like shown below.
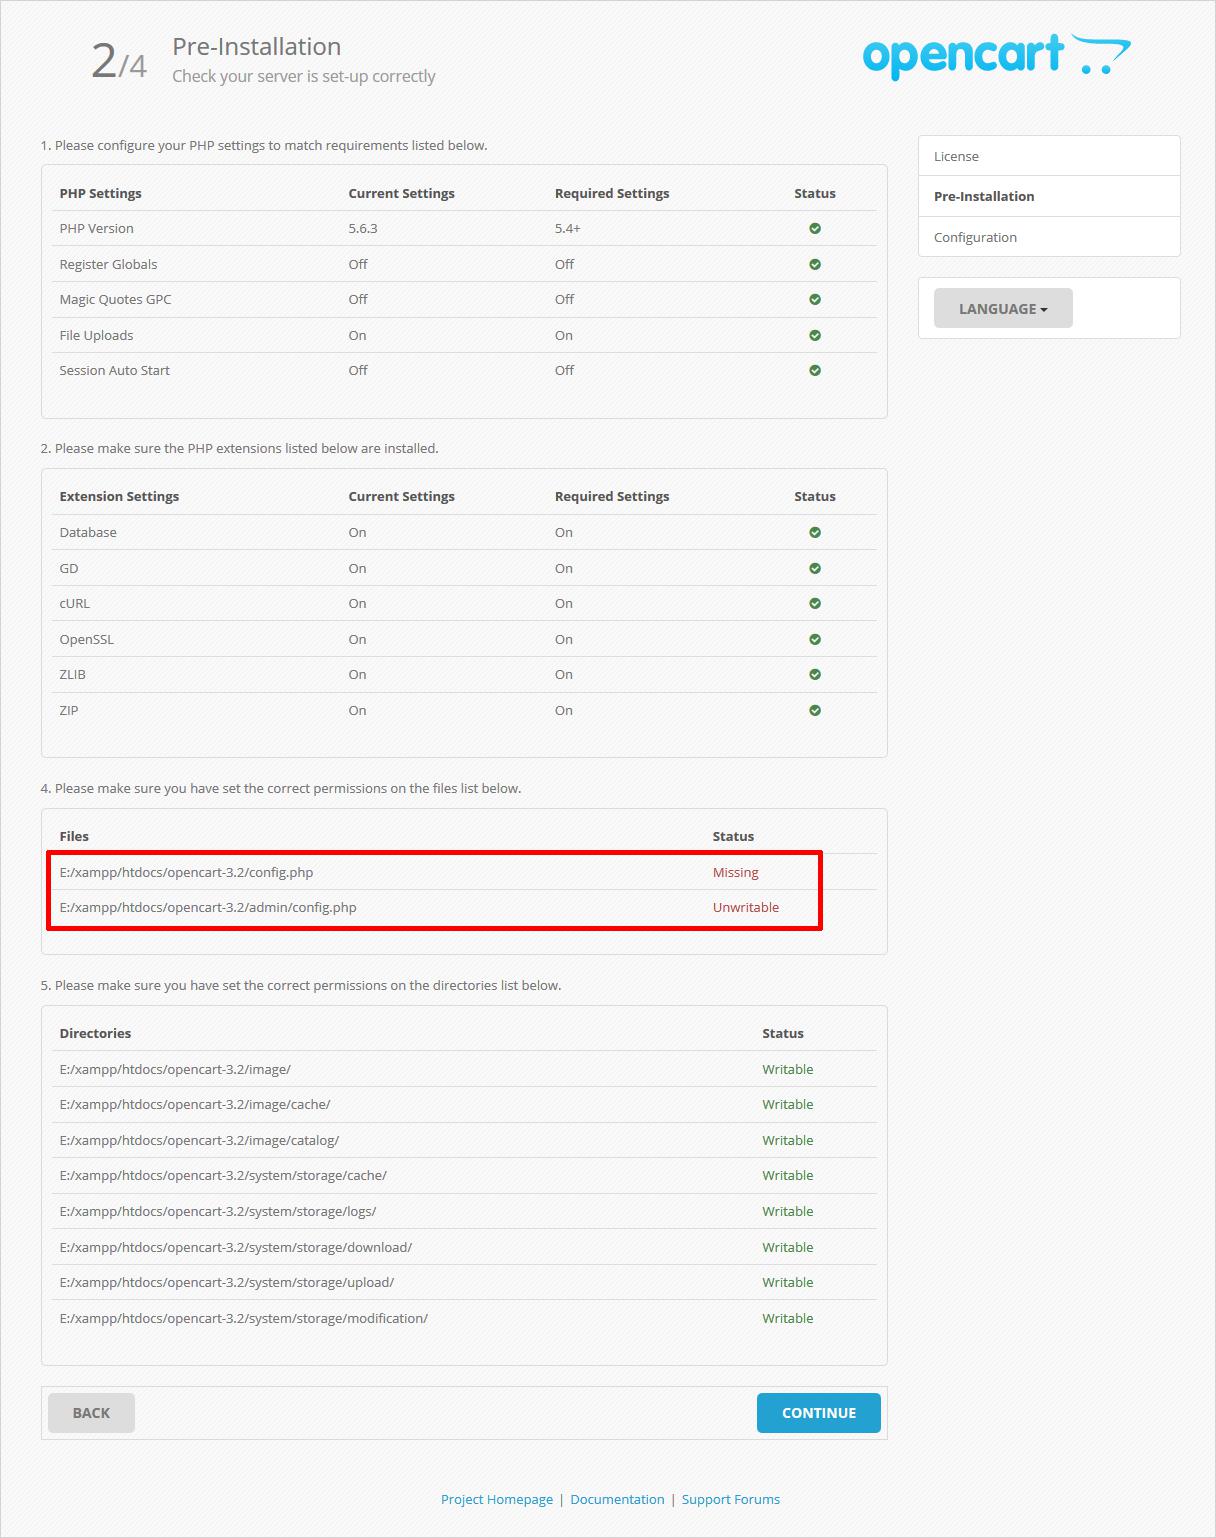
You can set the new permission for the files. For example, here it is showing a ‘Missing’ error corresponding to the ‘config-dist.php’ (which is stored in the root folder) and you need to rename this file to ‘config.php’ thus, it will show you green check. Likewise, the error ‘Unwritable’ against the files present in the Admin folder. You need to rename the file ‘config-dist.php’ to ‘config.php’ to correct it. And finally when you see all the Green tick marks, then click on the ‘Continue’ button to move ahead.
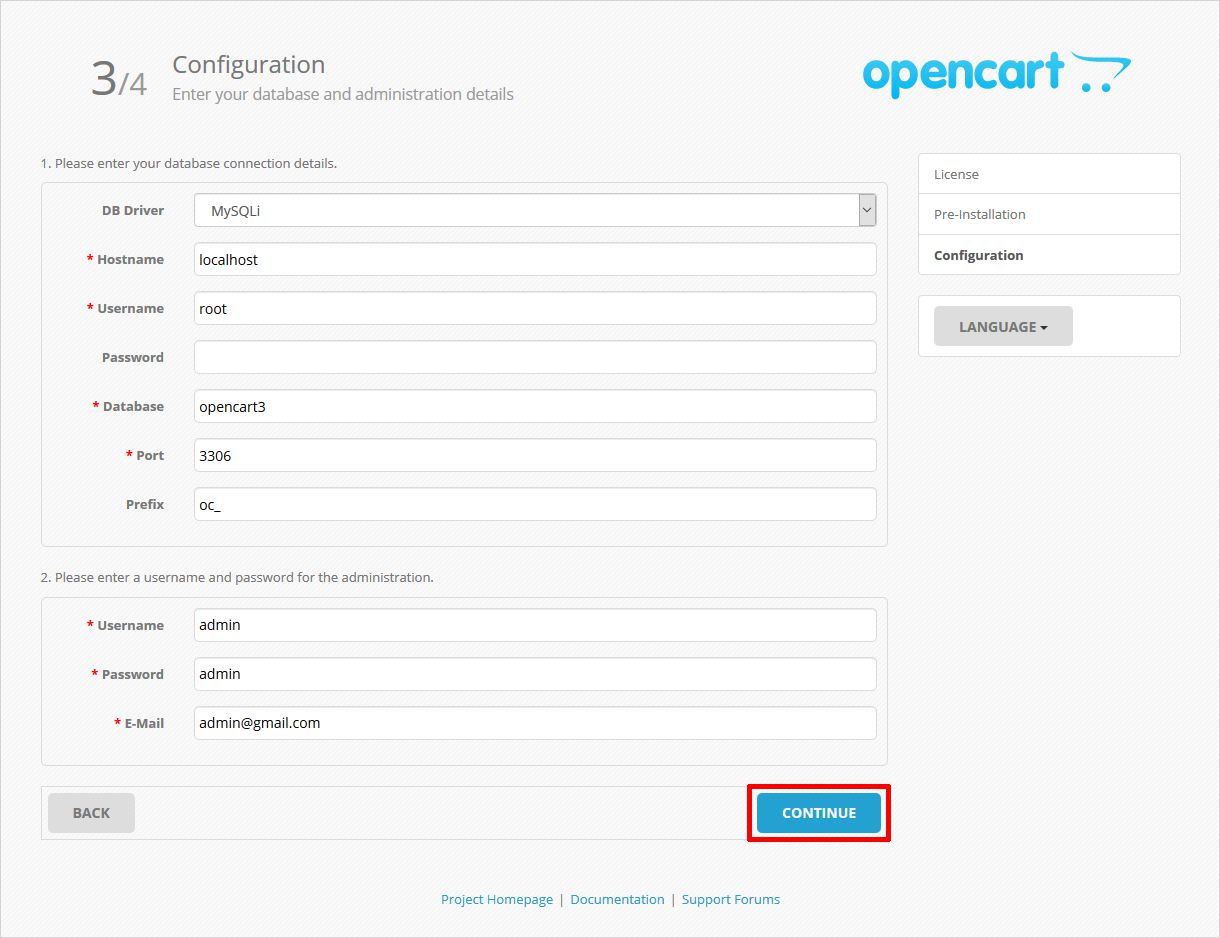
Step 4.3: Configuration Page
As the name is specify, here you need to add the administration as well as database details. So, first, add the database details i.e. ‘Hostname, Username, Database, Port’ and then your administration details like ‘Username, Password, E-mail’ and hit Continue.
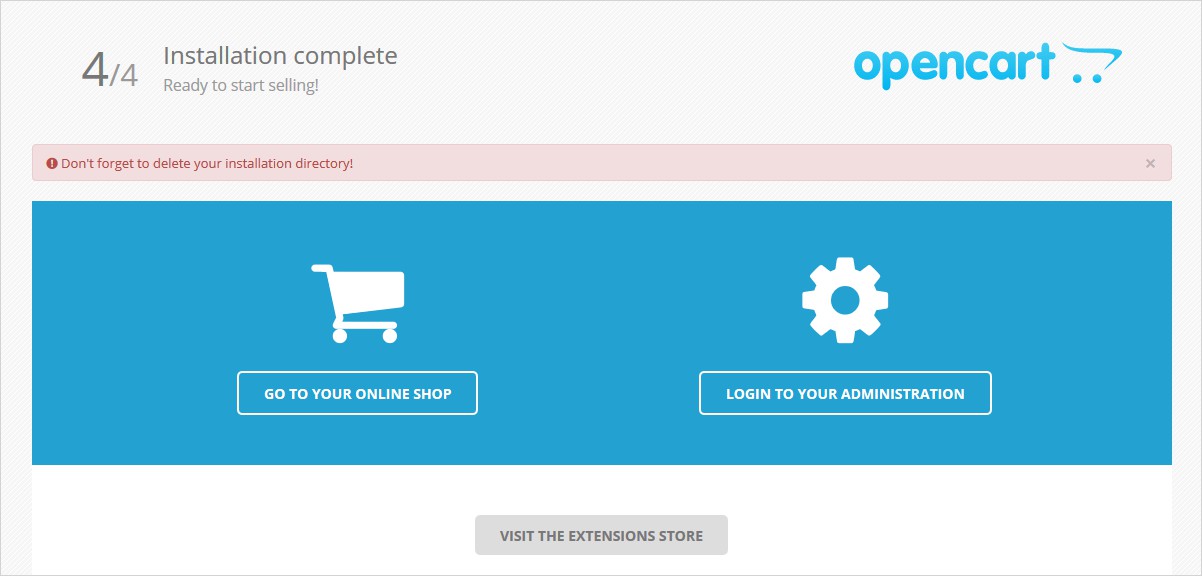
Step 4.4: Installation Complete Page
Here you will see the installation complete page with a reminder not to forget to delete the installation directory. However, you may think to skip this step for now but it is suggested that do it now because you will keep seeing this message over and over again. So, just go to the root directory and delete the ‘install’ folder.
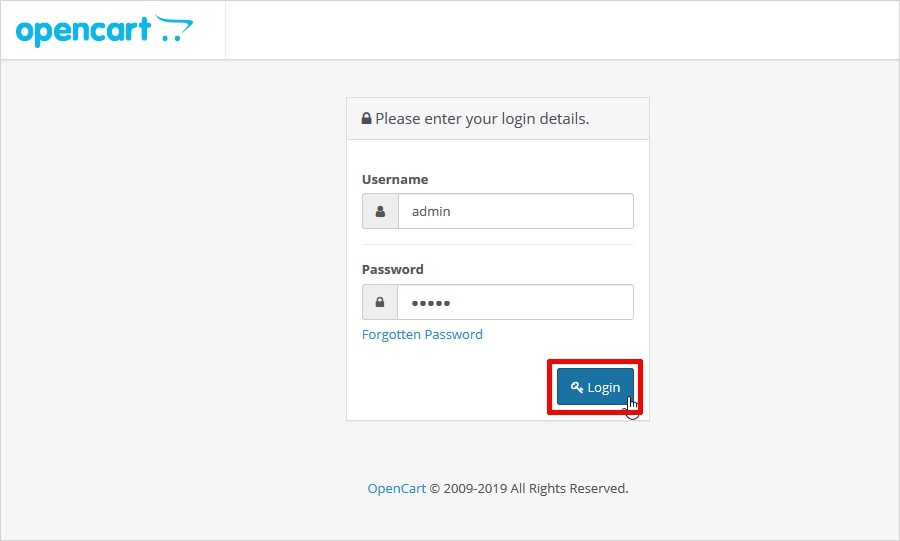
Step 5: Login Page
Now is the time to choose what you want to start with. You can start with either your Administration or you can choose the Storefront. I am choosing here ‘Login with your Administration’.
Voila! You have completed your own eCommerce store.
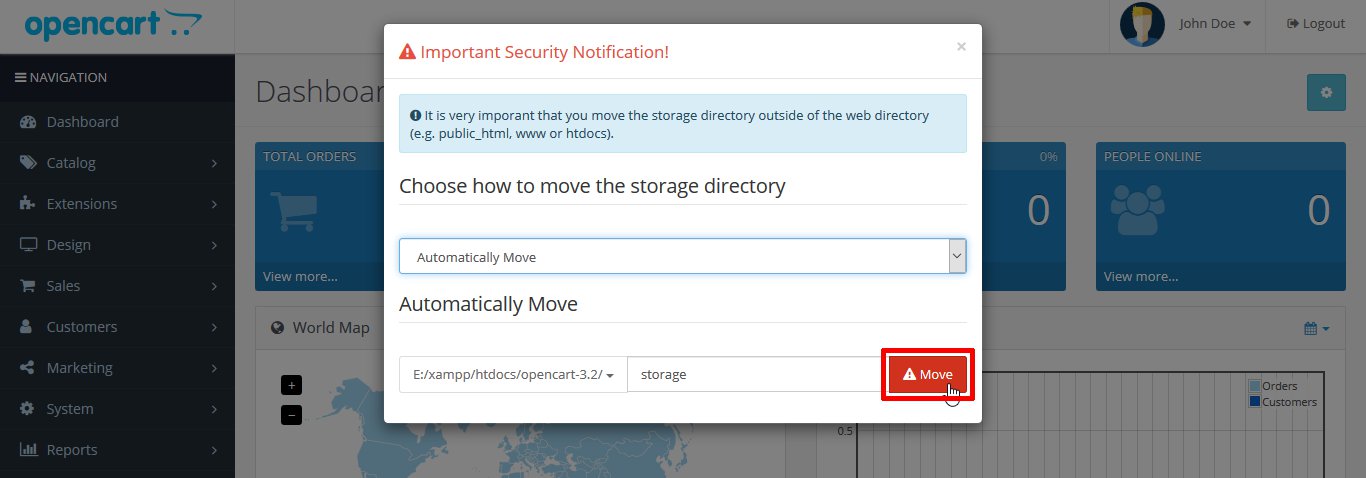
Step 6: OpenCart Dashboard
Soon after you enter the right credentials you will see the OpenCart DashBoard. And here you will see a security notification asking you to move the storage directory to a new location. And this will be done automatically, you just have to click on the ‘Move’ button.
Now you can see the OpenCart dashboard with options to manage your online store. There are various options such as Catalog, Extension, Design, Sales, Customers, Marketing, System, Report. And there various other sub-options under each category to beautify your storefront.
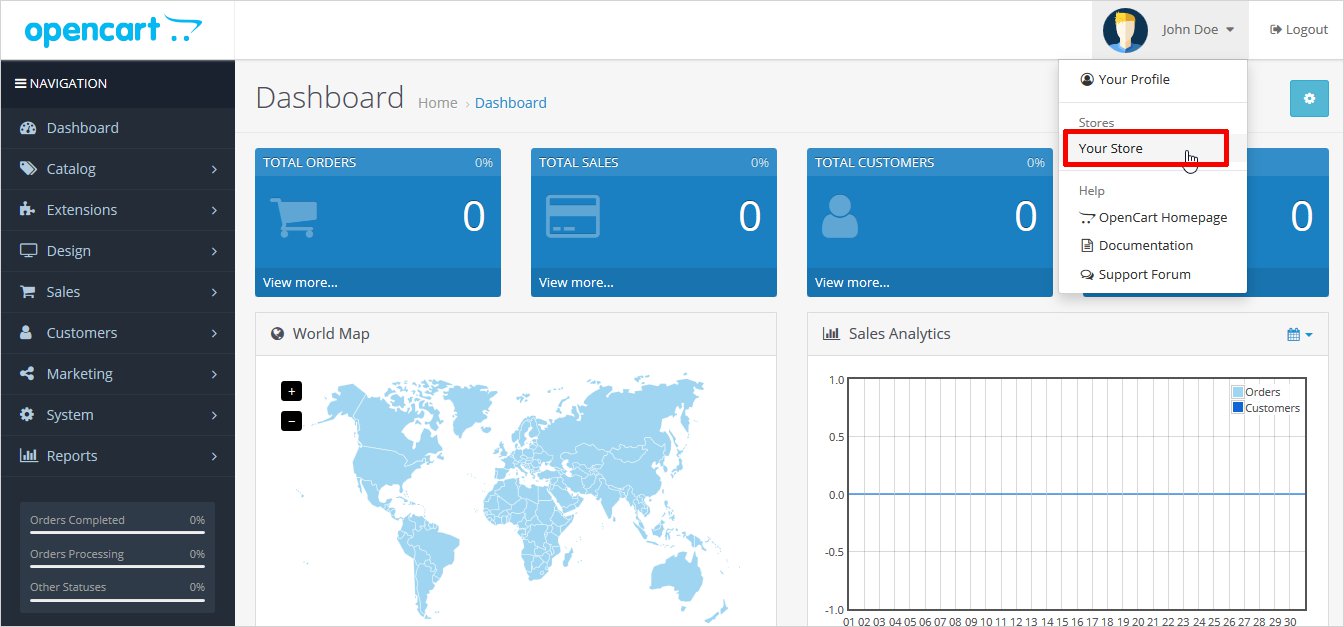
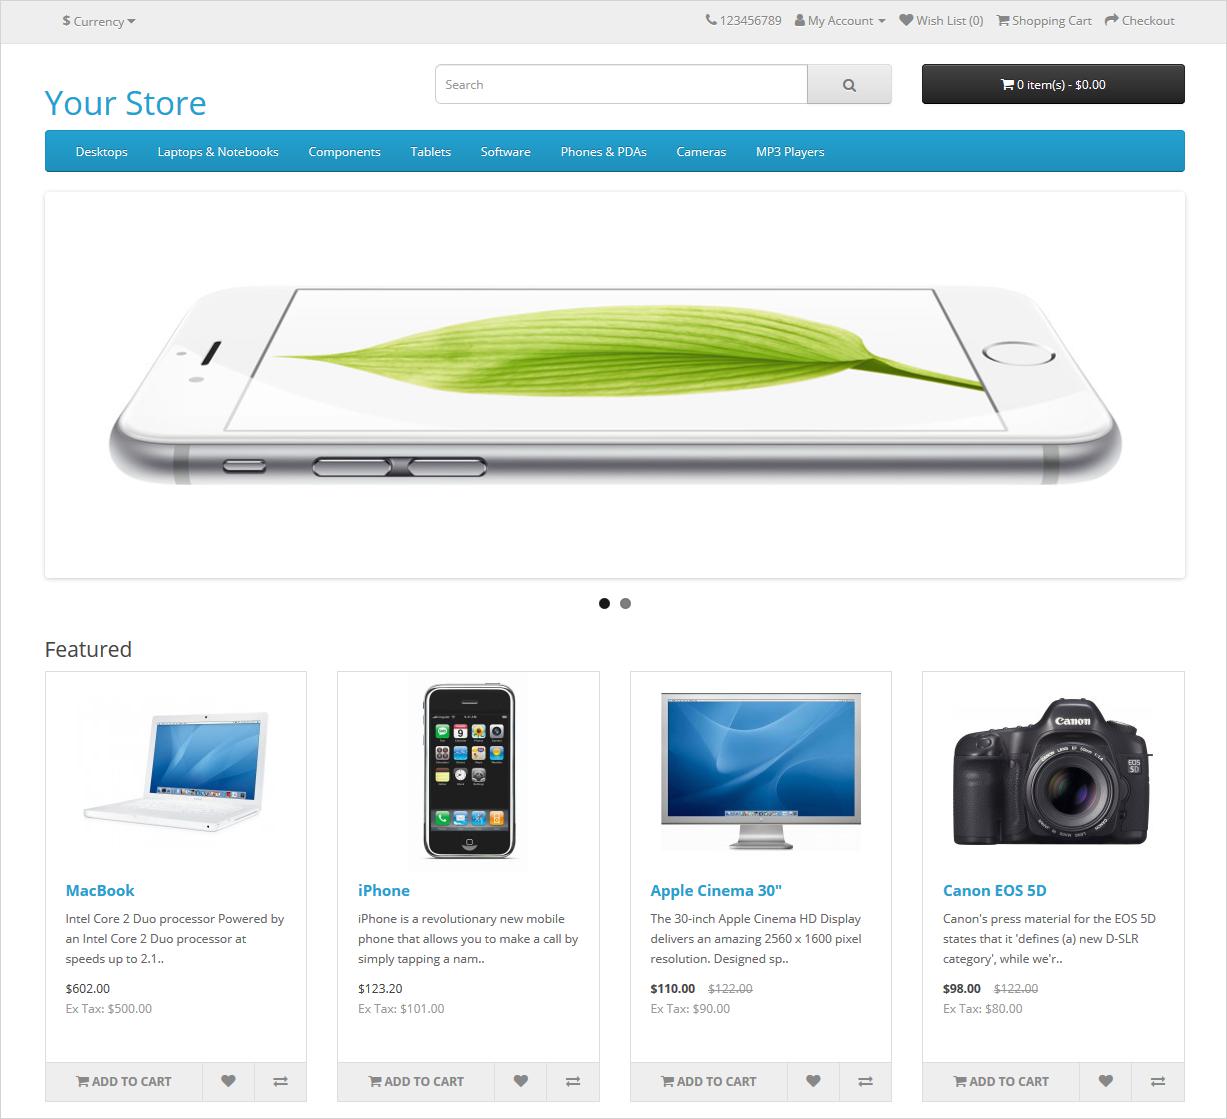
To view your storefront, click on your profile icon (at the top right corner) where you will have the option to view your storefront. As soon as you will click on the ‘Your Store’ option you will be launched to the home page of your store with the default theme and dummy products. Use the plugins to enhance the functionality and flexibility of your store.
A theme is basically a fundamental structure to make your online store appealing and expandable. You can easily use various free or paid themes, available in the market. However, if you wish to create an OpenCart theme on your own, even that is achievable. Since you are now an OpenCart store owner, you might face OpenCart SSL certificate error, never panic because there are various quick fixes are available for this error.
In a NutShell
Well, that’s all! Now, you have a well-structured, fully functional OpenCart online store. You must have realized that it is not at all tough to install OpenCart manually. You just have to do it properly. And I am sure this step-by-step tutorial have cleared all your doubts about how to install OpenCart. And now you can easily set up your online store by creating a catalog, categorizing products, shipping rates, payment methods, etc. If you don’t want to get involved in all this process, then consider using a powerful OpenCart theme builder software. It will give shape to your dreams. free OpenCart themes are also available You can easily create a magnificent eCommerce store that too without any coding skills. Hence, you can rely on it. I hope you have as much enjoyed reading this post, as much as I enjoyed writing it. Do share your experience with me in the comments below. You can also share if you want me to cover any specific topic. I will do that as well.
Build a Stunning Website in Minutes with TemplateToaster Website Builder
Create Your Own Website Now
My experience is OpenCart is good plus this article really enhanced my insights towards OpenCart.
I am looking forward to work with TemplateToaster and OpenCart.
It is very easy to install OpenCart, thanks for sharing this information. I really appreciate it.
I was always confused on the configuration page, but this article helps me a lot to solve my problem.
Hey There, is it important to rename after re-install the page?
Shopify comes under opencart?