How to Schedule Posts in WordPress – Tutorial Guide
We always tell you to be consistent with your posting. It shows that you are serious about your blog and respect the time of your audience. To establish a stable audience, you need to treat your blog more than just a hobby. You need to spend time to formulate a content strategy and create content around your long-term strategy. It is time to quit the ‘finish and hit publish’ habit and start curating content for your long-term benefit. Scheduling your content can help you align your content strategy. Therefore, I am going to explain how to schedule posts in WordPress.
If you don’t have a WordPress website or blog, you can create one with TemplateToaster. Pick a beautiful free WordPress themes and modify it according to your wish using the drag-and-drop editor. Keep reading this tutorial guide to learn how to schedule posts in WordPress.
Why schedule posts in WordPress?
Unless you’re just doing it for the fun of it, I won’t suggest you post your blog post as soon as you finish writing. There can be many reasons for scheduling your blog post. I am going to list the 5 main benefits of scheduling posts in WordPress. Let’s get started-
Consistent publishing routine
Usually people just finish writing a blog or article and hit Publish. It is the common mistake a beginner or even an experienced author can make. A professional will always tell you that consistency matters when it comes to publishing content more than the volume of content you publish. It doesn’t matter if you can commit to only one post per week but if you are sticking to your commitment, it’s good. Just ensure that you select a day, like Wednesday and post on every Wednesday. Also, make sure that your audience knows that you publish a post every Wednesday.
On the other hand, if you are posting 3-4 posts a week on random days, your posting might not be that effective. Scheduling a post in advance makes it easier for you to be consistent with posting. In case you forget to post, your post will be published automatically and will reach your audience.
Keep a safe buffer for content posting
It is next to impossible to create blog posts consistently. Even if you are working clock-wise, it’s unlikely that you can create content so routinely. We all have some unproductive days when the words just don’t seem to flow. Therefore, by scheduling your post in advance you create a buffer. It enables you to compensate for your unproductive days with some productive days. You can create a safe buffer that lets you know how much time you have to work on the next post. By committing to creating a posts schedule in WordPress, you can create a buffer of ready-to-publish posts that will get you through any lean period of time. Moreover, it also enables you to write as much content as you want when inspiration is flowing on productive days.
Schedule content for peak traffic
Website traffic is never consistent. However, you can analyze the pattern of your audience and calculate a time which is likely to bring more traffic on your site. Moreover, new content always seeks the interest of your audience, so it’s highly recommended that you publish your content during one of the peak periods by using tools like Google analytics that enables you to monitor your traffic and offers great insights about your WordPress site.
Once you’ve calculated and determined your high traffic points, it should be easier for you to schedule your posts on the most likely peak traffic time of your site. With advanced scheduling, you can guarantee that your posts are being posted on the peak traffic time.
Consider the big picture view
When you strategize your content according to your long-term objective, you also start to analyze the strengths and weaknesses of your content. For instance, when it is time to publish your content, you might notice a section which needs more work. With advanced scheduling, it gives you time to proactively craft the content you need and plenty of time to make edits accordingly. Therefore, it is always good to schedule your content in advance so you can make advanced edits. Moreover, it also gives you more insights on your content strategy.
Take some time off the website
Writing and publishing your content doesn’t have to be so hectic and stressful. Stress has become a part of work-life. Even when we are off-work, we are always stressing about something related to work. To take some load off, try scheduling your posts in WordPress. You can write in advance, stock up some posts, and schedule your work. Once you are done you can enjoy your vacation while the scheduled work will be posted automatically. Your audience won’t even suspect that you were gone. Moreover, the peace of mind it offers is unimaginable.
How to schedule posts in WordPress
There are two different methods to schedule posts in WordPress. In the next section, I will explain both of the methods in the step-by-step manner.
Schedule posts in WordPress Using the classic editor
The first way to schedule a WordPress post is by using the in-built editor. This method is quite simple if you are familiar with working with the WordPress admin panel. Here’s how you can schedule posts in WordPress using in-built editor-
Follow these easy steps to Schedule posts in WordPress
Step 1: Login to your WordPress dashboard and navigate to Posts> Add New section.
Step 2: On the right-hand side of your screen, you will see a sidebar, you will see the Publish menu, when you can schedule the publishing time.
Step 3: Click on the Edit button and enter the publish date and time you wish your content to publish.
Step 4: Once you select the desired date and time for publishing your post, click the Schedule button. Your content will be published according to the date and time you mentioned.
That’s all. You’ve successfully scheduled your posts in WordPress using the in-built WordPress editor.
Schedule posts in WordPress Using a plugin
Another way to schedule your posts in WordPress is by using a Plugin. If you are fairly new with WordPress Dashboard and uncomfortable with fiddling around then I’d suggest you should go for this method. Moreover, this method enables you with some additional features, depending upon the plugin you use. If you are not sure which plugin would work for, I’d make a quick suggestion: Advanced Scheduled Posts. This plugin is easy to use and offers a lot of additional features like ability to set the expiration date of a post. Moreover, you can also overwrite expired posts with other ones. Here are the steps to schedule posts in WordPress using a plugin-
- First, install the plugin. After that, access your WordPress dashboard, navigate to Plugins> Add new and search for Advanced Scheduled Posts. Click on the Install Now button and then Activate Plugin. You can also refer to this article to how to install a WordPress Plugin.
- You can access calendars by clicking Posts> Calendars and start drafting and scheduling your posts in advance. Moreover, you can simply drag the post and drop it onto your preferred date. The plugin will do the rest for you, automatically.
You can fiddle around the plugin to spot some more features. That’s all you need to do to schedule posts in WordPress using a Plugin. In case you don’t like this plugin, I’ve also mentioned some more options in the next section. Explore them and use the one you like.
Other plugins to schedule posts in WordPress
Apart from Advanced Scheduled Posts plugins, there is a great range of other plugins that you can use to schedule your blog posts in a simple yet effective manner. Some of the plugins that you can use are-
WP Scheduled Posts
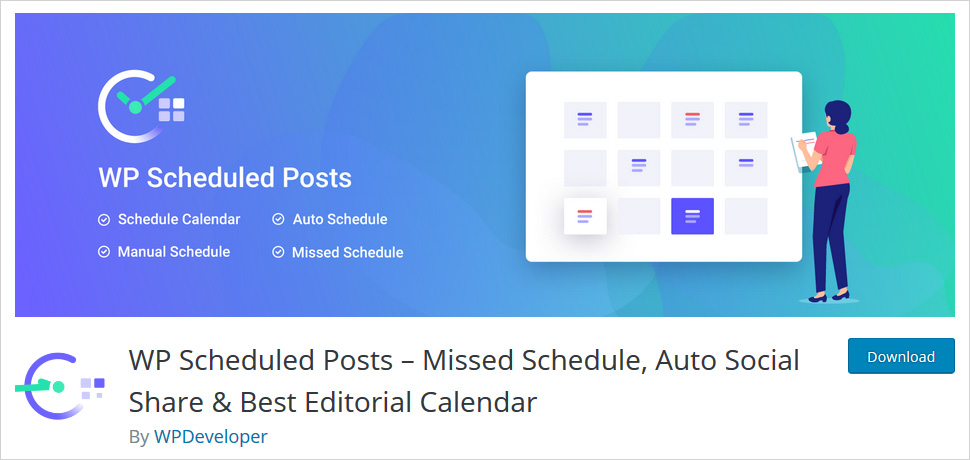
As the name suggests WP Scheduled Posts is a complete solution for scheduling posts in WordPress. It allows you to manage scheduling through editorial calendars and enables auto schedulers moreover, you can also handle auto share on various social media platforms like Facebook, Twitter, Pinterest, LinkedIn, Instagram, and so on. Furthermore, it offers an easy to use and navigate Admin bar and Dashboard widget to display all your scheduled posts. Some of the pros of this plugin are-
- Allows you to manage multiple authors in one place
- Allows you to schedule hundreds of posts using the editorial calendar
- Minimum human intervention required
Schedule posts calendar
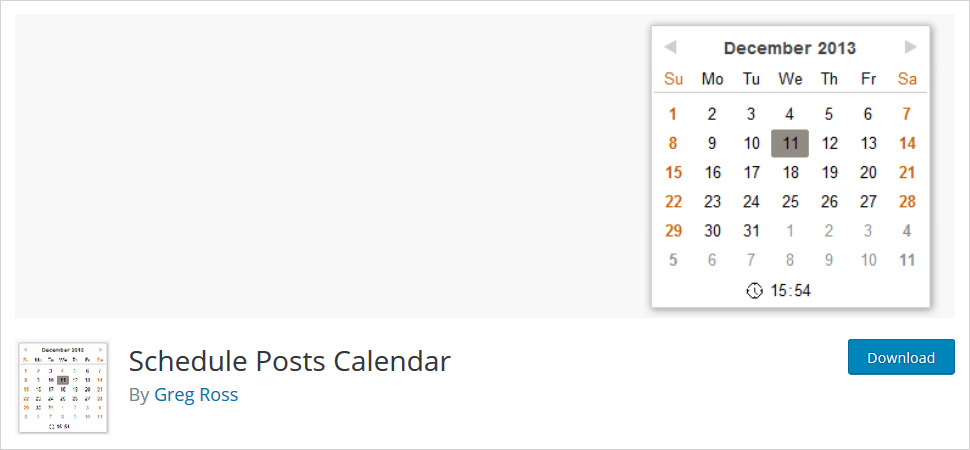
Schedule Posts Calendar plugin is also used to schedule posts in WordPress. This plugin is open source and available for free to use. Moreover, it offers a JavaScript calendar to the scheduled publish widget to allow the author to pick a date and time graphically, instead of entering it in the text format. That way, it minimizes the risk of entering the wrong date or time by mistake. Some of its pros are as mentioned below-
- Replaces text-format calendar with a JavaScript calendar
- Enable you to select the date and time graphically instead of entering it in the text format
- Allows you to define months in shorten form and a few other options too.
Easy scheduled posts
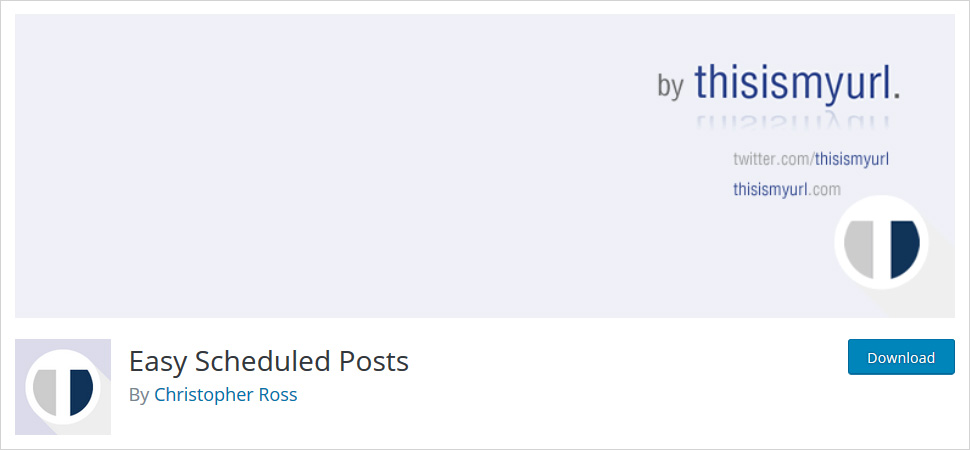
Easy scheduled posts is an advanced WordPress plugin, dedicatedly designed to schedule posts on your WordPress site. It helps developers/authors to organize their content by defining the schedule in advance. You can use this plugin with shortcode integration. Moreover, you can also display a widget control panel. This plugin is available in different languages including English, French, and German. Some of its pros are as mentioned below-
- Offers shortcode integration and widget control panel as well
- Instant post scheduling
- Allows you to who can see the widget based on user roles
How to schedule posts in WordPress – Conclusion
Scheduling posts in advance on your WordPress site can be beneficial to you in many ways. It gives you useful insights on your long-term content strategy while you can create a buffer of posts and put them on automatic scheduling while being on a vacation. Basically, it keeps your posting consistent. In this article, I explained two different methods to schedule posts in WordPress. If you are from a technical background and don’t mind performing a couple of steps on your WordPress dashboard, then it is better to do it using the first method. You can avoid purchasing and loading your WordPress site with another plugin. However, if you are a beginner, we’d recommend you to go with another method. Using a plugin for tasks is easier and will save your going through the trouble of making manual changes.
We hope that this article was helpful to you and you learned to schedule posts on your WordPress site. You may also want to see our tutorial on How to Change Password in WordPress.For more details or recommendation, please comment below.
Build a Stunning Website in Minutes with TemplateToaster Website Builder
Create Your Own Website Now