How to Create Pre-Publish Checklists for Your WordPress Posts
If you run a busy website, you know that it can be difficult to make sure all your content meets the same high standards. Besides, one author has their specific style. While the second author has a different method. And the third author has another approach. So, let learn how to create pre-publish checklists for your WordPress posts.
Most magazines, newspapers and book publishers have a style guide that they use for their content. Likewise, WordPress websites can also benefit from their own style guide. This is important to make the content look good, but also for search engine optimization. Therefore, any website that wants good rankings needs to make sure that all its content has a certain number of words, categories, and tags.
So, how do you achieve it? All of this is possible with the PublishPress Checklists plugin.
What is the PublishPress Checklists plugin?
When you use PublishPress Checklists, you can define the important features of every post on your site.
For example, you can choose a minimum or a maximum number of words for your post. You can also require all your posts to have a featured image.
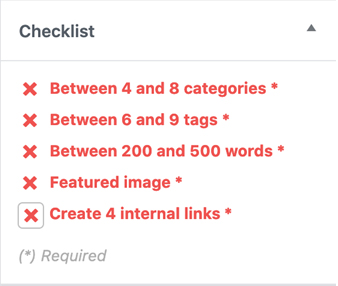
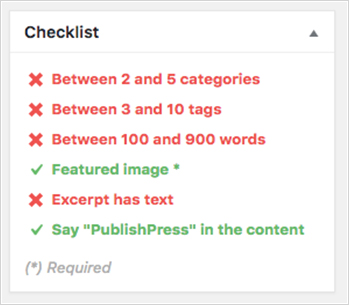
As well as, when the authors complete each item, the red text automatically turns to green. In the image below, you can see that the author has successfully added enough categories. However, they still need to make sure they add enough tags and words, plus a featured image.
Creating Checklists for your posts
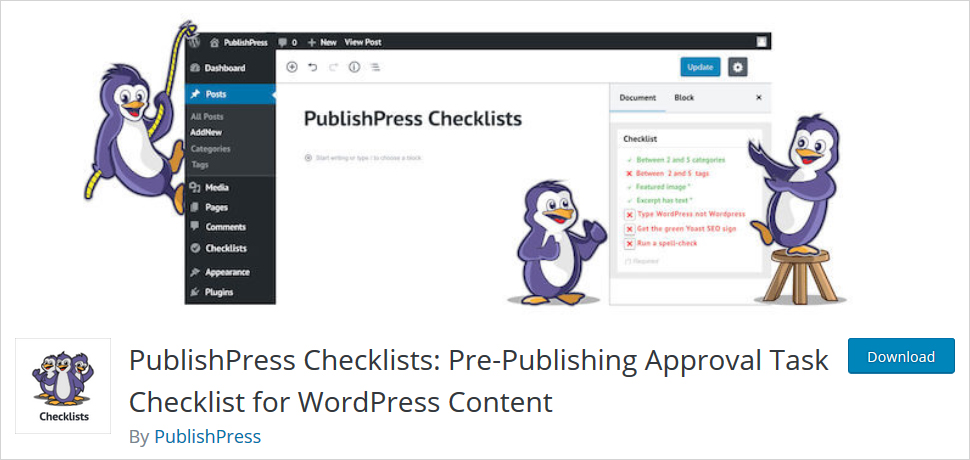
To create a pre-publish checklist for your WordPress you can install PublishPress Checklists from WordPress.org. You can click here to see the plugin listing.
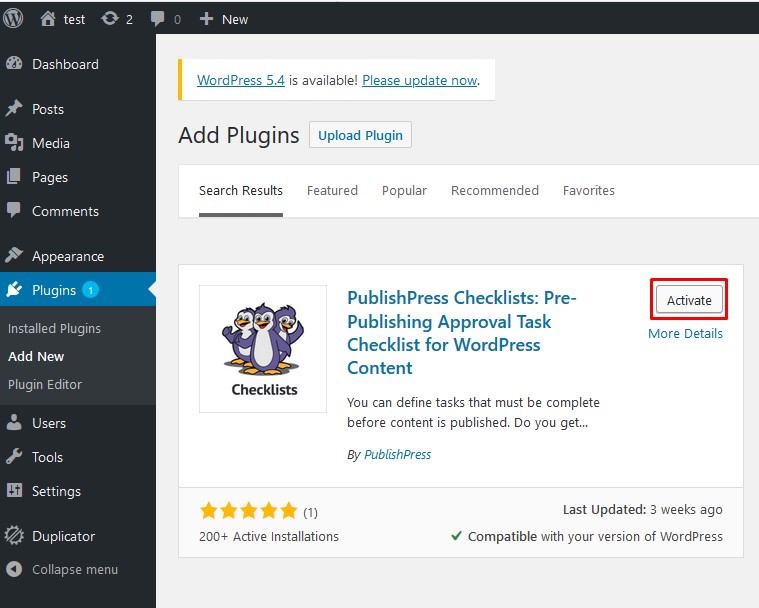
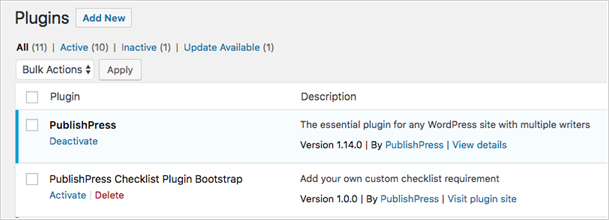
Also, go to the “Plugins” link in your WordPress admin area and click “Add New”. This image shows what you’ll see in the plugin search:
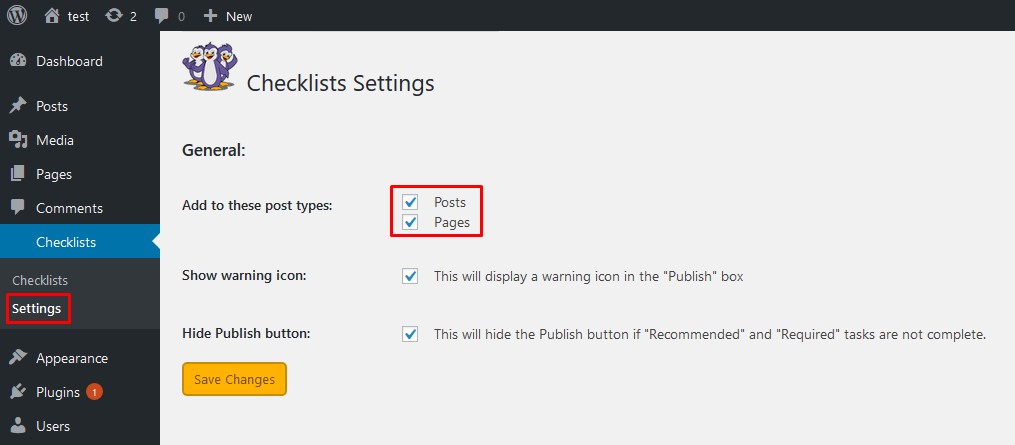
- Go to Checklists > Settings.
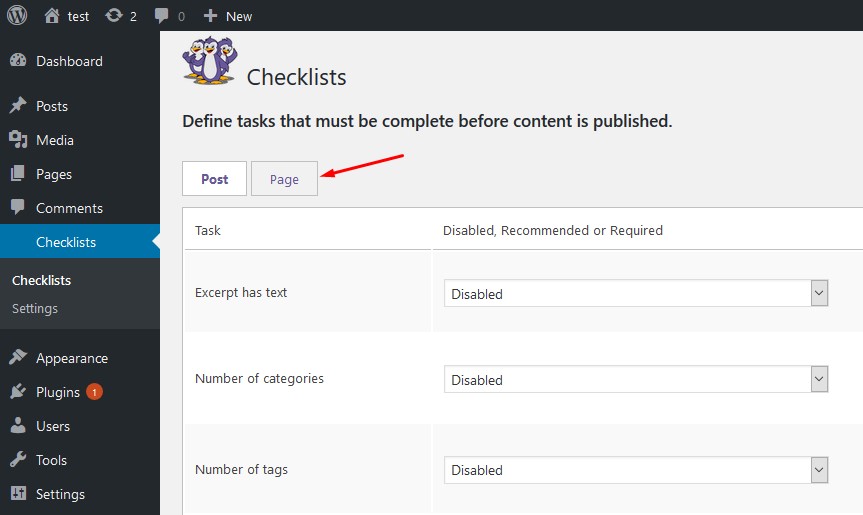
- You choose which post types you want to use the plugin with. In the image below, I’ve chosen both Posts and Pages:

- Click “Checklists” in your WordPress admin menu.
- Select which post type you want to work with. In the image below, “Post” is selected.

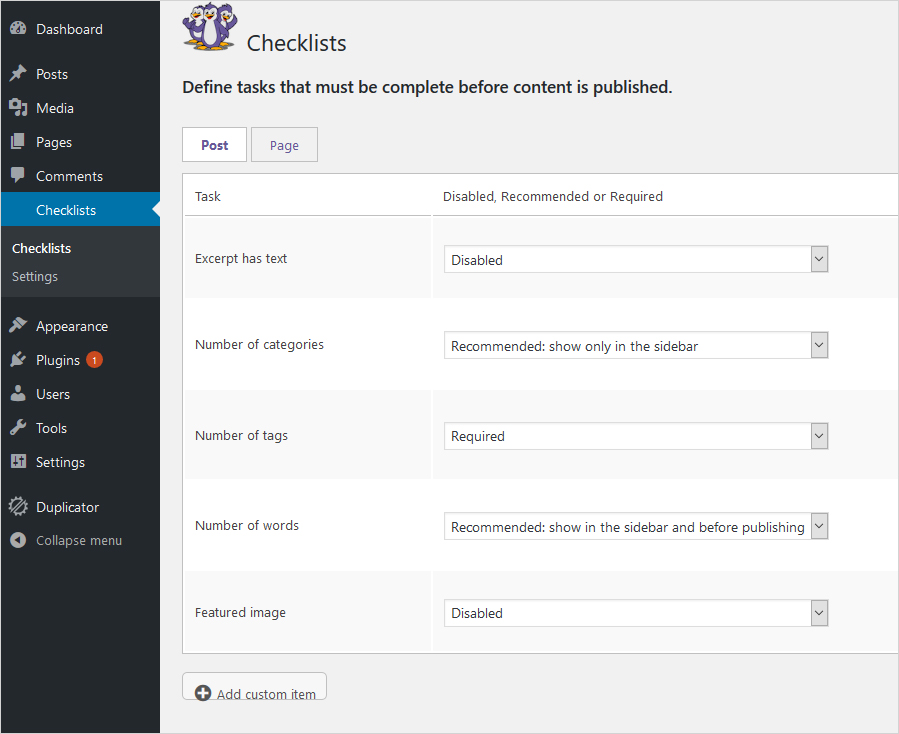
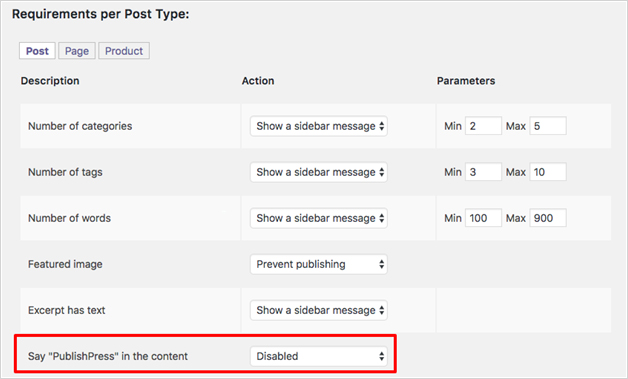
You will now see six different requirements:
- The excerpt has the text: You can require that the excerpt is used.
- The number of categories: You can choose the minimum or a maximum number of categories for this post. We normally recommend no more than ten categories. Find out more in this guide.
- Number of tags: You can choose the minimum or a maximum number of tags for this post.
- Featured image: You can force posts to have a featured image.
- The number of words: You can choose the minimum or a maximum number of words in the post. Find out more in this guide.
Permalink uses standard chars: This feature was requested by users who found odd characters in their URLs. If this feature is enabled, your permalinks can only use the A-Z and 0-9 characters, plus underscores and dashes.
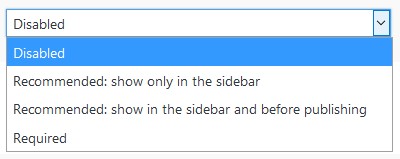
You can decide how strict to make each requirement. You can choose from these settings:
- Disabled: This requirement won’t show for anyone.
- Recommended: show only in the sidebar: This allows users to publish posts, but the requirement is marked in red with an X in the sidebar.
- Recommended: show in the sidebar and before publishing: This also allows users to publish posts, but they will see an extra warning message.
- Required: This forces users to complete the task before they can publish.

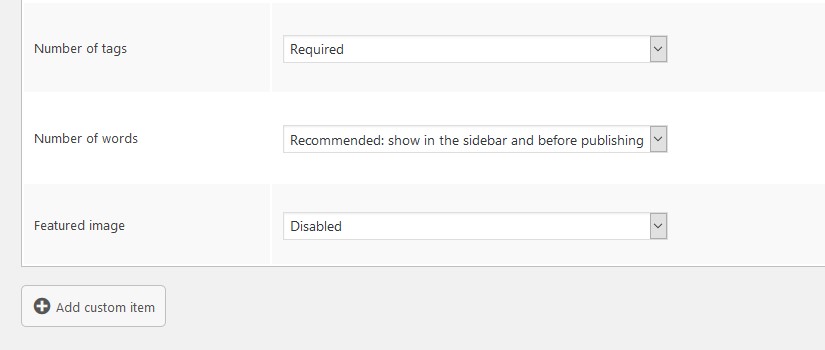
- There’s also the option to add your own custom tasks to your checklist.
- Enter your task.
- Click “Add custom item” at the bottom of the checklist.

- Click “Save Changes” when you’ve finished.
Using Checklists with your Posts
Now let’s see how to use the checklist that you created:
- Inside your WordPress site, go to write a new post.
- In the right sidebar, you will see a “Checklist” box, showing the tasks you need to complete.

PublishPress Checklists is smart enough to test the default requirements automatically. For example, as soon as you write 200 words, that checklist item will turn green for you.
This image is similar to the one at the start of the post, although there is one additional task. “Create 4 internal links” is the custom requirement. Also, you will need to manually click on the red text to turn it green.
If you have not finished all the “Required” tasks, you won’t be able to click the “Publish” button. Likewise, the PublishPress Checklists plugin will make the button unclickable until all the essential tasks are completed.

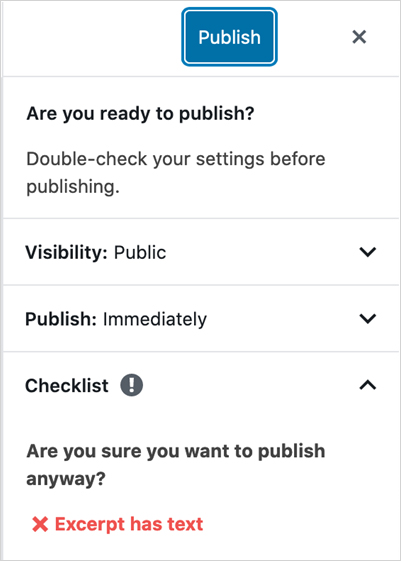
However, this message is flexible and will change depending on the requirements you choose. For example, let’s see what happens if you choose “Recommended: show in the sidebar and before publishing”. And, if you try to publish a post without completing that recommended task, you will be shown the incomplete task. PublishPress Checklists will ask, “Are you sure you want to publish anyway?”
Ignoring Tasks in PublishPress Checklists
Besides, there are some more advanced settings available in PublishPress Checklists. For example, you can allow some user groups to skip some tasks.
For example, you may want all of your “Authors” and “Editors” to write a minimum number of words for each post. However, you may also want “Administrators” to ignore that requirement when needed.
- Go to “Checklists” in your WordPress admin menu.
- Look at the “Who can ignore the task?” column. Here you can decide which user roles can skip a particular task. In this image below, I’ve decided that anyone in the “Administrator” role is exempt from the “total number of words” requirement.
Checklists for WooCommerce Products
WooCommerce is probably the most popular e-commerce platform in the world. Moreover, WooCommerce users are relying on the plugin for busier and busier stores.
Anyone who runs a busy WooCommerce site has 1,001 things to think about every day. Equally, they need to worry about shipping, taxes, customer support and all the everyday challenges of e-commerce
Wouldn’t it be great if you had one less thing to worry about?
The Pro version of PublishPress Checklists allows you to create requirements for WooCommerce products. Moreover, this allows you to guarantee that your products are set up correctly.
- Want every product to have an SKU number?
- Need to ensure every item has a Product Image?
- Need to make sure all Product descriptions are a similar length?
- Want all your listings to be “Virtual” products?
You can set over 20 requirements that must be fulfilled before WooCommerce products are published.
- Install the Pro version of PublishPress Checklists.
- Go to “Checklists” in your WordPress admin menu.
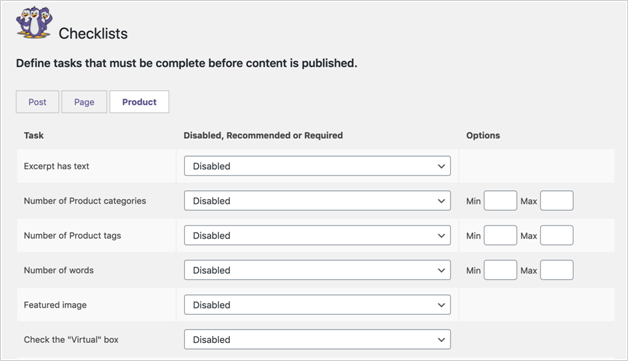
- Select the “Products” post type:
- Go to Checklists in the WordPress admin menu.
- Click the “Products” tab.
You can choose from almost twenty different WooCommerce requirements:
- Excerpt has text
- Number of Product categories
- The Number of Product tags
- The total number of words
- Featured image
- Check the “Virtual” box
- Check the “Downloadable” box
- Enter a “Regular price”
- Enter a “Sale price”
- Schedule the “Sale price”
- Discount for the “Sale price”
- Enter an “SKU”
- Check the “Manage stock?” box
- Check the “Sold individually” box
- Check the “Allow backorders?” box
- Select some products for “Upsells”
- Select some products for “Cross-sells”
- Product image
When you go to create a new WooCommerce product, you will now see your checklist in the right sidebar:
All of the main features of the Posts and Pages Checklists are also available. For example, you can add your own custom items, or you can choose specific user roles to skip some tasks.
Expanding the Checklist Options
So far we’ve seen that PublishPress Checklists has a wide range of tasks, and it also allows you to create custom items. In addition, those custom items can be manually checked by users. However, it’s also possible to create tasks that work automatically.
Before we start this mini-tutorial, I’ll mention that this part will require you to write some code.
There’s a sample plugin on Github called the PublishPress Checklists Plugin Bootstrap. Uniquely, this is a WordPress plugin designed to work as a base for your own plugin.
The example plugin will automatically check that your content contains the word “PublishPress” in its main body.
This plugin can be downloaded and installed:
When you Publish this new plugin, an extra requirement will become available. You can see this requirement in the image below: “Say “PublishPress” in the content”.
When this requirement is enabled, PublishPress Checklists will automatically search the text of your posts to make sure it contains the word “PublishPress”. It can search for both whole words and partial words. So, if your content does contain the word “PublishPress”, you’ll see this message:
At this point, you’ve seen the plugin in action. You can dive into the code which is freely available on Github and use it as the basis for your own requirements. You can read posts vs pages in WordPress.
PublishPress Checklists Conclusion
PublishPress Checklist is an excellent plugin to make sure your content is ready to go live.
We see people use this plugin on their personal websites, to make sure they’re disciplined and meeting their own content targets.
We find people using PublishPress Checklists on content-heavy websites. In particular, it can be helpful with search engine optimization. SEO experts have strong opinions on how posts should be written: how many words, tags, categories etc. Also, this plugin allows you to make sure all your content is optimized.
WooCommerce stores find the plugin useful too. You can avoid users forgetting to enter an SKU number, or adding product images. Similarly, you can also avoid short one-line text descriptions that hurt your SEO.
Finally, we see a lot of people use PublishPress Checklists on corporate sites to make sure that many authors are all on the same page.
If you want to create your own website in minutes check out TemplateToaster website builder.
Related readings
Related reading: WordPress 101 tutorial
How to check WordPress version, How to find WordPress login URL, How to install WordPress
How to change WordPress language, How to create a WordPress custom login page, How to create a WordPress theme from scratch, How to fix WordPress page update not working
Build a Stunning Website in Minutes with TemplateToaster Website Builder
Create Your Own Website Now
The plugins looks good. Thanks for sharing your review
Very Nice plugin! helped me increase my writing productivity.
Every step has mentioned very clearly, it is easy to understand, thanks.
I love your way to mention the things very clearly, I fount it a very helpful article for me.
My friend recommended me this once I discuss with him the things but today I came to know the actual meaning of it, thanks for posting.
Your articles are always helpful and amazing and very informative,that’s why I love to read them as soon as you publish the new one. Thank you.
Template Toaster has very nice themes, I have used a to from there to make a wonderful website.
Exactly, it is wonderful for SEO people as well, because it is mandatory to know about the right content before post it no website.
By the editing of this article, my work productivity has increased, thanks for your support.
PublishPress Plugin also suggest the alternate of that content?