How to Create Blogger Template from Scratch: Beginners Tutorial
Are you a blogger, who loves to share your experience or simply write your thoughts and opinions to the audience? Do you want to build your blogging community? Then it will be quite convenient for you to learn about blogger templates from scratch. Do not get intimidated, we have an easy step-by-step guide for beginners, to help you learn how to create blogger templates from scratch.
Google’s Blogger platform is one of the most popular platforms to write and read blogs. When it comes to blogging, design or the template matters the most, as it helps create the first impression. A good custom-designed blogger template not only looks visually appealing but also helps grab the attention of visitors. To create a blogger template from scratch you need to have slight knowledge of HTML, CSS, and JavaScript languages. Having said that, it is not difficult, so do not lose your hopes there. Notably, the Blogger theme is an XML template, while the XML template contains HTML and custom Blogger tags. In this post, we are going to learn how to build custom blogger templates. We are going to focus on two methods – Manual and Template Creator. So that you can easily design your custom blogger template designs.
How to Create Blogger Template? Tutorial for Beginners
Having your own unique blogger template is something sumptuous. But the question arises – from where to start? The simple answer is, there are two reliable methods for designing a template as follows
There are two ways to Create Blogger Template
- Create Blogger Template with Manual Method
- Create Blogger Template with TemplateToaster
If you have good knowledge of coding, you will go for manual method to create blogger template. But if you are a beginner and don’t know how to code then TemplateToaster is the best to choose to create and customize blogger template. You require no coding with this blogger template creator. It will give you an easy drag & drop interface to design your template. You just select what you want, rest of the things it will handle. Let’s delve deeper to see the detailed procedure that how to design blogger template with both the methods
Follow Steps Create Blogger Template with manual method
A Blogger template consists of XHTML and blogger elements. To design a basic layout of the template, you will use namespaces. A namespace (xmlns) is pre-defined to use with the Blogger by Google. 3 types of namespaces are basically used as follows
- xmlns:b – ‘b’ specifies that this namespace is used to access the blogger elements.
- xmlns:data – It is used to specify that from where the data of the blog comes.
- xmlns:expr – Calculates the expression for attributes.
You will write all the code in main.xml file of Blogger.
Step 1: Syntax for Basic Layout
<?xml version="1.0" encoding="UTF-8" ?>
        <!DOCTYPE html PUBLIC "-//W3C//DTD XHTML 1.0 Strict//EN" "http://www.w3.org/TR/xhtml1/DTD/xhtml1-strict.dtd">
        <html xmlns='http://www.w3.org/1999/xhtml' xmlns:b='http://www.google.com/2005/gml/b' xmlns:data='http://www.google.com/2005/gml/data' xmlns:expr='http://www.google.com/2005/gml/expr'>
        <head>
        <title><data:blog.pageTitle/></title>
        </head>
        <body>
        <!-- BODY CONTENTS -->
        </body>
        </html>
Sections
A blogger template is divided into sections. The basic sections are: Header, Content, Footer, Sidebar. You will use the Widget element to define the content in a section. Note that you can’t use HTML within a section. But around a section, it is permissible to use HTML.
The correct format of section will be
<b:section id=’ ‘ class=' ' maxwidgets=' ' showaddelement=' '>
        <b:widget……../>
        </b:section>
        While the below format, will be considered Wrong:
        <b:section id=' ' class=' ' maxwidgets=' ' showaddelement=' '>
        <h1>Content heading</h>
        <div>Content</div>
        </b:section>
Section Attributes
You need to specify following attributes in a section. id is the only required attribute while others are optional.
- id – It is the unique name of section specified in letters and numbers only.
- class – Consists of common classes such as navbar, main, header, footer, and sidebar. If you change templates later, these will let you to decide whether transfer your content or not. You can also use other class names if you wish.
- maxwidgets – It limits the maximum number of widgets that can be added in a section.
- showaddelement – Consists of “yes” or “no” value. Yes is the default. This establishes whether the Page Elements tab displays the “Add a Page Element” link or not.
- growth – It can be “horizontal” or “vertical”. “vertical” is the default. This determines whether widgets are arranged side-by-side or stacked within a section.
Step 2: Syntax to Add Sections
<b:section id='header' class='header' maxwidgets="1" showaddelement="no">
        <!-- Section contents -->
        </b:section>
        <b:section id="sidebar" class="sidebar" maxwidgets="" showaddelement="yes">
        </b:section>
        <b:section id='main' class='main' maxwidgets="1" showaddelement="no">
        <!-- Section contents -->
        </b:section>
        <b:section id='footer' class='footer' showaddelement="no">
        <!-- Section contents -->
        </b:section>
Widgets
A widget is the main part which displays real data for section. It works as a placeholder. Section only defines the layout elements. Some default widgets are available in blogger. However, you can also create your own custom widget.
Widget Attributes
Widget can have many attributes. Out of which, only id and type are required and others are optional.
- id – It can have letters and numbers only. Each widget ID is unique. Widget ID can only be changed by deleting the widget or creating a new widget.
- type – It indicates the type of widget and can have one of the valid widget types listed below
- BlogArchive
- Blog
- Feed
- Header
- HTML
- SingleImage
- LinkList
- List
- Logo
- BlogProfile
- Navbar
- VideoBar
- NewsBar
- locked – It can have a ‘yes’ or ‘no’ value. The default value is ‘no’. You cannot move or delete a locked widget from the Page Elements tab.
- title – Displays the title of the widget. If not specified, a default title such as ‘List1’ is used.
- pageType – It can be ‘all’,’archive’,’main’, or ‘item’. ‘All’ is the default. A widget will display only on the designated pages.
- mobile – It can be ‘yes’, ‘no’, or ‘default’. It tells a widget will display on mobile or not. Only Header, Blog, Profile, PageList, AdSense, Attribution will be displayed on mobile if it is set to ‘default’.
Step 3: Widget Syntax
Widgets are included within a section. The syntax to add a widget in a section will be somewhat like this
<b:section id="sidebar" class="sidebar" maxwidgets="" showaddelement="yes">
        <b:widget id='CustomSearch1' title='Search' type='CustomSearch' locked='false'/>
        <b:widget id='FollowByEmail1' title='Follow By Email' type='FollowByEmail' locked='false' />
        <b:widget id='PopularPosts1' locked='false' title='Popular On Relatemein' type='PopularPosts'/>
        <b:widget id='Label1' type='Label' locked='false' />
        </b:section>
Follow Steps to Create Blogger Template with TemplateToaster
In this method, no coding is involved. Just a simple drag and drop interface to create Blogger template. More interestingly, it is a complete solution to the frequently asked questions by readers that how to make responsive Blogger template as all the templates designed with TemplateToaster Blogger template creator are responsive by default. Check out Blogger Templates.
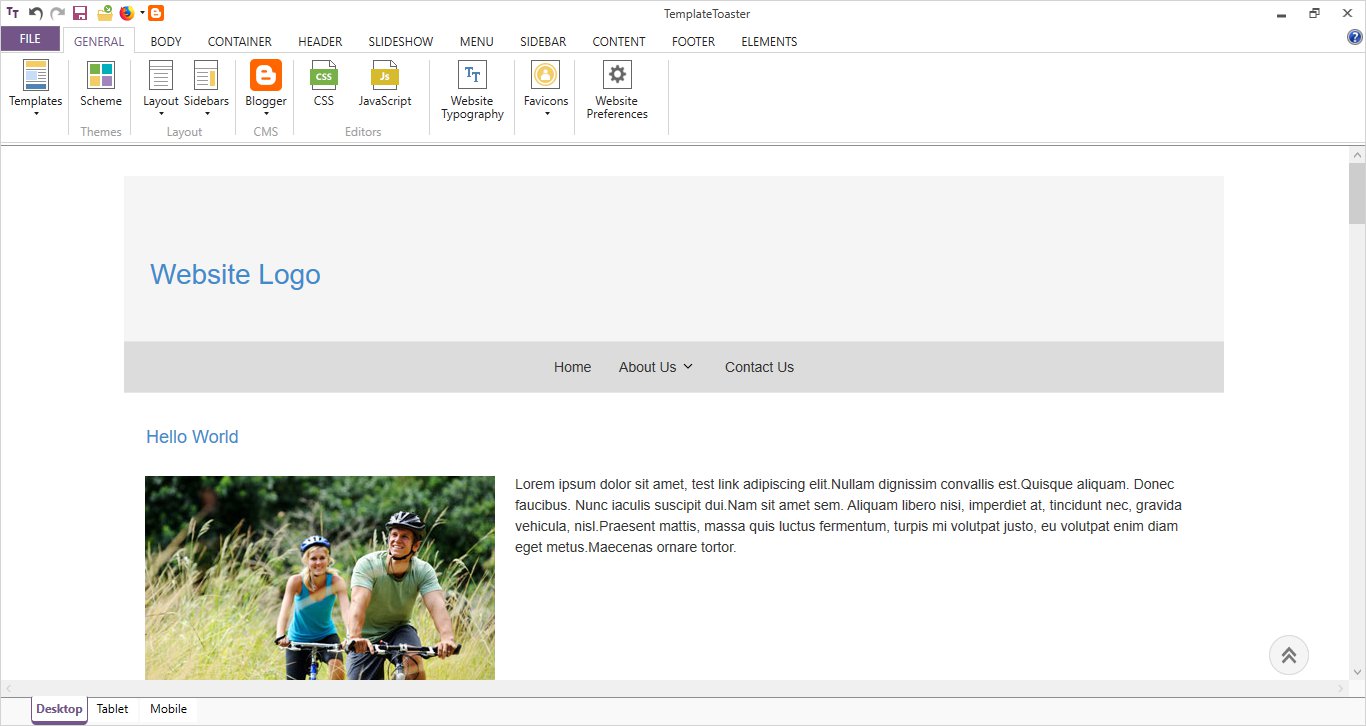
TemplateToaster is the most convenient method to create Blogger template. Just download it by visiting the official site. Its trial version is free. Follow the easy steps to install. The first screen you see after installation will look like

From here, you will make a CMS selection. As TemplateToaster supports many CMSs, you will see many options. But you will select Blogger.
Step1: Choose a Platform
Now, you will get the screen to choose a sample template to customize blogger template from scratch. Select Start From Scratch and click Modify
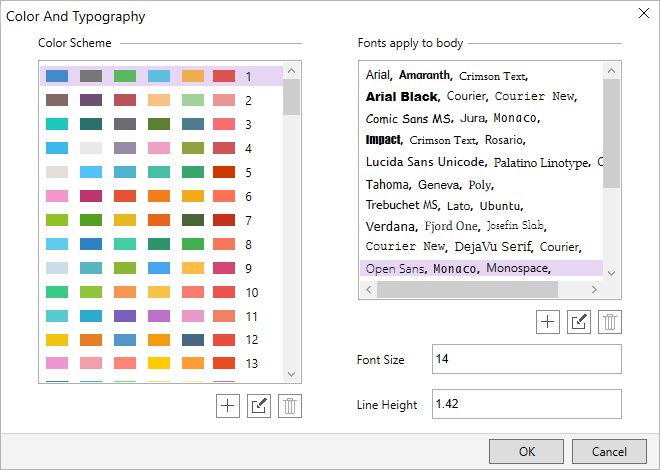
Step2: Choose Color scheme and typography
From next screen, you can choose a color scheme and font typography for your template. You can change it anytime during designing.
This is the Main Interface of the software. From here, you can design your template as per need. It has many self-depicting tabs like Header, Menu, Footer, Content, Slideshow, Sidebar etc. It facilitates you hundreds of latest option to design a unique template.
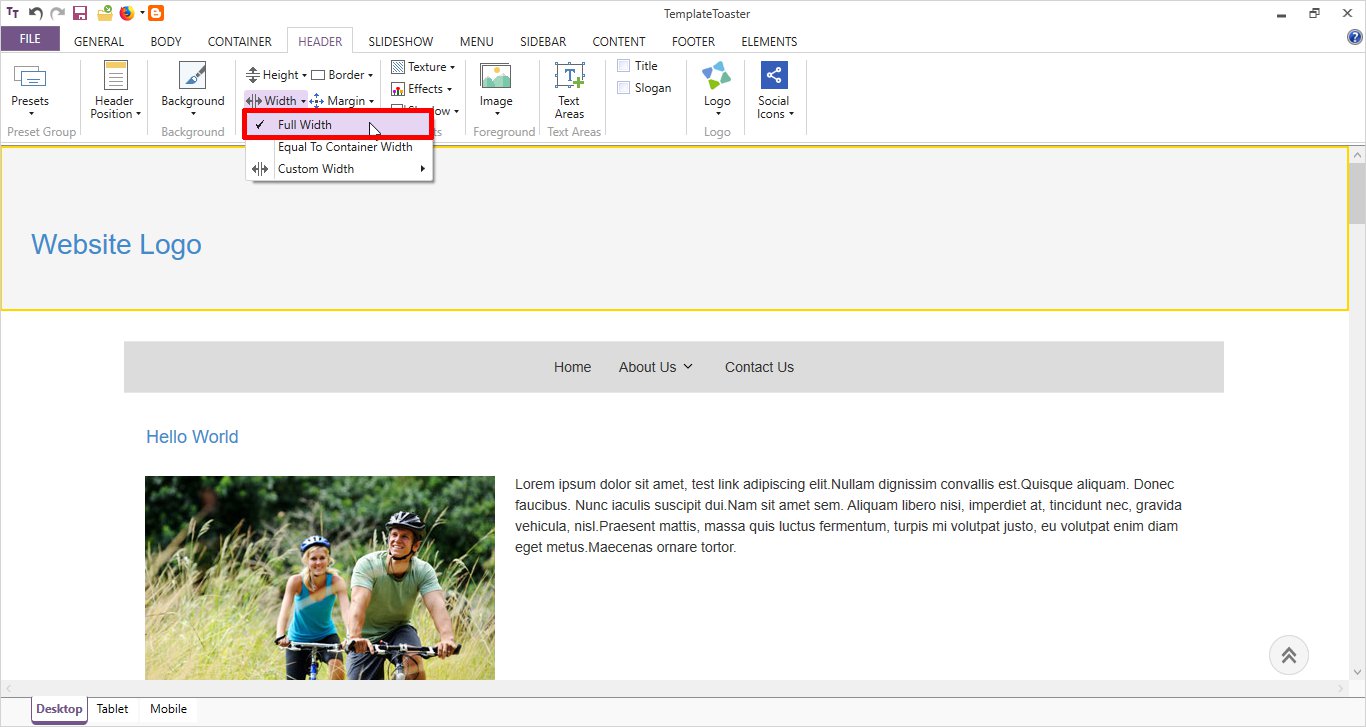
Step 3: Designing the Header
Select the Header tab from the Top menu of the main screen.
Now, set the width by selecting Width option. Here, a Full Width header is placed.
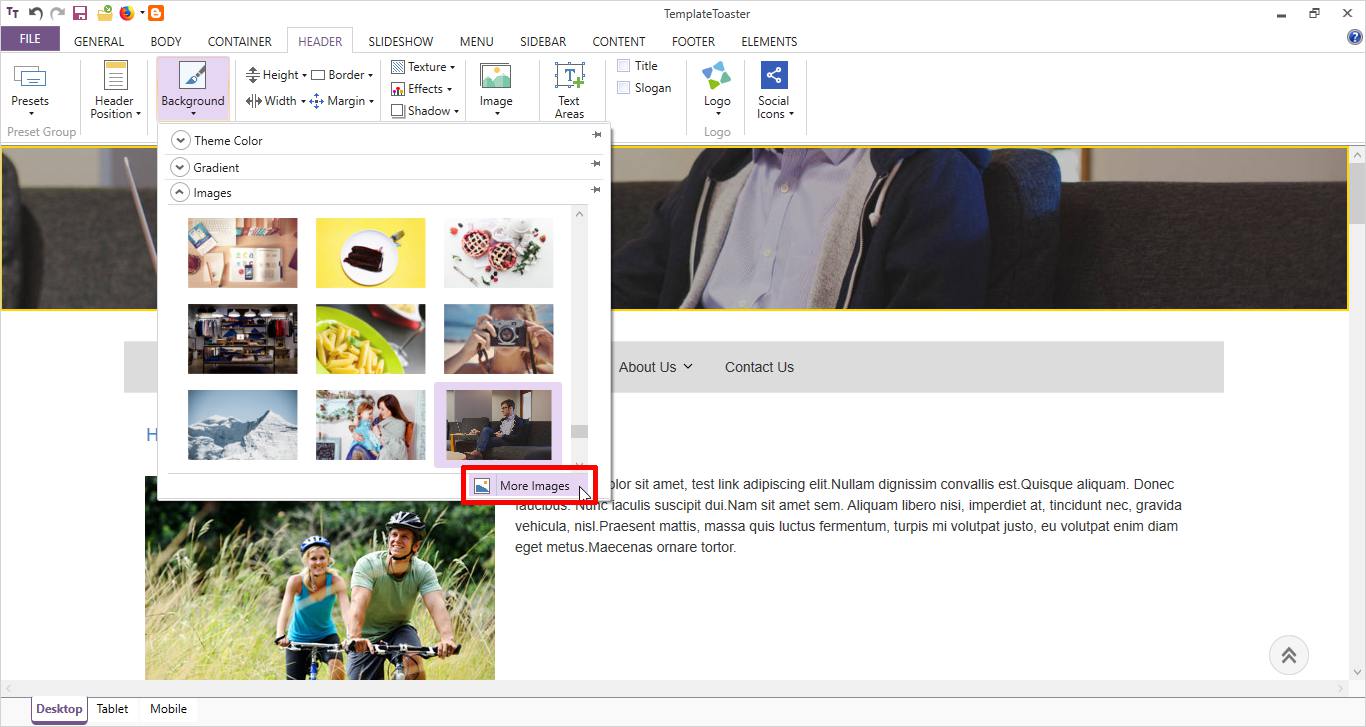
Select the Background option. It will help you to set a background color, gradient or image. Here, a Background Image is selected. It gives you an image gallery but you can also browse your own custom image.
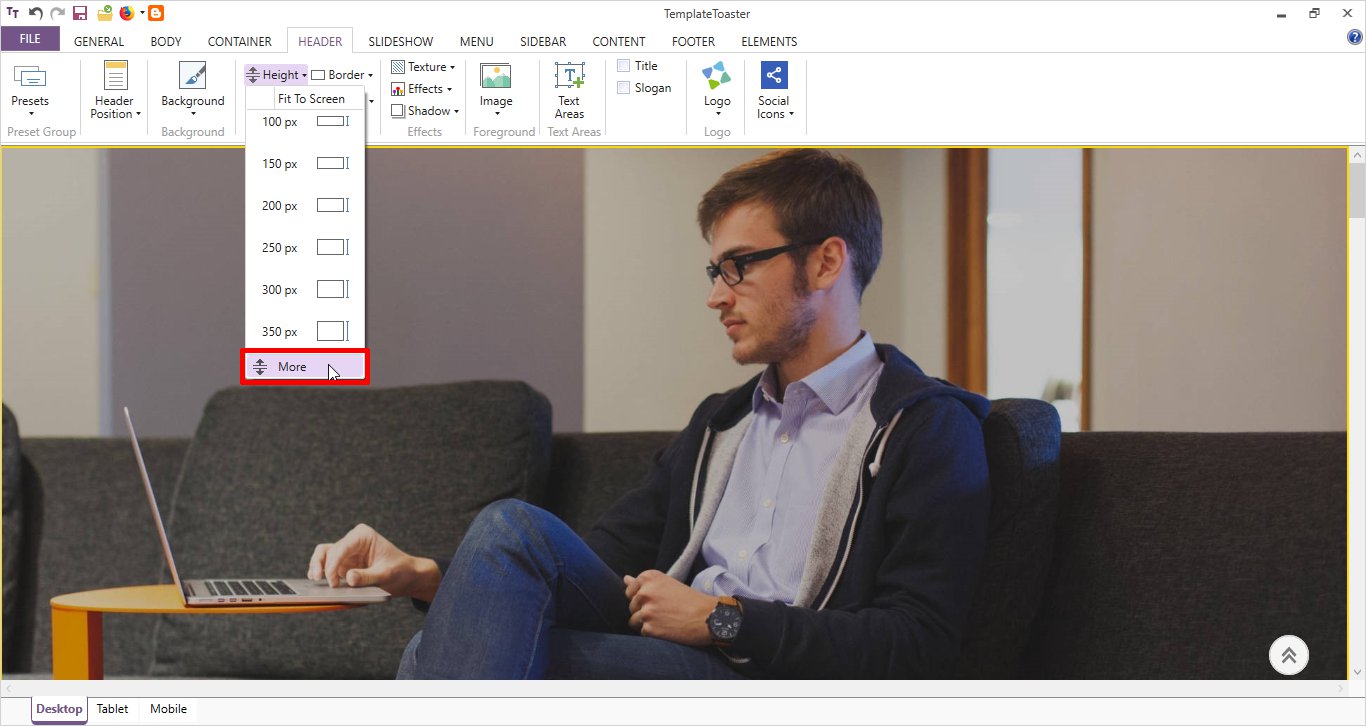
Set the Height of header as shown below.
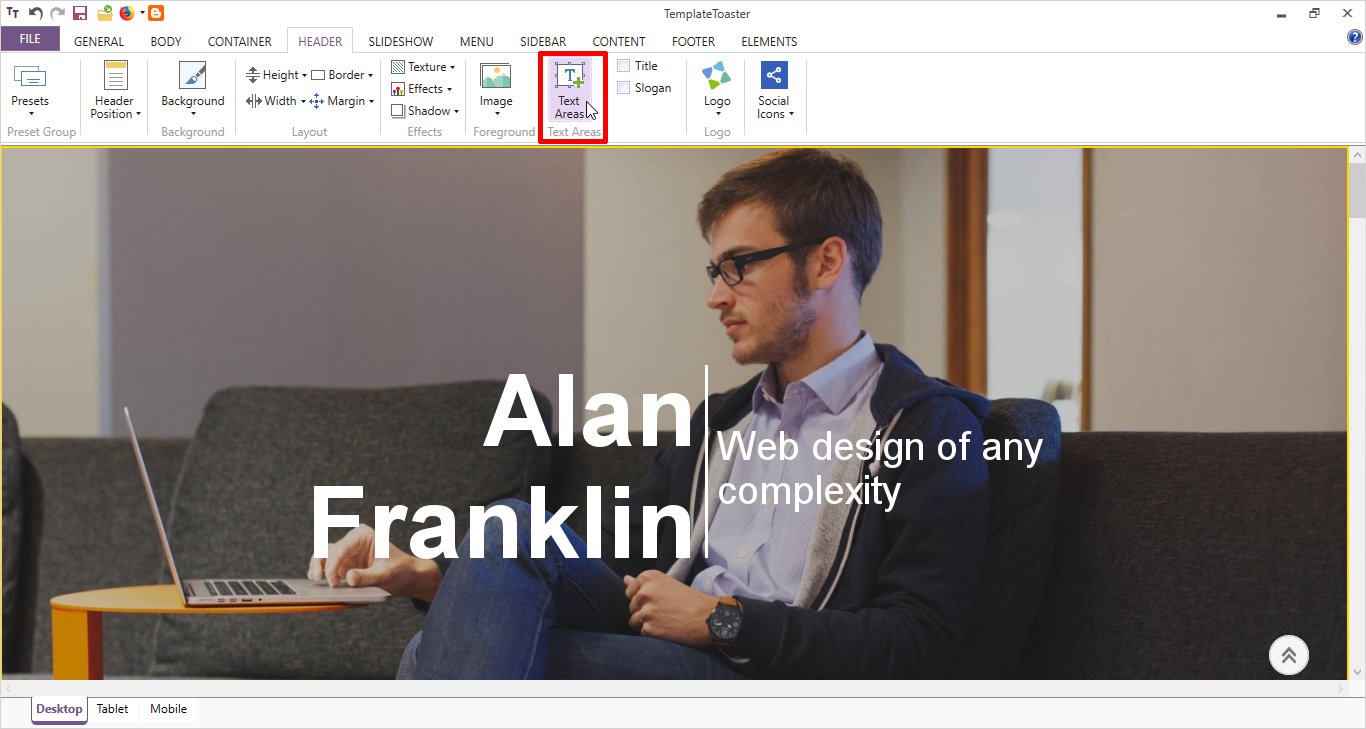
Draw a Textarea with the help of Text Areas option. Write the appropriate text here.
Step 4: Designing The Menu
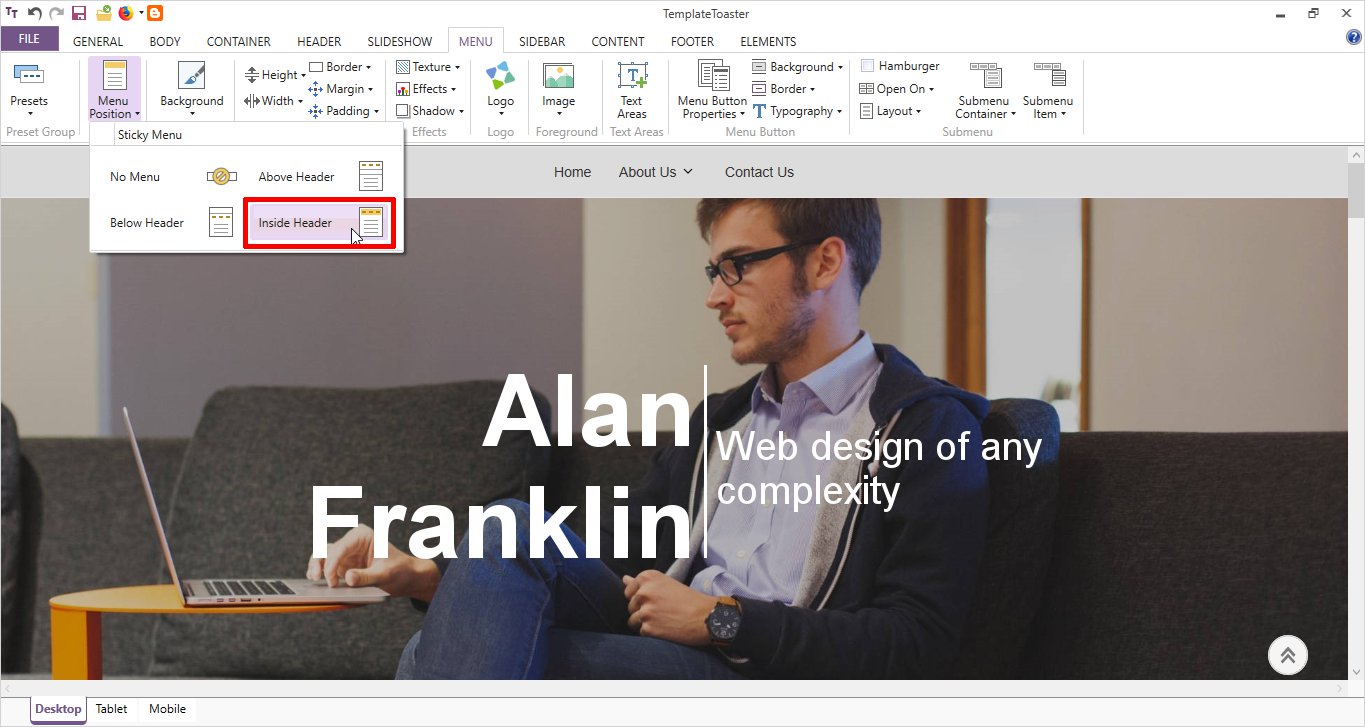
Specify the Menu Position with respect to the header.
Here, the Menu is placed Inside Header by selecting Inside Header option.
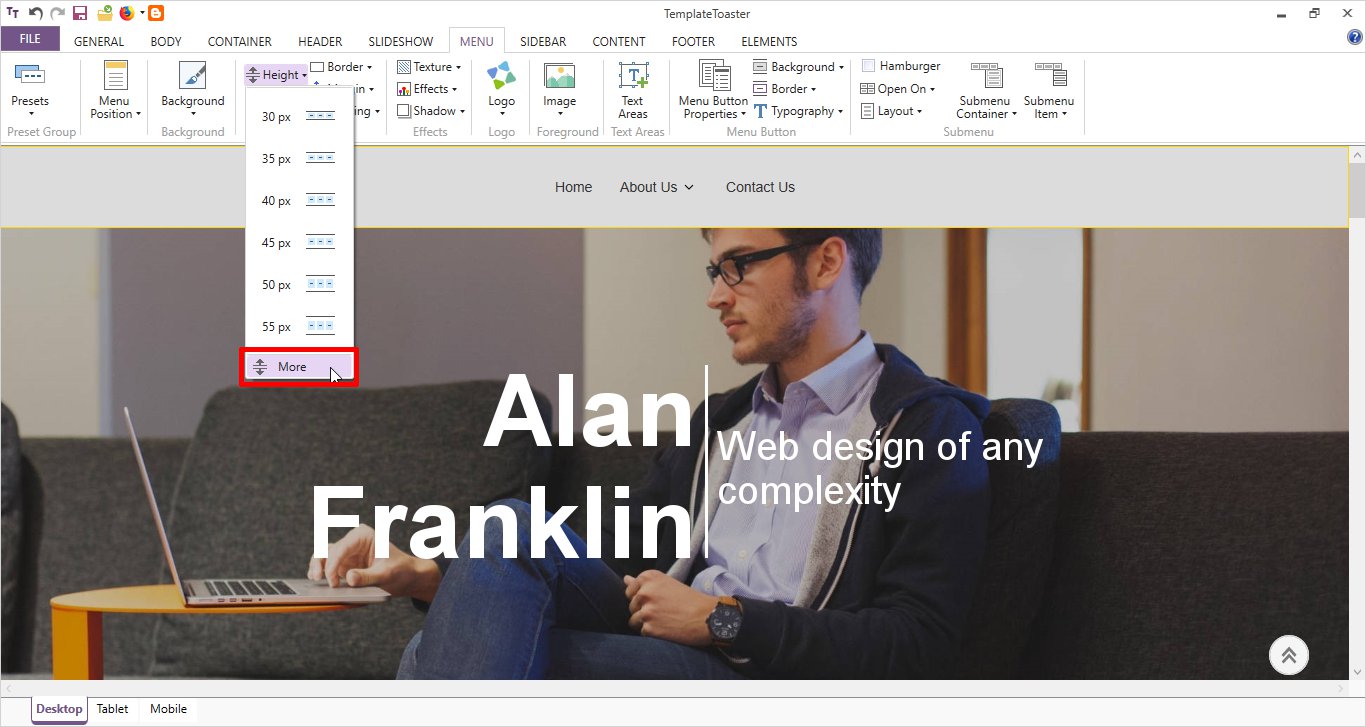
Set the Height of Menu. You can also specify a custom menu height.
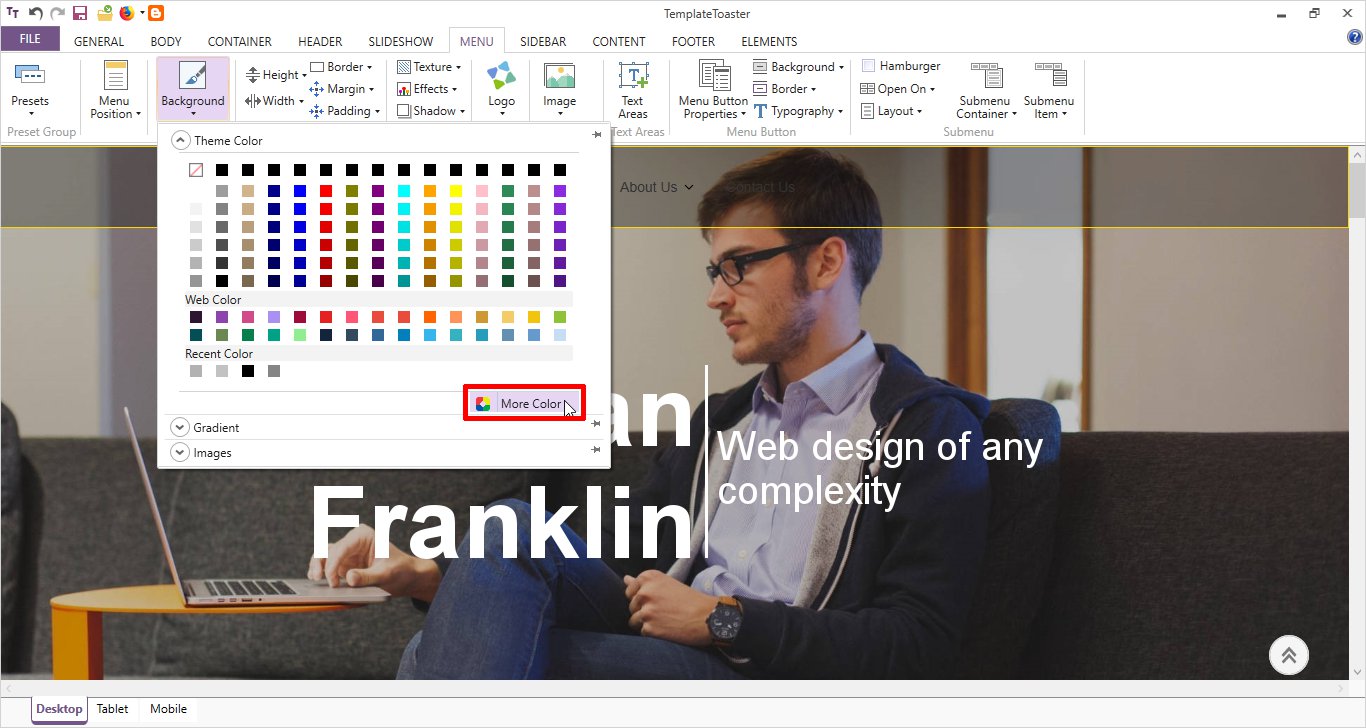
Set a Background color for the menu. You can also set a gradient or image. Even, you can make a custom color by specifying different brightness and opacity with More Color.
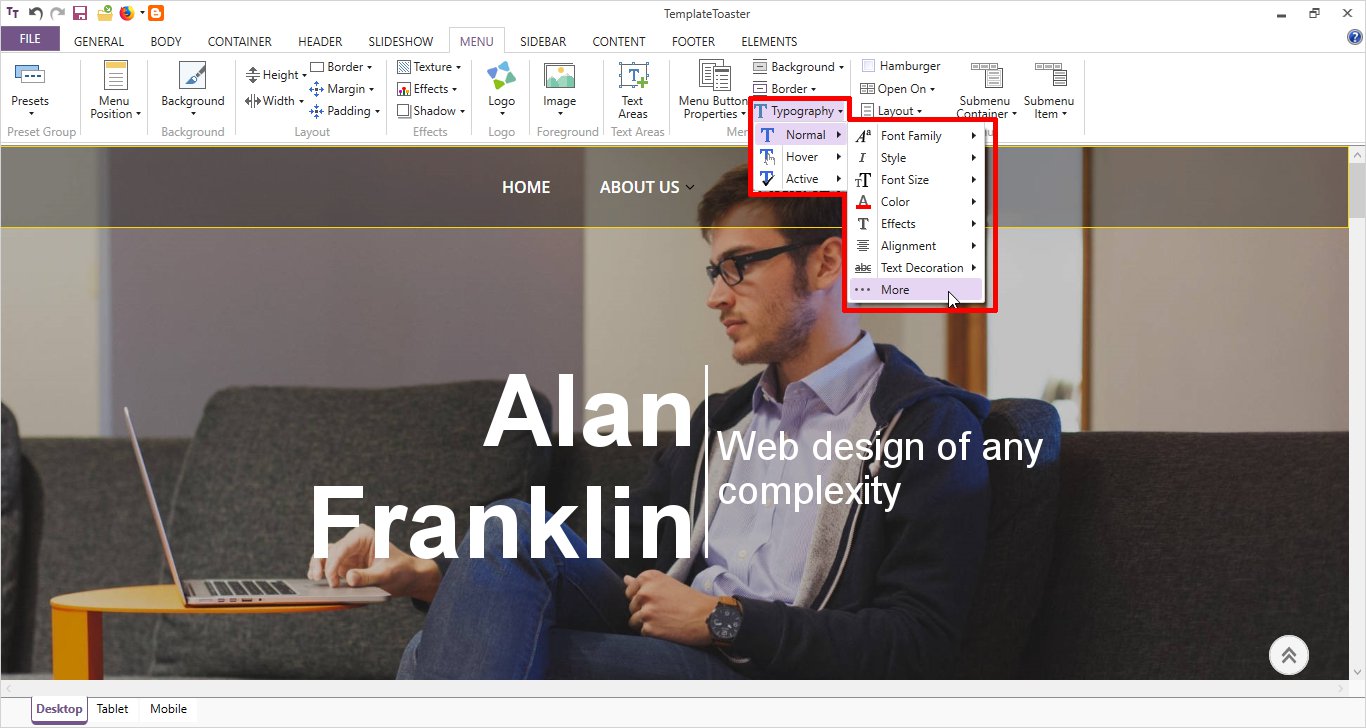
Set the Typography of menu items. Here, you have different options available as Font family, size, color, alignment etc. as shown below
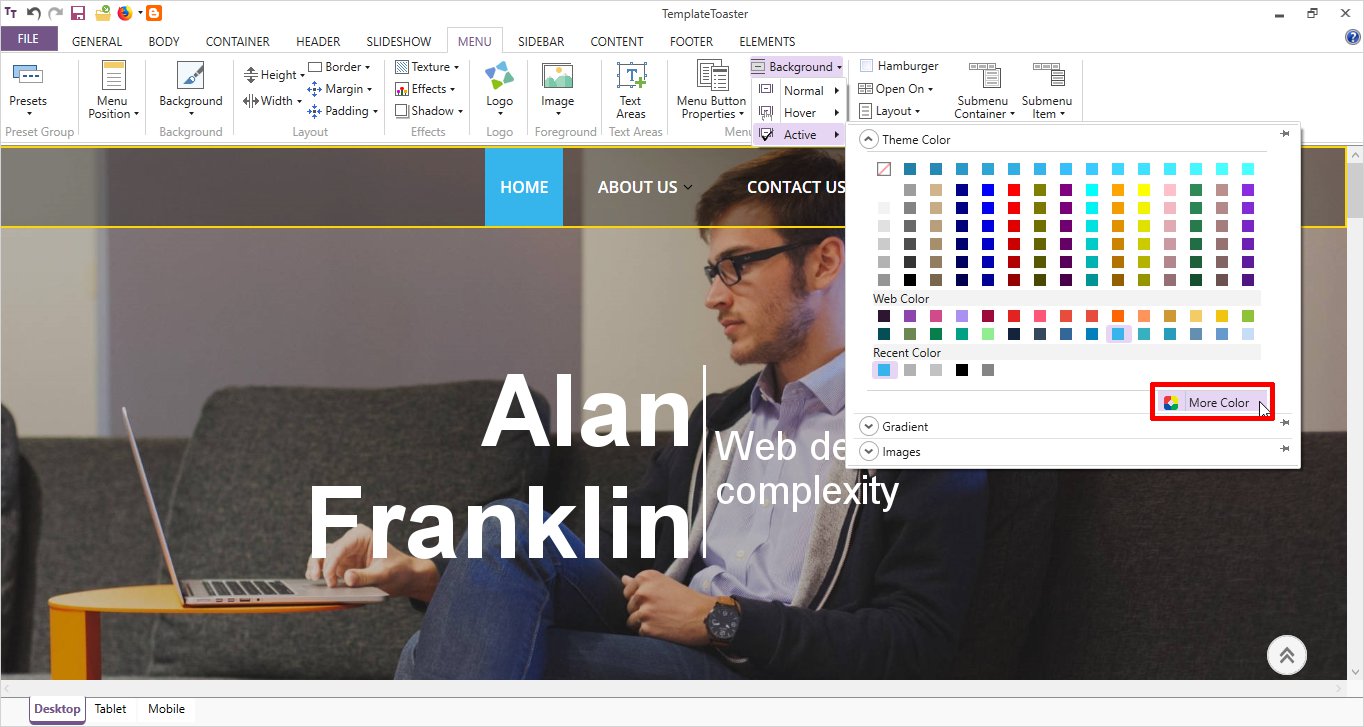
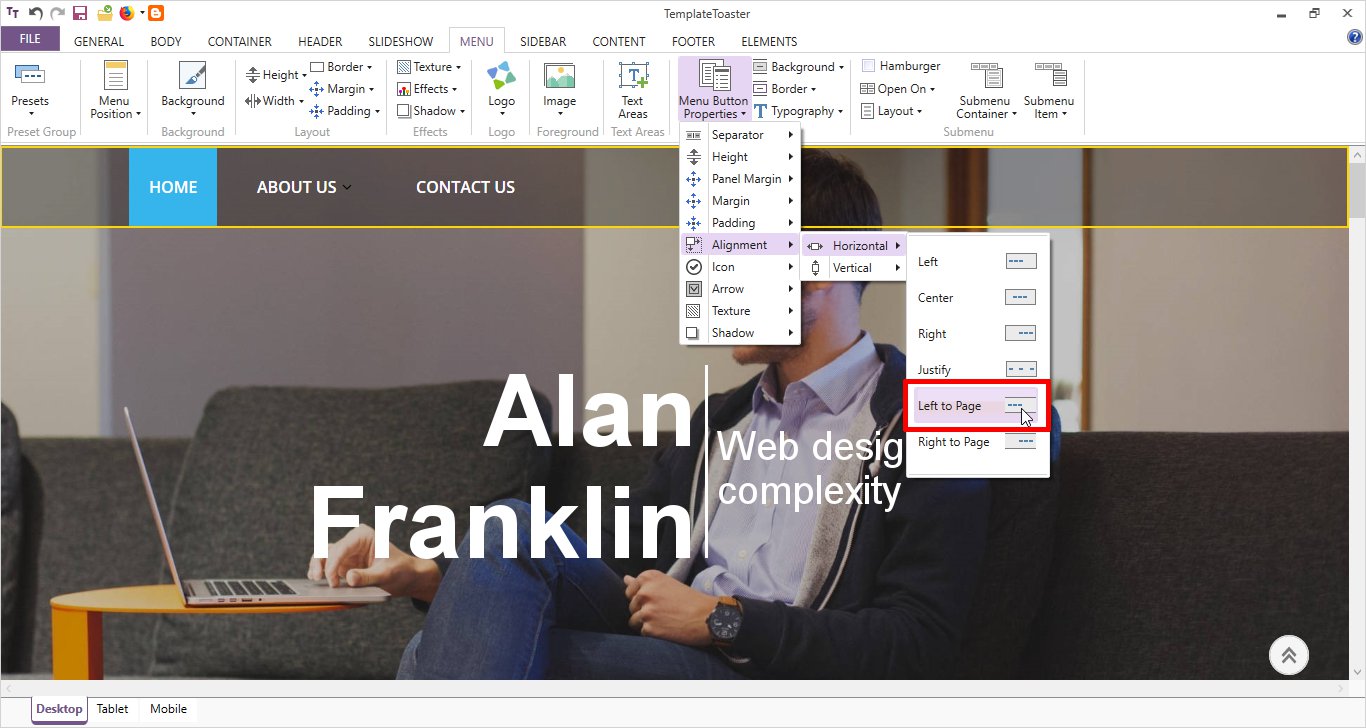
You can also set a different color on different states of a menu button. As below, with Menu Button Properties option, a background color is specified for Home menu button.
Finally, set the alignment of menu items by Menu Button Properties -> Alignment -> Horizontal -> Left to Page.
Step 5: Designing the Sidebar
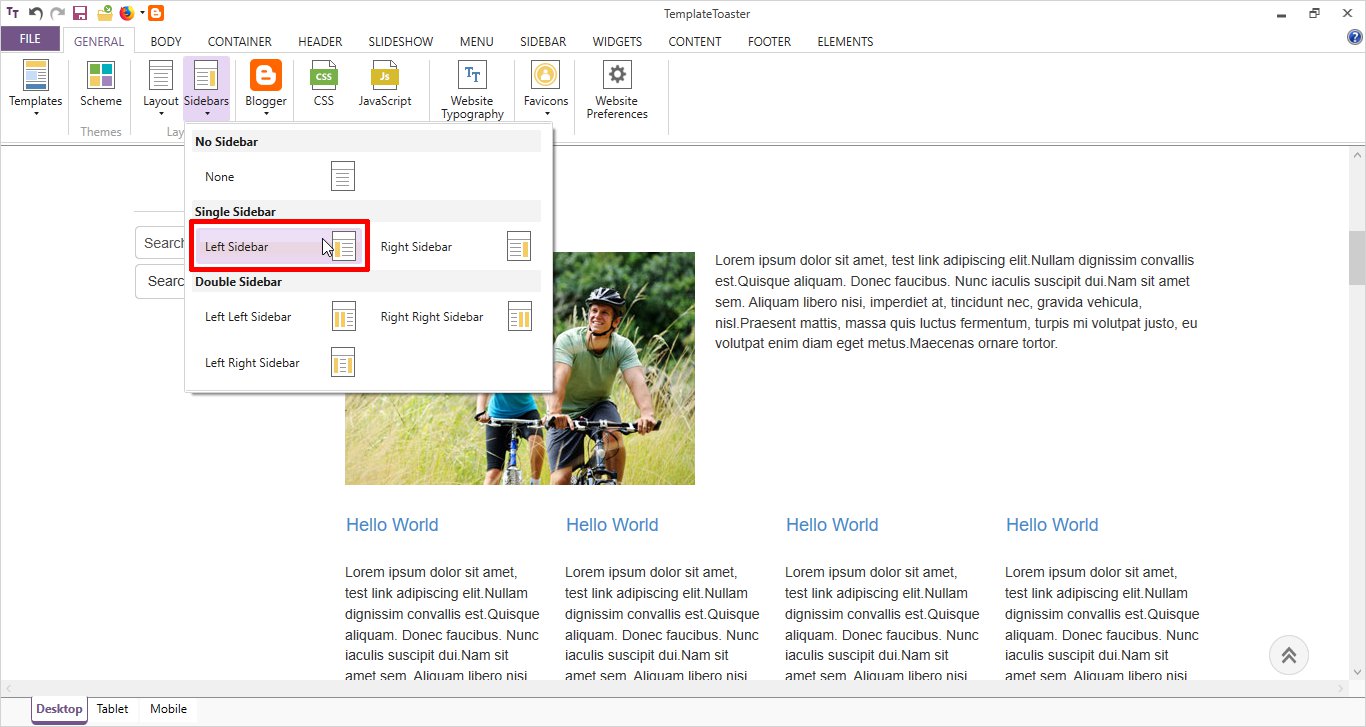
TemplateToaster gives you many options to apply left, right or both sidebars.
Here, a left sidebar for search is placed from sidebar tab.
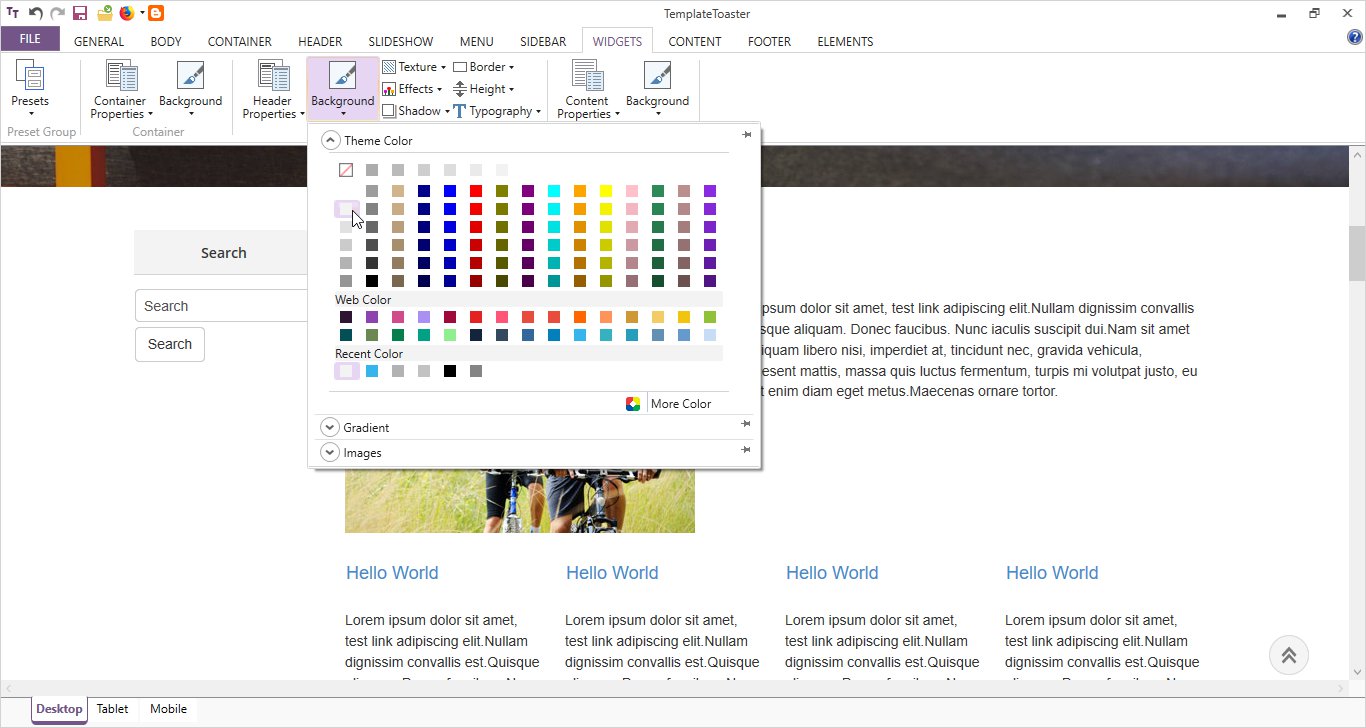
Set a background color for it. Rest of the work for adding widgets will be done after export.
Step 6: Designing the Content (Main Area)
Now for designing the content part, select the Content tab.
If you want to display metadata i.e information about the post like title, posted date, author, category etc., click Metadata → Show Metadata.
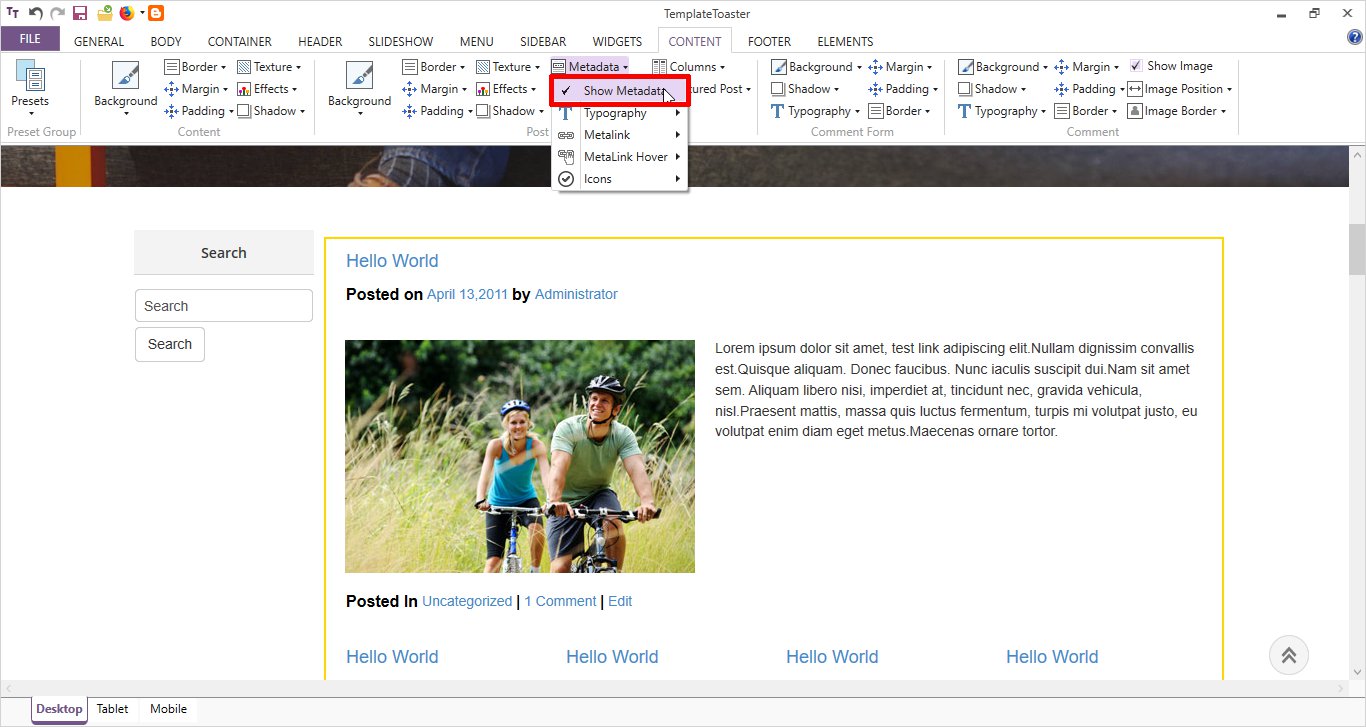
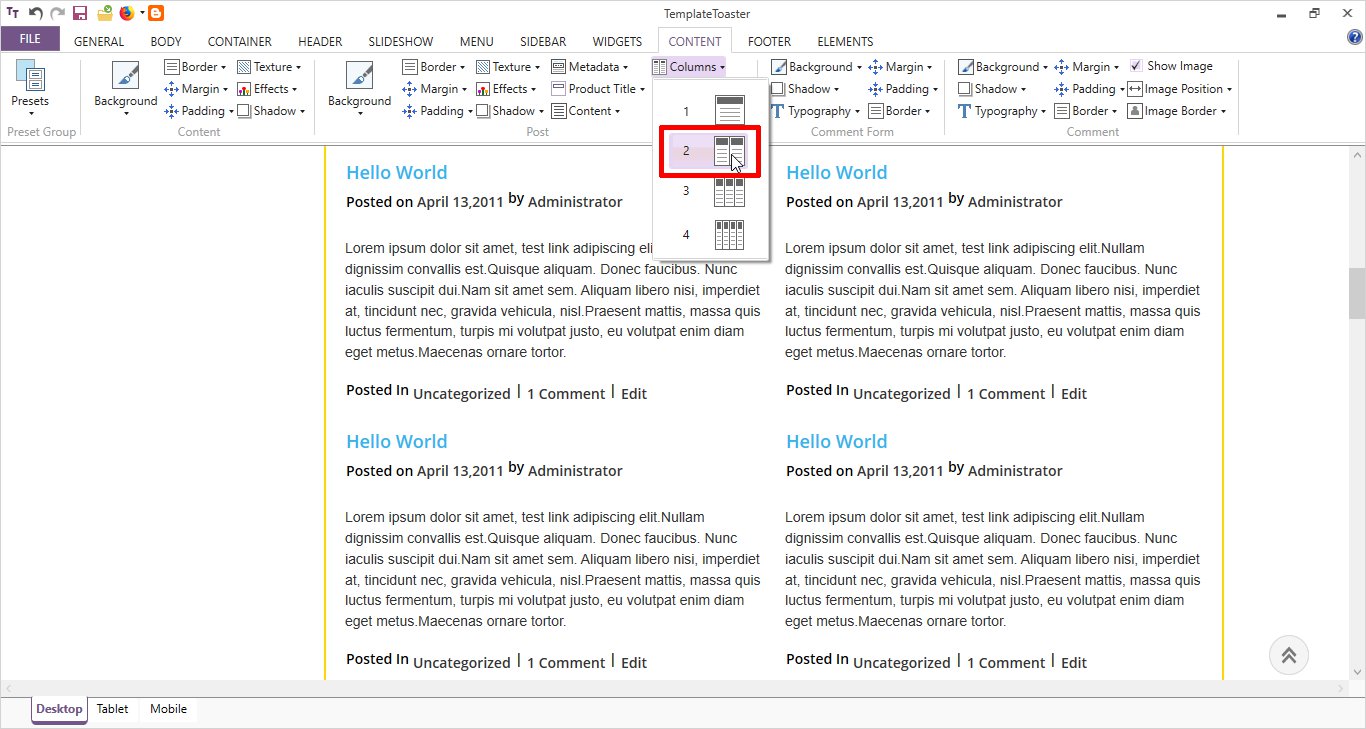
You can set the number of columns in the content area. For that, move to Columns option and select the suitable option. A two-column display is selected below.
Step 7: Designing the Footer
Finally, design the footer with Footer tab.
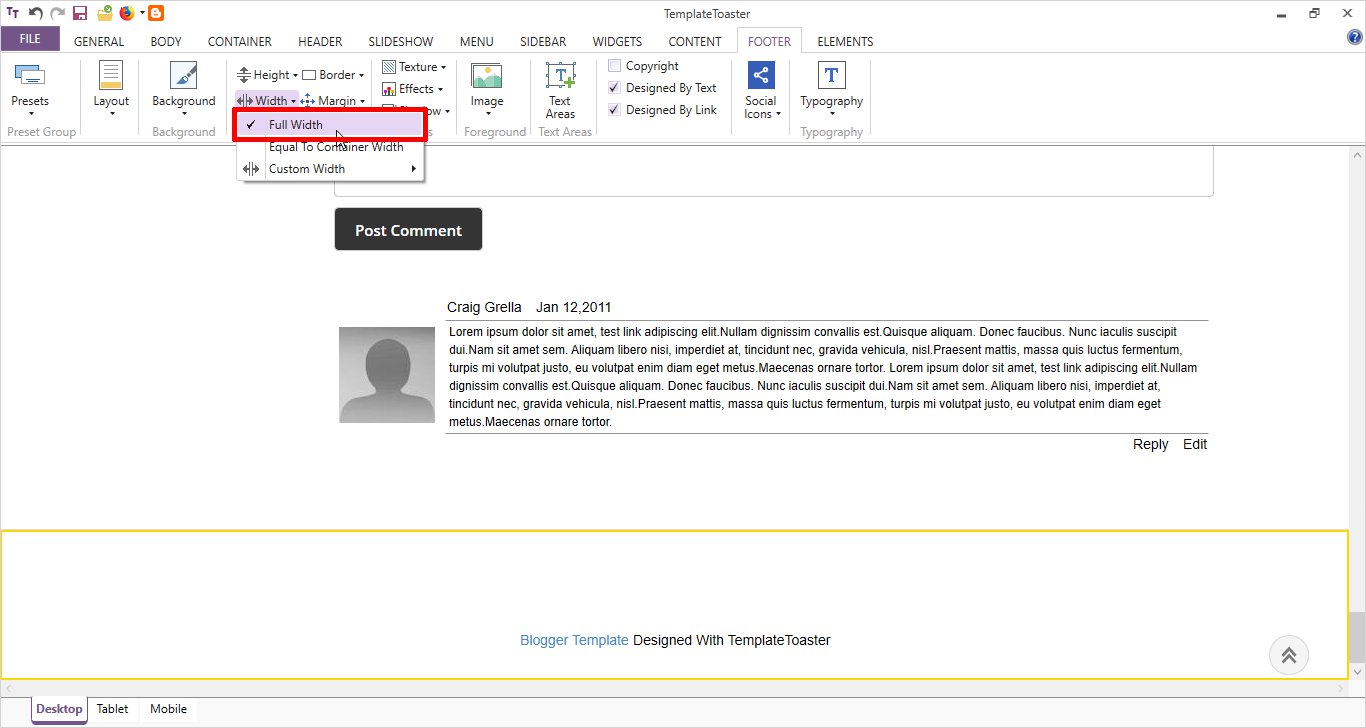
Set the width as Full width.
From Background option, apply a background color as shown below

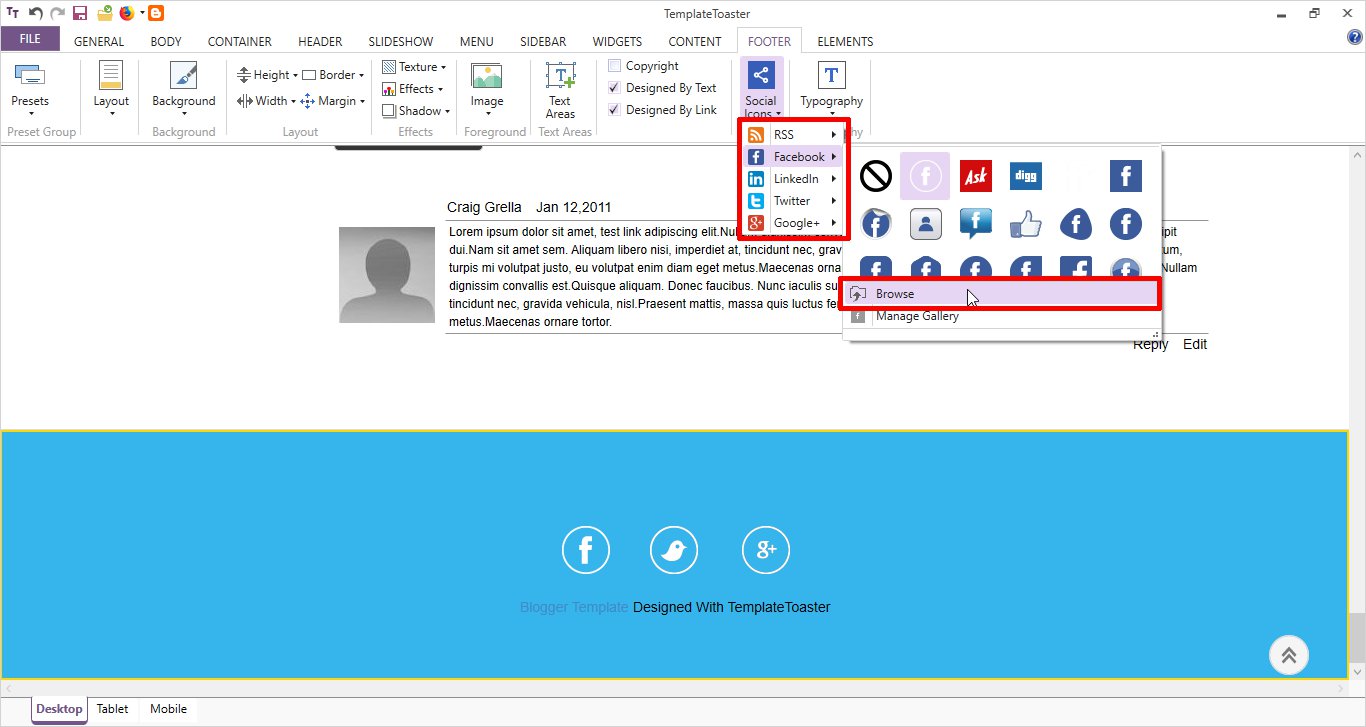
Place the social media icons from Social Icons option and link them to appropriate sites. You can select any icon from icon gallery that fits your design.
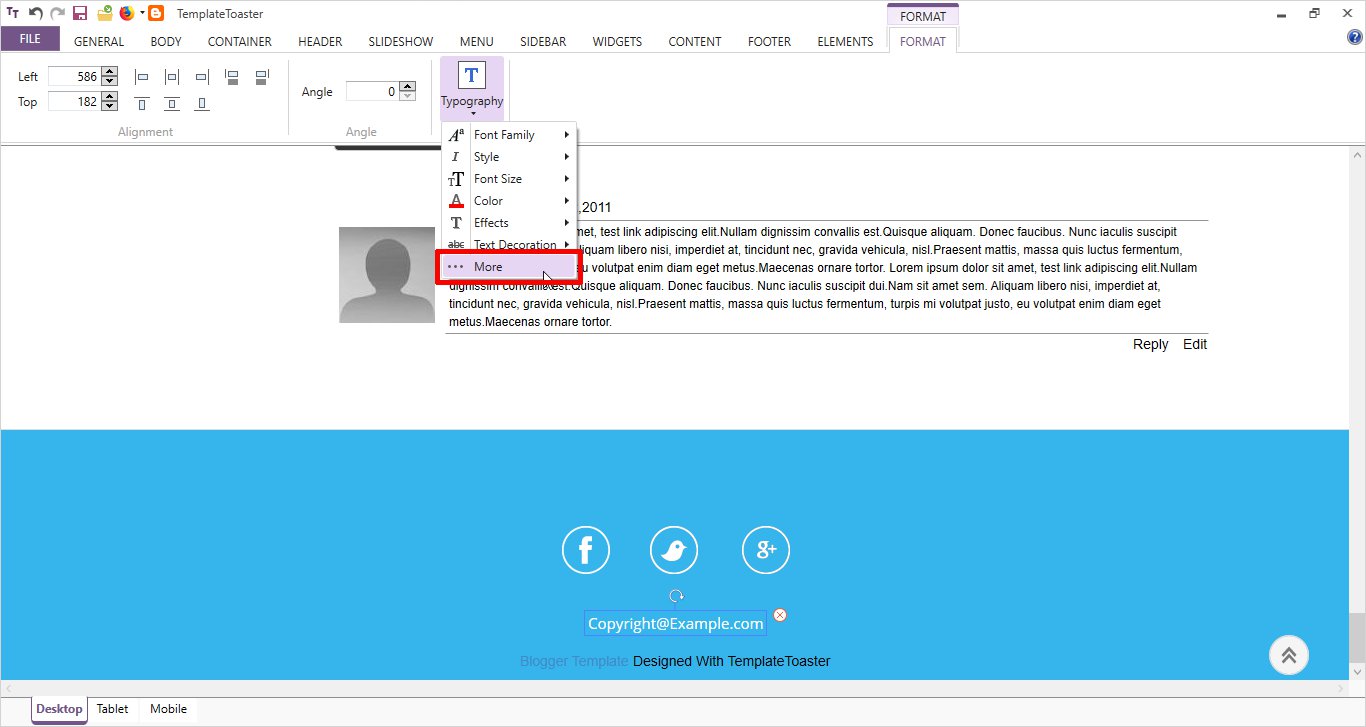
Now, double-click the copyright text to customize it. It will open a Format tab. From here, you can set alignment, angle or typography of text.
Step 8: Export the Template
Once you are ready with your template, export it. For that, select export option from Quick Toolbar. It is the last option in the rightmost place. You can also select Export option from File menu.
Once you click export, you will see an Export Blogger Theme dialog box. Write the folder name and path. Click Export button.

Now, a Google accounts dialog will open. Here, choose an existing account from the drop-down menu or add a new account name and click Save.

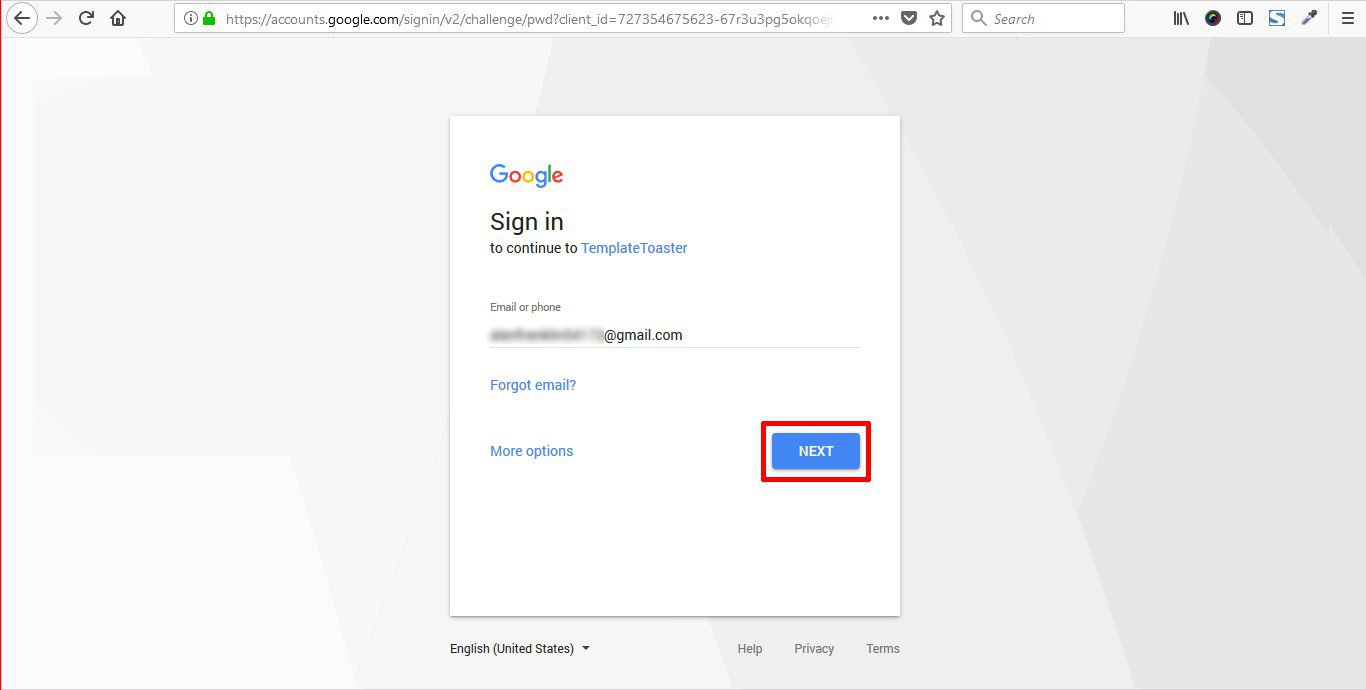
Now, it will redirect you to Google sign-in page. Here, give your email and click Next.
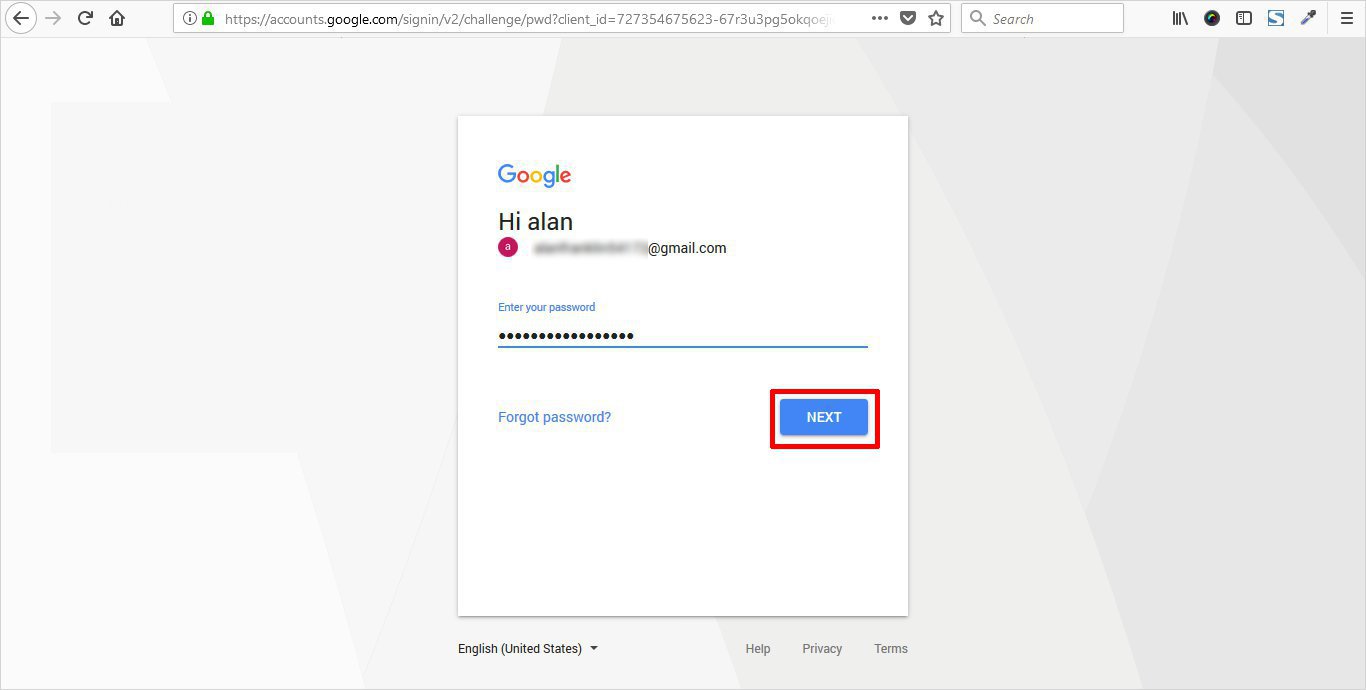
Enter the password and click Next.
Grant the permissions to TemplateToaster by clicking ALLOW.

You will be redirected to Blogger dashboard.
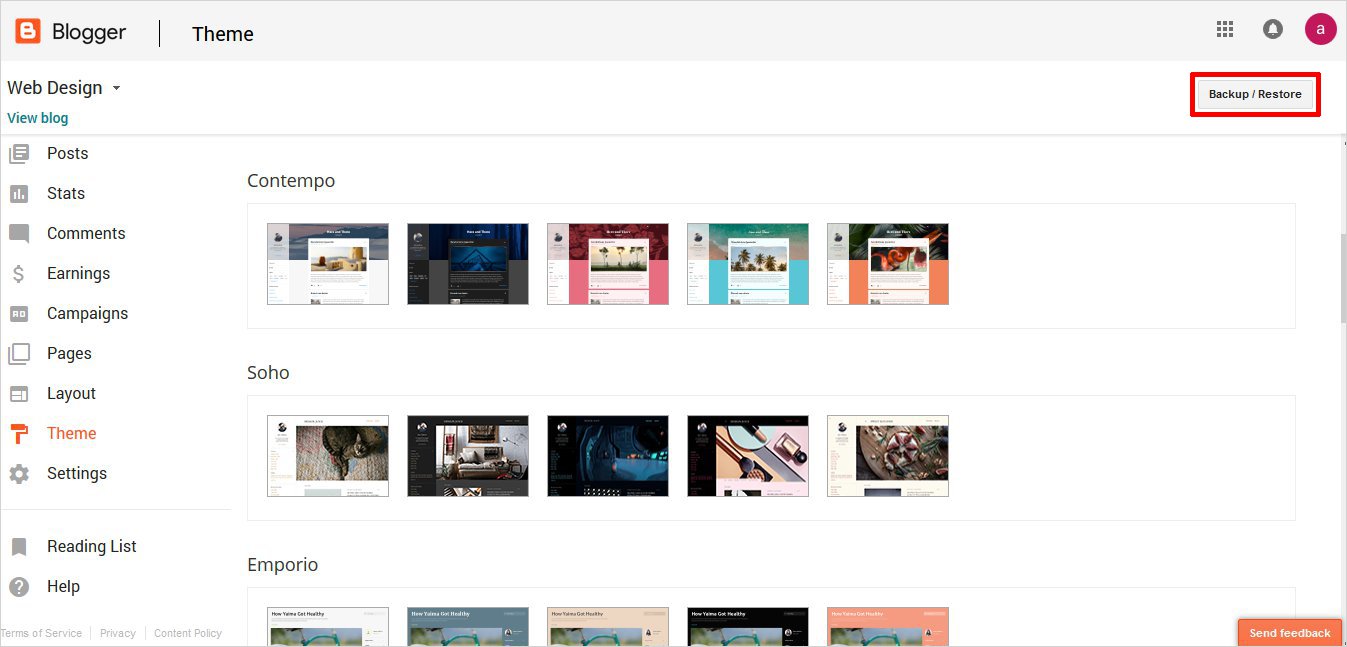
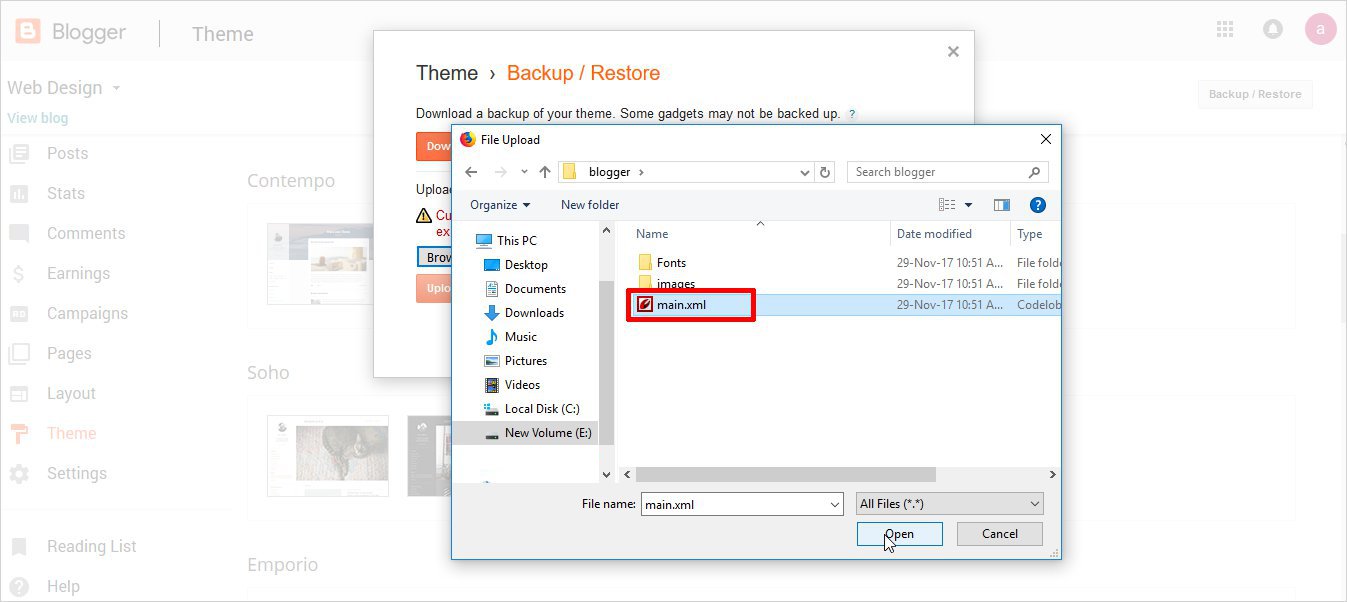
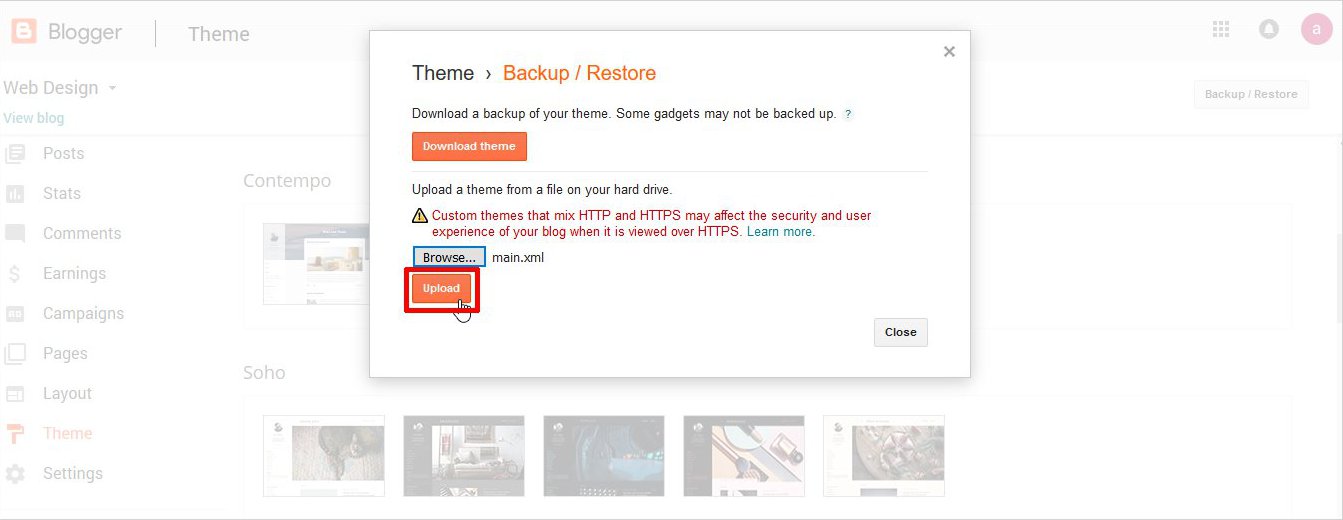
Now from left pane of the screen, go to Theme -> Backup/Restore. Upload your exported template file here by browsing.
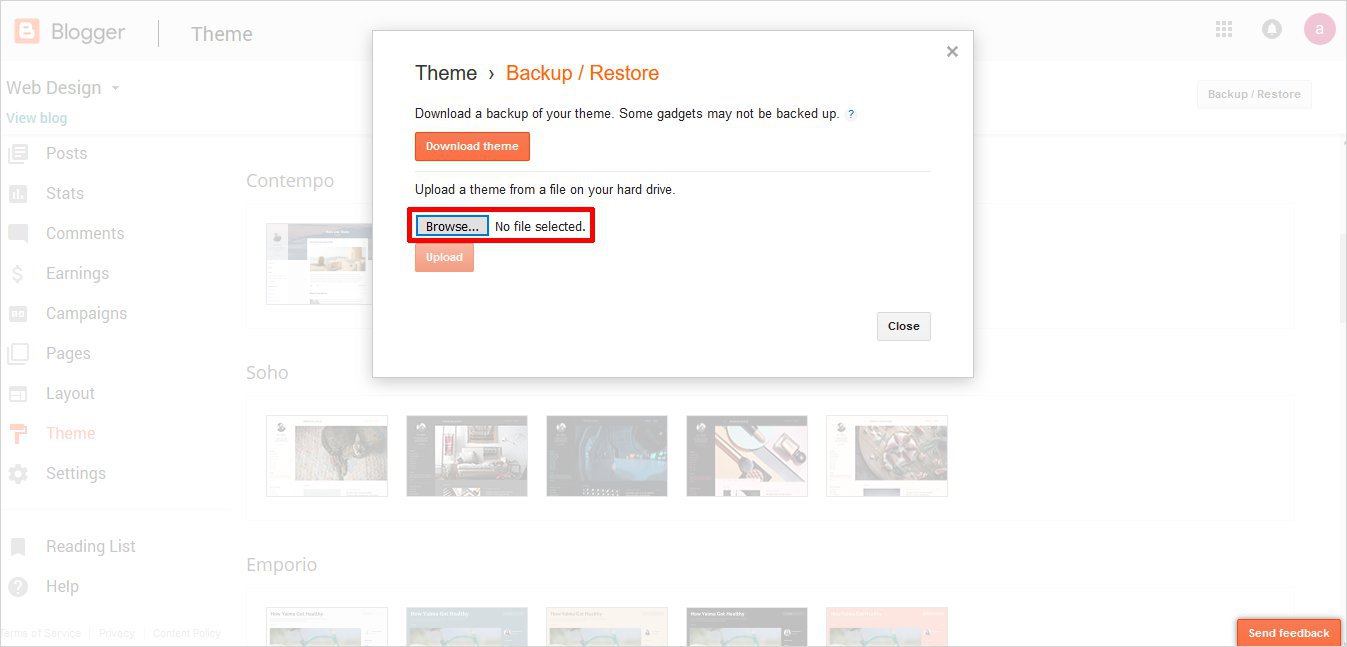
Select the template file by clicking Open.
Upload the template file.
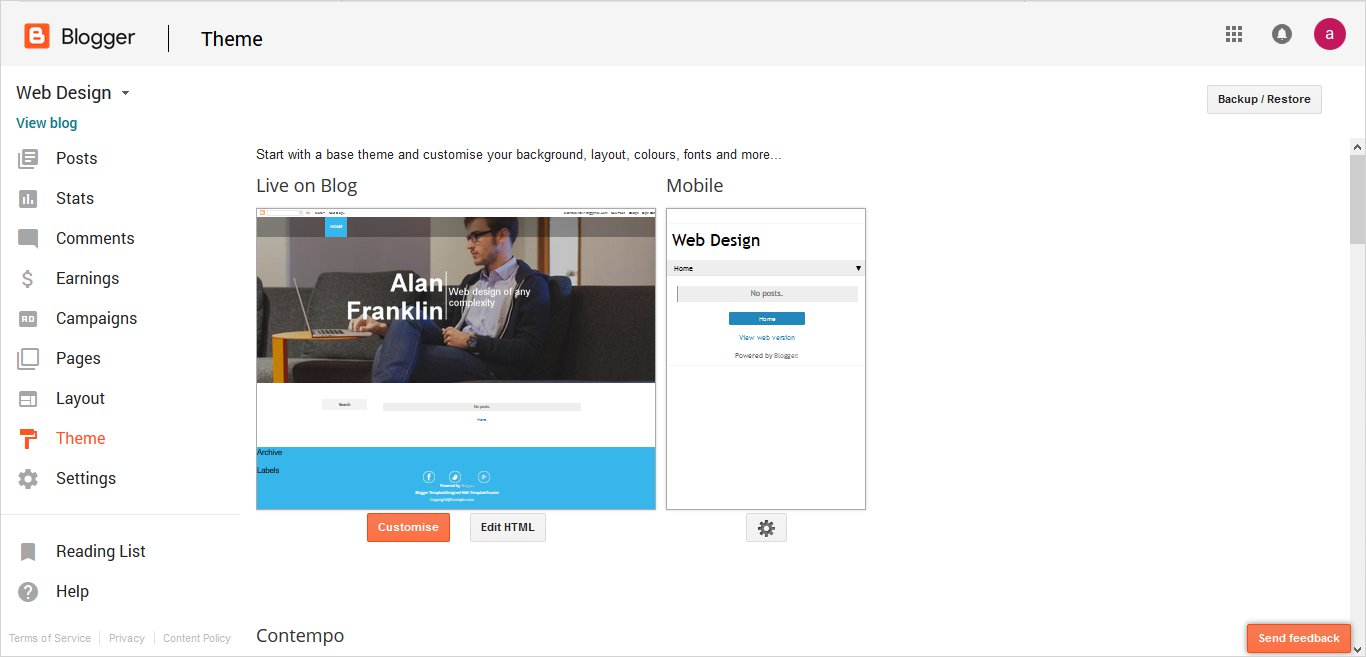
Now in the Theme section, you can see your own theme.
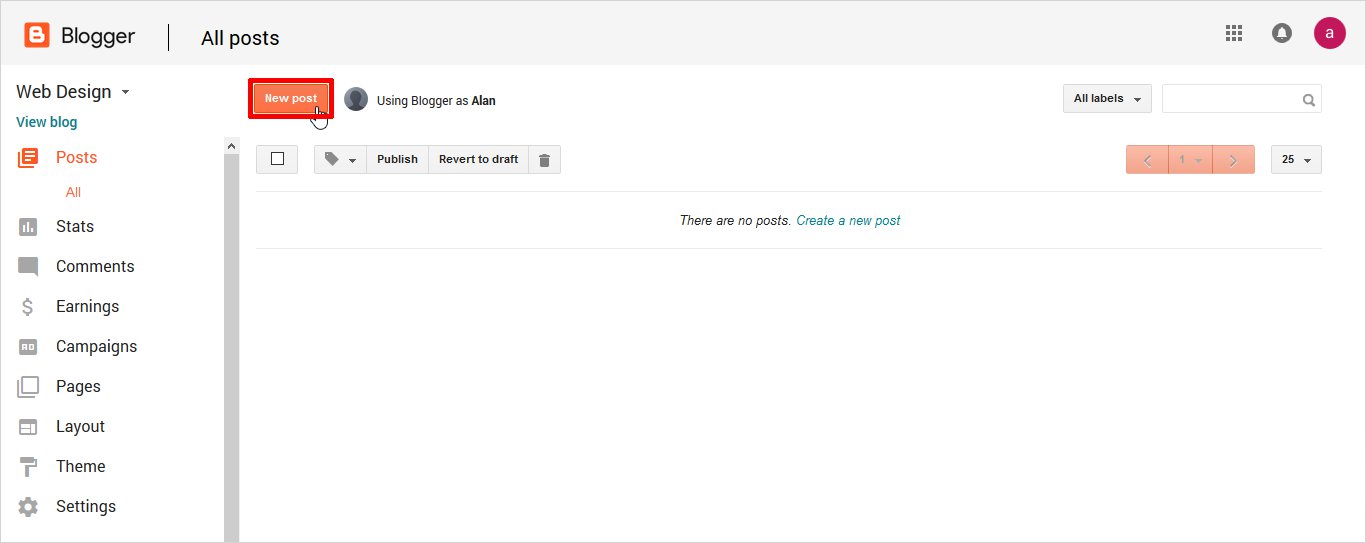
Go to Posts from the left pane of the screen as shown above.
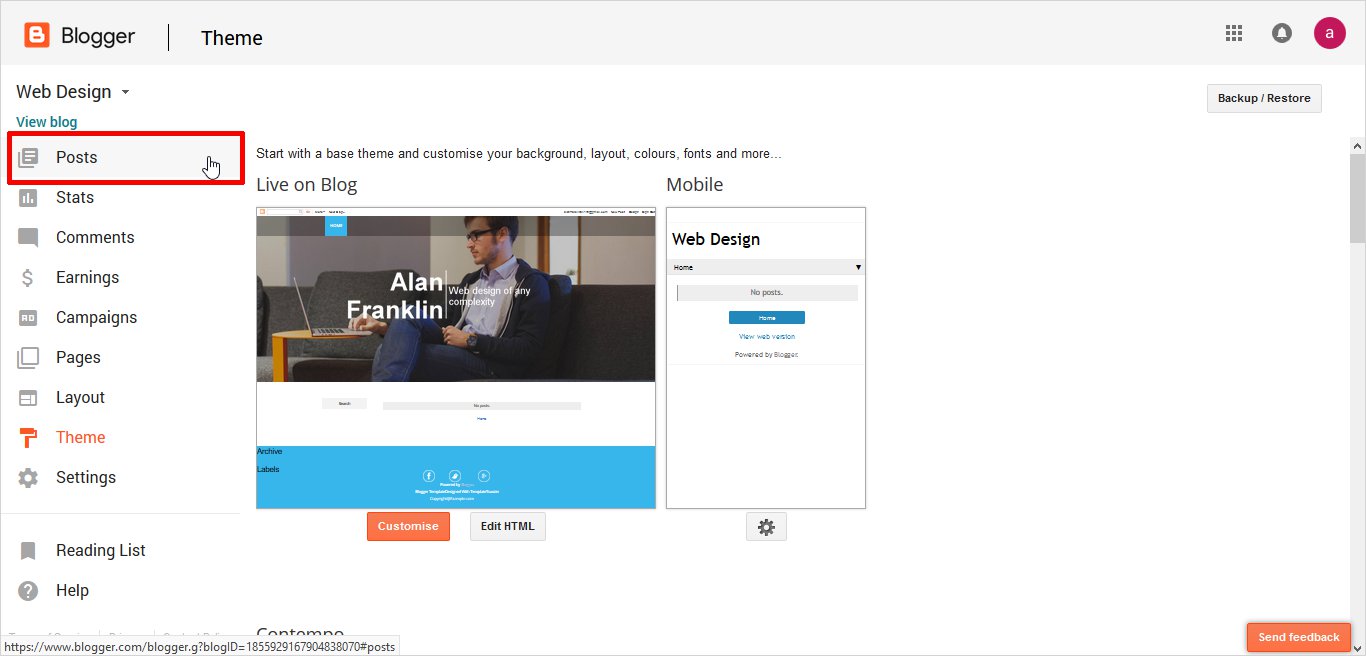
Navigate to New Post option to publish a new post.
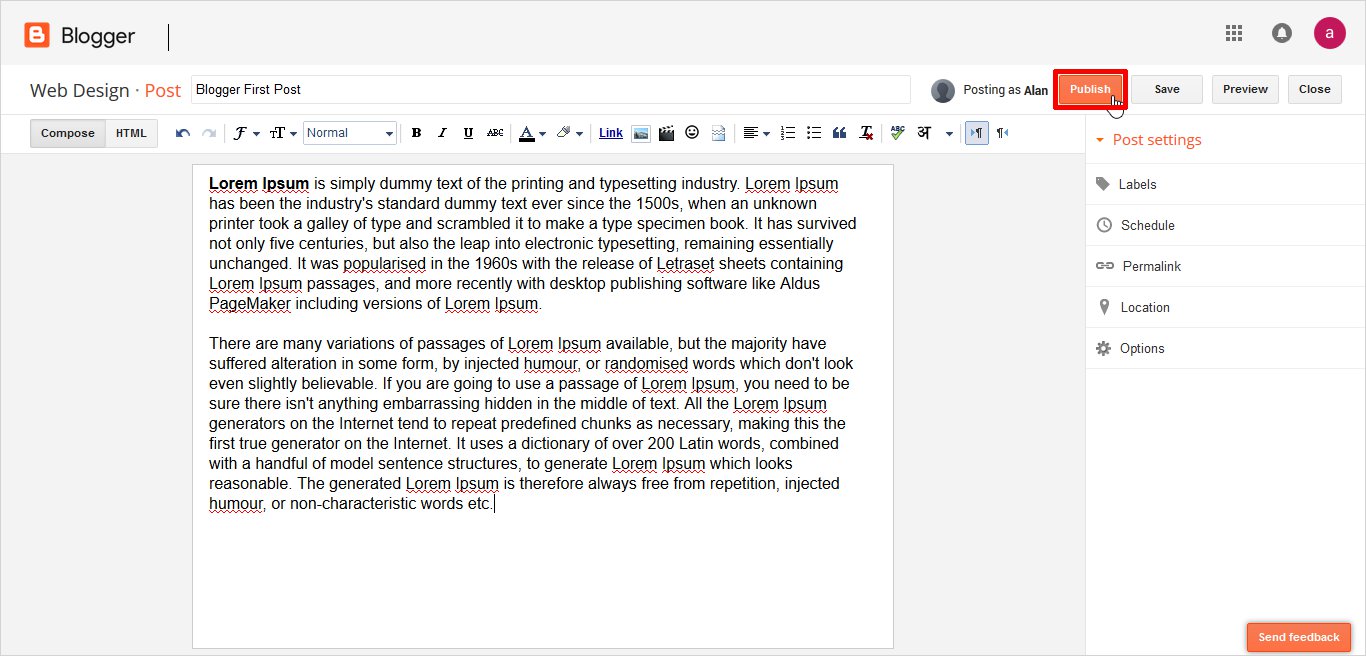
Once you draft your post in the blogger post editor, you can Publish it. Similarly, you can add more posts.
Now you will click the View Blog option to preview the blog page.
Adding Widgets in Sidebar
As you have added the posts, the only task remained is of adding widgets to the Sidebar.
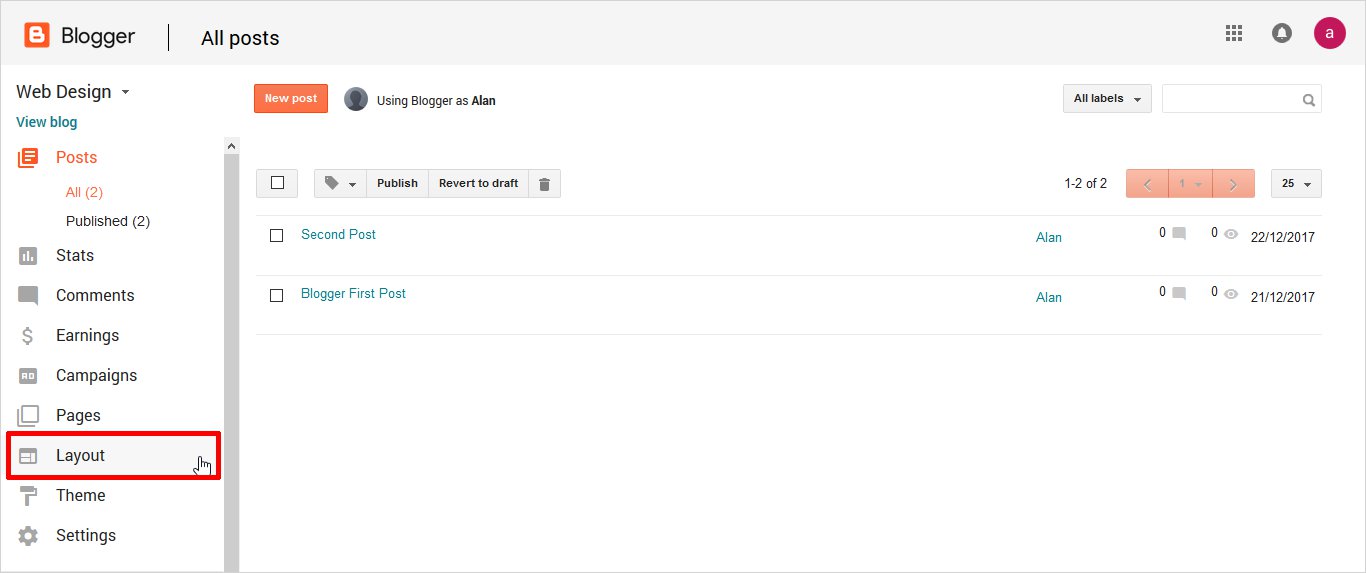
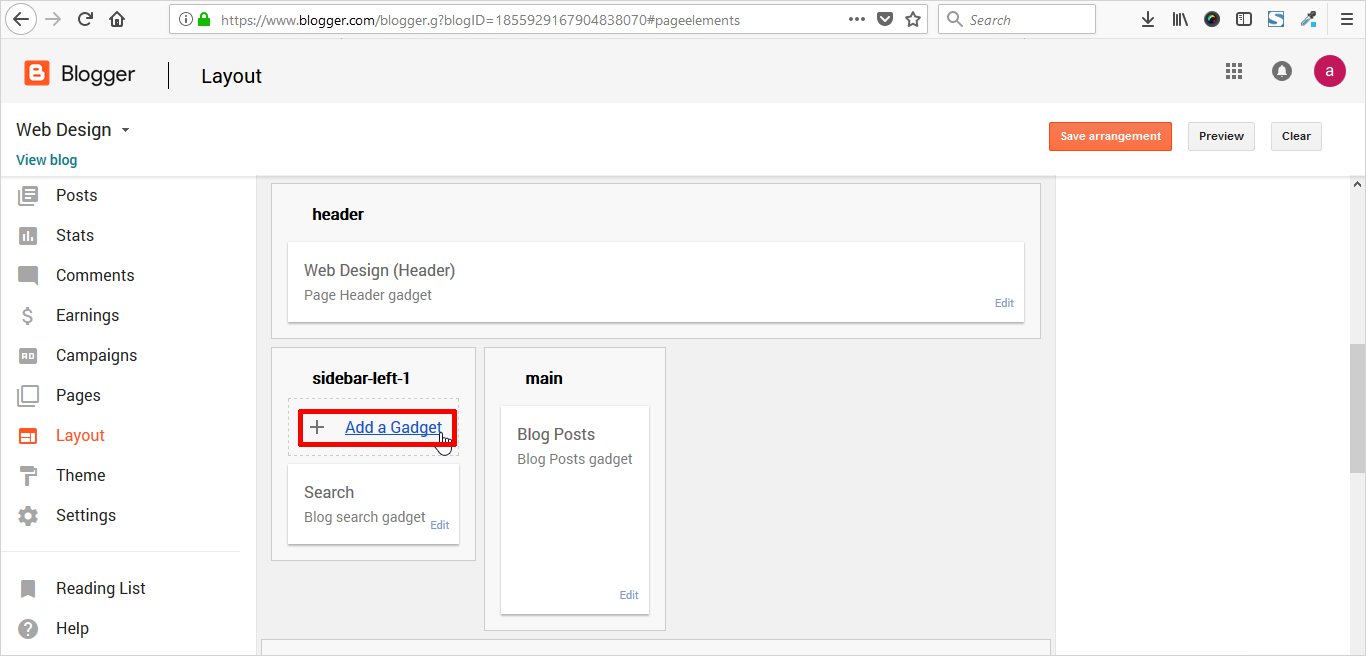
For that from left pane select Layout. It will open a layout window.
Click Add a Gadget in sidebar-left-1.
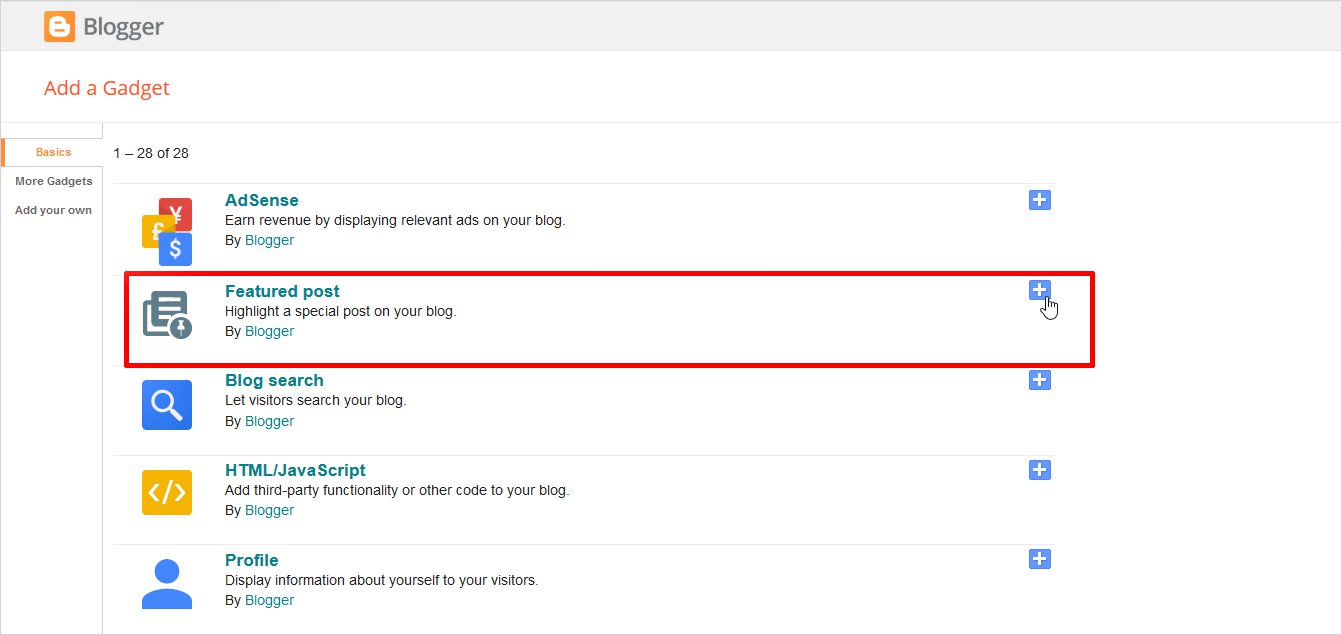
It will open a gadget list, you will add a Featured post from here.
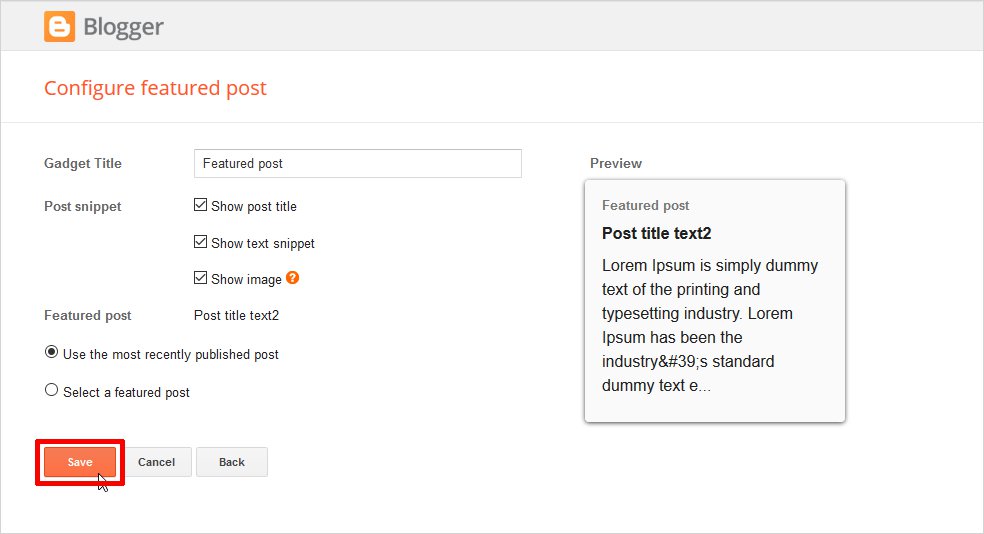
Now, you will configure featured post by adding different Post snippet. Check the snippets you want as shown above. Click Save.
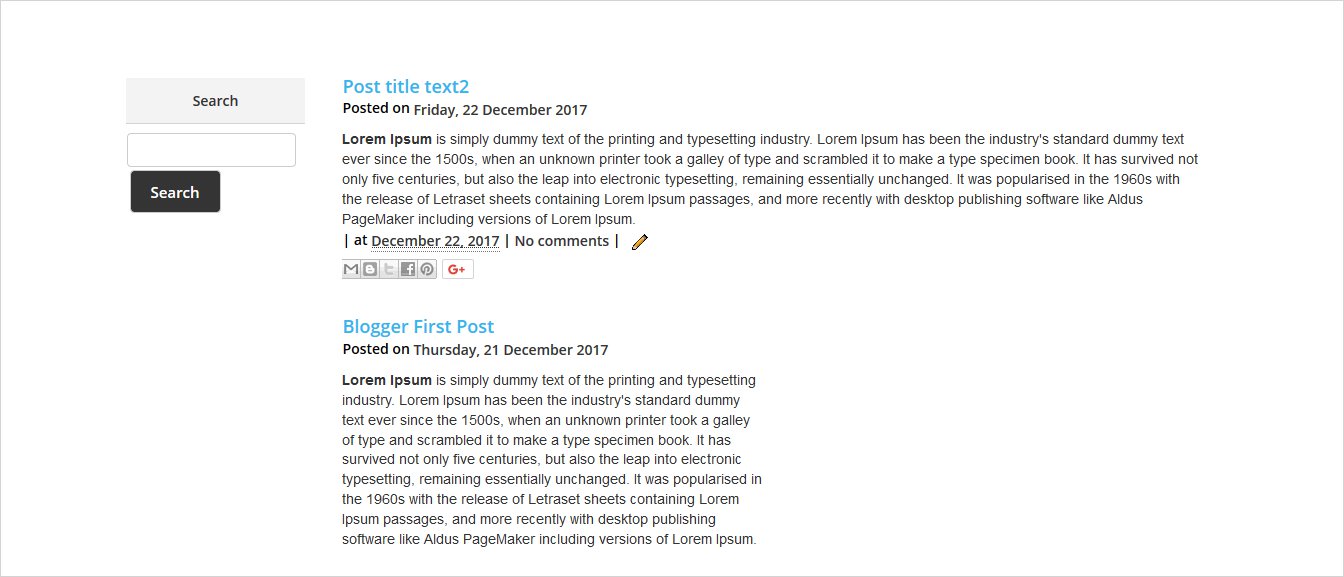
Now if you View Blog, it will print output with the featured post as shown.
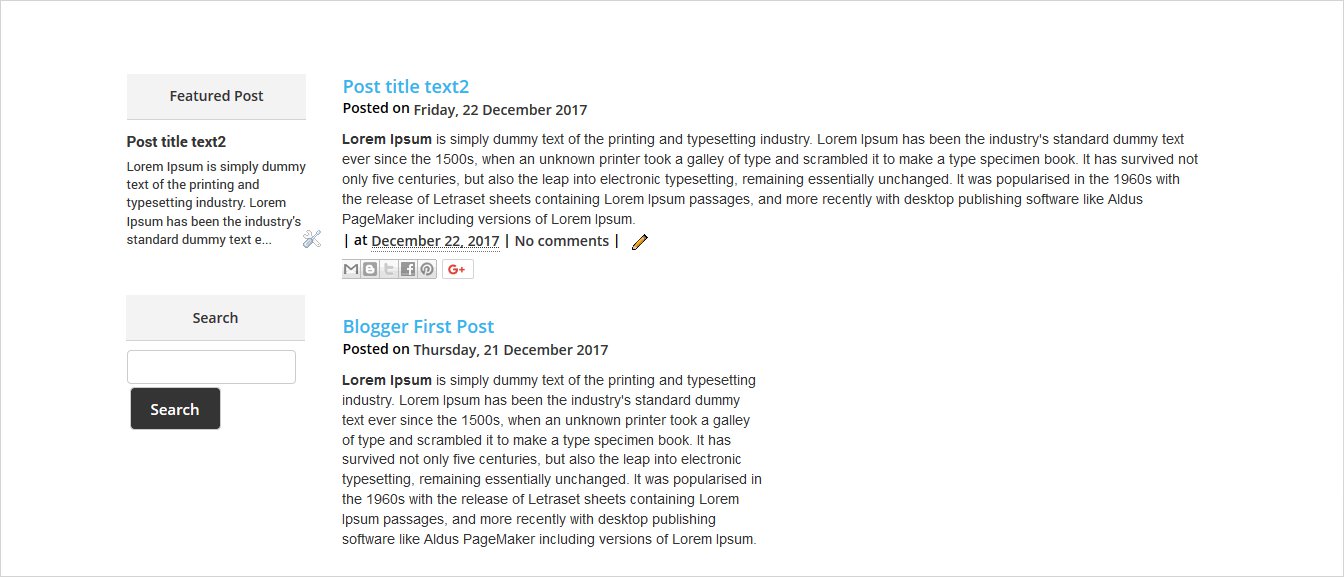
This is your final Blogger Template. It is really exciting as you create Blogger theme of your own. Isn’t it?

Which way you use to create blogger template ?
And, that’s a wrap. Hopefully, now you will be familiar with how to create a blogger template on your own. Creating a blogger template, requires you to have basic knowledge of coding and a sense of idea to design. In this guide, we have discussed two methods – manual and automated methods. While the manual one requires basic coding knowledge in HTML, CSS, and JavaScript. The latter one with the blogger template maker is a cinch! So, based upon your knowledge and skills you can choose the method that best fits you.
You can also check out Blogger login, Blogspot vs. Blogger and Blogger vs. WordPress. Also if you already have it, and want to Migrate Blogger to WordPress without losing backlinks you can easily do so.
Build a Stunning Website in Minutes with TemplateToaster Website Builder
Create Your Own Website Now
Great effort, I wish I saw it earlier.
awesome Thanks
This is really wonderful. I was looking for such a software, hopefully my search ends up with this.
wow nice website
Very Helpful Article it is by learning Template Toaster we are able to create our own blogger template
That’s wonderful
Outstanding . Thanks for this post .
Thanks
like
I liked this tutorial very much.
This is a great too totuorial, I started my blog years back using free template . But later on.. . I learned how to edit them and it makes sense now.Thanks for this.
How to make blogger theme 2019 amp template
Allgk.xyz
The tutorial from scratch is not complete, the message says it must be a skin in the template.
good
Thanks
thanks for sharing this information
Hi Param,
Thanks for sharing such a lovely article with easy tutorials.
hi
Thanks for sharing such a nice article
I am fond of writing a blog. Creating Customizable Greetings and blogs writing it’s my passion. Marvellous posting. Thanks….
That’s awesome. My first ever created template is the one am using on my website
I will check out TemplateToaster builder too.
Thank you 🙂 Regards
Thanks for sharing this content.
Very useful article
Build your own personal branded website in simple easy steps
For creating blogs blogger template is necessary?
Great post! Quick question how to get seo friendly content for website?
Please also explain the manual blogger theme creation process in more detail.