How to Create OpenCart Theme: Tutorial for Beginners
Who do you count on when you struggle with the code while creating your OpenCart theme? If you are not sure about your answer then read this post to know the reliable means to create OpenCart Theme. I am sure by the end of this post you will have a clear vision and a definite choice to fit that last piece of puzzle right.
It can be an intimidating experience to create OpenCart theme from scratch with all the latest functionalities if you are not so fluent in its technicalities. And if you are seeking a powerful solution to fuel your skills, then without losing another second just run through the post and this will most likely be the best learning experience for you.
This post explains how easily you can create OpenCart theme. And gives you broader prospect to view possible solutions to decide how you should move to get your OpenCart website up. Here at Templatetoaster offline website builder software, showcases a quick preview.
However, if you are a pro and thinking what new can I tell, then you have to be a little patient to know about the solutions I have come up with.
I am here with the two tried and tested methods to create OpenCart theme from scratch. The first method is do it yourself by handcoding. You need to code to create your theme. Whereas, if you wish to use the below given code, you’re free to do that as well. Copy and paste, and you will have a very basic OpenCart theme, simple!
As we know that coding requires some intermediate knowledge of HTML, CSS, JavaScript, and PHP, so you need to have these skills to create OpenCart theme. And I assume if you are going to code all by yourself then you definitely possess the required knowledge.
So, here we go with our first method…
1. Manual Method (Code to Create OpenCart Theme)
Step 1: Create OpenCart Installation Directory
To create OpenCart theme from scratch the very first thing you need to do is to create theme folder with OpenCart installation directory.
Opencart installation directory  catalog view theme create your theme folder for example customtheme
Step 2: Create Images & Stylesheet Directory
- Create images and stylesheet directories within theme folder, these are some basic and necessary directories for the theme.
- Now create a template folder under the theme directory to store your files.
- OpenCart installation folder:
- Catalog > View > Theme > Your theme folder
- Images
- Stylesheet
- Template
- JavaScript
- Catalog > View > Theme > Your theme folder
- OpenCart saves all the template files under “.tpl” extension. And all the files will be stored under your template folder only.
- Images folder consists of all the images used in the theme.
- Stylesheet folder consists your theme stylesheet file.
- All the JavaScript related files are placed in the JavaScript directory.
Step 3: Organize Template Folder Structure
Now you have to organize the Template folder structure. All the template files are organized in a modular way in order to keep things separate. Some of the template sub-directories are as follows:
- Common:- Directory consists of the template files which are common for different pages of the website like Header, Footer, Home Page, Sidebar, Search etc.
- Error:- This directory contains the error file. In case any template file not found or an error occurs on the site.
- Information:- It consists of the template file related to site information, sitemap, contact etc.
Step 4: Customize Home Page Template
Customizing Home Page Template:
Go to your theme folder templates Common home.tpl
You can create your HomePage layout in the home.tpl file as per your requirement.
<?php echo $header; ?>
        <div class="container">
        <div class="row"><?php echo $column_left; ?>
        <?php if ($column_left && $column_right) { ?>
        <?php $class = 'col-sm-6'; ?>
        <?php } elseif ($column_left || $column_right) { ?>
        <?php $class = 'col-sm-9'; ?>
        <?php } else { ?>
        <?php $class = 'col-sm-12'; ?>
        <?php } ?>
        <div id="content" class="<?php echo $class; ?>"><?php echo $content_top; ?>
        <?php echo $content_bottom; ?></div>
        <?php echo $column_right; ?></div>
        </div>
        <?php echo $footer; ?>
Here, you can easily remove or modify sidebars i.e column right or left according to your layout and can also modify container HTML.
Moreover, to embed custom style and JavaScript file, you can add them in the header.tpl file.
Go to your theme folder templates Common header.tpl
<!DOCTYPE html>
        <!--[if IE]><![endif]-->
        <!--[if IE 8 ]>
        <html dir="<?php echo $direction; ?>" lang="<?php echo $lang; ?>" class="ie8">
        <![endif]-->
        <!--[if IE 9 ]>
        <html dir="<?php echo $direction; ?>" lang="<?php echo $lang; ?>" class="ie9">
        <![endif]-->
        <!--[if (gt IE 9)|!(IE)]><!-->
        <html dir="<?php echo $direction; ?>" lang="<?php echo $lang; ?>">
        <!--<![endif]-->
        <head>
        <meta charset="UTF-8" />
        <meta name="viewport" content="width=device-width, initial-scale=1">
        <meta http-equiv="X-UA-Compatible" content="IE=edge">
        <title><?php echo $title; ?></title>
        <base href="<?php echo $base; ?>" />
        <?php if ($description) { ?>
        <meta name="description" content="<?php echo $description; ?>" />
        <?php } ?>
        <?php if ($keywords) { ?>
        <meta name="keywords" content= "<?php echo $keywords; ?>" />
        <?php } ?>
        <script src="catalog/view/javascript/jquery/jquery-2.1.1.min.js" type="text/javascript"></script>
        <link href="catalog/view/javascript/bootstrap/css/bootstrap.min.css" rel="stylesheet" media="screen" />
        <script src="catalog/view/javascript/bootstrap/js/bootstrap.min.js" type="text/javascript"></script>
        <link href="catalog/view/theme/customtheme/stylesheet/stylesheet.css" rel="stylesheet"/>
        <link href="catalog/view/javascript/font-awesome/css/font-awesome.min.css" rel="stylesheet" type="text/css" />
        <link href="//fonts.googleapis.com/css?family=Open+Sans:400,400i,300,700" rel="stylesheet" type="text/css" />

        <?php foreach ($styles as $style) { ?>
        <link href="<?php echo $style['href']; ?>" type="text/css" rel="<?php echo $style['rel']; ?>" media="<?php echo $style['media']; ?>" />
        <?php } ?>
        <script src="catalog/view/javascript/common.js" type="text/javascript"></script>
        <?php foreach ($links as $link) { ?>
        <link href="<?php echo $link['href']; ?>" rel="<?php echo $link['rel']; ?>" />
        <?php } ?>
        <?php foreach ($scripts as $script) { ?>
        <script src="<?php echo $script; ?>" type="text/javascript"></script>
        <?php } ?>
        <?php foreach ($analytics as $analytic) { ?>
        <?php echo $analytic; ?>
        <?php } ?>
        </head>
Step 5: Menu Navigation
This code will help you create menu.
<body class="<?php echo $class; ?>">
        <nav id="top">
        <div class="container">
        <?php echo $currency; ?>
        <?php echo $language; ?>
        <div id="top-links" class="nav pull-right">
        <ul class="list-inline">
        <li><a href="<?php echo $contact; ?>"><i class="fa fa-phone"></i></a>
        <span class="hidden-xs hidden-sm hidden-md"><?php echo $telephone; ?></span></li>
        <li class="dropdown">
        <a href="<?php echo $account; ?>" title="<?php echo $text_account; ?>" class="dropdown-toggle" data-toggle="dropdown">
        <i class="fa fa-user"></i>
        <span class="hidden-xs hidden-sm hidden-md"><?php echo $text_account; ?></span>
        <span class="caret"></span></a>
        <ul class="dropdown-menu dropdown-menu-right">
        <?php if ($logged) { ?>
        <li><a href="<?php echo $account; ?>"><?php echo $text_account; ?></a></li>
        <li><a href="<?php echo $order; ?>"><?php echo $text_order; ?></a></li>
        <li><a href="<?php echo $transaction; ?>"><?php echo $text_transaction; ?></a></li>
        <li><a href="<?php echo $download; ?>"><?php echo $text_download; ?></a></li>
        <li><a href="<?php echo $logout; ?>"><?php echo $text_logout; ?></a></li>
        <?php } else { ?>
        <li><a href="<?php echo $register; ?>"><?php echo $text_register; ?></a></li>
        <li><a href="<?php echo $login; ?>"><?php echo $text_login; ?></a></li>
        <?php } ?>
        </ul>
        </li>
        <li><a href="<?php echo $wishlist; ?>" id="wishlist-total" title="<?php echo $text_wishlist; ?>">
        <i class="fa fa-heart"></i>
        <span class="hidden-xs hidden-sm hidden-md"><?php echo $text_wishlist; ?></span></a></li>
        <li><a href="<?php echo $shopping_cart; ?>" title="<?php echo $text_shopping_cart; ?>">
        <i class="fa fa-shopping-cart"></i>
        <span class="hidden-xs hidden-sm hidden-md"><?php echo $text_shopping_cart; ?></span></a></li>
        <li><a href="<?php echo $checkout; ?>" title="<?php echo $text_checkout; ?>">
        <i class="fa fa-share"></i>
        <span class="hidden-xs hidden-sm hidden-md"><?php echo $text_checkout; ?></span></a></li>
        </ul>
        </div>
        </div>
        </nav>
        <header>
        <div class="container">
        <div class="row">
        <div class="col-sm-4">
        <div id="logo">
        <?php if ($logo) { ?>
        <a href="<?php echo $home; ?>">
        <img src="<?php echo $logo; ?>" title="<?php echo $name; ?>" alt="<?php echo $name; ?>" class="img-responsive" /></a>
        <?php } else { ?>
        <h1><a href="<?php echo $home; ?>"><?php echo $name; ?></a></h1>
        <?php } ?>
        </div>
        </div>
        <div class="col-sm-5"><?php echo $search; ?>
        </div>
        <div class="col-sm-3"><?php echo $cart; ?></div>
        </div>
        </div>
        </header>
        <?php if ($categories) { ?>
        <div class="container">
        <nav id="menu" class="navbar">
        <div class="navbar-header">
        <span id="category" class="visible-xs"><?php echo $text_category; ?></span>
        <button type="button" class="btn btn-navbar navbar-toggle" data-toggle="collapse" data-target=".navbar-ex1-collapse">
        <i class="fa fa-bars"></i></button>
        </div>
        <div class="collapse navbar-collapse navbar-ex1-collapse">
        <ul class="nav navbar-nav">
        <?php foreach ($categories as $category) { ?>
        <?php if ($category['children']) { ?>
        <li class="dropdown">
        <a href="<?php echo $category['href']; ?>" class="dropdown-toggle" data-toggle="dropdown">
        <?php echo $category['name']; ?></a>
        <div class="dropdown-menu">
        <div class="dropdown-inner">
        <?php foreach (array_chunk($category['children'], ceil(count($category['children']) / $category['column'])) as $children) { ?>
        <ul class="list-unstyled">
        <?php foreach ($children as $child) { ?>
        <li><a href="<?php echo $child['href']; ?>"><?php echo $child['name']; ?></a></li>
        <?php } ?>
        </ul>
        <?php } ?>
        </div>
        <a href="<?php echo $category['href']; ?>" class="see-all"><?php echo $text_all; ?>
        <?php echo $category['name']; ?></a> </div>
        </li>
        <?php } else { ?>
        <li><a href="<?php echo $category['href']; ?>"><?php echo $category['name']; ?></a></li>
        <?php } ?>
        <?php } ?>
        </ul>
        </div>
        </nav>
        </div>
        <?php } ?>
Step 6: Create Footer
Now create a new file to add a footer to your site.
<footer>
        <div class="container">
        <div class="row">
        <?php if ($informations) { ?>
        <div class="col-sm-3">
        <h5><?php echo $text_information; ?></h5>
        <ul class="list-unstyled">
        <?php foreach ($informations as $information) { ?>
        <li><a href="<?php echo $information['href']; ?>">
        <?php echo $information['title']; ?></a></li>
        <?php } ?>
        </ul>
        </div>
        <?php } ?>
        <div class="col-sm-3">
        <h5><?php echo $text_service; ?></h5>
        <ul class="list-unstyled">
        <li><a href="<?php echo $contact; ?>"><?php echo $text_contact; ?></a></li>
        <li><a href="<?php echo $return; ?>"><?php echo $text_return; ?></a></li>
        <li><a href="<?php echo $sitemap; ?>"><?php echo $text_sitemap; ?></a></li>
        </ul>
        </div>
        <div class="col-sm-3">
        <h5><?php echo $text_extra; ?></h5>
        <ul class="list-unstyled">
        <li><a href="<?php echo $manufacturer; ?>"><?php echo $text_manufacturer; ?></a></li>
        <li><a href="<?php echo $voucher; ?>"><?php echo $text_voucher; ?></a></li>
        <li><a href="<?php echo $affiliate; ?>"><?php echo $text_affiliate; ?></a></li>
        <li><a href="<?php echo $special; ?>"><?php echo $text_special; ?></a></li>
        </ul>
        </div>
        <div class="col-sm-3">
        <h5><?php echo $text_account; ?></h5>
        <ul class="list-unstyled">
        <li><a href="<?php echo $account; ?>"><?php echo $text_account; ?></a></li>
        <li><a href="<?php echo $order; ?>"><?php echo $text_order; ?></a></li>
        <li><a href="<?php echo $wishlist; ?>"><?php echo $text_wishlist; ?></a></li>
        <li><a href="<?php echo $newsletter; ?>"><?php echo $text_newsletter; ?></a></li>
        </ul>
        </div>
        </div>
        <hr>
        <p><?php echo $powered; ?></p>
        </div>
        </footer>
        </body></html>
and save as footer.tpl.
Step 7: Create Sidebars
Sidebars code will look something like this. It depends on you if you want a left sidebar or a right sidebar.
For column_left.tpl
<?php if ($modules) { ?>
        <aside id="column-left" class="col-sm-3 hidden-xs">
        <?php foreach ($modules as $module) { ?>
        <?php echo $module; ?>
        <?php } ?>
        </aside>
        <?php } ?>
and this is for column_right.tpl
<?php if ($modules) { ?>
        <aside id="column-right" class="col-sm-3 hidden-xs">
        <?php foreach ($modules as $module) { ?>
        <?php echo $module; ?>
        <?php } ?>
        </aside>
        <?php } ?>
To further style your theme you can do it by creating your own stylesheet. However, the default stylesheet.css file has a lot to offer you.
These custom style and script file must be placed inside theme/stylesheet or JavaScript folder respectively.
Similarly, you can override template files from the OpenCart default theme and modify them as per your requirements.
That’s all from the coding section. Now it’s time to introduce the powerful OpenCart theme builder software. Yes! Another method to create OpenCart theme from scratch is to use a software that has the ability to deliver an amazing OpenCart website in no time. It’s not an ordinary software I am talking about. It’s the most reliable and convenient one. And before setting any notions and perpetuate the false belief, do try this software yoruself.
Here we go…
2. Automated Method (Create OpenCart Theme With TemplateToaster)
TemplateToaster is a desktop software that provides you the best possible solution to your how to create OpenCart theme dilemma. It comes with tremendous features which lets you create OpenCart theme from scratch. Following are the steps you need to follow to create your custom OpenCart theme.
Prerequisite
Download and install TemplateToaster on your computer.
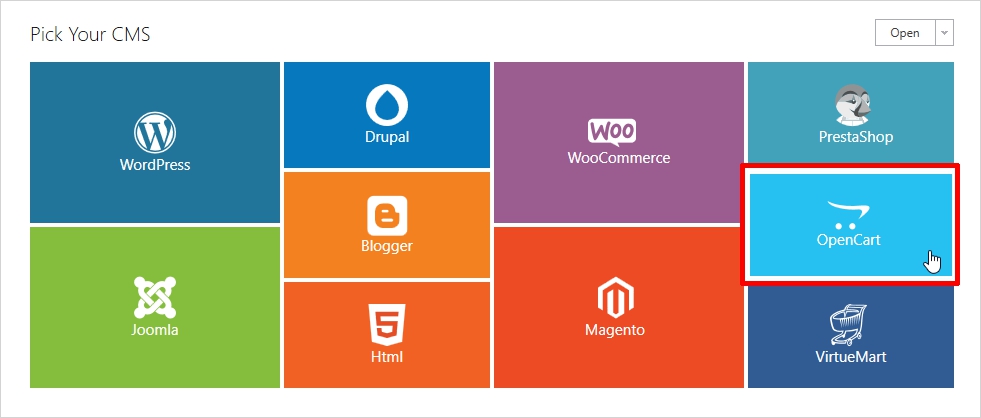
1. Pick up a Platform
The very first screen shows you the various CMSs and you have to pick the one you want to work with. And I am choosing OpenCart here.
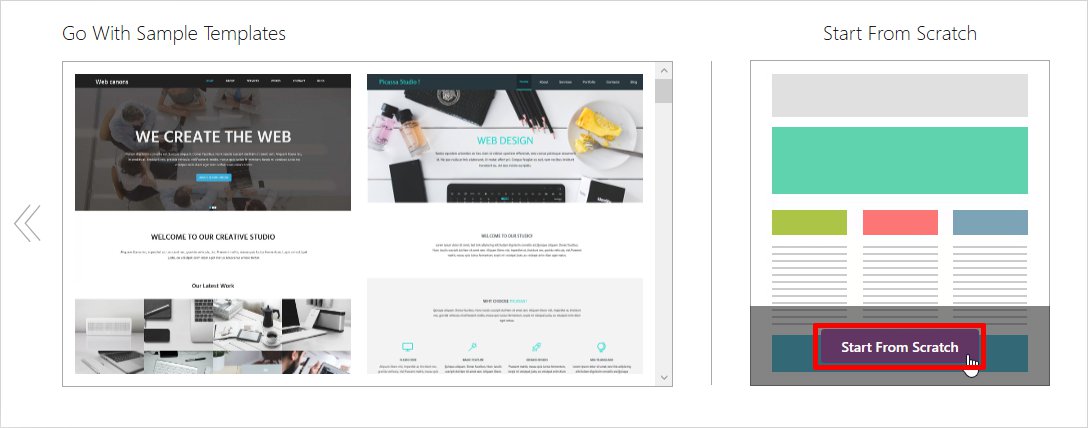
Now in another window will open where you have to choose out of two options. If you want to modify a pre designed OpenCart Theme or you want to Start From Scratch. I am choosing Start from Scratch. Let’s explore it !!
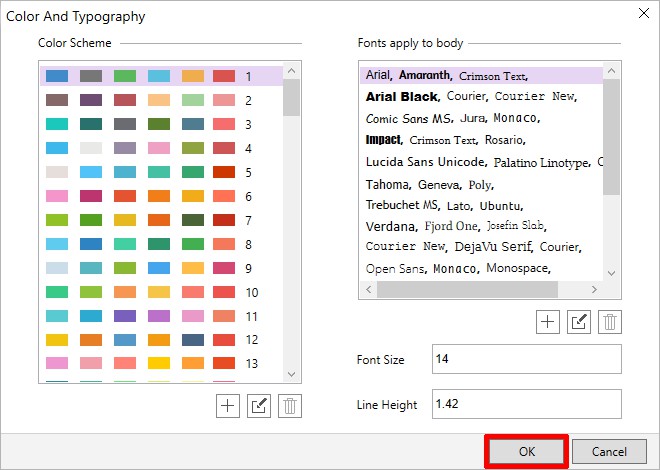
Now select the color and the font you want to apply from the color and typography options. And click ‘OK’ to get ahead.
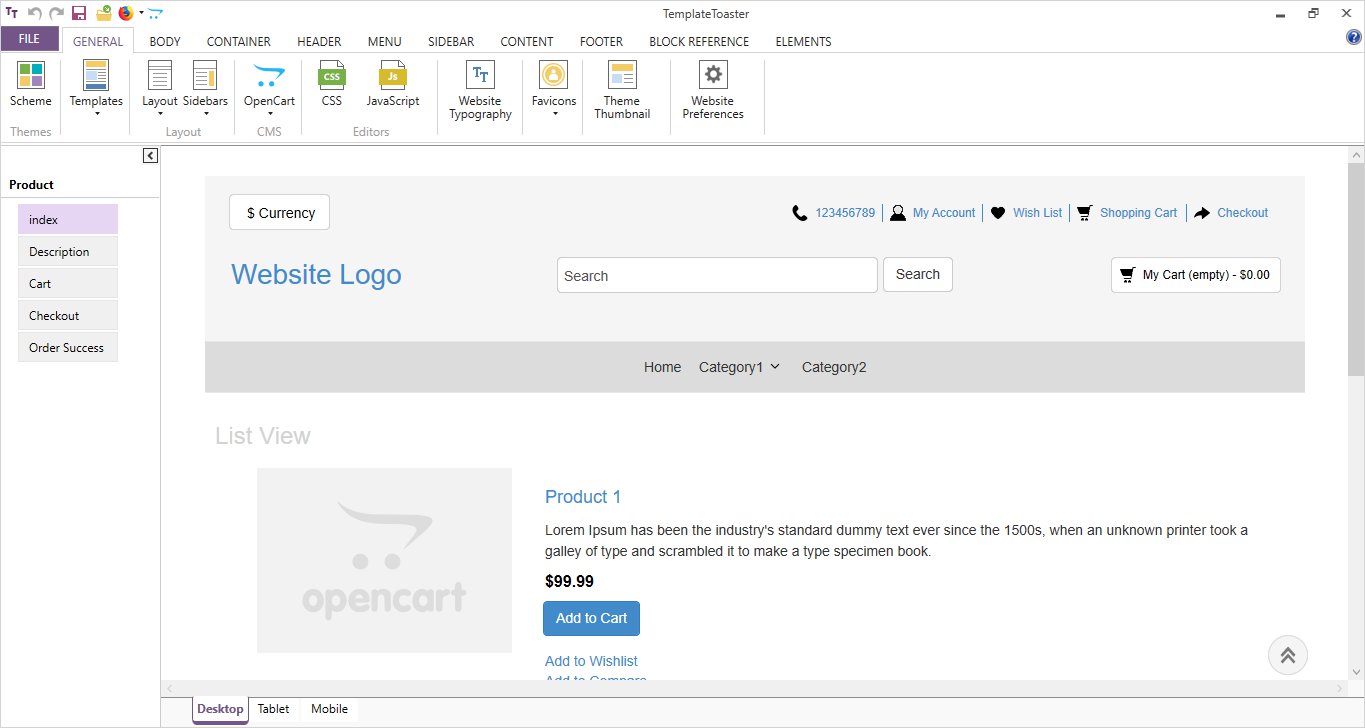
As soon as you click on OK button you will be launched to the Main Interface. And that looks like the one shown below.
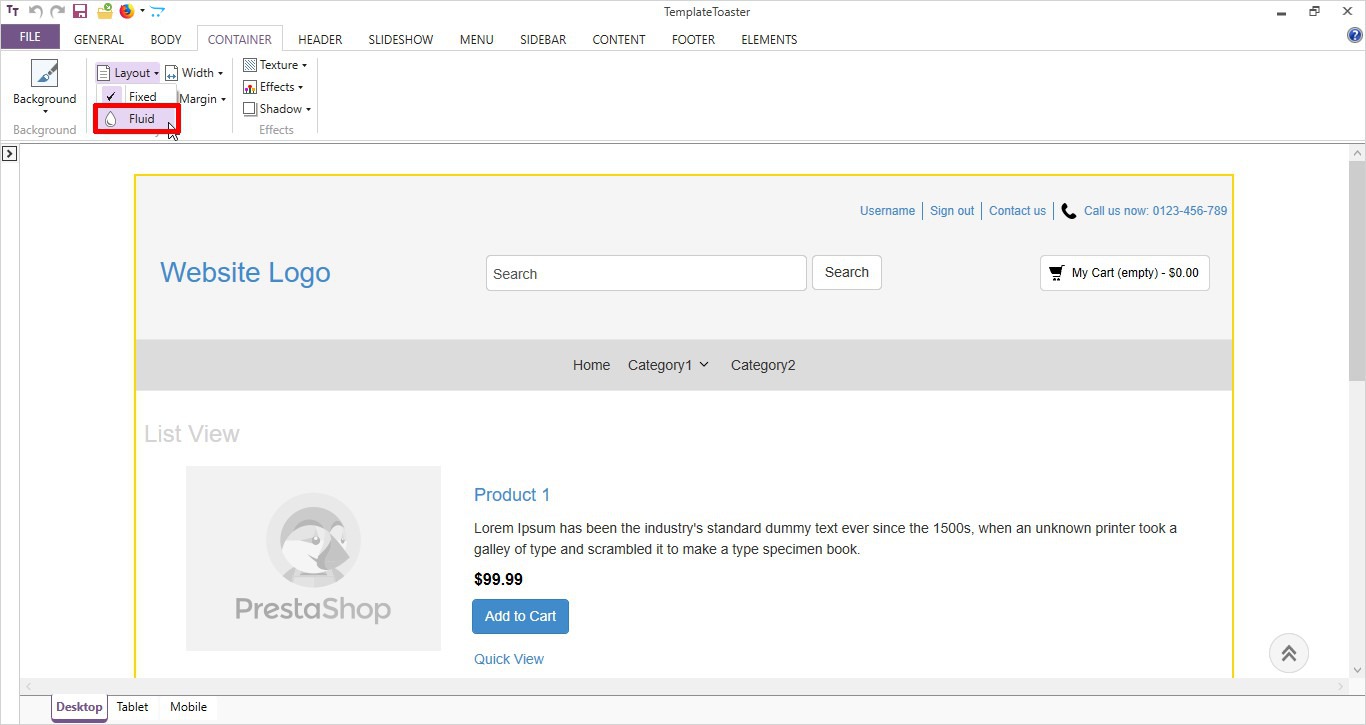
2. Which Layout You Want !!
Now set the Layout for your page. There two given choices Fixed and Fluid, choose whatever you like. I am choosing Fluid.
CONTAINER Layout Fluid
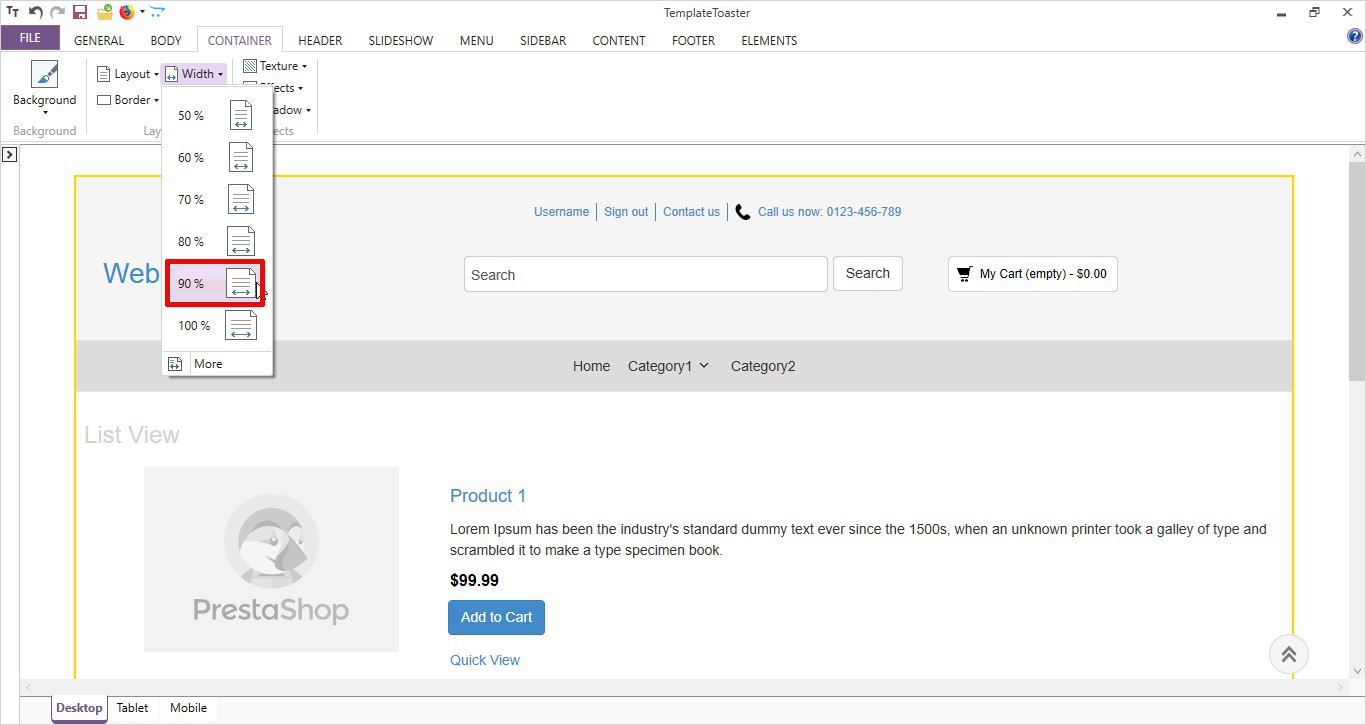
Adjust the width as you need. You can set to any custom percentage you want to.
CONTAINER Width 90%
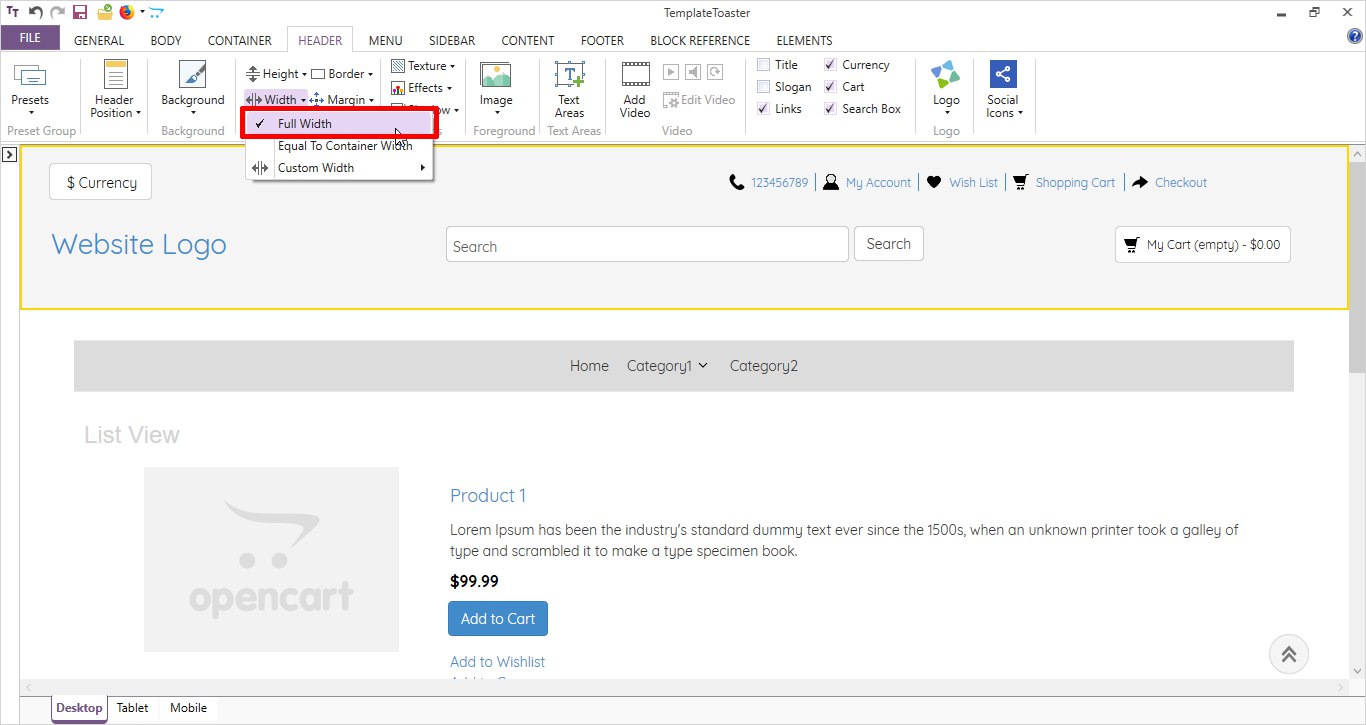
3. Design a Beautiful Header !!
Set your header width as much as you want like shown below.
HEADER Width Full Width
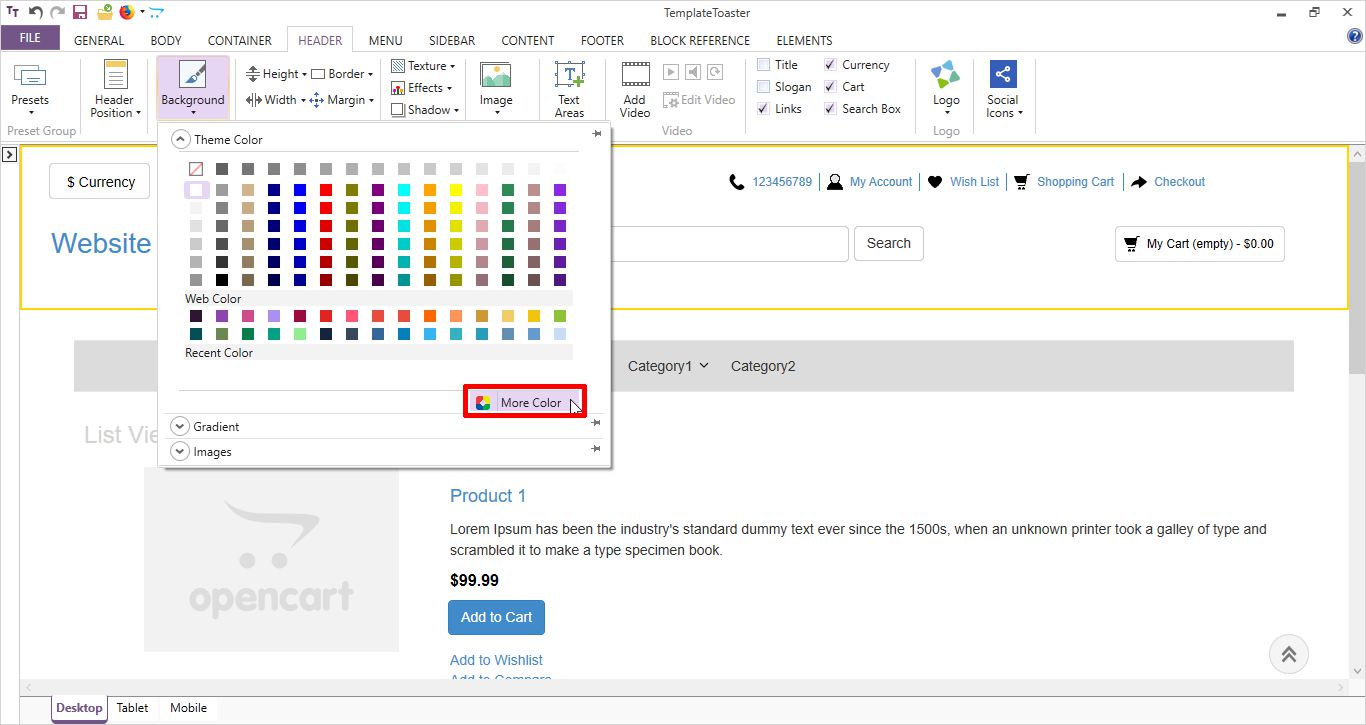
Set your header background color. Choose from the huge color gallery or explore more by clicking on the more color option.
HEADER Background More Color.
Now design your Logo. You can choose the logo image from the gallery or choose your own custom image by clicking on the Browse option as displayed below.
HEADER Logo Browse
![]()
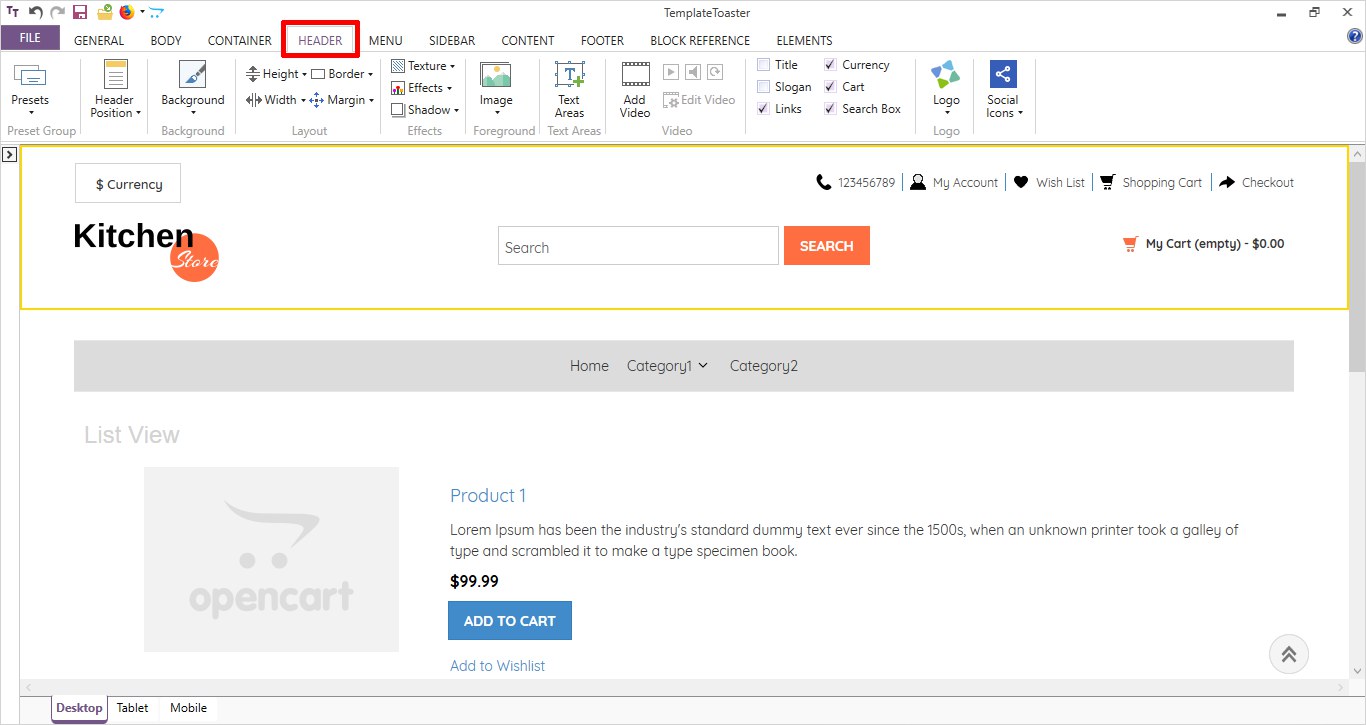
After all the styling, this is how your header will look like.
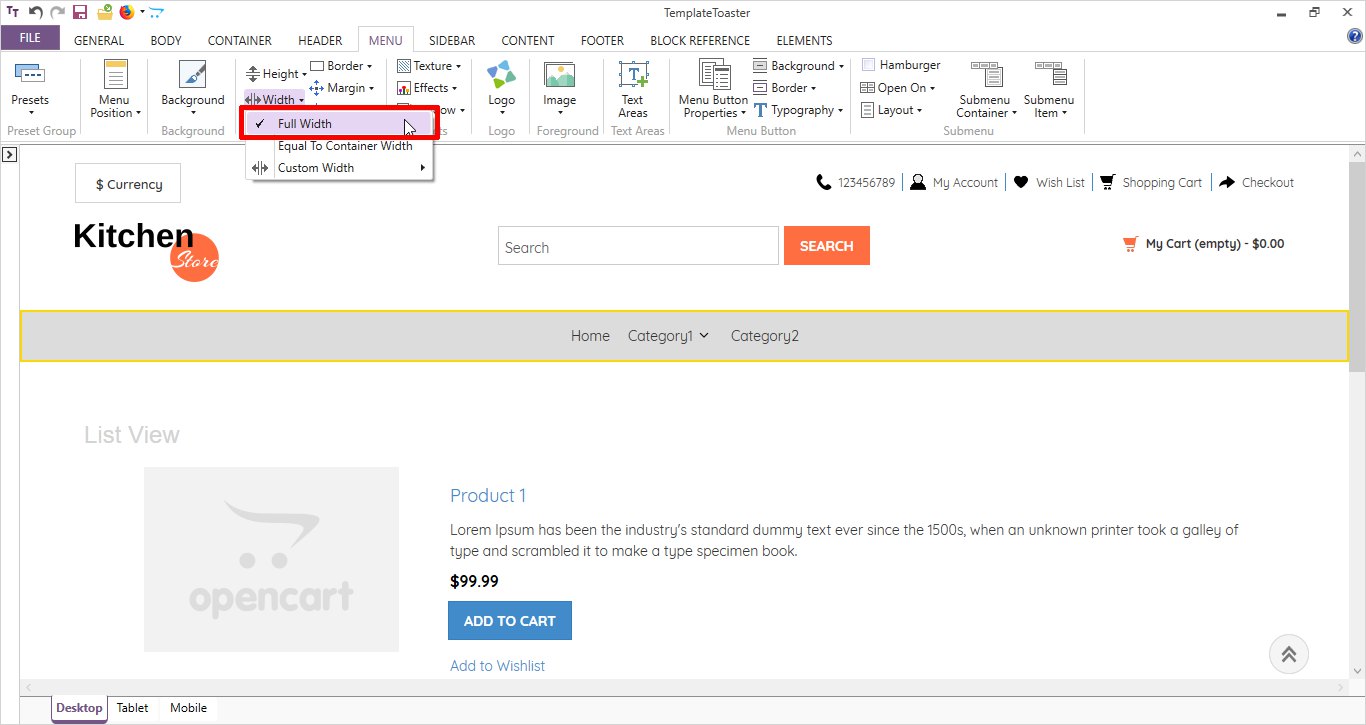
4. Design Your Menu as Tempting as You Want !!
There are various Menu options to make the menu tempting. Choose to create a stylish menu for your theme. Choices like Hamburger Menu, Submenus with adjustable Width and Height as per your needs.
MENU Width Full Width
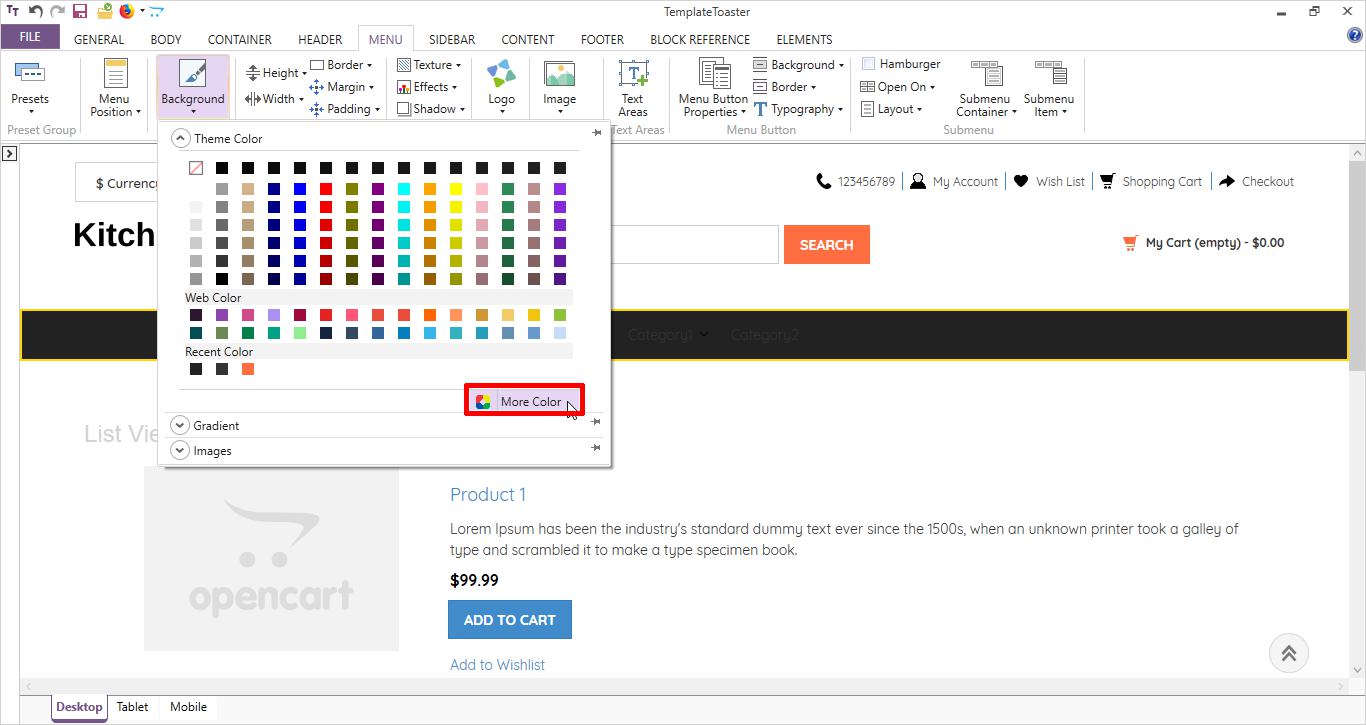
You can select the desired color for your menu background from the gallery. And if you want some more then explore.
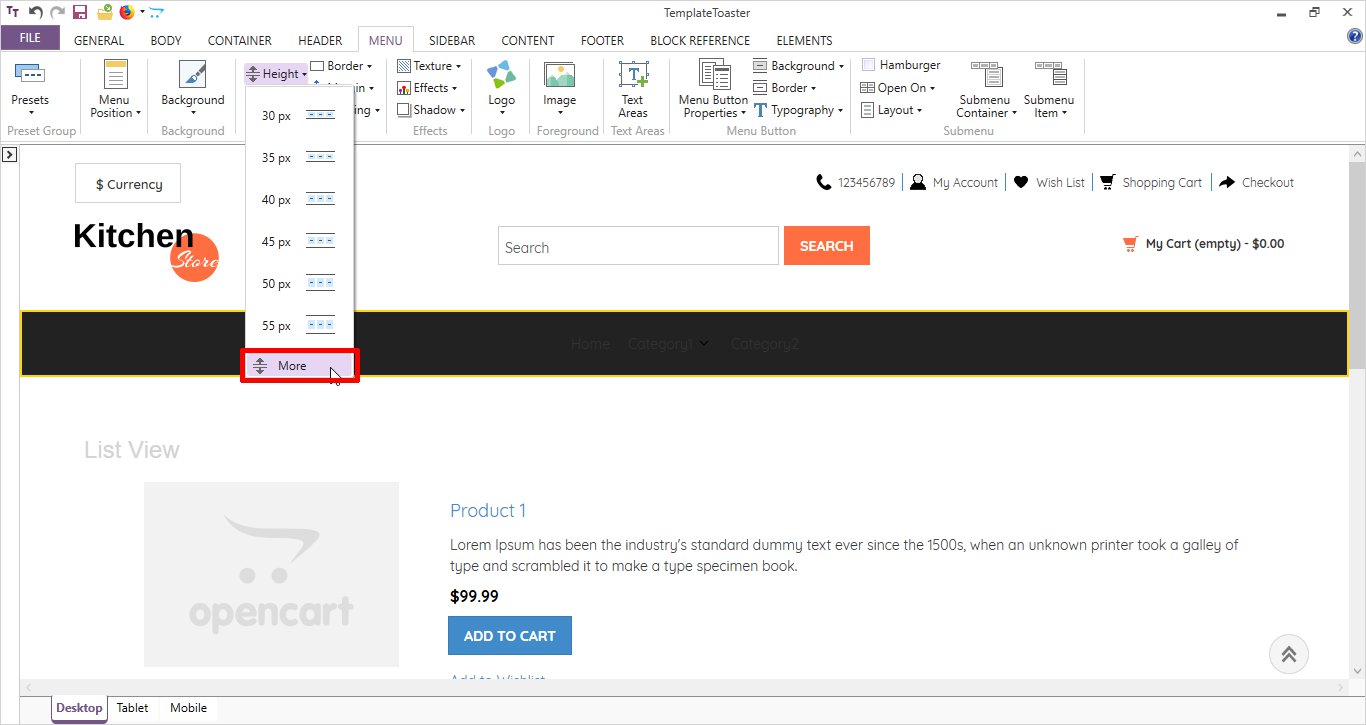
Select the appropriate height for your menu by going
MENU Height Any required value
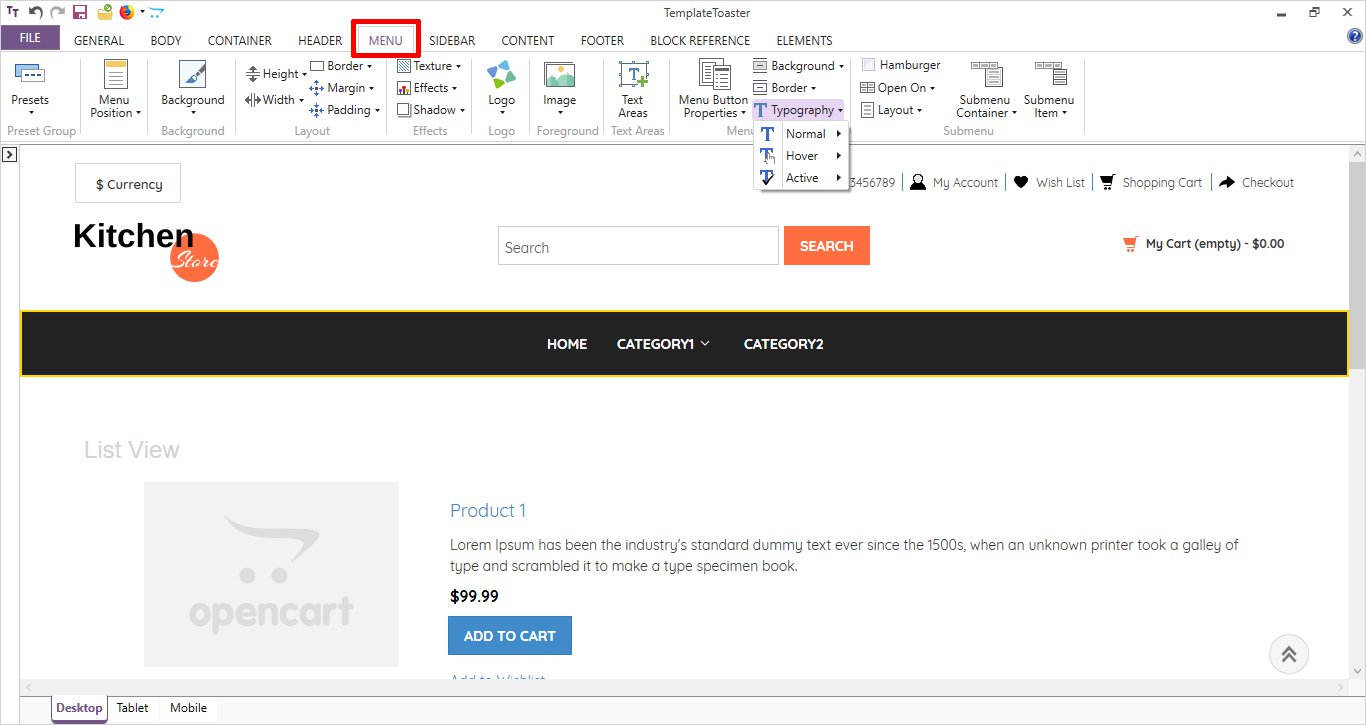
Select the most likable style to set the typography for the menu elements from the given options.
MENU Typography Normal/ Hover / Active
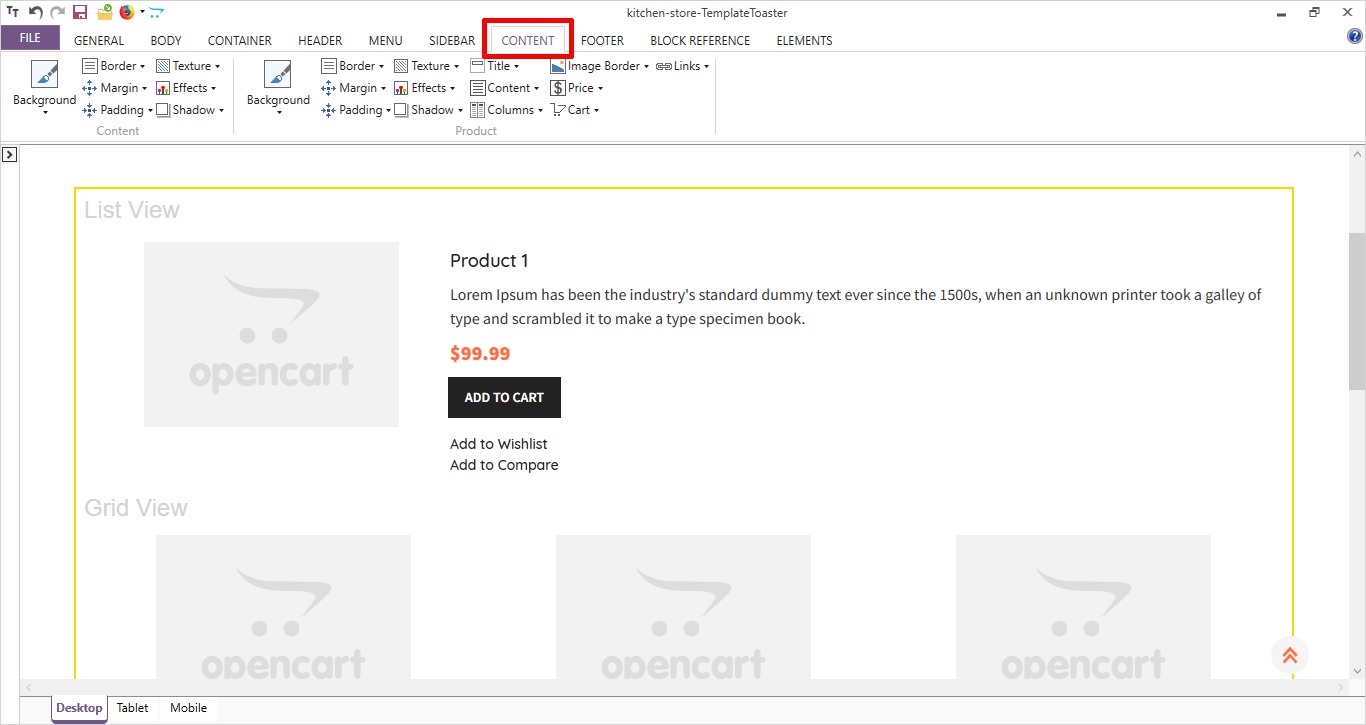
5. Content Design: The Most Significant Area
You can manage the main content here in the content area. Set the different style options for your content and product that you want to show in the main area.
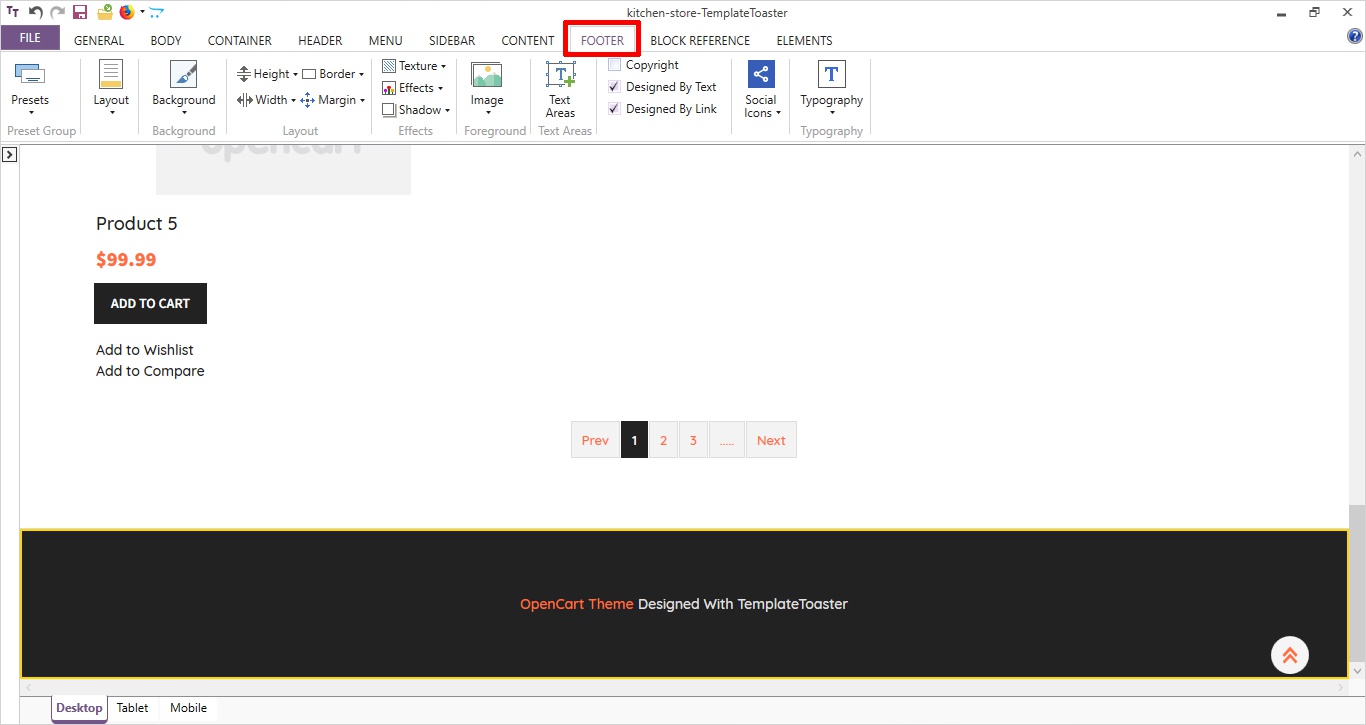
6. Design the Footer: Style it Your Way
Time to design the footer now. Stylize your theme with things like putting up a Background Image, Layout, Foreground Image, Textarea, Effects, Typography, add Social Icons etc etc. will end up giving you a beautiful footer.
Now, that you are ready with the theme, it’s time to export it. And to export the theme, you need to follow the below given steps.
7. Export Your Theme now
It is quite simple to export the theme. Go to file and select export and a dialog will appear and simply follow the process.
FILE Export
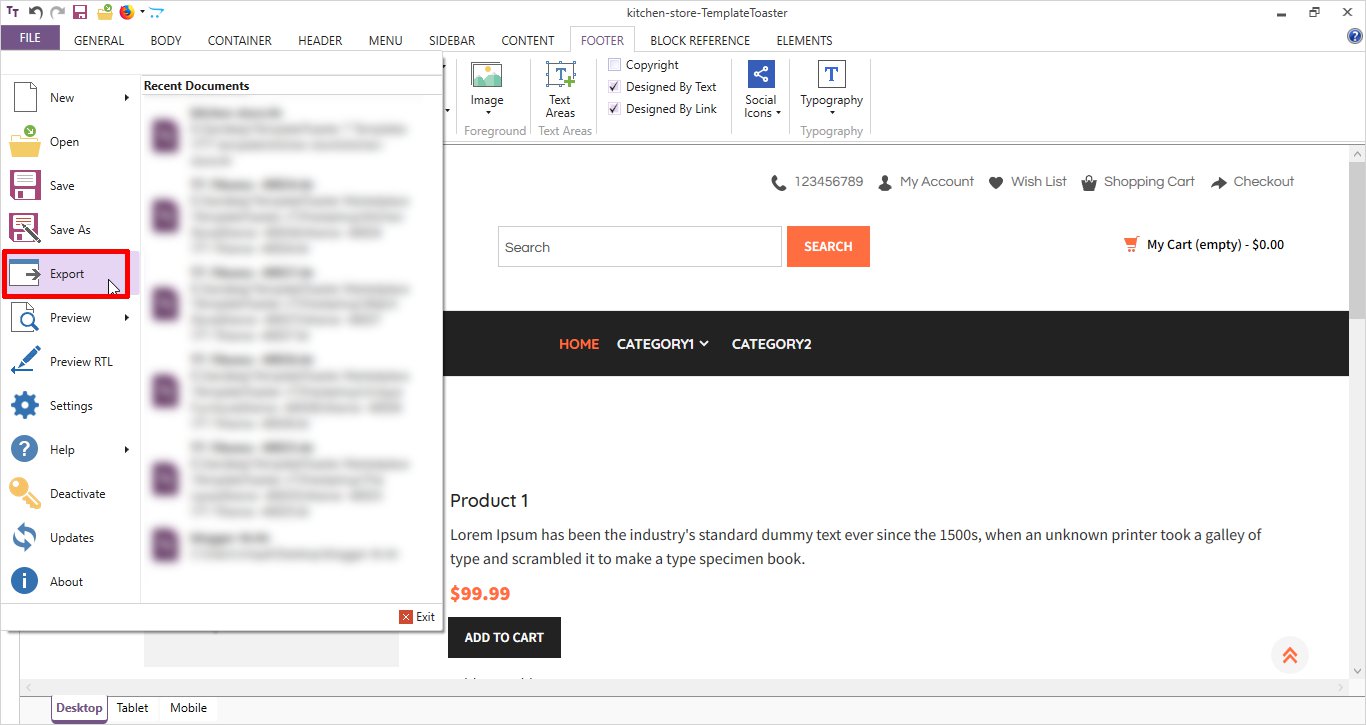
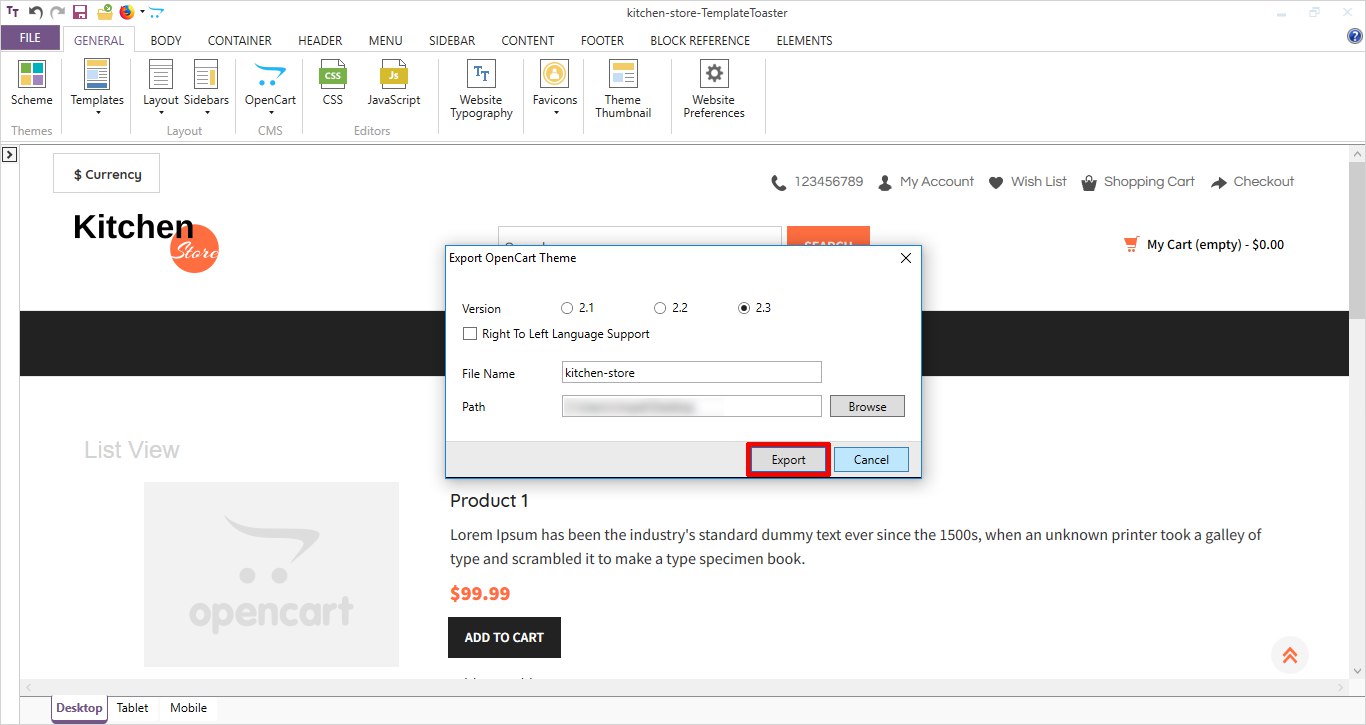
In this dialog box confirm the name of your theme. If it’s right, then select the OpenCart version on which you are going to install this theme and click the export button.
Now go to the OpenCart Dashboard by entering your credentials.
Dashboard Extension Installer
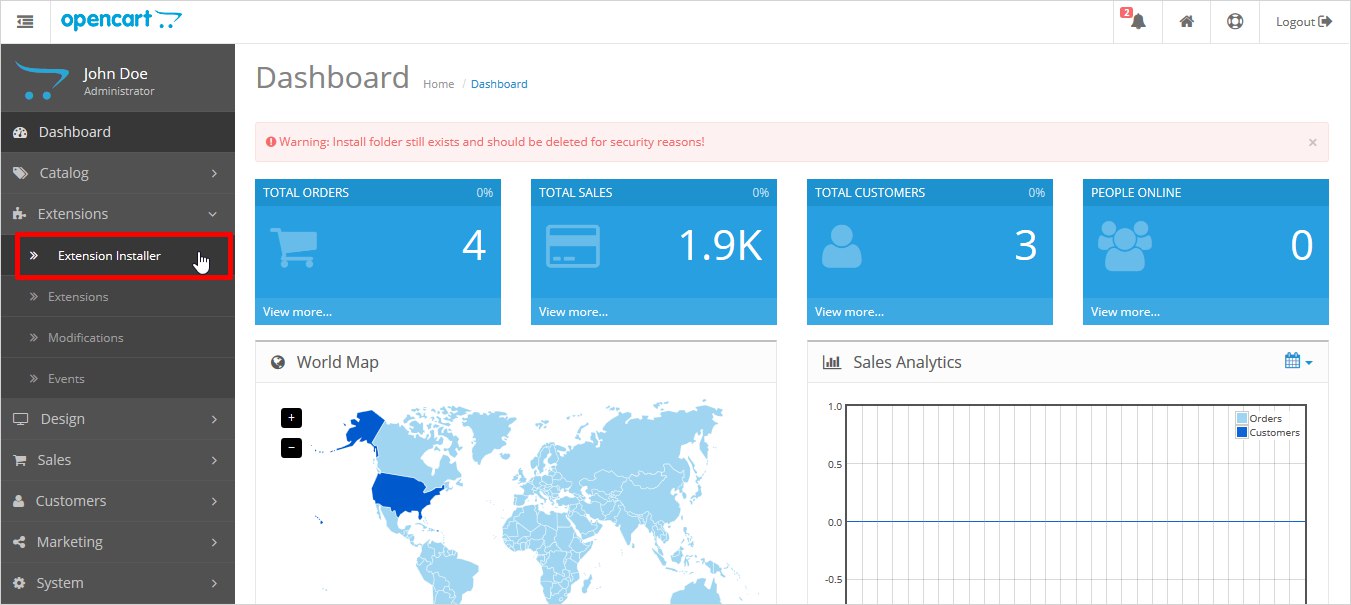
Under Extension Installer click on the upload option to upload your theme.
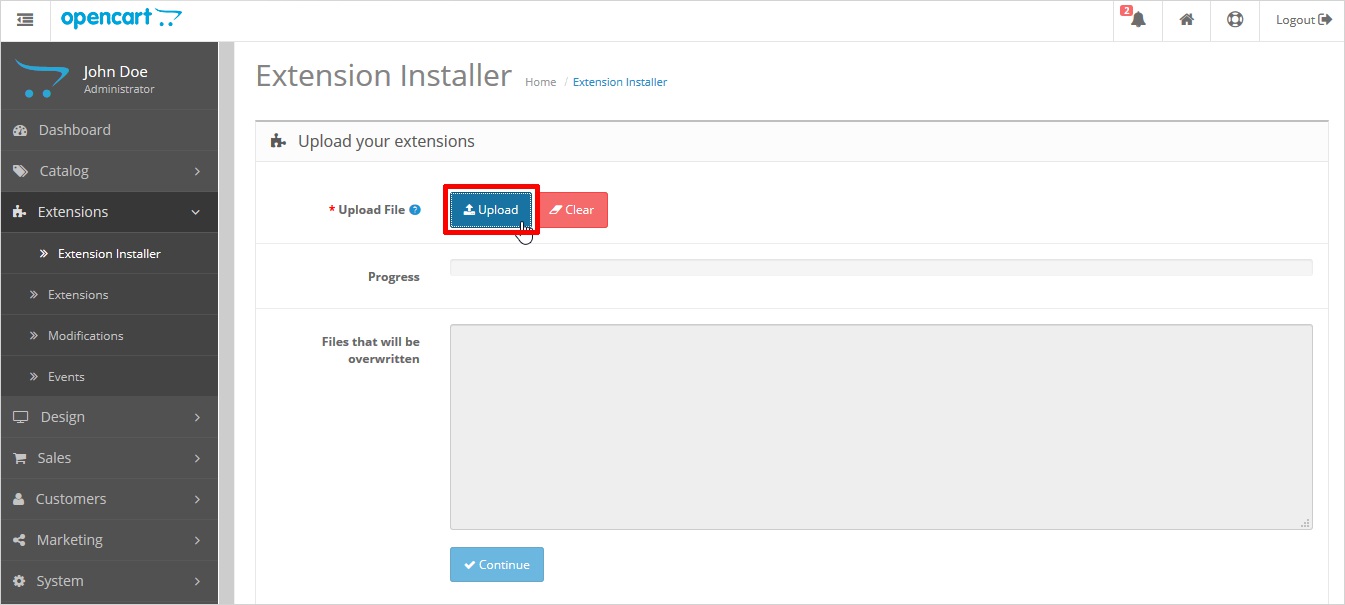
Click on the Upload and a dialog box will appear from where you can browse the ‘theme zip folder’. Once you will select the theme zip folder this how it will be shown.
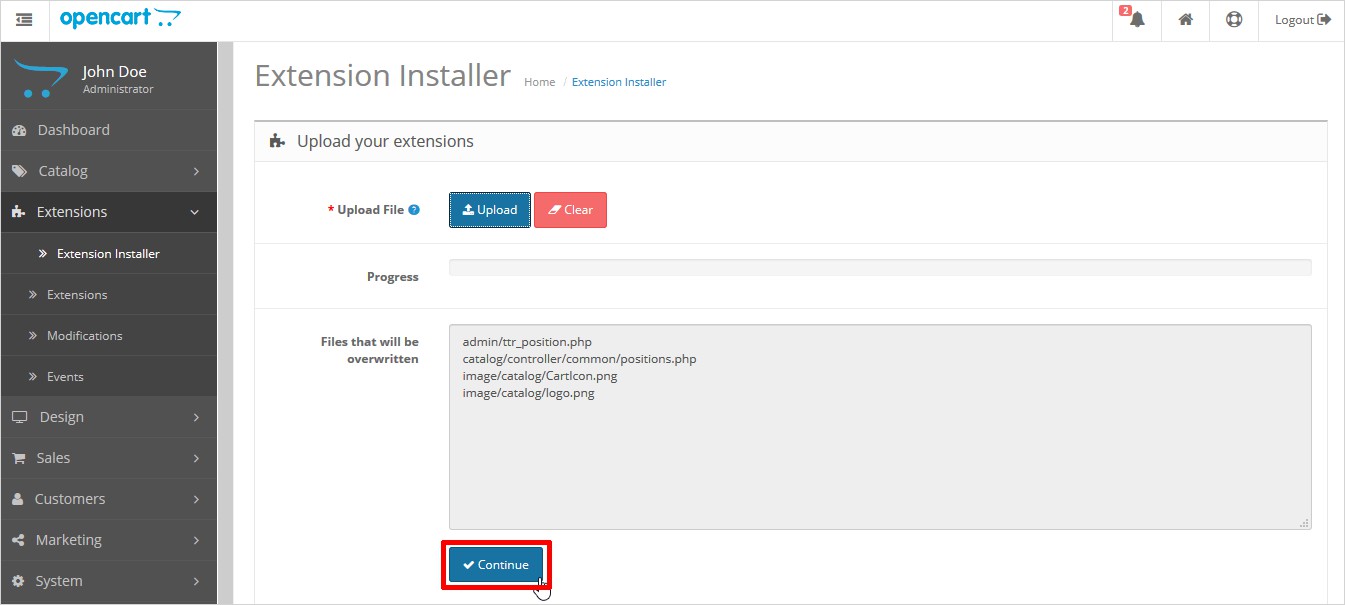
Once the zip folder is installed successfully, you will see a ‘Success Message’ on the screen.
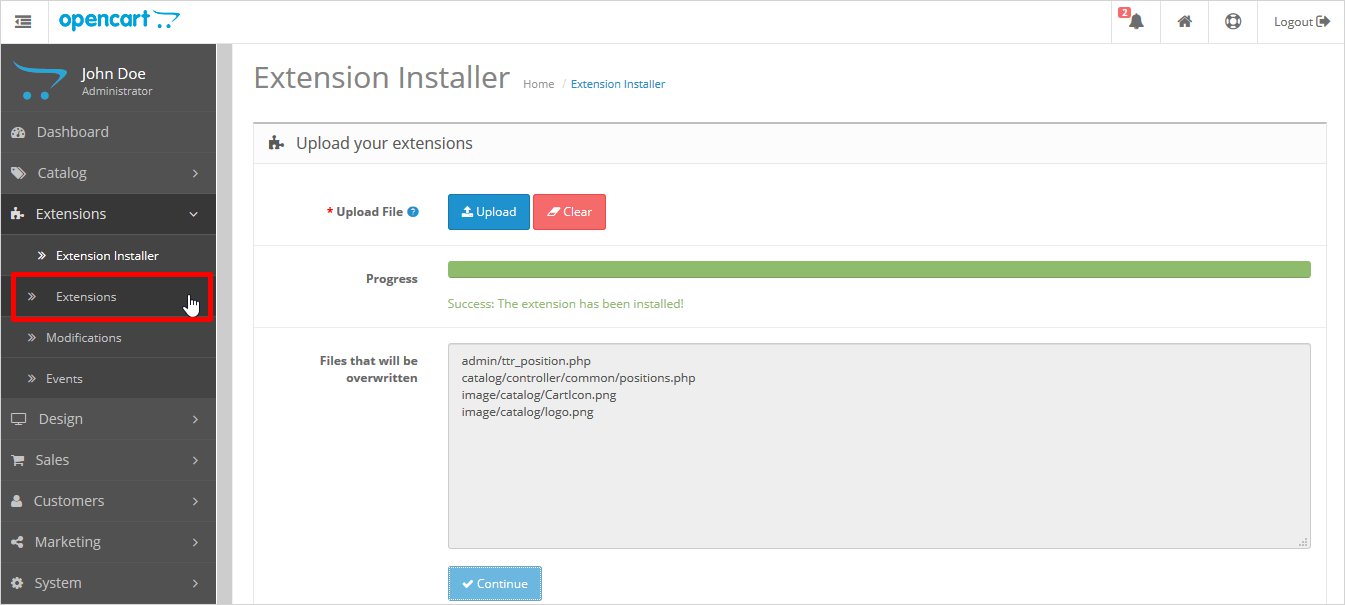
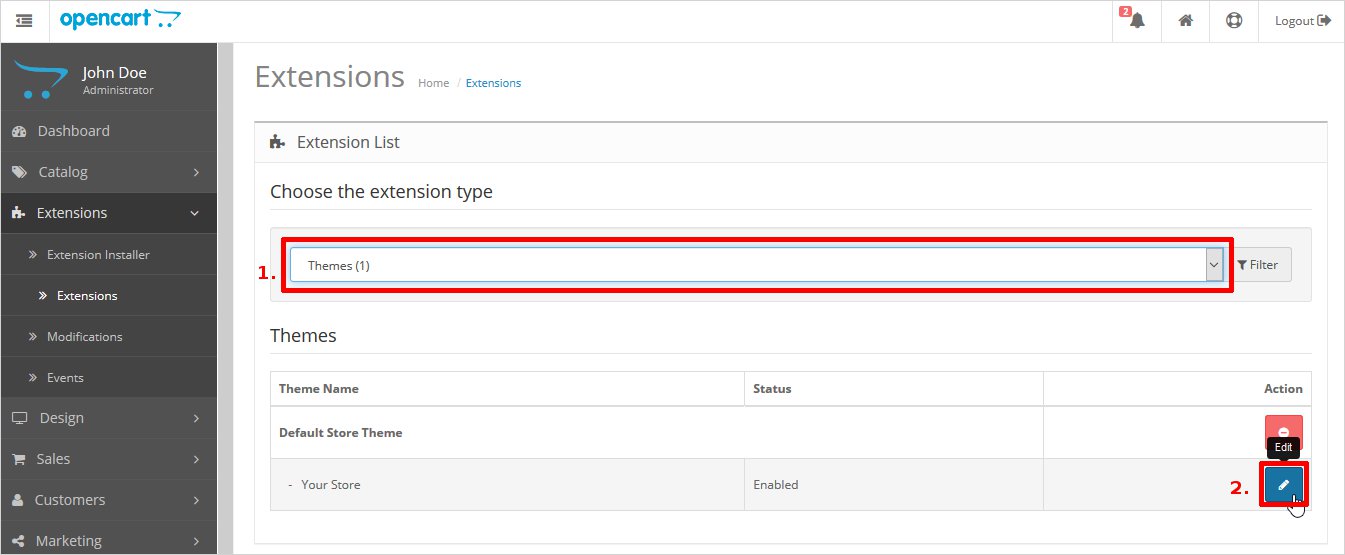
Your files will be uploaded. Now click on the extensions and it will ask you to choose the extension type. By default, it will show you the ‘analyst’ option which you have to change it to the themes (your file name) and then click on the edit button placed at the below right corner.
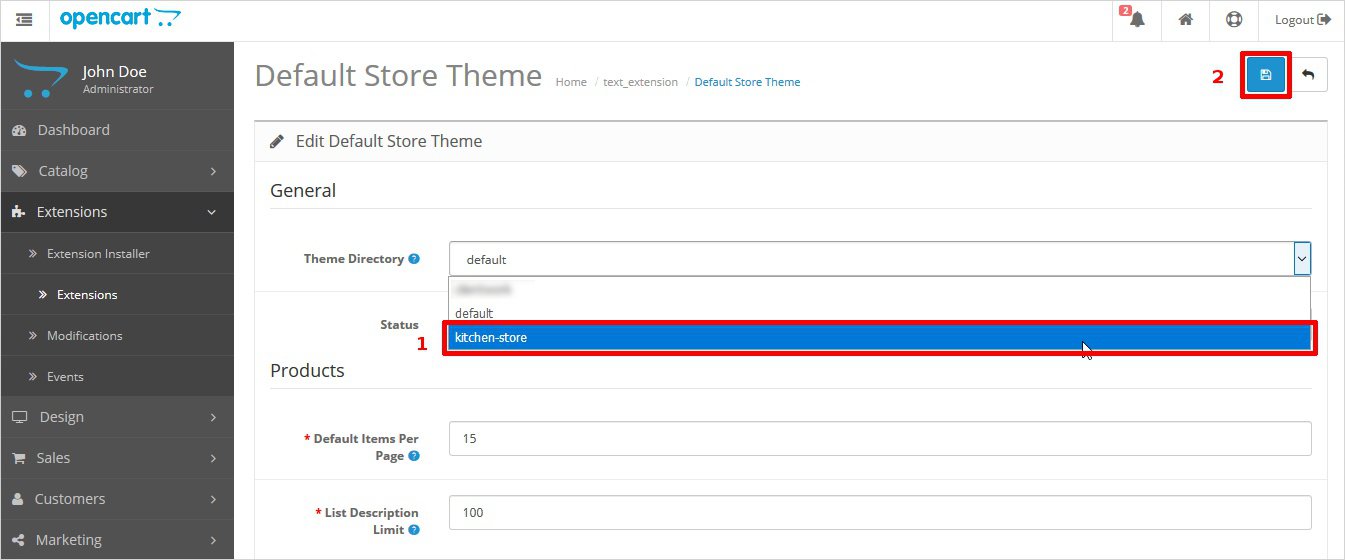
Now, from the theme directory choose your file like here we are choosing ‘kitchen-store’ and click on the save button at the top right corner.
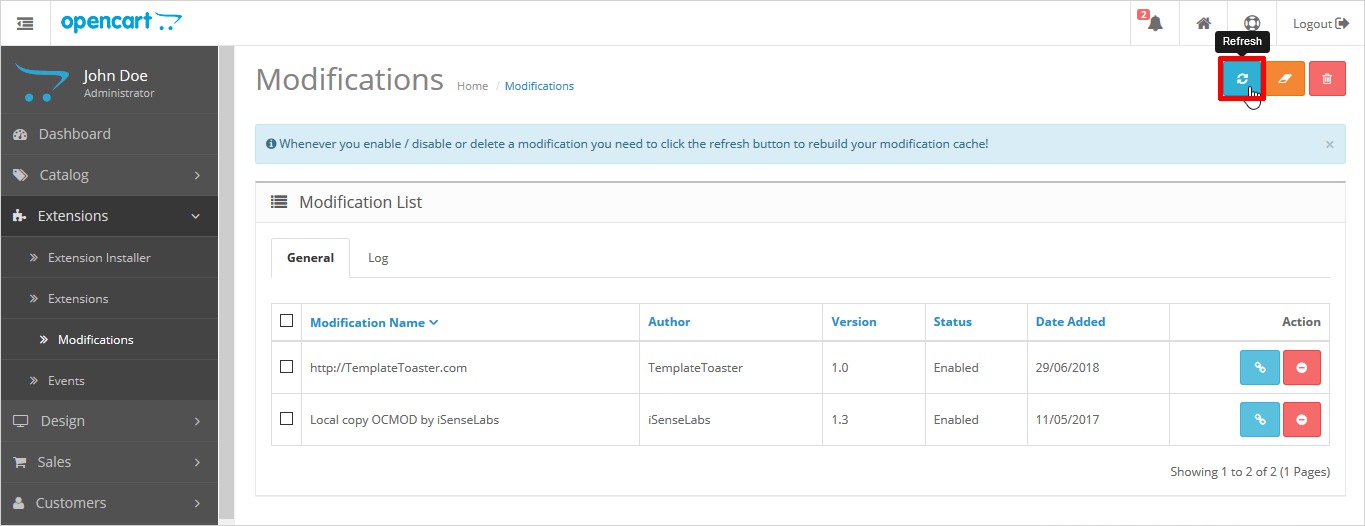
Go to the Modifications and here you have to click on the refresh button in order to remove the cache memory.
Click on the Refresh button
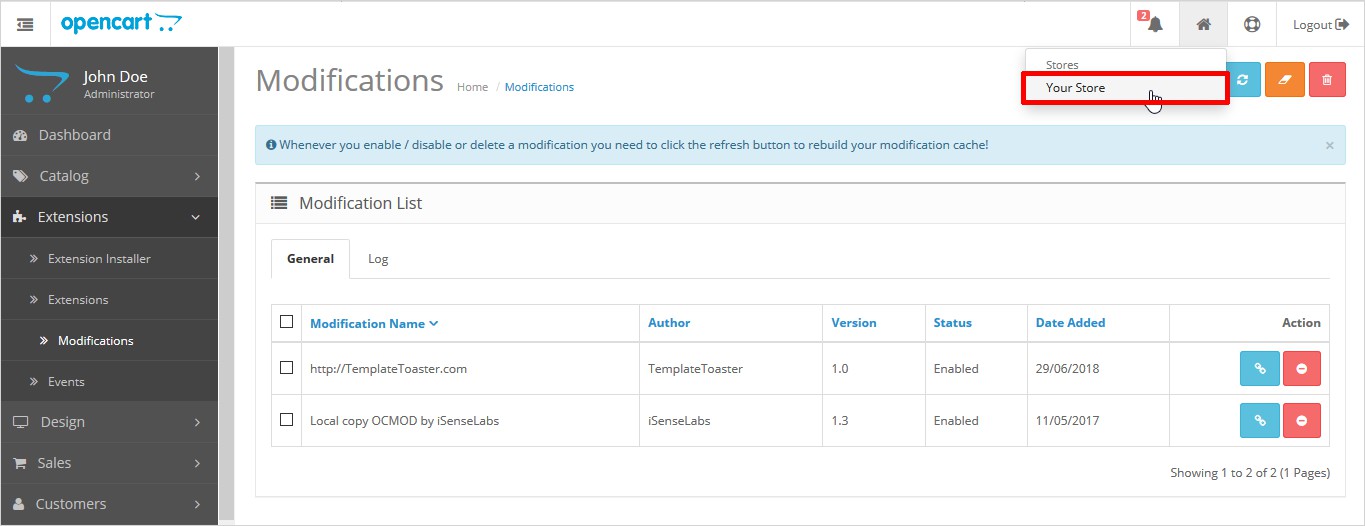
Now, simply click on the home icon → your store and see the preview of your theme. That’s all. You are done with the procedure.
Keep reading and exploring TemplateToaster to find the ways to make a strong hold on your technical skills !!
Which way you use to create OpenCart theme ?
I have given you the two vivid choices to create OpenCart theme from scratch. Both the approaches give you the chance to experiment with new things and show up your creativity. free OpenCart themes are available.
However, getting started with your theme requires only one inspiration and the rest will follow. And as far as the technical help is concerned, you have TemplateToaster web design software only a few clicks away.
So, without wasting any more time create magic with your fingers. If you still have any question or confusion, please feel free to ask and I’ll do my best to answer.
Build a Stunning Website in Minutes with TemplateToaster Website Builder
Create Your Own Website Now
Thanks for a simple guide to creating an OpenCart 3 theme
Here you have mentioned very easy steps to create open cart theme, it is really helpful.
IN Automatic method there are auto placed images or we can choose as per our own requirements?
You have mentioned all the steps very systematically, thanks for posting such an informative.
Can anybody suggest me, which method is more reliable and useful?
Can we also modify our theme after install it once?
Wow! amazing I was looking for this information from very long time. Thanks a lot.
I guess hand coding would be a bit difficult because we can forget any step or something while writing a code.
I love the way of mention everything with the help of screenshots, this is the best method.
We can set each and everything as per our own requirement, that is really great.
Menu code is not working from my end. Is there any other code for this?