How to Install XAMPP and WordPress Locally
The XAMPP & WordPress combination is greatly used for website development. While XAMPP provides the local server environment, the WordPress is a web development platform. XAMPP is the most common localhost application used by the developers. Being cross platform, it can be used on Windows, Linux and OSx. In this article here at Templatetoaster WordPress theme generator and WordPress theme builder, I will discuss the installation of XAMPP and WordPress on Windows.
XAMPP Installation
Get start with setup
Download XAMPP for windows from apachefriends.org. Then, run the installer to get start with the XAMPP setup.
Select Components
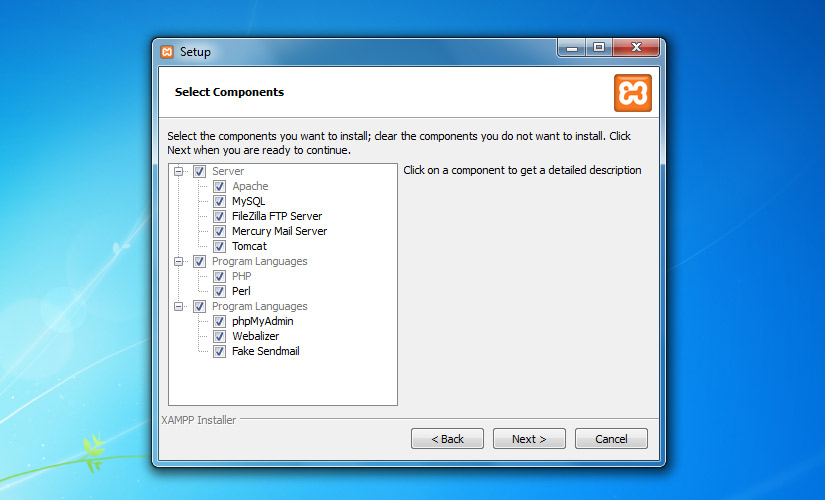
In the component wizard, all the components are by default selected. You can uncheck the components that you don’t plan to use.
Let’s quickly go through these components.
Apache– It is the HTTP web server, and essential to run the website.
MySQL– It is the database server.
FileZilla FTP server– It is used for setting up an FTP server.
Mercury Mail Server– It is used for setting up a mail transport system.
Tomcat– It is an application server, which runs Java based web applications.
PHP– It is a server side scripting language used for making dynamic web pages.
Perl– This language is widely used by the programmers for writing CGI scripts.
PhpMyAdmin– It is a necessary component to handle the administration of MySQL.
Webalizer– It is a web log file analyzer, which generates statistical reports about how many people visit a website and what do they look for in the website
Fake Sendmail– For testing email transfer on localhost, Fake Sendmail is used. If you are going to work on such a project which involves sending emails, then this component will come in your use.
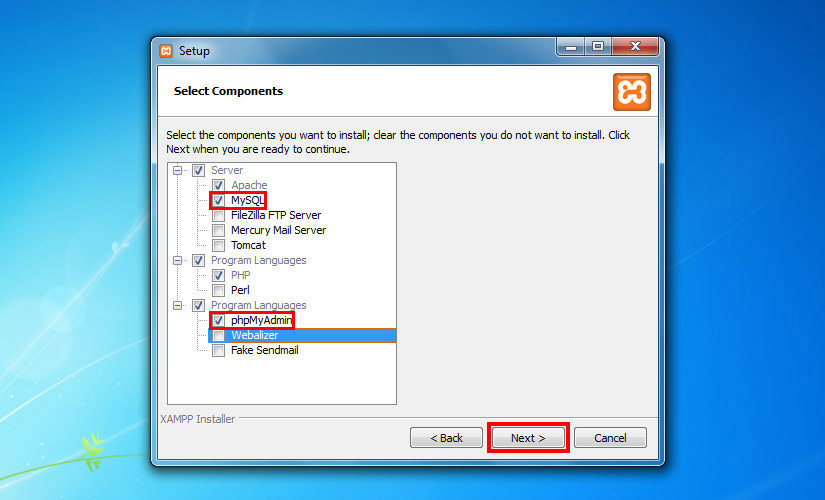
We have chosen the Apache, MySQL, PHP and phpMyAdmin since these are necessarily required for WordPress installation. As we don’t have any plan to use the rest components, we have unchecked them all.
Install
After selecting the components, you will be prompted to specify a location where you want to install XAMPP. Once you specify the location, the setup will be ready to install.
Start Apache and MySQL
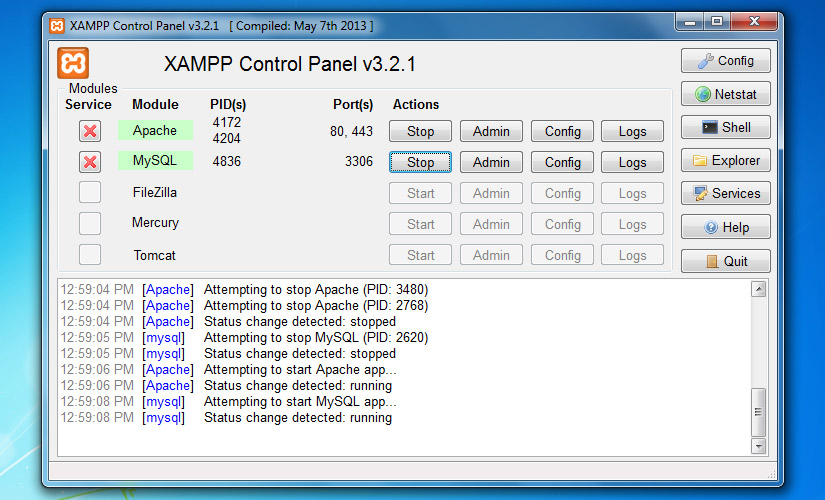
Once the installation is complete, open XAMPP control panel. For this, find the xampp-control.exe inside XAMPP folder and launch it. Default location of XAMPP folder is C:\xampp
Having to open the control panel, start the Apache and MySQL components. As you will start these components, their Admin links will become clickable. Then, select MySQL “Admin” for moving ahead to phpMyAdmin or you can open it from here http://localhost/phpmyadmin .
WordPress Installation
Create MySQL Database
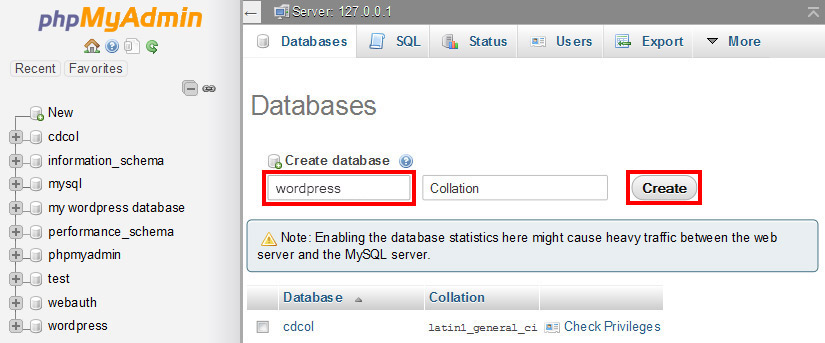
On phpMyAdmin interface, find the “Databases” tool on the top-left side and create the database. For example, we have created the database by the name wordpress.
Unzip WordPress zip file
After creating the database, we are set to start the installation of WordPress. Now, we are going to download WordPress.
Once the download is complete, extract the zip file to C:\xampp\htdocs\. If you’ve extracted the package correctly, you will see the “wordpress” folder inside htdocs.
Select language
Next step is to browse this URL- http://localhost/wordress in your browser for initializing the actual installation of WordPress.
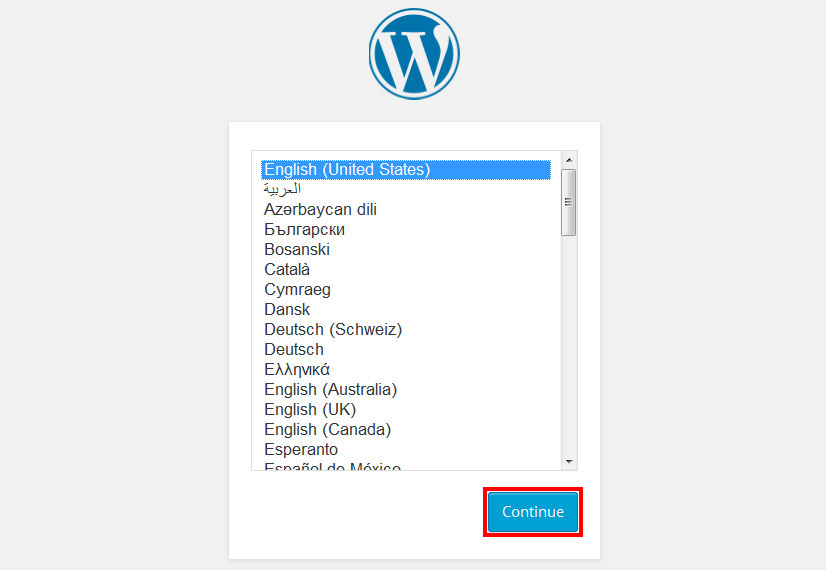
Select language on the screen and continue.
Fill database information
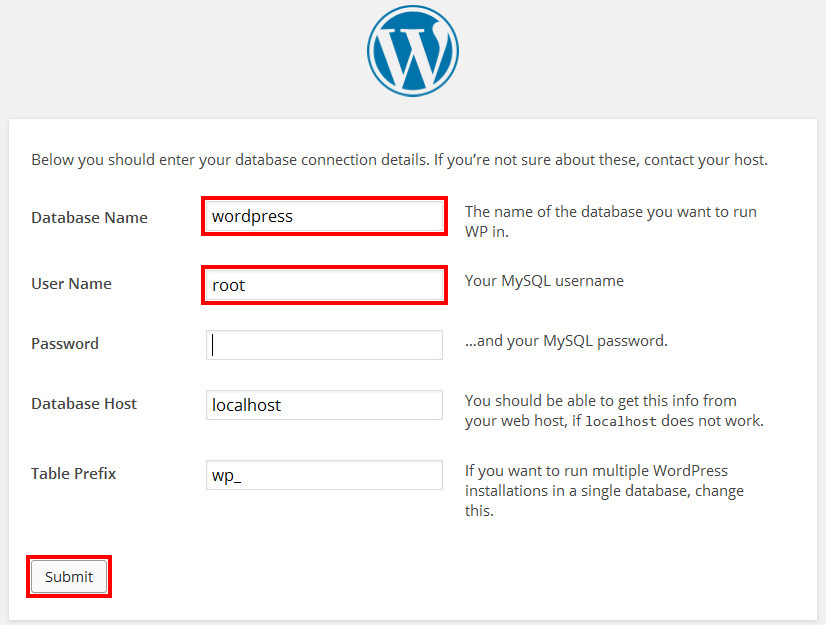
Fill the name of database which you have created in the above step. In our case it is’ wordpress’. Fill “root” in username field and leave the password field blank, and fill localhost the database host field.
In the last field, you may define a prefix to all the database tables, and submit.
Fill in the website information
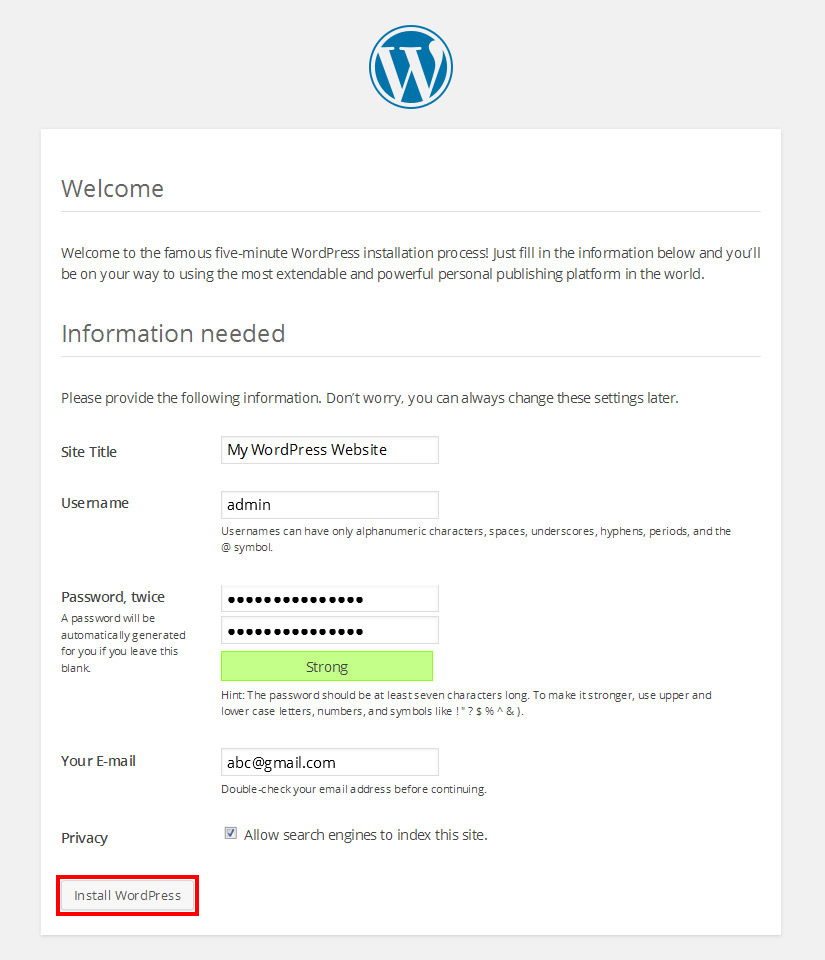
In the next step, you are prompted to set the title of your site and fill up user information, like site title, username, password and Email.
Fill up the required fields, and press “Install WordPress”.
That’s it. You have installed WordPress. Now, you are in business.
Log in to dashboard
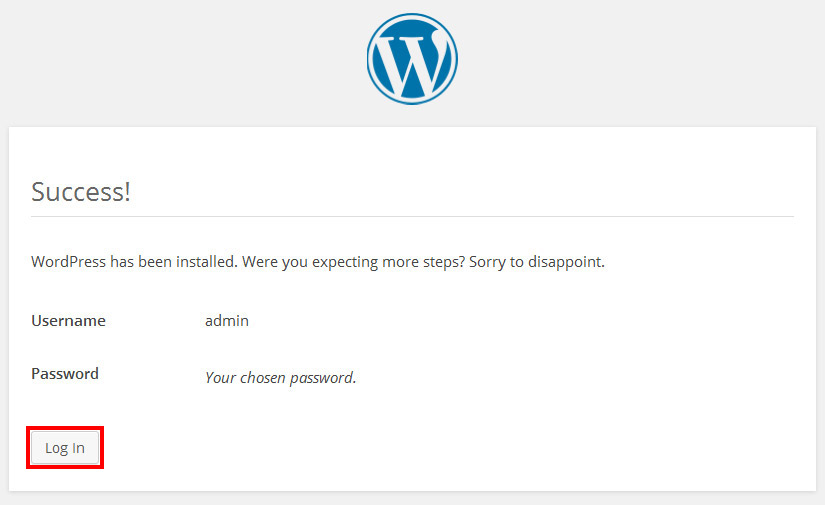
Now, you have installed WordPress locally. You can move on to the dashboard by clicking on the Log in button. check out our free templates and free WordPress themes.
Build a Stunning Website in Minutes with TemplateToaster Website Builder
Create Your Own Website Now
How to migrate on the production site seamlessly then?
I have to build a new version of an existing website and do not really know how to proceed exactly. (Never done that before. Only new sites and domains)
Shall I develop it locally and then erase the former one and migrate the new one on the platform?
Any article on this?
Thank you 🙂
It is called staging, you can try one of the following solution:
http://stackoverflow.com/questions/21801930/what-is-the-best-way-to-merge-development-database-with-production
https://www.godaddy.com/garage/webpro/wordpress/set-wordpress-staging-site/
https://ithemes.com/2015/05/05/how-to-set-up-a-wordpress-staging-site-with-backupbuddy-deployment/
Wonderful Article
Nice post. Thanks for sharing.
thank you awesome article
Remove http use only localhost/wordpress
I just noticed the link is wrong. Its not matter though I have to tell it… http://localhost/wordpress
Hi, I really appreciate the article. It works a treat. One question I do have, is it possible to create more than one locally hosted WordPress website? So you can develop more than one website simultaneously, if so please could you share how we go about doing this?
Thanks again for the great article!
XAMPP checks all the boxes listed above. It’s free, reliable, easy to use, and works on all major platforms. You can’t go wrong with it.