WordPress Media Library: A Comprehensive Beginner’s Guide
Managing media files is a critical part of keeping your WordPress website organized and visually appealing. Whether you’re uploading images, videos, or documents, WordPress provides a user-friendly way to handle all your media needs. In this guide, we’ll walk you through the process of uploading, editing, and deleting media files within WordPress. Whether you’re a beginner just getting started or a seasoned webmaster looking for tips on optimizing your media library, this tutorial will help you streamline your workflow and ensure your media is properly managed. Let’s dive in.
In this article, I’ll guide you through three essential steps for managing media in WordPress. First, I’ll show you how to upload media files to your WordPress website, which is an important part of building any site, whether you’re using a WordPress Website Builder or you’re looking to create a WordPress theme from scratch. Then, I’ll take you through the process of editing your media files, helping you fine-tune aspects like cropping, resizing, and adding metadata to ensure your content looks polished and professional. Finally, I’ll explain how to delete media files you no longer need, allowing you to keep your media library clutter-free and well-organized. By the end of this guide, you’ll have all the tools you need to manage your WordPress media with confidence.
How to Add Media in WordPress
WordPress media library offers a variety of features with it. Let’s learn how to upload a media file to the media library.
Step1. Access the Media Library
- Log into your WordPress dashboard.
- From the left-hand menu, click on Media and select Library. This will open your existing media library where you can view all previously uploaded files.
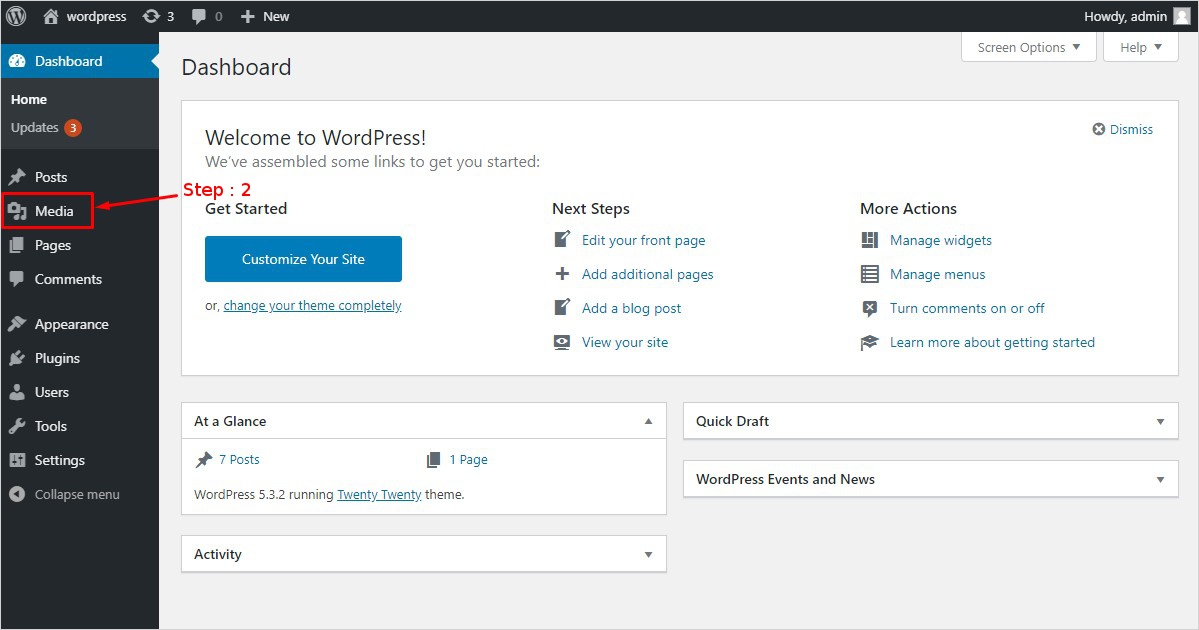
Step2. Add New Media
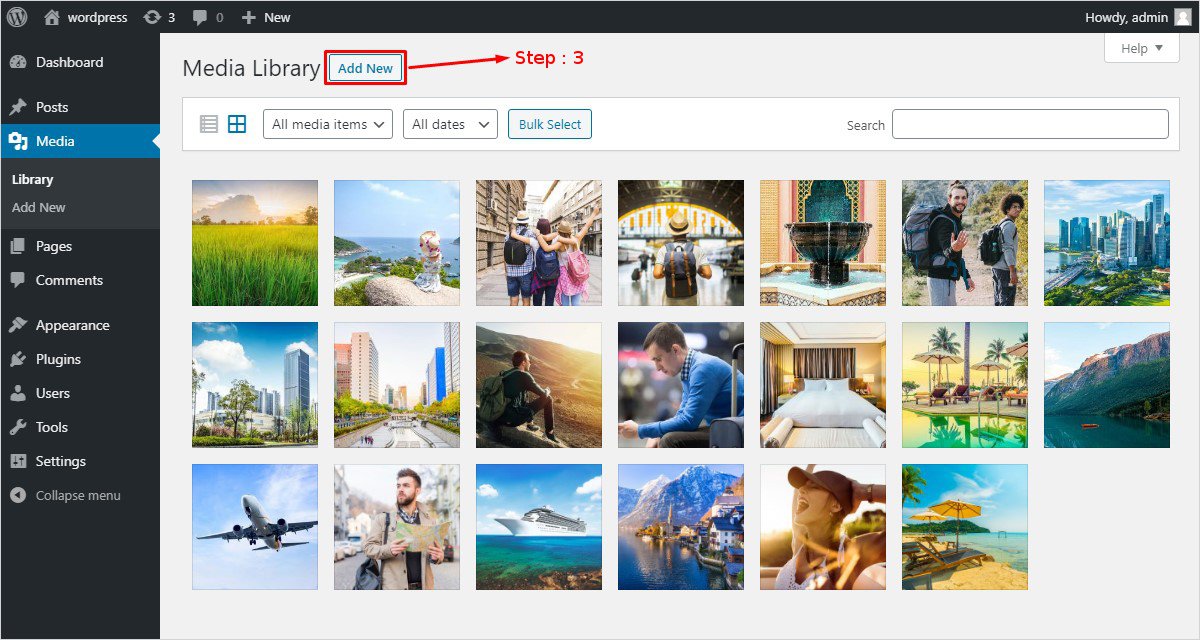
- To upload a new file, click the Add New button at the top of the Media Library page. You’ll be prompted to upload media directly.
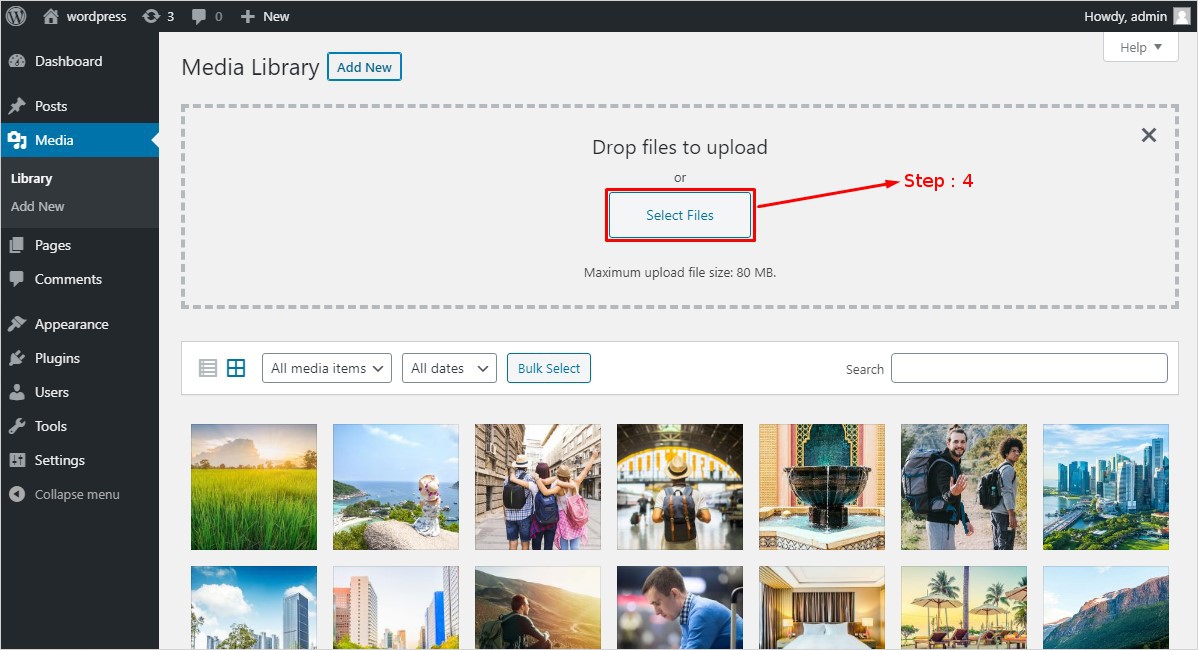
You can either click Select Files to browse for files on your computer, or simply drag and drop them into the upload area.
Step3. Choose the file
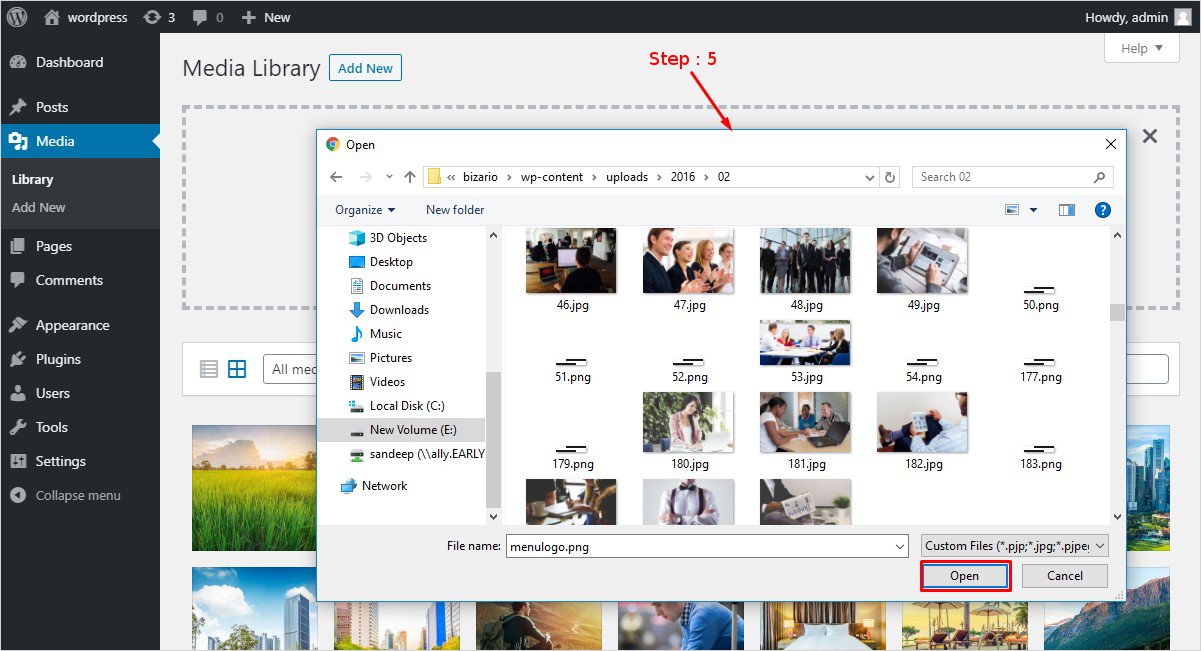
If you clicked on select files. Then your personal library will open up there. Choose the file you want to upload. And click on open.
Bonus: Uploading Multiple Files
- If you have multiple files to upload, WordPress allows batch uploads. Select all your media files at once and drop them into the upload area. This saves time and ensures that all your content is added efficiently.
How to Edit Media in WordPress
Once your media files are uploaded to WordPress, you may need to make adjustments to ensure they fit perfectly within your content. WordPress offers basic media editing tools that allow you to crop, resize, rotate, and more, all without needing an external image editor. Here’s how to edit media in WordPress:
Step1. Access the Media Library
- From your WordPress dashboard, click on Media and select Library to open the media library where all of your uploaded files are stored.
- Locate the file you want to edit. You can use the search bar or filter options to find specific images, videos, or other media files.
Step2. Open the Media File for Editing
- Click on the media file thumbnail you want to edit. This will open the Attachment Details window.
- In this window, you’ll see basic information like the title, caption, alt text, and description. Below the image, click the Edit Image button to access WordPress’s built-in editing tools.
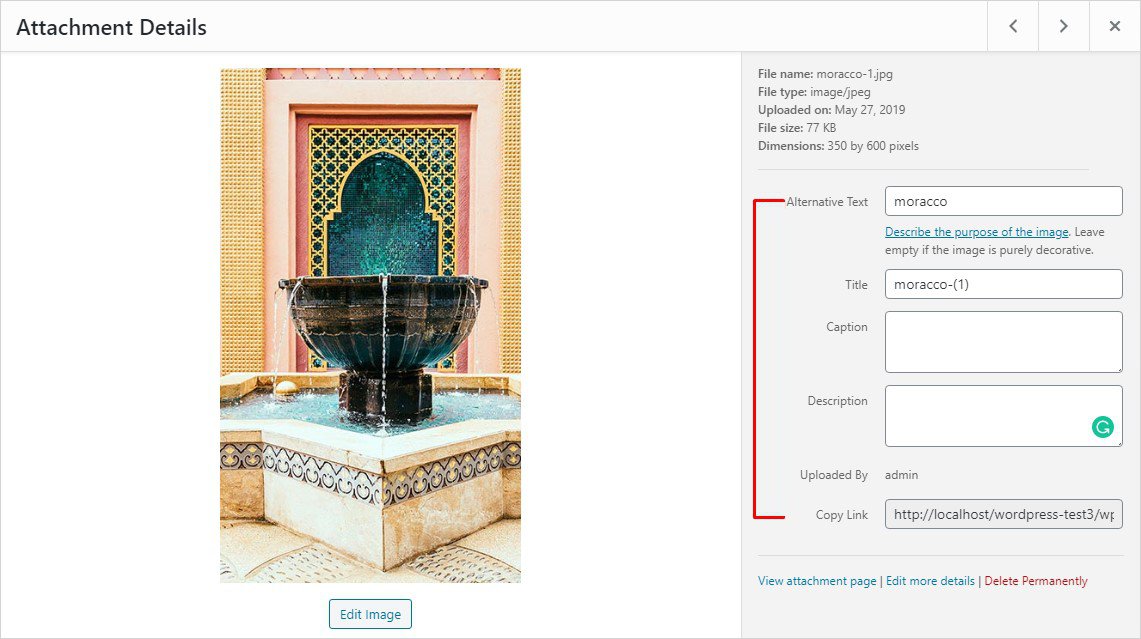
URL – It is generated by WordPress when an image is uploaded. It is not editable. But you can view it.
Title – As the name says its the title of the image. It can be the name of the image. When you uploaded it to the media library. But it can be changed according to your needs.
Caption – The caption of an image is displayed on the front end. Just below the image. It summaries the image in few words. You can edit it.
Alt text – Usually, the title of an image and alt text is the same. As alt text is shown on the front end. Before the image comes up. You can always edit it.
Description – It is for the SEO of the image. This description describes the image. And also consists of keywords for the SEO. It is editable.
Uploaded By – It shows the person who has uploaded that image. And it can’t be edited.
More Options
There are 3 more options. Such as view attachment page, edit more details, and delete permanently. Let’s learn about their significance.
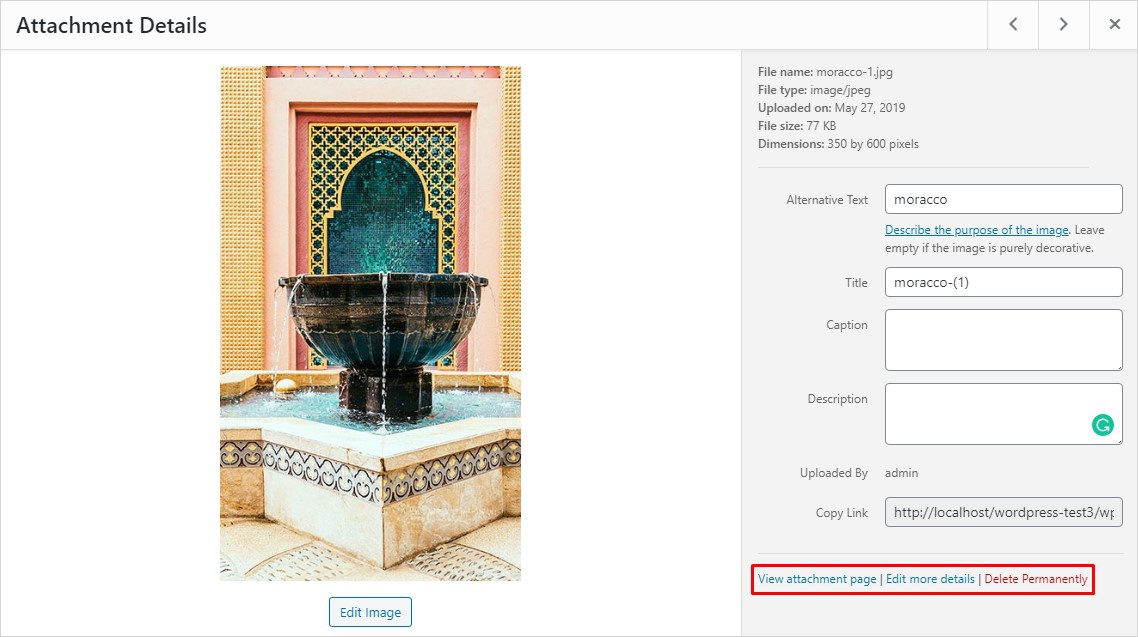
View Attachment Page- This is the front end page. Where you can see how the image looks. Once you have made all the desired changes in attachment details.
Edit More Details – This represents the back end page. Where all the image attachments details can be edited. It consists of Alt text, caption and description details. Only these can be updated.
Delete Permanently – It deletes the media you have opened permanently. Therefore, use this option carefully.
There is one more option of edit image. Let’s learn how to edit an image in WordPress media library.
How to edit an image in WordPress Media Library ?
Its true you can edit your image in the WordPress media library. All you need to do is click on the edit image option below the image to get started. Once you have opened the attachment details page, you are provided with options to rotate the image left or right. Or flip it in the horizontal or vertical direction. Further, it also gives options to crop and scale the image.
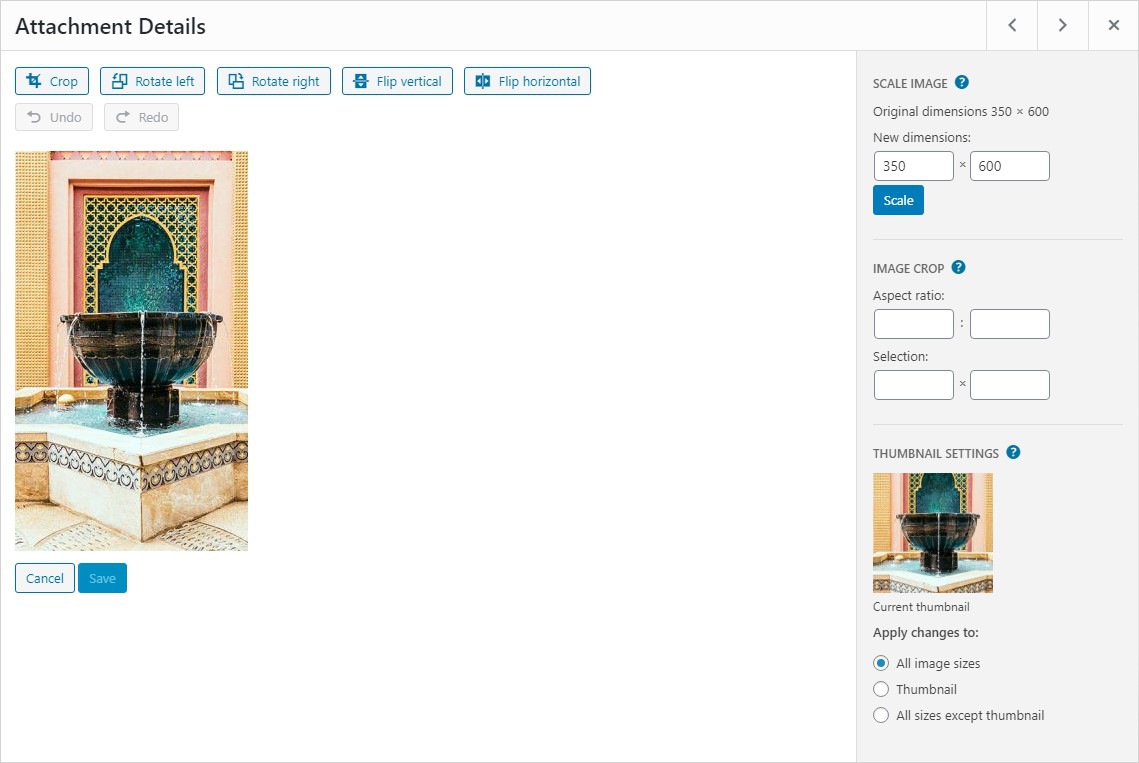
Crop, Rotate, and Scale Your Image
WordPress provides several basic tools to modify your images:
- Crop Tool: Drag your mouse over the image to select the portion you want to crop. Then click the Crop button to trim the image to the selected area. This is useful if you want to focus on a specific part of an image.
- Rotate: Use the rotate buttons to turn your image 90 degrees clockwise or counterclockwise. This is especially helpful if an image was uploaded in the wrong orientation.
- Flip: Flip your image horizontally or vertically with the flip buttons.
- Scale Image: To resize your image, enter the desired dimensions in the Scale Image fields. WordPress will maintain the aspect ratio to avoid stretching or distorting the image. Scaling down the image size is recommended for faster loading times.
How to Delete Media in WordPress
There are numerous reasons to delete media in WordPress. Generally, accidental uploads, freeing up storage space on your web host, removing or replacing old images with the new ones, clearing irrelevant images are some of the major reasons to delete media in the WordPress website.
Note: Media files deleted from the media library can not be retrieved. So make sure you are deleting only the futile media files.
Maintaining a clean and organized media library is crucial for optimizing your WordPress site’s performance and ensuring that you only keep relevant files. Deleting unnecessary media files not only frees up storage space but also reduces clutter, making it easier to find the files you need. Here’s a step-by-step guide on how to delete media in WordPress:
1. Access the Media Library
- Log into your WordPress dashboard.
- From the left-hand menu, click on Media and then select Library to view all the media files you have uploaded to your site.
2. Identify the Media Files to Delete
- Browse through your media library to find the files you wish to delete. You can use the search function or filter by type (images, audio, video, etc.) to locate specific files quickly.
3. Delete Media Files
- To delete a media file, hover over the thumbnail of the file you want to remove. You will see several options appear below the file.
- Click on the Delete Permanently link (or the trash icon) to remove the file. WordPress will prompt you to confirm the deletion, as this action cannot be undone.
4. Bulk Deleting Media Files
- If you have multiple files to delete, you can use the bulk delete feature.
- In the Media Library, click the checkbox next to each media file you wish to delete. After selecting the files, click on the Bulk Actions dropdown menu at the top of the page and select Delete Permanently. Then click the Apply button to remove all selected files at once.
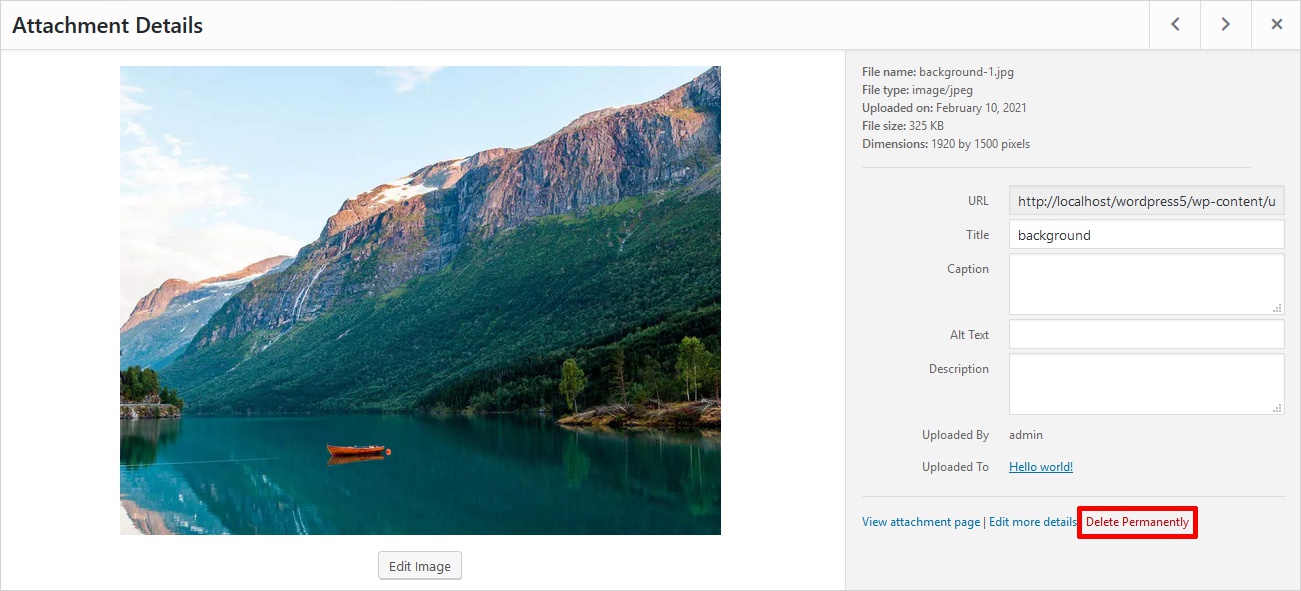
Once you have deleted any image, it is permanently deleted. There is no way to recover the deleted image. Therefore, it is advisable to be very sure about your decision.
How to Enhance Functionality of WordPress Media Library using Plugins
To increase the functionality of your WordPress Media Library. You can always install some useful add on plugins. Here are a few plugins, that can increase your media library functionality tenfolds.
1. Enable Media Replace
Enable media replace is a great plugin for you. If you are tired of re-uploading, deleting or renaming media files. It is a perfect fit for you. As it is easy to use. Plus this plugin simply provides you with the ability to replace a media file with the newly uploaded file.
2. WP Media Cleaner
Managing your media library can become overwhelming, especially as you continue to upload new files. The WordPress Media Cleaner plugin is a powerful tool that helps you streamline your media management by identifying and removing unused media files from your WordPress site. Here’s an overview of how this plugin works and its key features:
The Media Cleaner plugin scans your entire media library and identifies files that are not being used in your posts, pages, or other content. This helps you quickly locate items that can be safely deleted. By removing unused media, you can significantly improve your website’s performance, as fewer files lead to faster loading times and reduced storage usage.
3. Media Library Assistant
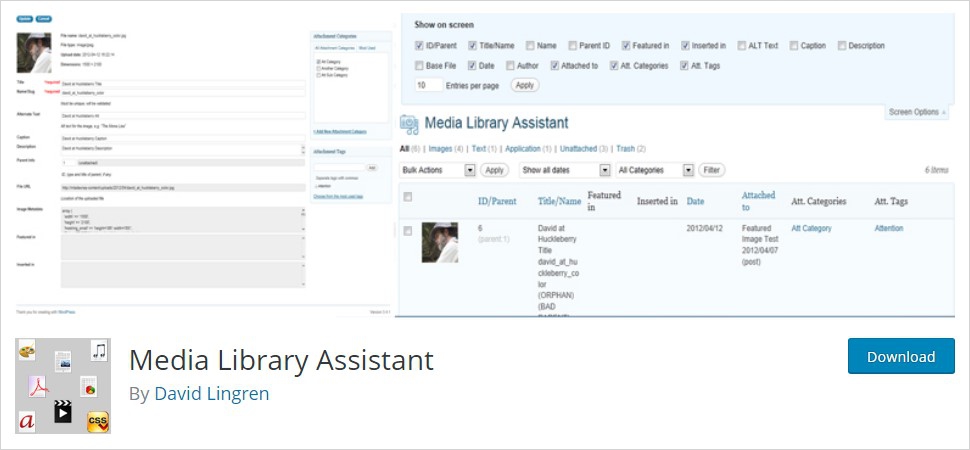
Media library assistant helps in managing the media library. It provides several enhancements to help manage the media library efficiently. Powerful content templates, attachment metadata are some of the features that come along with it.
4. Media File Renamer
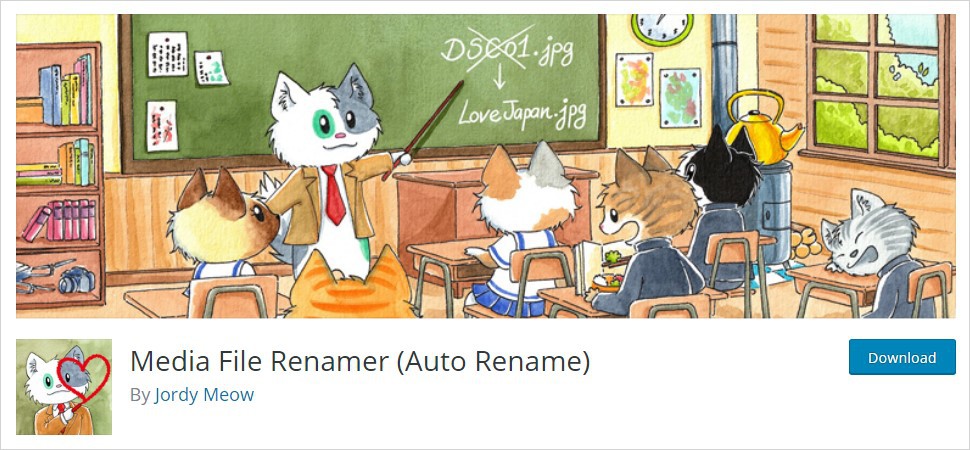
In order to create a cleaner file system and for better SEO. The media file renamer plugin renames media files automatically. It is highly dependent on media title. Additionally, its pro version also provides a manual rename feature.
5. Media Library Categories
Media library categories plugin adds categories in WordPress media library. You are provided with the option to change, add, or remove the category. Moreover, these actions can also be taken in bulk.
WordPress Media Library plugin Conclusion
By now you possess all the information you require to use WordPress media settings efficiently. Whether it comes to uploading an image to the WordPress media library, or editing the uploaded image in the media library. Now you are fully equipped with all the tools to make your WordPress media library experience splendid. Thus, making you more efficient and effective.
Build a Stunning Website in Minutes with TemplateToaster Website Builder
Create Your Own Website Now
Apart from that is there another plugin available for managing media in WordPress?
This is nice article to give idea to the bignners about media plugin.
Do you have another articles also related to WordPress, if yes please provide me some links as it s very helpful for me.
How to edit the uploaded media.
Steps with screenshots are more clear and easy to follow.