WordPress Media Settings – Beginners Guide
Are you looking for a standard image size solution for your WordPress website posts? If that is the case, then you have come to the right place. WordPress media settings is the answer to all your troubles. It helps you set a standard for the size of images that are being uploaded on your WordPress posts.
Still, a question arises how does this happen? How does WordPress Media Settings solve all of this? But before we get into detailed WordPress media settings part. Let’s understand, what happens when you upload an image to your WordPress post. When a user goes to a particular post. And wishes to add an image to that particular post. He or she uploads a picture. As soon as the picture is uploaded, WordPress automatically creates 3 copies of it in different sizes on its own. These 3 copies are classified based on their size as thumbnail size, medium size, and large size images. The height and width of these 3 types of images are set using default WordPress Media settings.
So, while uploading an image you get to choose the size of that image. It can be a thumbnail, medium or large size according to your needs. Once that is done, the image appears in your post with the desired size. Without further ado, let’s see how to configure these WordPress media settings. And what other aspects are present there related to these image settings.
Steps to Change WordPress Media Settings?
WordPress media settings play a very important role in your WordPress blog. Therefore, its important to understand how it works. Follow the following steps to change your WordPress media settings.
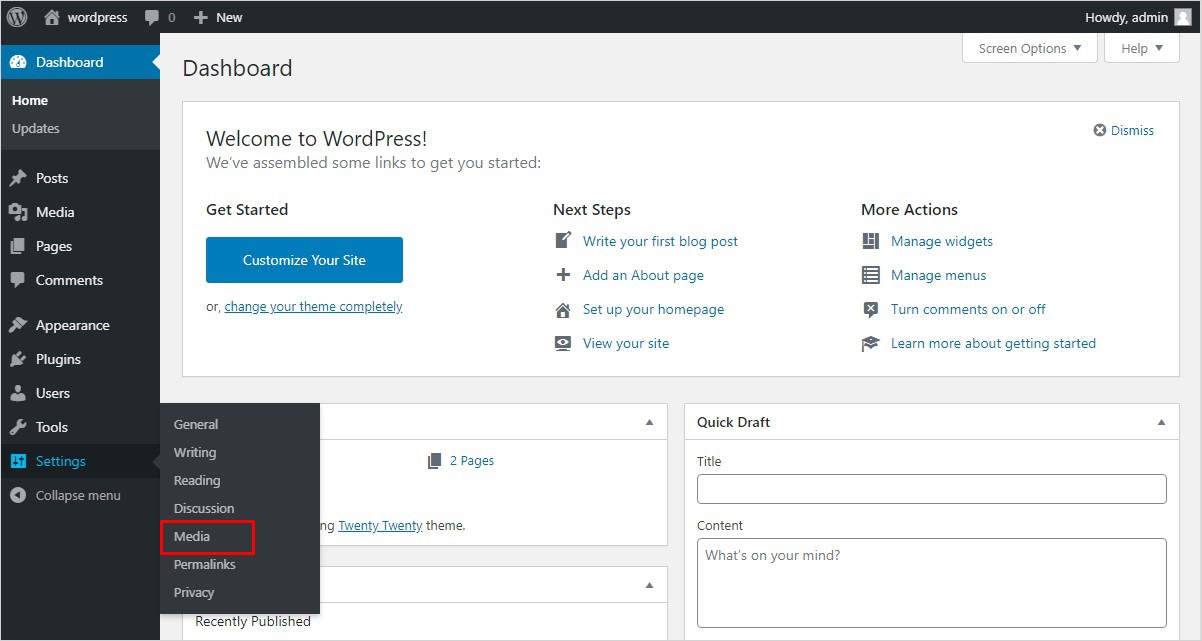
Step1 – First, open the WordPress dashboard.
Step2 – Click on the settings option present on the left sidebar of the screen.
Step3 – Next, you will be able to see the media option. Click on it.
Step4 – Once you have done that, the media settings page will appear.
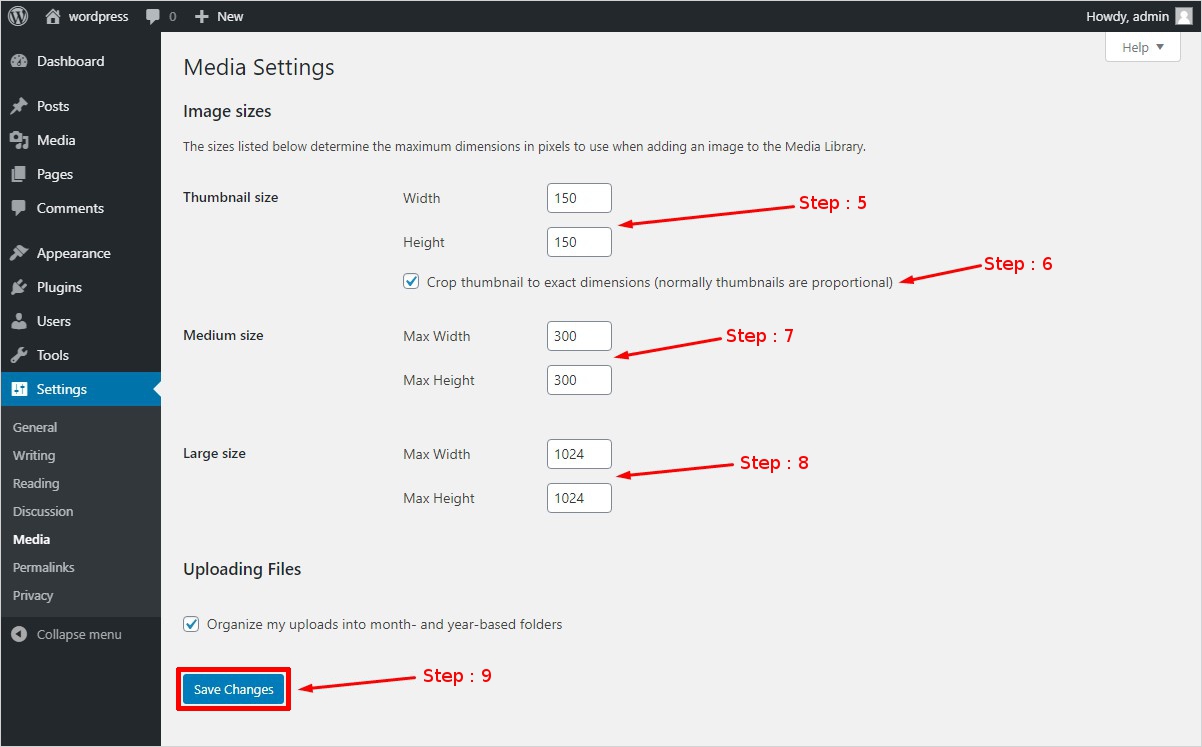
Step5 – Now, you will see thumbnail size image settings under the image sizes column. In front of it, there are boxes to put height and width numbers. You can fill a number in each according to your needs. These images are usually used for making a collage.
Step6 -Once done, just underneath that you will notice “ crop thumbnail to exact dimensions (normally thumbnails are proportional)” checkbox. Check the checkbox. If you wish to crop images that are not equally proportioned to one another in width and height in their original size.
Step7 -Further, you will see medium size image settings just below the thumbnail size image settings. Now in front of it, there are boxes to fill maximum height and width of images. Fill in a number in each according to your requirements. Such kind images are used at places where you can’t fit a large/full-size image.
Step8 – Moving forward, you will come across large size image settings under the medium size image settings. Similarly, as above you will see the maximum height and width boxes in front of it. Fill those with the desired number. These types of images are mostly used in WordPress posts.
Step9 – Further, click on save changes option that is present at the end of the page. In order to save thumbnail, medium, and large size image setting changes you have made.
These changes will work as a standard for every image you upload to a post. But you can always customize an image size anytime you wish from the normal editing of an image.
Default WordPress Media Settings
WordPress also provides a default size for thumbnail, medium and large size images. For thumbnail size images, it is 150 for both width and height. Whereas for medium size images, 300 is the maximum width and height. In the case of large size images, the default maximum height and width is 1024. But you are allowed to change them according to your requirements.
Additional WordPress Media Settings
You probably have noticed by now, that below the image sizes column. There is an uploading files settings option in the last row of the image size column. Below it is a checkbox that says “ Organize my uploads into month- and year-based folders “. So let’s first understand what it means before you check or uncheck it.
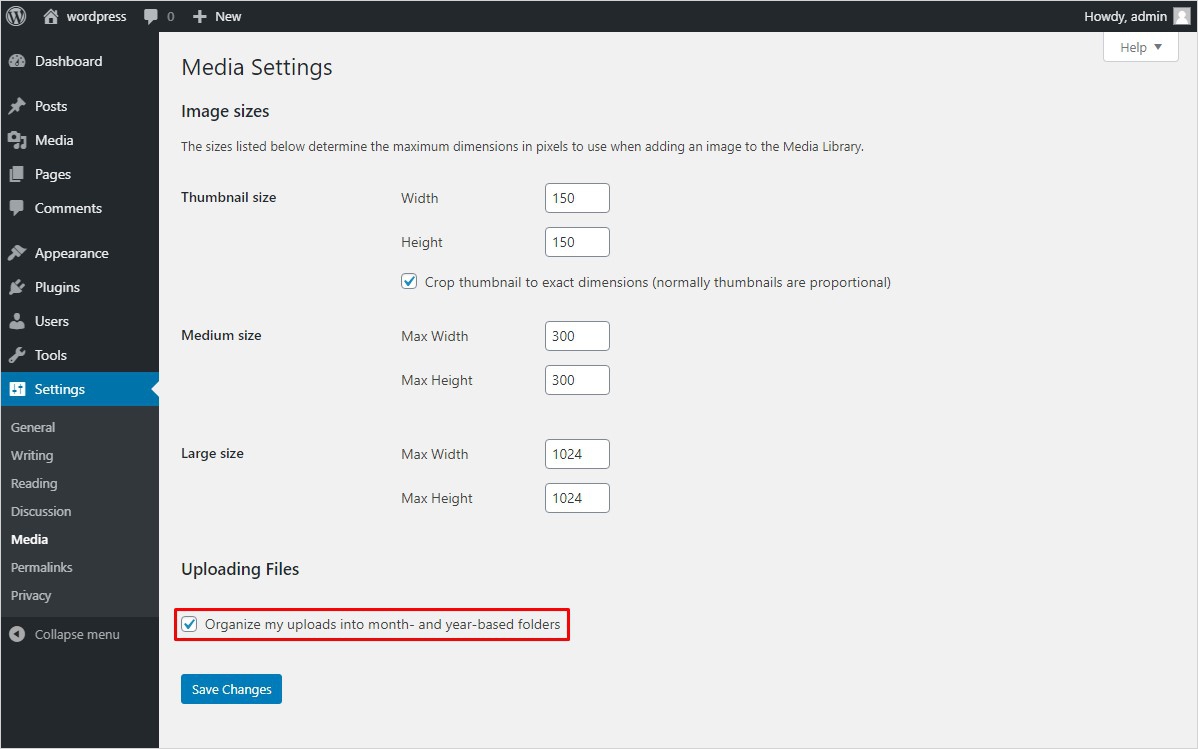
It simply means to ask users where do they wish to save their uploaded images on the backend. You actually have two options from here. Option one is you keep that box unchecked. That would mean that the uploaded images are stored inside the WordPress content/uploads directory. Whereas in option two where you check the checkbox. Your uploaded images get stored in WordPress content/uploads, followed with proper folders mentioning the year and month in which images were uploaded. Once you have selected the option of storage. Again click on save changes below it. To get the desired changes to work.
Conclusion
From here on, you are all set with your WordPress media settings. All you need to do is configure what your requirements are with the images for your posts. And then set your WordPress media settings accordingly. To help you make your every post look perfect. Be smart with your choices.
Just in case you are looking to find solutions for other WordPress related issues like how to disable WordPress comments? or how to change the time and date format in WordPress? We here at the TemplateToaster WordPress Website Builder blog are more than happy to share our knowledge with you. On each and every topic related to WordPress and other CMS like Drupal, Joomla, etc in detail.
Related Links:
Build a Stunning Website in Minutes with TemplateToaster Website Builder
Create Your Own Website Now
This article is very clear and to the point. Thank you, I was facing this issue.
This is very helpful article for bignners.
Hey there, I am bit confused about sixth step, please explain it again.