How to Add Drupal Webform on Site
Drupal Webform, since its inclusion in the set of Drupal modules has proved to be very useful as a solution to add contact forms. This plugin has made the whole process seamless. So, in this tutorial for beginners, I will give you an introduction to how to add Webform in Drupal and further discuss its advantages with the steps to add it.
What are Drupal Weform?
A Drupal Webform is an extended module of Drupal. It contains all features expected as an enterprise proprietary form builder. It has openness and flexibility of Drupal.
Why we need Drupal Webform?
This module primarily comes in use for building surveys and forms in Drupal. Administrators and submitters can use customizable e-mails to retrieve submissions. These submissions or results can then be exported to Excel or other spreadsheet applications.
How to add Drupal Webform?
Here I have downloaded and installed Drupal and XAMPP server on my local PC. Now I will show you step by step to how to add Webforms to Drupal.
Steps to add Drupal Webform
You can following steps to add Webforms
Step 1. Login to your account with your Drupal Username and Password.
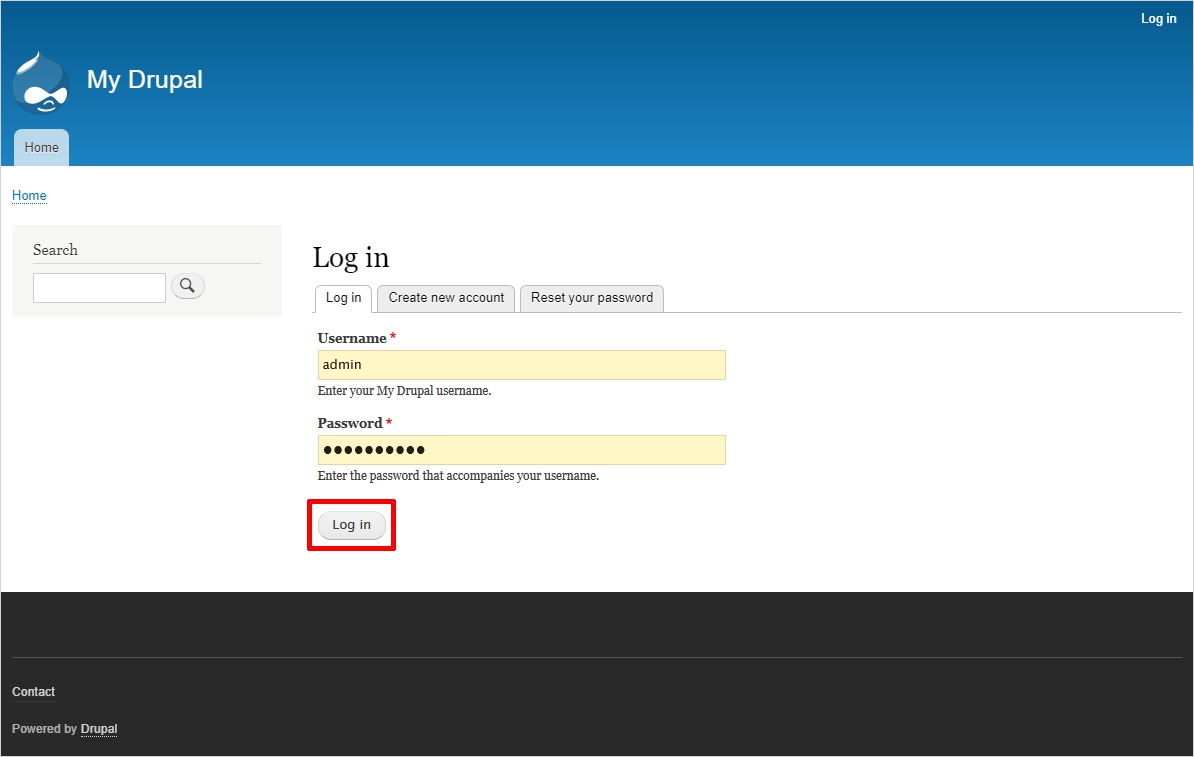
Whether you are using Drupal locally through XAMPP server or on an online hosting, you need to login to your Drupal account the same way. After you’ve logged in, you will see a this Drupal screen.
Step 2. Select “Manage” tab.
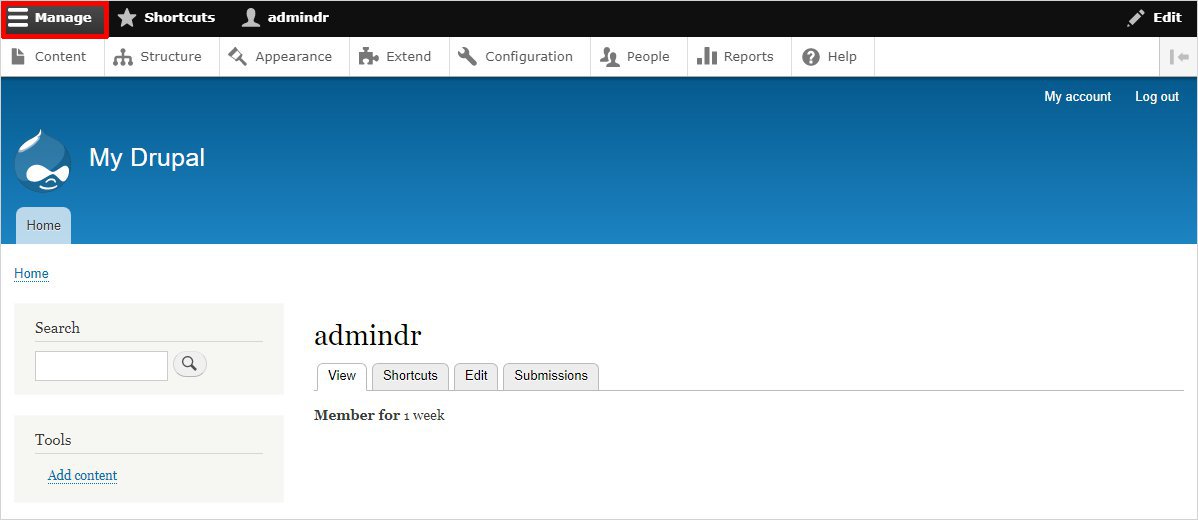
On the screen which you get after logging in, you will see a admin toolbar towards the top left of the screen. You will be able to see 3 tabs, namely “Manage”, “Shortcuts” and the third one will be named as your username. The “Manage” is of our use and we shall click on it. It will display a series of other tabs such as Content, Structure, Appearance, Extend etc.
Step 3. Select “Extend” tab
Among the series of tabs being displayed, we shall select the “Extend” tab. It will display a list of all modules, Installed or uninstalled. Among the list, you need to search for “Webform”.
Step 4. Select “Webform” and Click “Install”.
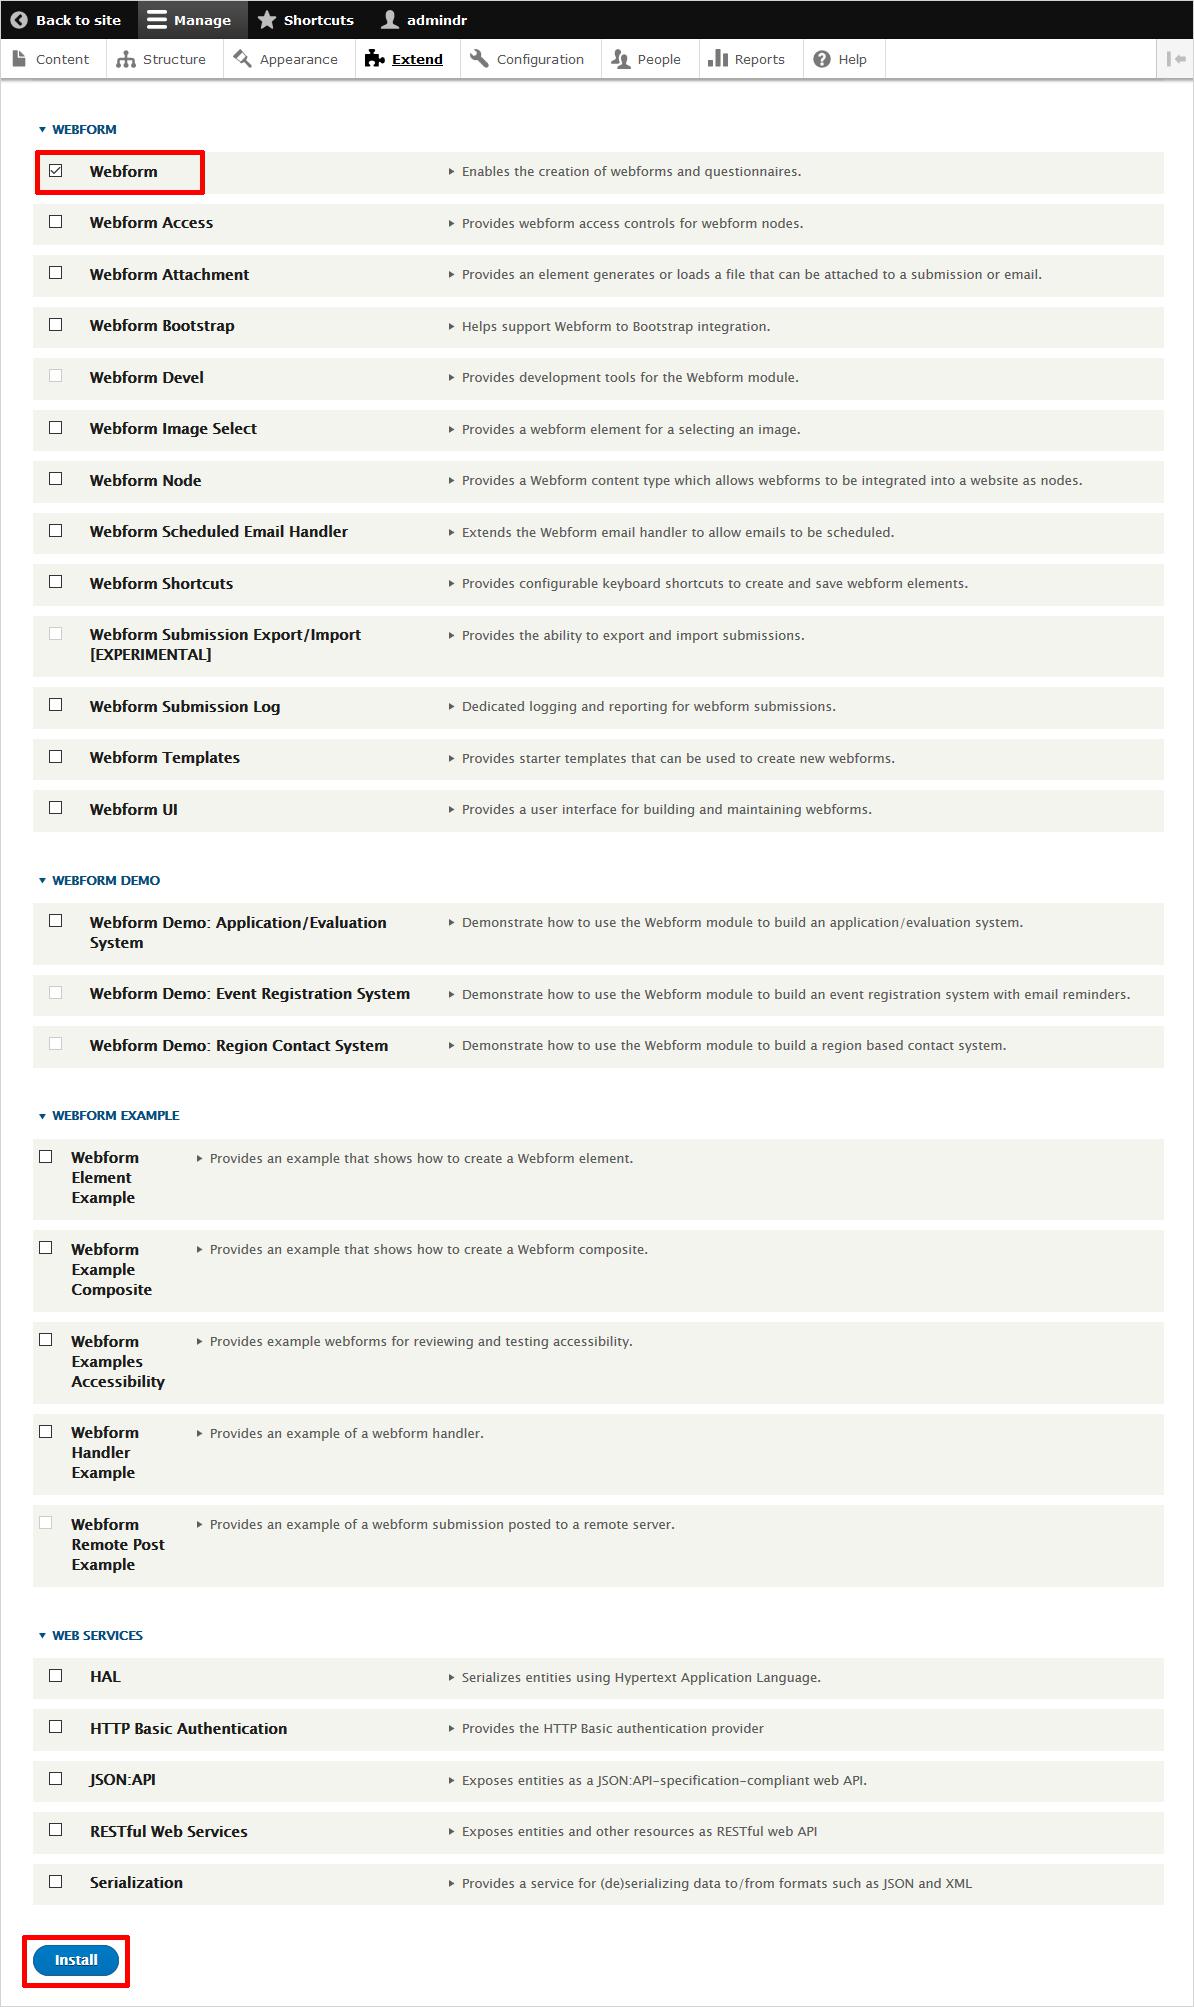
If the checkbox to the left of “Webform” is already check marked, it means that the webform module is already installed. However, you will have to install it if you find the box is without a check mark. To add the module, click on the install button which is present at the very bottom of the list of modules, after marking the checkbox.
Step 5. Select “Structure” tab.
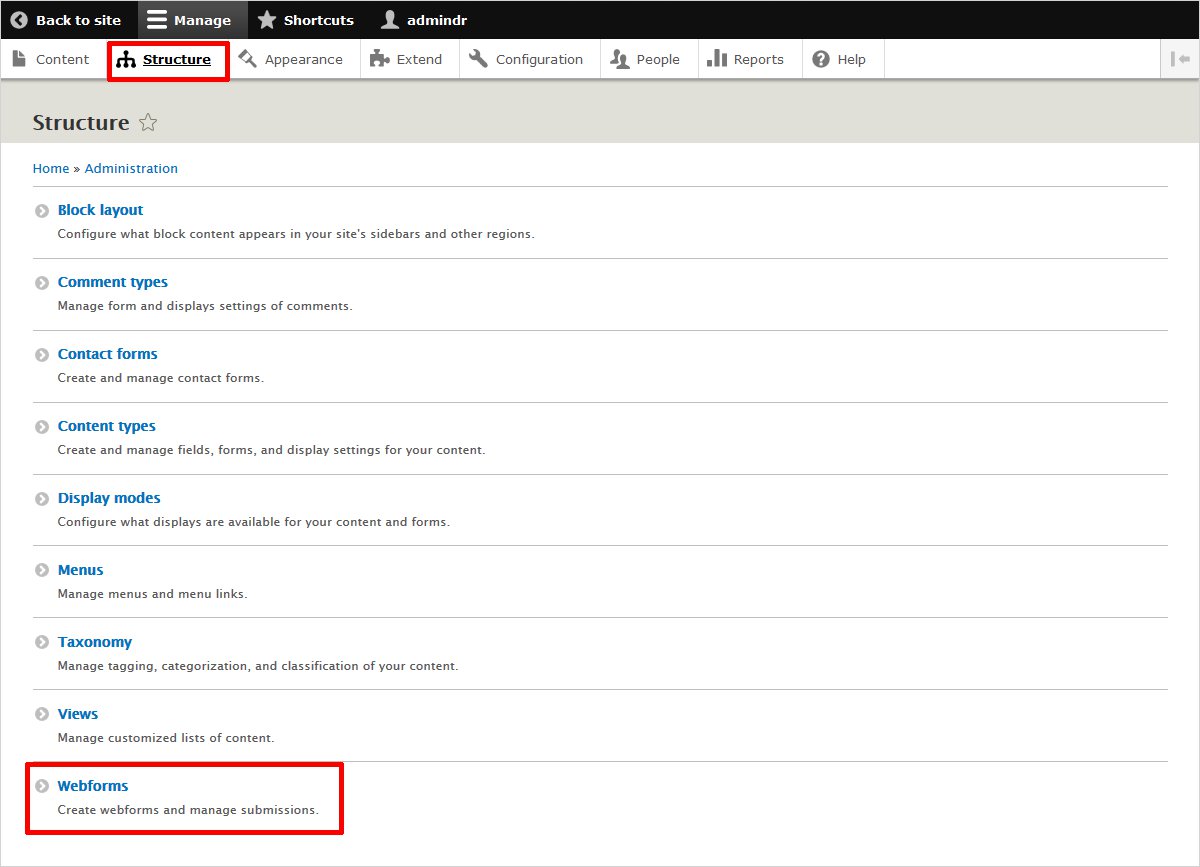
After the installation is over, you will see a message “Module Webform has been enabled”. To see the added webform, you need to click the “Structure” tab from the dashboard. Now you will be able to see all the added modules. Webform can be seen as the bottom most module.
Step 6. Select “Webforms” from the list of installed modules.
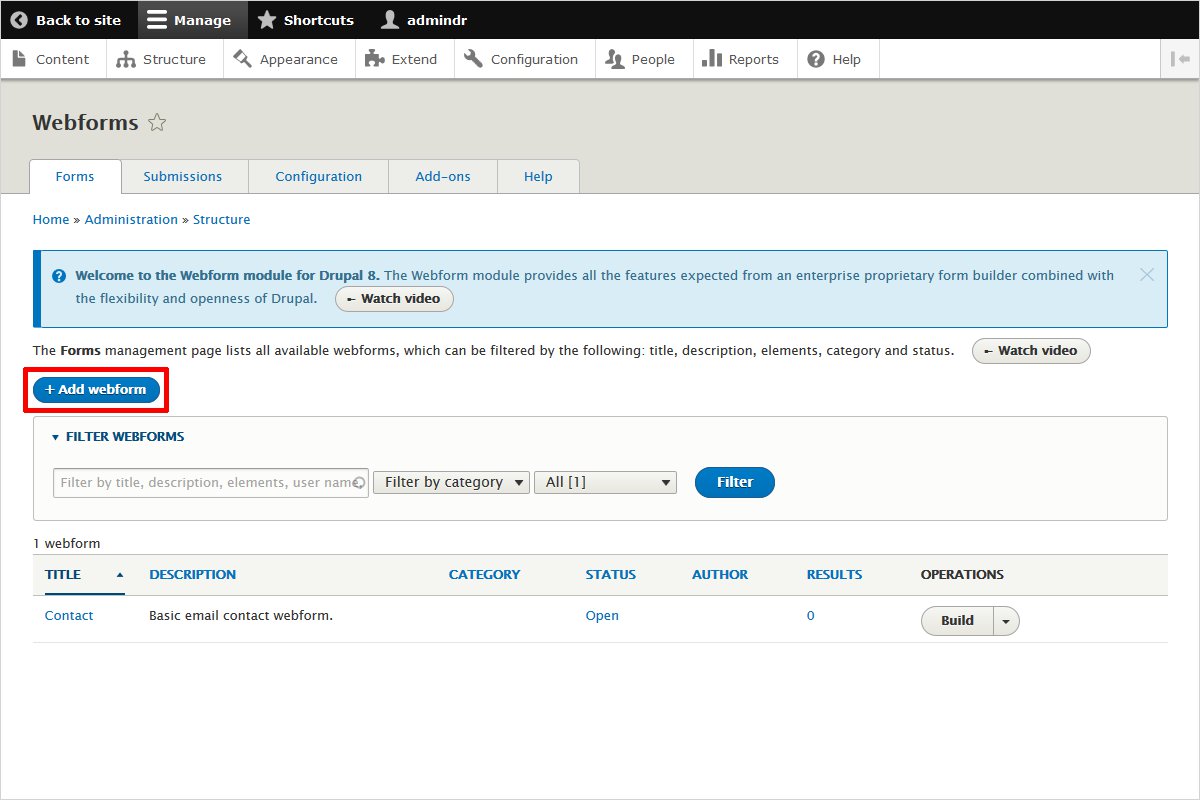
Selecting “Webforms” will now take you to the main screen where you will be adding all the fields for your Webform.
What are components of Dashboard of Drupal Webform?
So, above is a step-wise installation procedure of “Drupal Webforms”. Now that i have told you about the installation steps, let me also explain how the main working dashboard of drupal webform looks and what are its components.
There is only nine webform by default but you can add as many number of webforms as you like. For this purpose you have to use a blue colored tab on the top left region of the dashboard which says “Add webform”. By clicking on it you can add other fields as well. Thus you will be able to get a variety of details from the user.You may read about how to add Recaptcha in Drupal.
How to do Customization in Drupal Webform?
Again on the main dashboard, on Selecting the operatons tab from a series of tabs forming a menu, a dropdown menu will appear.
Selecting the “Settings’ option from the drop down menu will finally take you to a new page. This page is known as the general settings page that allows you tom customize any administrative information, pasths, behaviours etc. or any third party settings.
Conclusion
By following the above steps, you will ultimately able to integrate Webform, which would act as a channel of communication between the customers and the company. With webform, you can now carry out variety of tasks such as customer’s contact details, carrying out survey about the quality of updated features, getting review in written form and much more.
In the case of Drupal, you can design your layout, use modules such as web-forms, now when the final task of imparting a theme is to be done, it can be done through one of a Drupal Theme Generator i.e. TemplateToaster. It’s just like a cherry on the cake. Use as many modules as you want according to your requirement and leave the designing part up to TemplateToaster. Believe it and you will be able to build all your creative ideas into a great website with an ease! Check out Free Drupal themes.
Related reading
Build a Stunning Website in Minutes with TemplateToaster Website Builder
Create Your Own Website Now
Hey there, Great article.
Which plugin should i use for email newsletter for my Drupal Website.
Amazing information given in this article, it is really helpful for me.
Amazing, these kinds of articles are very helpful for us. Thanks for posting.