How to Create Drupal Theme from Scratch: A Step by Step Guide for Drupal 7 & 8

Creating a Drupal theme may seem a worrisome task but you easily get through it once you come across the right resource. Here’s what all you need to know to create own Drupal theme.
Drupal is an amazing open source Content Management System as well as a customizable platform to create anything from a personal blog to a corporate website. Drupal offers many native features. It is a preferred choice for developers and designers to create themes. A Drupal theme gives you an opportunity to come up with an SEO and mobile friendly website. You can create your own custom Drupal website theme to entice your customers with minimum efforts.
How to Create Drupal Theme from Scratch?
Having your own unique Drupal theme is something sumptuous. But the question arises – from where to start? The simple answer is, there are two reliable methods for designing a theme as follows
There are two tried and tested ways to create Drupal theme as follows
- Create Drupal theme with coding Method
- Create Drupal theme Using TemplateToaster
A step by step tutorial is going to be showcased as follows to create a Drupal theme from scratch using both the methods
Follow Steps Create Drupal theme with manual method
You need to have good knowledge of PHP, CSS, JavaScript in order to create Drupal 8 and 7 themes. Here, you will get to know about the basic files to create custom Drupal 8 theme and Drupal 7 theme as follows
Creating Drupal 8 Theme
Step 1: The first step is to create a theme folder in Drupal 8 where your theme will reside, a .info.yml file and libraries file.
1. Create the Theme folder
- Create a folder in the /sites/all/themes directory.
- Name your folder themename, all lowercase.
2. Create the .info.yml file
Create a file named themename.info.yml, inside ‘themename’ folder. Describe the site information in it using text editor like Notepad.
name: themename
type: theme
base theme: false
Core: 8.x
libraries:
  - themename/global-styling-and-scripts
regions:
header: Header
primary_menu: 'Primary menu'
secondary_menu: 'Secondary menu'
page_top: 'Page top'
page_bottom: 'Page bottom'
highlighted: Highlighted
featured_top: 'Featured top'
breadcrumb: Breadcrumb
content: 'Content'
3. Create the .libraries.yml file
Create a file named themename.libraries.yml, inside ‘themename’ folder. Define all the css and js to be used.
global-styling-and-scripts:
version: VERSION
css:
theme:
css/bootstrap.css: {}
css/style.css: {}
dependencies:
- core/jquery
- core/jquery.ui.effects.core
js:
js/bootstrap.min.js: {}
js/Customjs.js: {}
*dependencies: Add dependencies only if required.
Step 2: Creating Stylesheets
Add the CSS and Js files defined in themename.libraries.yml. Here, you can see an example style.css. You can design it in your own unique way.
/*header layout styling*/
.path-frontpage header {
background:
#2A93D3;
padding: 20px 0;
}
.region.region-header {
max-width: 1100px;
margin: auto;
width: 100%;
}

/* search form*/
.search-block-form h2 {
color:
#FFF;
font-size: 16px;
margin: 0;
font-family: arial;
font-weight: normal;
display: inline-block;
}
#search-block-form
{
display: inline-block;
}
#search-block-form #edit-submit
{
background:
#DDD;
border: none;
padding: 5px 15px;
font-size: 14px;
}
#block-dummy-search
{
text-align: right;
}


/* site-name */
#block-dummy-branding {
margin: 20px 0;
}
.site-name
{
display: inline-block;
}
.site-name a {
color:
#FFF;
font-size: 18px;
text-decoration: navajowhite;
}
.site-logo {
font-size: 14px;
color:
#FFF;
margin-right: 10px;
}

/*main-menu*/
#block-dummy-main-menu
{
max-width: 1100px;
margin: auto;
width: 100%;
}
ul.menu a.is-active
{
color:
#000;
background:
#FFF;
padding: 10px;
font-size: 14px;
text-decoration: navajowhite;
display: inline-block;
}
.menu li a
{
color:
#FFF;
font-size: 14px;
text-decoration: none;
padding: 10px;
}
.navigation li {
display: inline-block;
}
.navigation .menu {
margin: 0;
}

/*main content */
.path-frontpage main {
max-width: 1100px;
margin: auto;
width: 100%;
}
The code simply sets the content background color, width, and margin of the navigation bar and so on. It tells about styling the text of sidebars, footer, navigation bar. You can give a unique touch to different elements of content through a stylesheet. You can also add more stylesheets as per your needs.
Step 3: Design
If you want, you can copy the main PHP template files into your theme folder and modify as per your liking. These files are as follows
- page.html.twig
- node.html.twig
- block.html.twig
That’s it. Now, you have your own custom Drupal 8 theme.
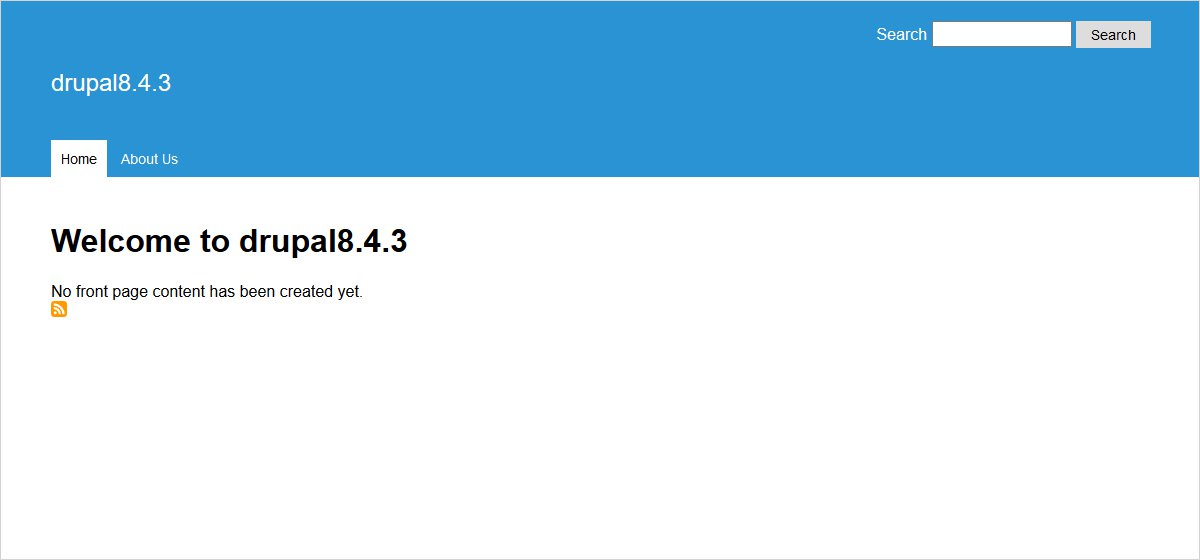
Creating Drupal 7 Theme
Step 1: The first step is to create a theme folder in Drupal 7 where your theme will reside and a .info file. An Info file tells Drupal about your theme.
1. Create the Theme folder
- Create your folder on the /sites/all/themes directory.
- Name your folder themename, all lowercase.
2. Create the .info file
Create a file named themename.info, inside ‘themename’ folder. Add site information in it using a text editor like Notepad.
name = themename
description = Description of themename
core = 7.x
engine = phptemplate
regions[header] = Header
regions[breadcrumb] = Breadcrumb
regions[Content] = Content
regions[Sidebar1] = Left
regions[Sidebar2] = Right
regions[footer]=Footer
stylesheets[all][] = bootstrap.css
stylesheets[all][] = style.css
scripts[] = bootstrap.min.js
scripts[] = Customjs.js
Save It.
* You can add more stylesheets and Js files as per your requirement.
Step 2: Add stylesheets as described in themename.info file. The example style.css will have this code
body.front
{
margin: 0;
}

/*name slogan*/
#name-and-slogan {
float: none;
padding: 20px 0;
}
#site-name a {
font-size: 20px;
text-decoration: none;
}

/*admin menu */

#secondary-menu {
position: absolute;
right: 0;
top: 5px;
width: auto;
}

/* menu styling*/

#main-menu-links a {
font-size: 14px;
padding: 10px;
display: inline-block;
text-decoration: none;
}
/*sidebar-styling*/

.sidebar .section {
padding: 0 15px 0 0;
}

.region.region-sidebar-first {
padding: 20px 0;
}
.sidebar .block {
background-color:
#F6F6F2;
border-color:
#F9F9F9;
padding: 20px;
margin-bottom: 20px;
}
#edit-actions {
display: block;
margin-top: 5px;
}
#edit-submit {
background:
#DDD;
border: none;
padding: 5px 15px;
font-size: 14px;
border: 1px solid
#CCC;
border-radius: 15px;
}

/*footer region*/
.region-footer span {
color: #DDD;
}
Step 3: Design
You are almost done. If you want, you can copy the main PHP template files into your theme folder. Then, modify as per your liking. These files are as follows
- page.tpl.php – For the layout of the whole page.
- node.tpl.php – For all the ‘nodes’ i.e module positions.
- block.tpl.php – For all the blocks in whichever region you are placing.
You are ready with your custom Drupal 7 theme!!
Follow Steps Create Drupal theme with TemplateToaster
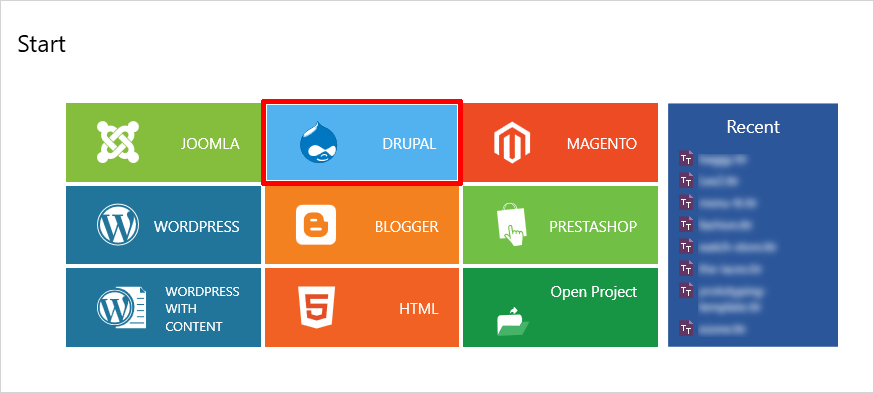
First of all, get started by selecting an appropriate CMS platform as TemplateToaster website maker supports almost all the major CMSes. You can download TemplateToaster and can start using it. As you want to create Drupal theme, you will select the ‘Drupal’ from the window throwing choices for different CMSes as shown below:
Step 1: Choose Platform
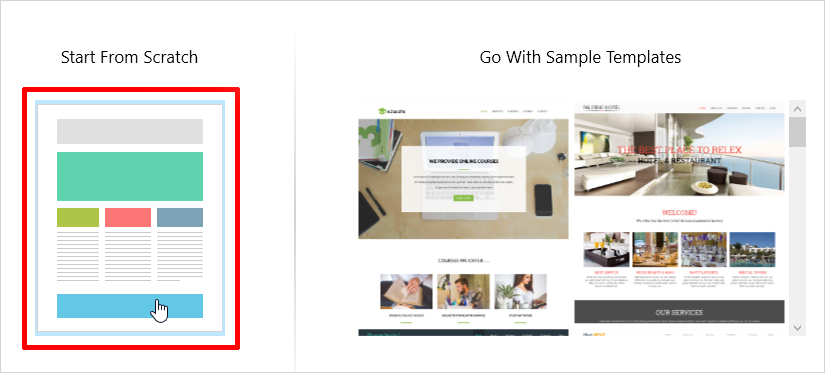
Once you selected the CMS, you will be asked to go from scratch or with a sample template. You can select ‘Start From Scratch’.
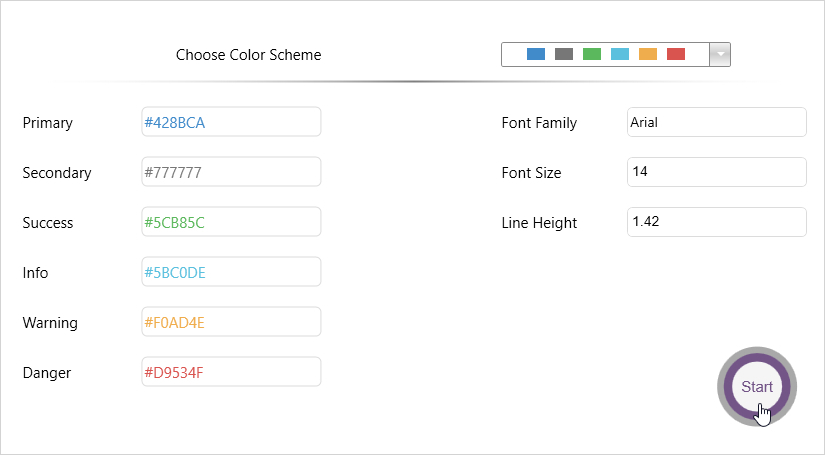
Now, you can select the colour and font typography from the following window and click ‘Start’.
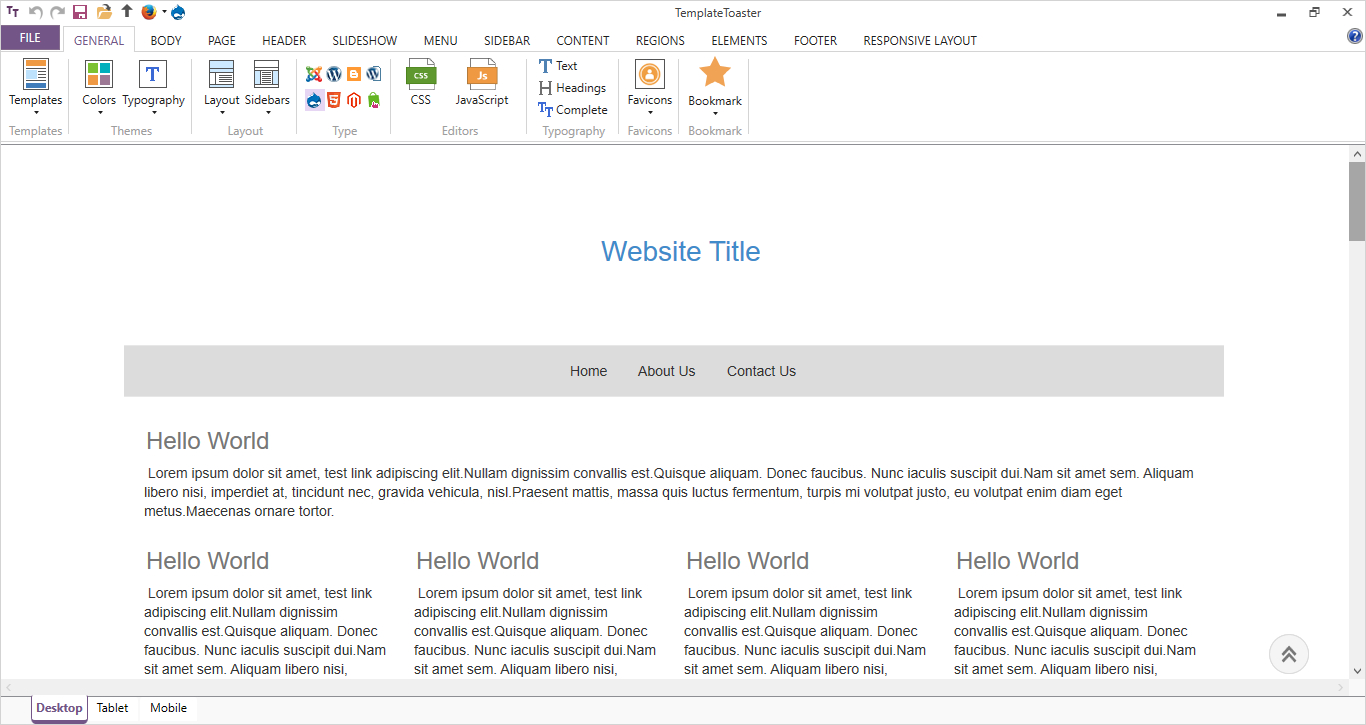
Once you select start, this forwards you to the main interface of the software as shown below:
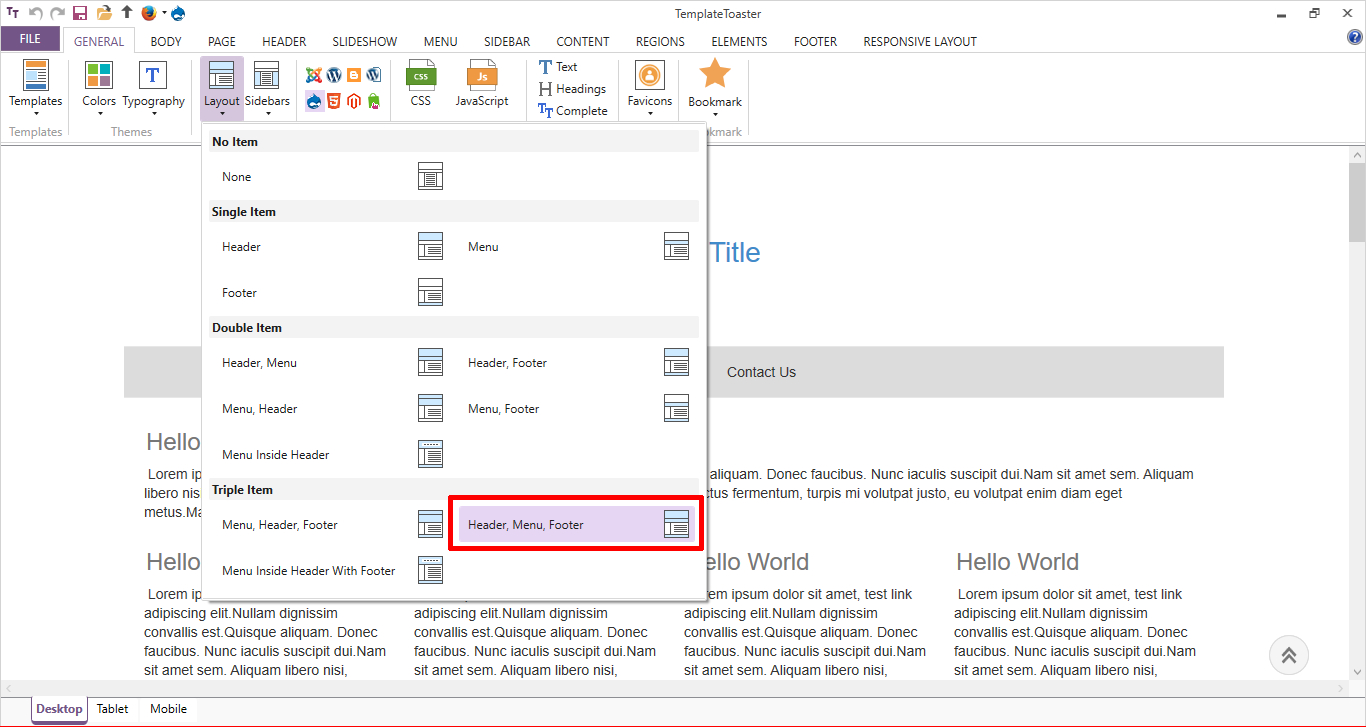
Step 2: Choose a Layout
First, you are going to select the layout for your web page. Here, you have a number of options like Single, Double, Triple layouts. You can select any of these according to your design. Here, to show all the sections, Triple layout including Menu, Header, Footer is selected.
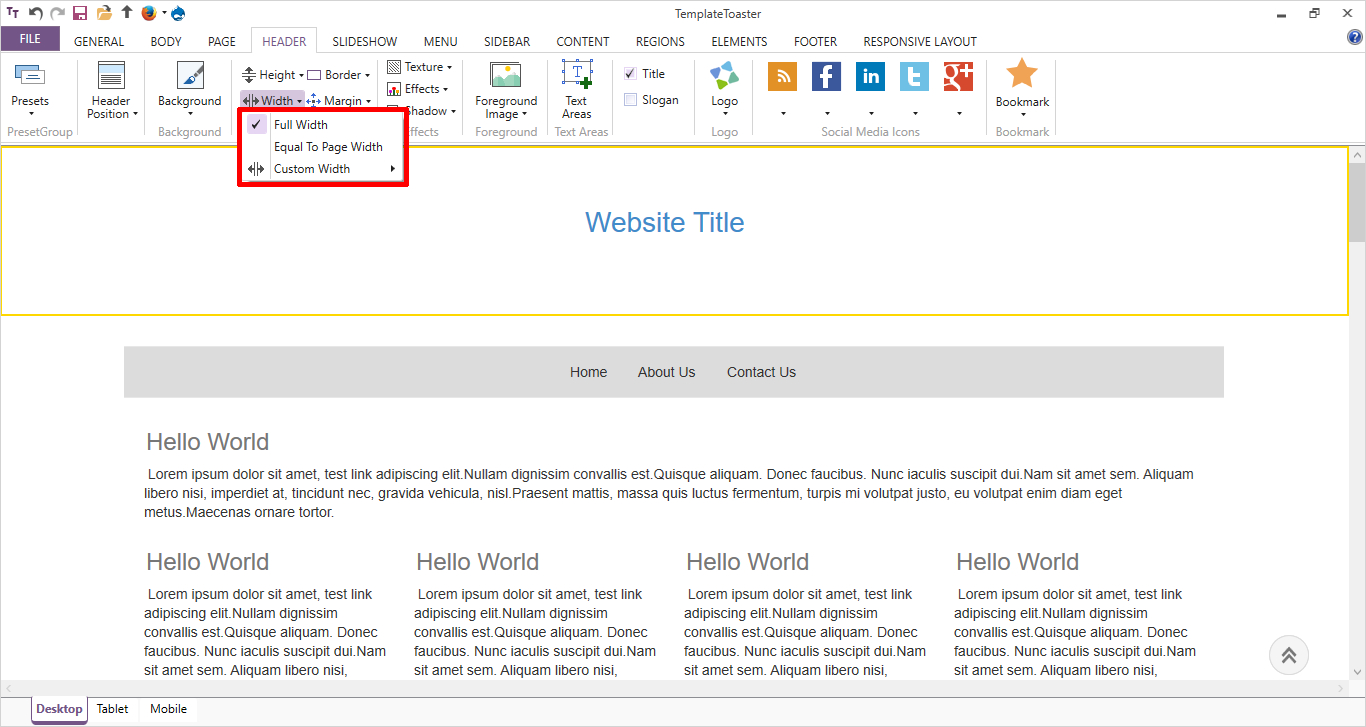
Step 3: Designing a Header
From here, you will actually start designing the Drupal theme. First of all, design Header. Go to the Header tab and select the ‘Full Width’ for a header as follows:
For current Business theme, we are to change the height of header from Header→ Height→More options, as shown below:

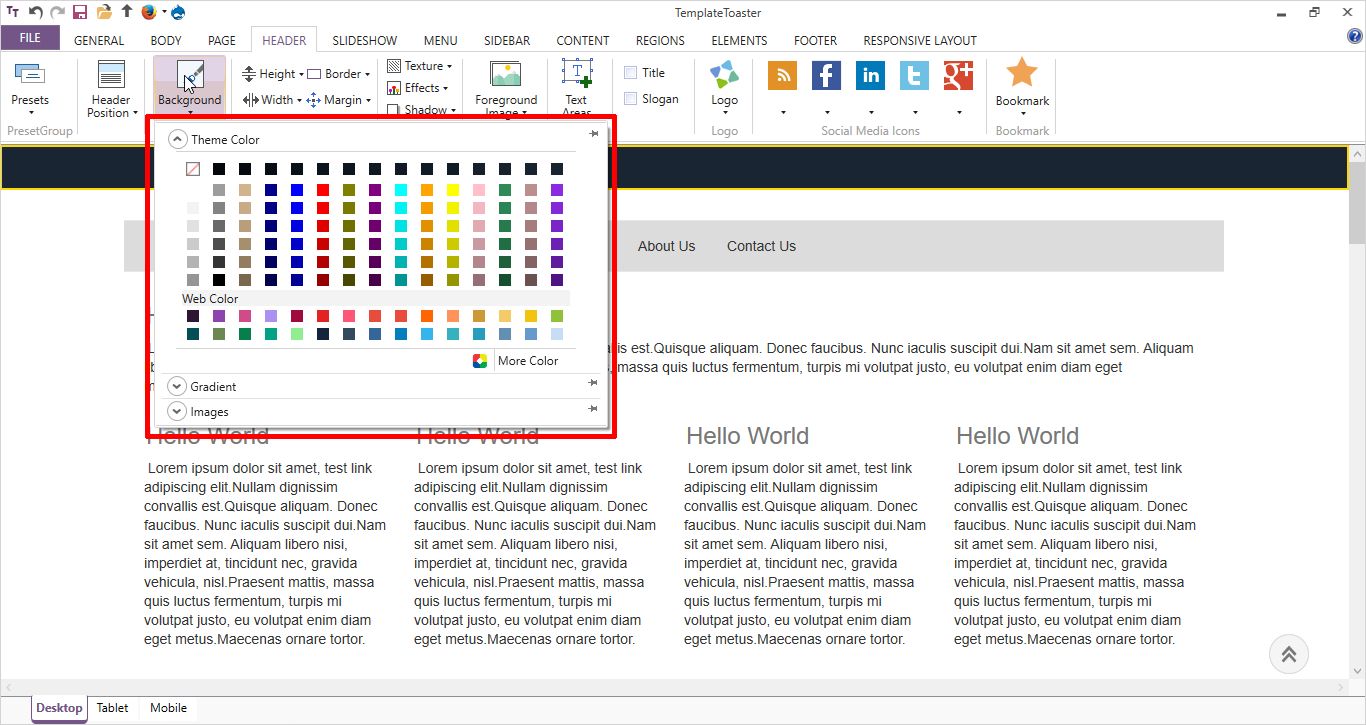
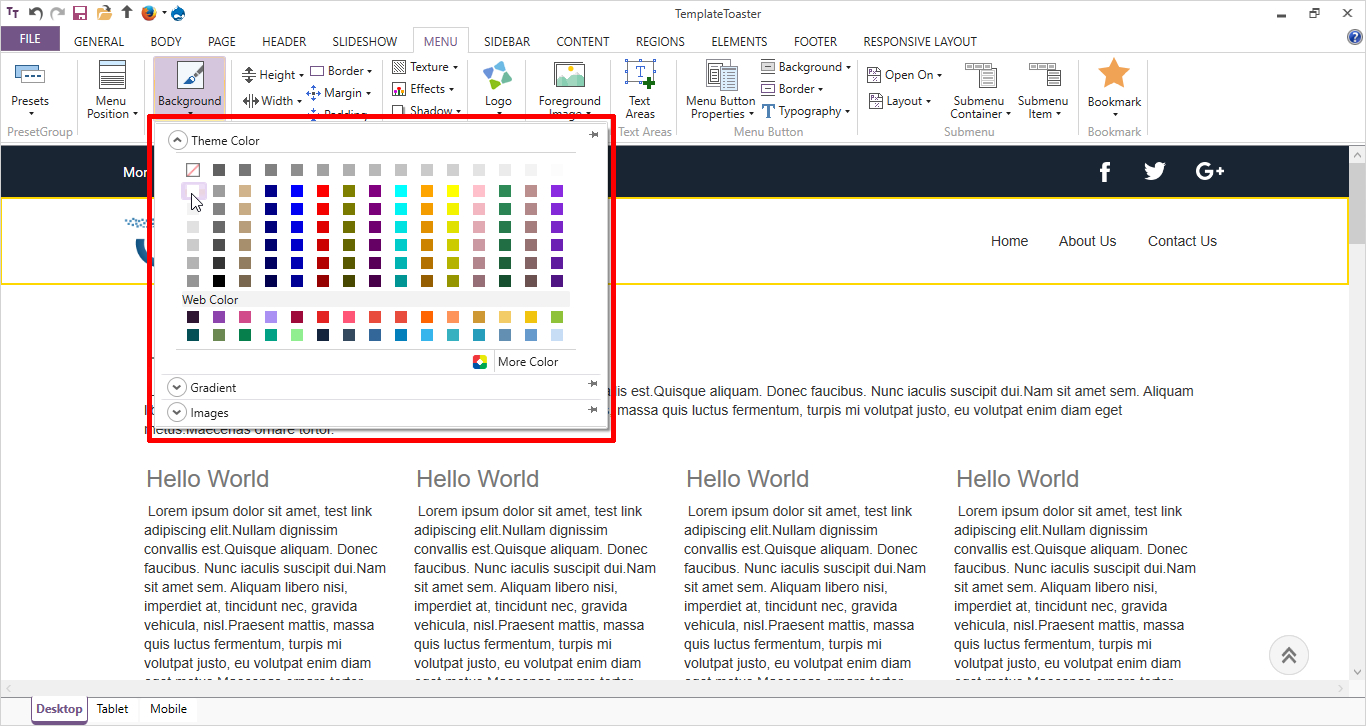
Choose a Background Color for the header from the ‘Background’ option. You can also set a gradient or an image according to your preferences.
Now remove the Website Title and draw a text area to put the contact details as email id and phone number. Set the typography of the text as required from the Editor tab that open when you click on the text area drawn.

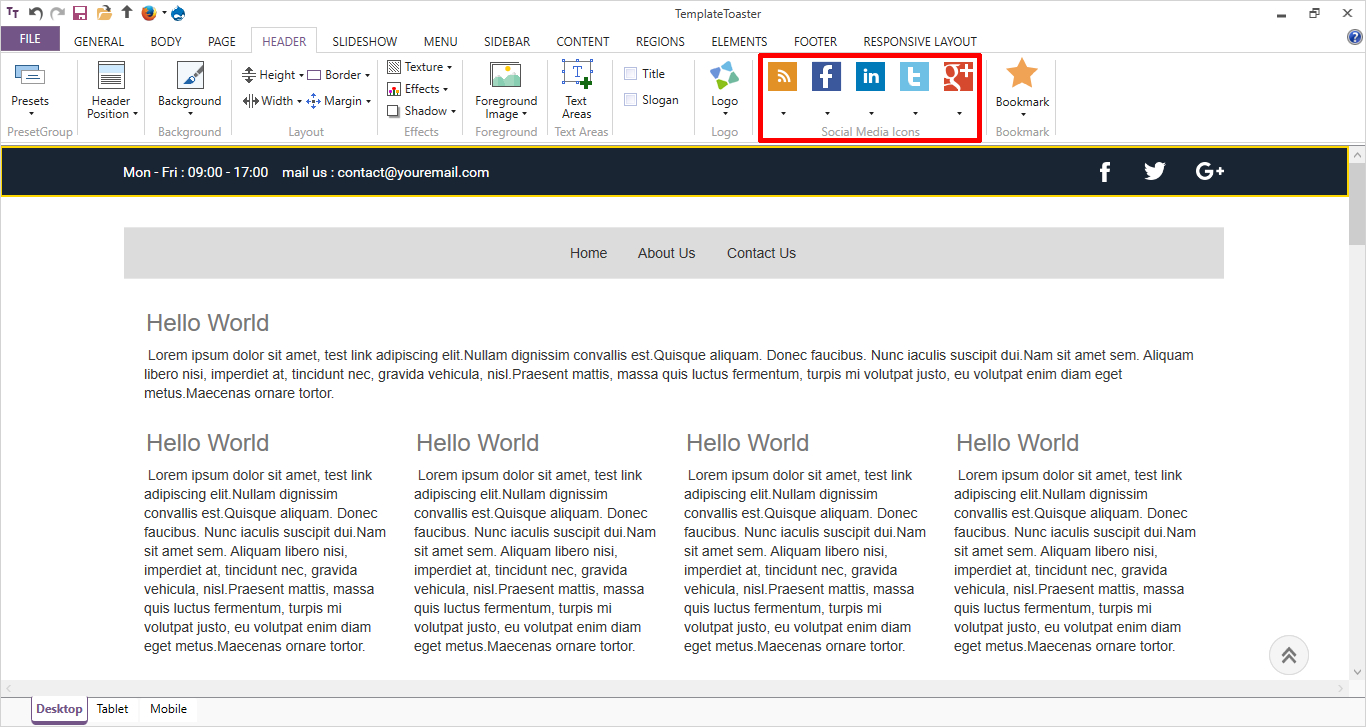
Now, just in the right corner of the header, place the ‘Social Media Icons’ from the given options. You can browse your own custom icons from the browsing option ‘More’. You can also put the Website Title and Slogan if you need as all the options are available here.
You completed designing of the Header part.
Step 4: Designing the Menu
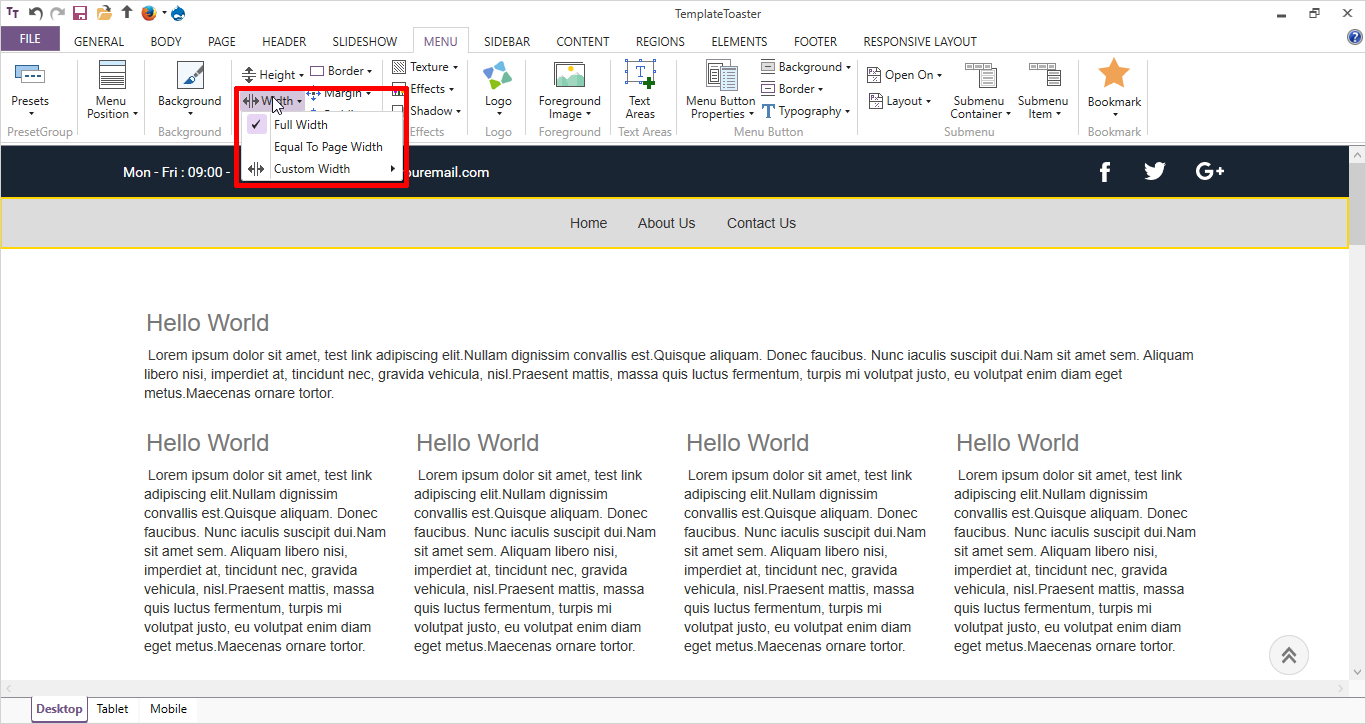
Next section is Menu. Move to the Menu Tab. Make it ‘Full Width’ as shown below. You can also set a custom width or width equal to the page as per your preferences.
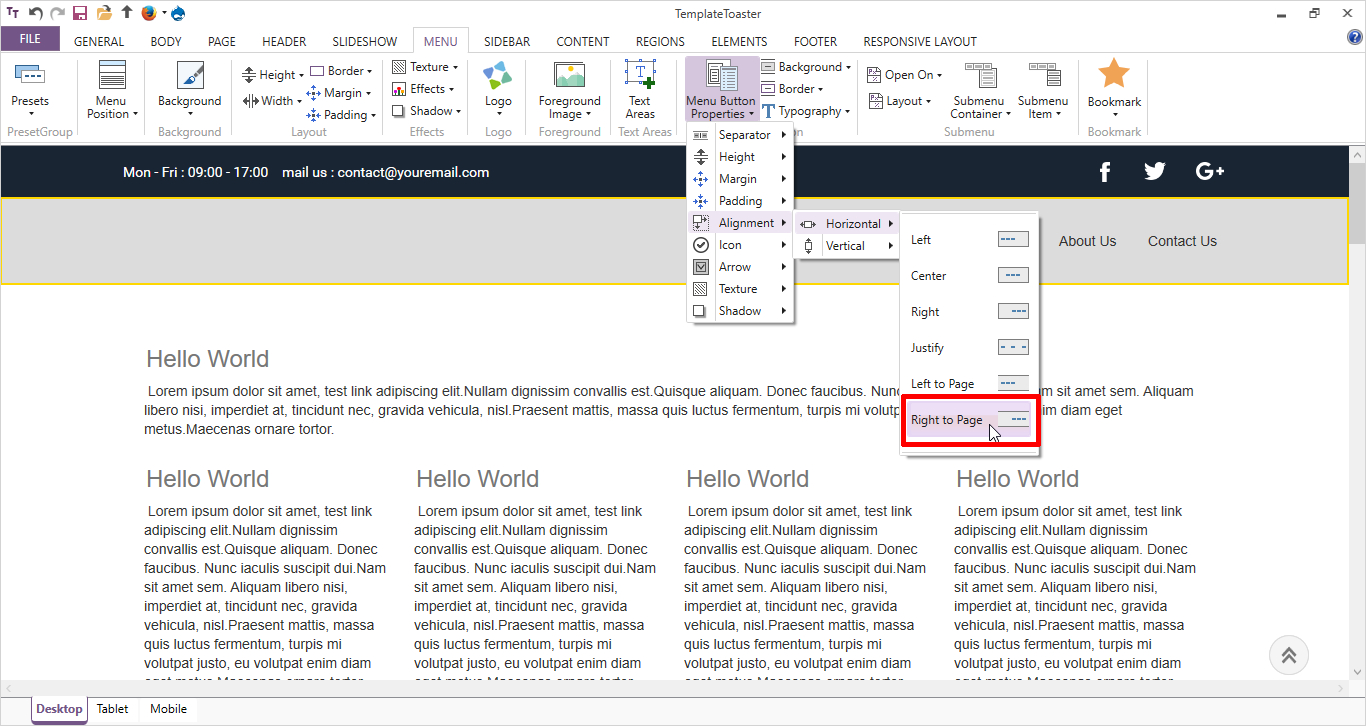
Now, from the Menu Button Properties; move all the menu items to the right of the page.
Menu Button Properties → Alignment → Horizontal → Right to Page
Set a ‘Logo’ from given logo images or browse a custom image for it.
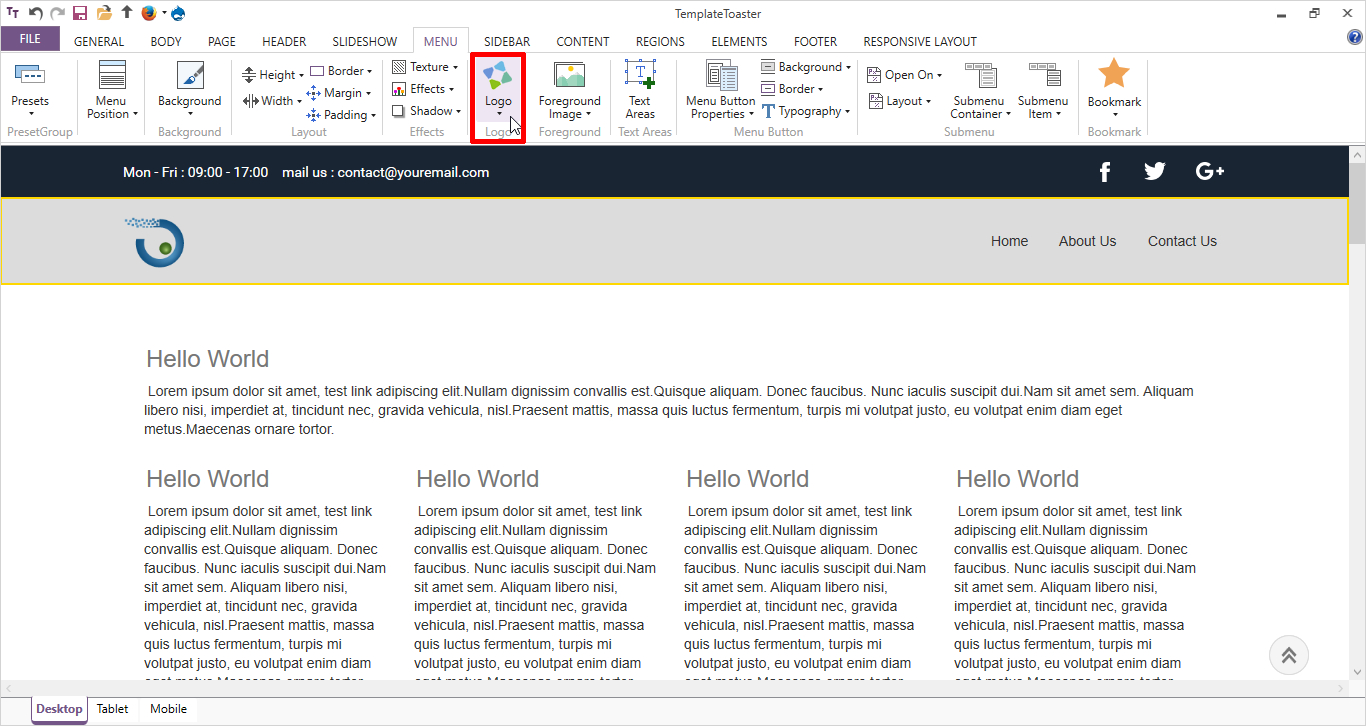
Set a ‘Background‘ Color for the menu as shown below.
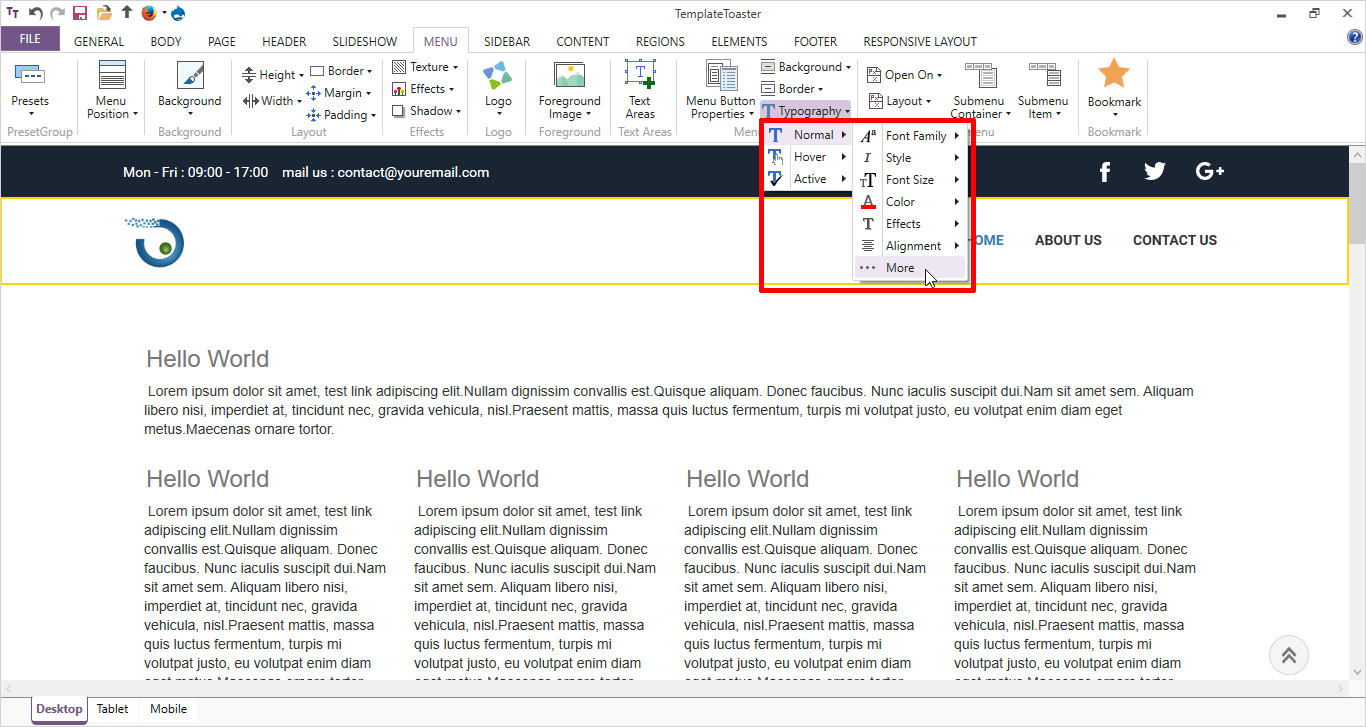
Finally, style the text of menu items on any of the State Normal, Hover, Active as shown below:
Menu Button Properties → Typography→Normal/Active/Hover → More
The Menu is ready.
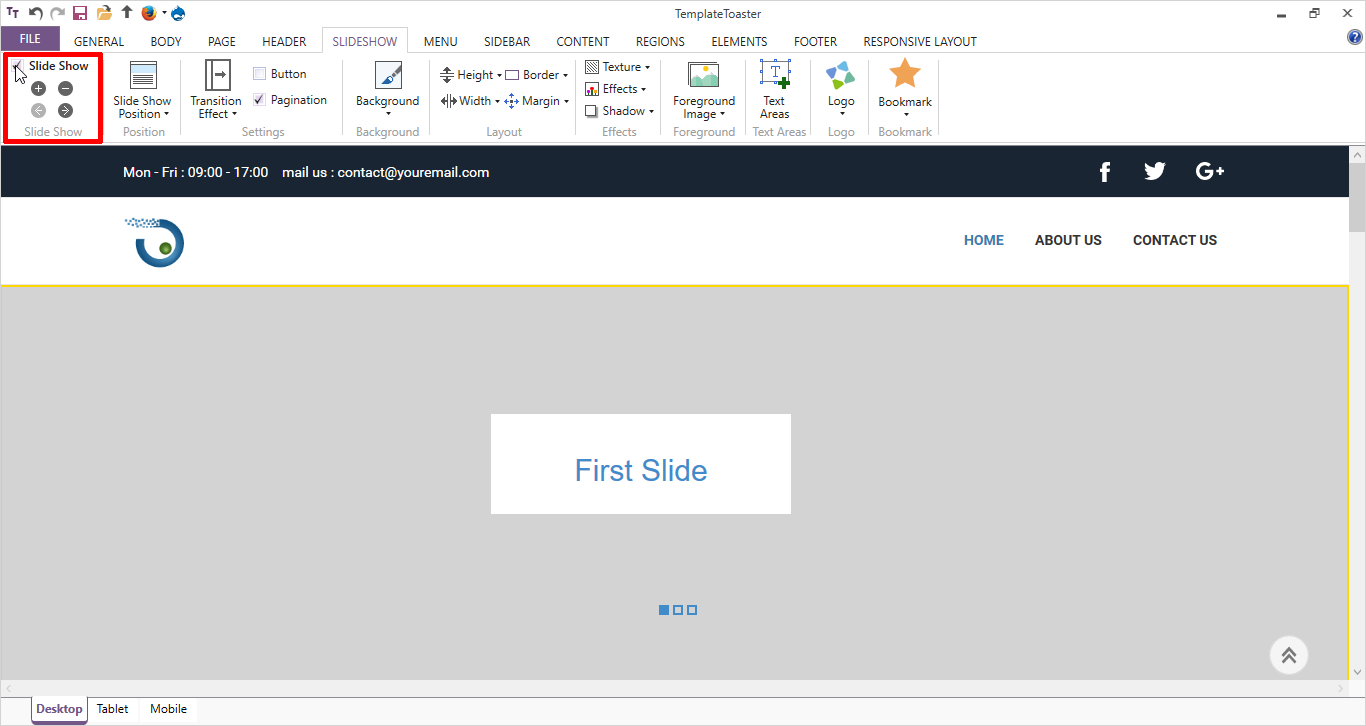
Step 5: Designing a SlideShow
Just check the box of ‘Slide Show’ to show a slideshow.
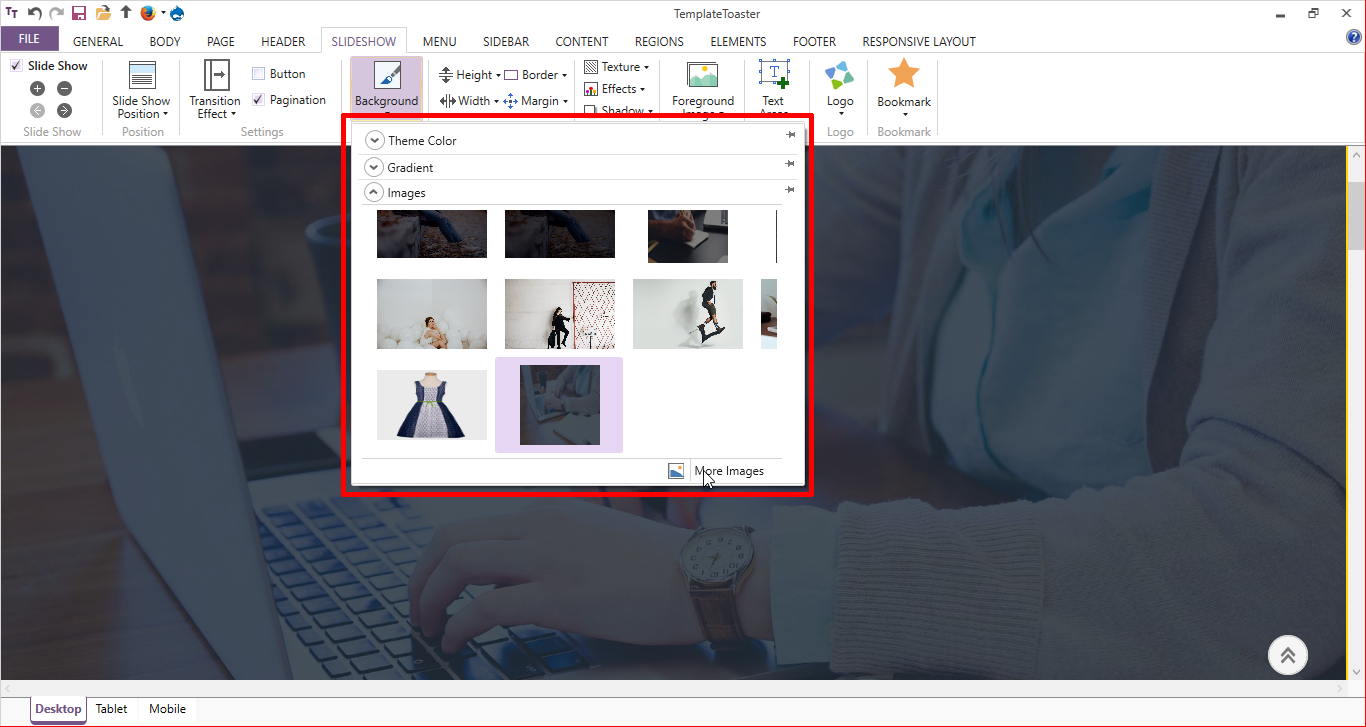
Set a ‘Background‘ image on it. While you can browse your own custom image from ‘More Images’ option as shown below:
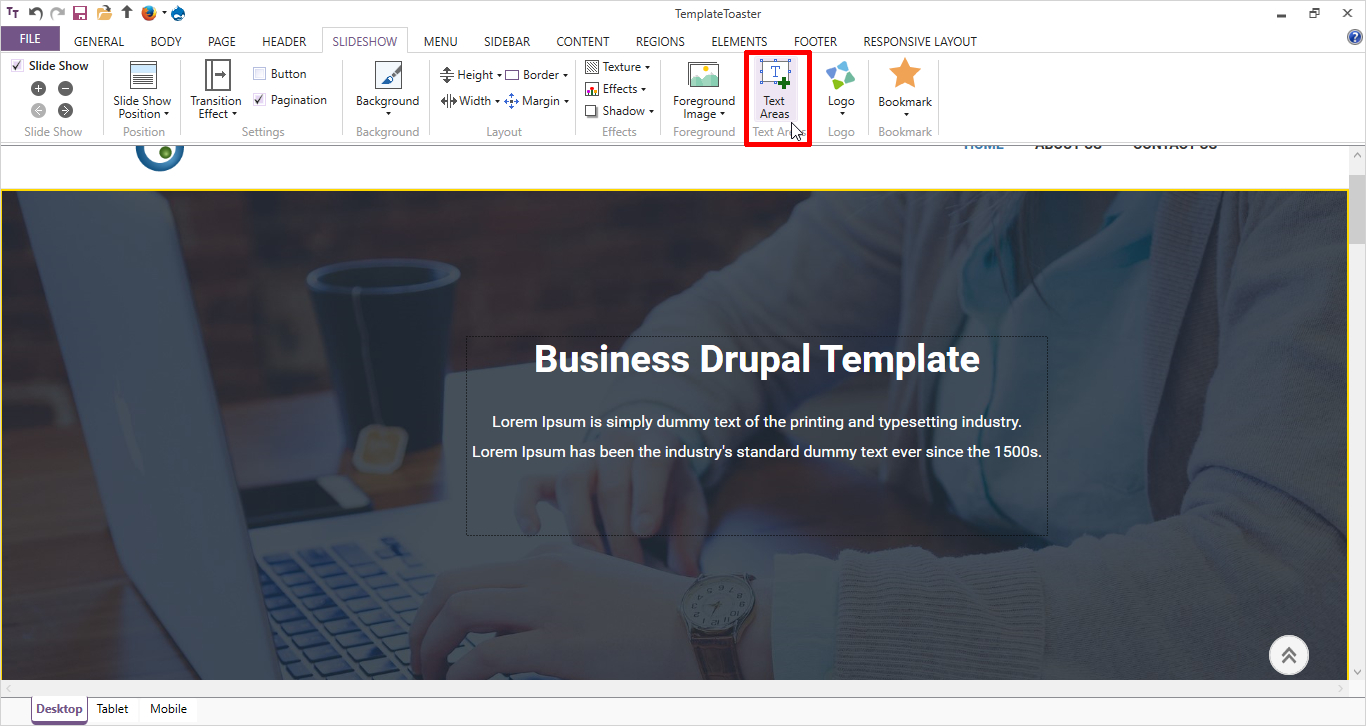
Now, draw a text area on the slideshow to put the content.
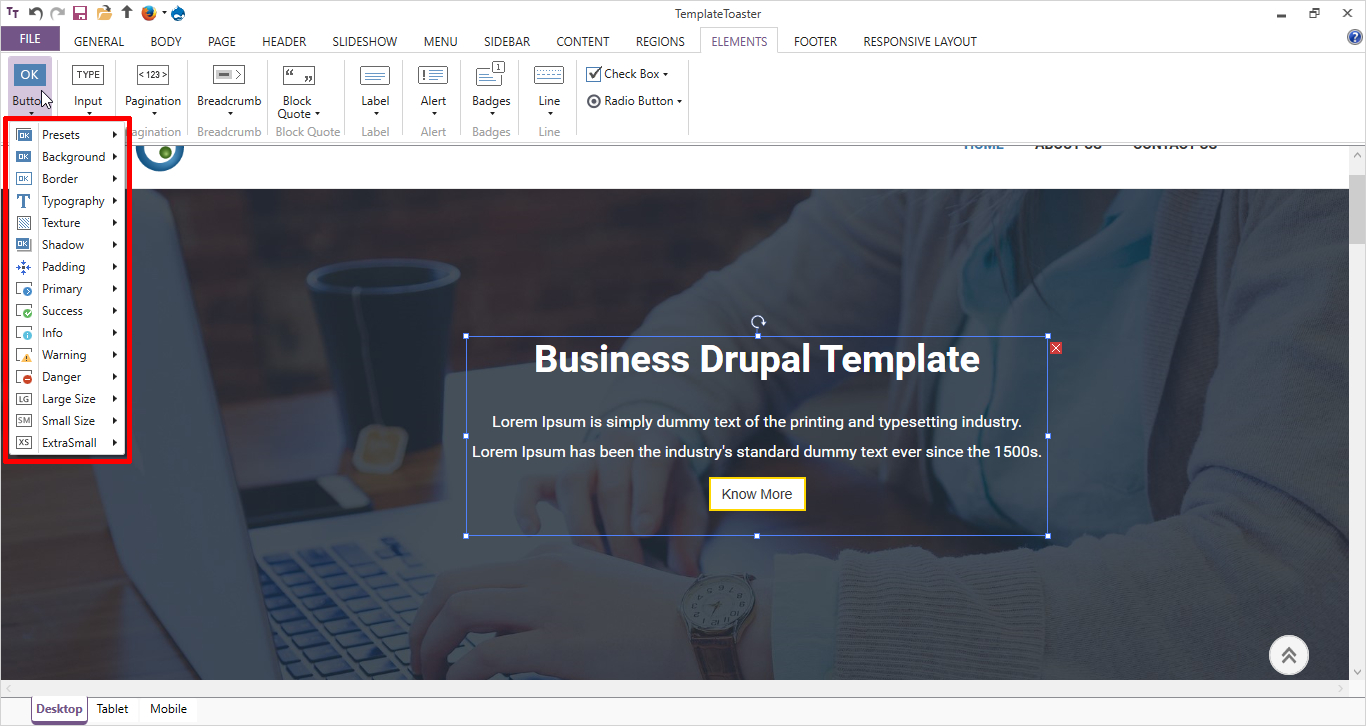
Also, place a button labeling “Know More” that you can style it from ‘Elements Tab’.
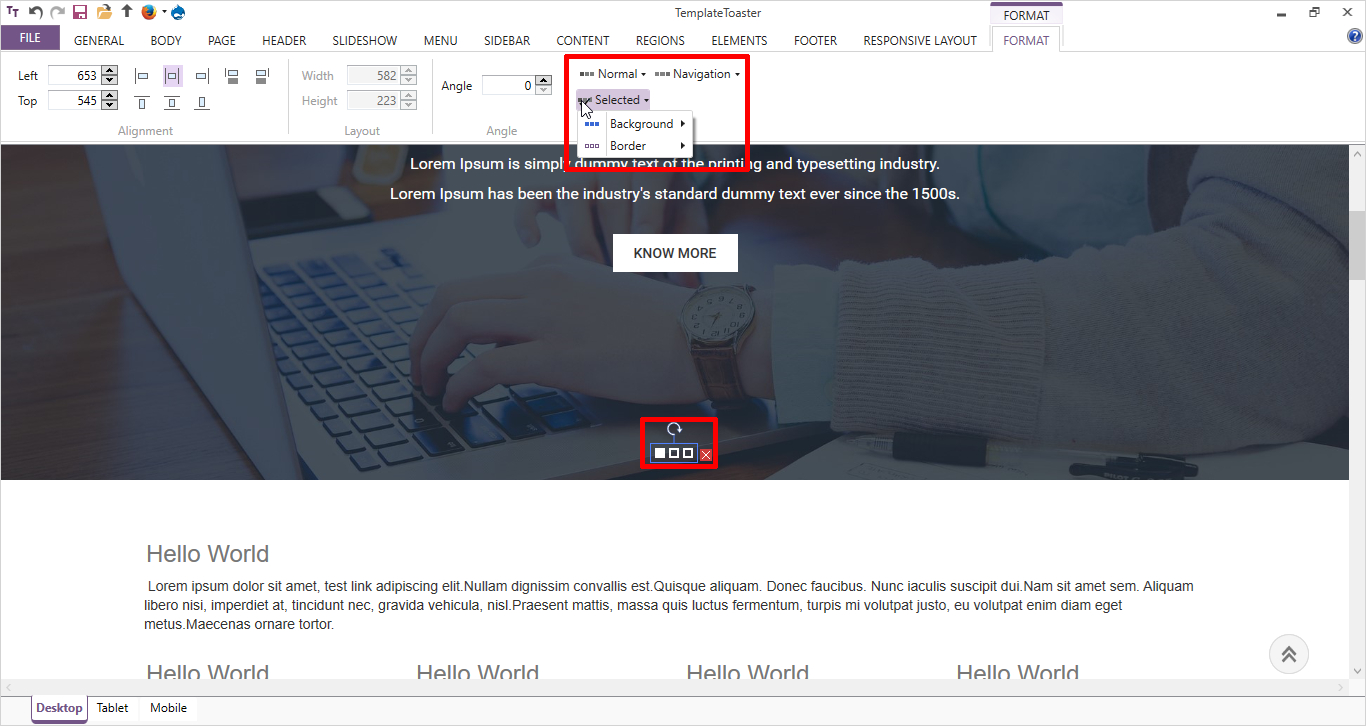
Finally, style the pagination from ‘Format Tab’ on ‘Selected State’.
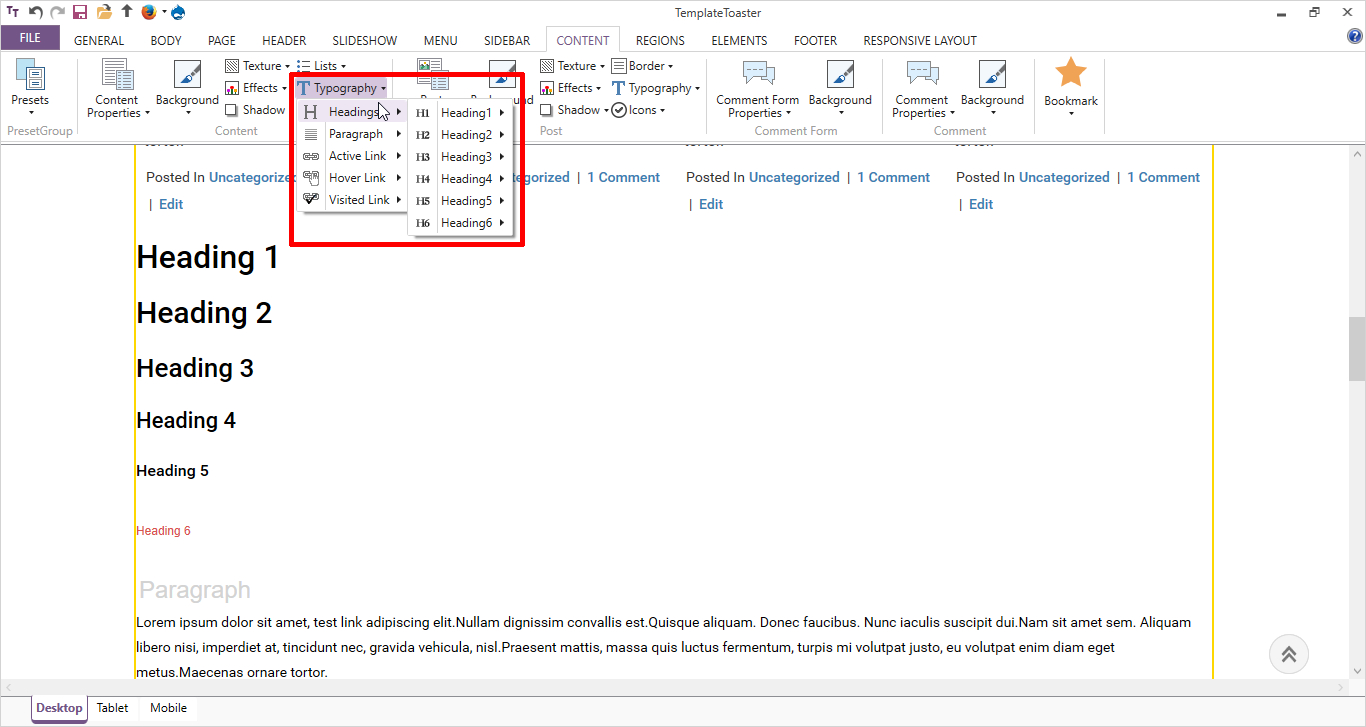
Step 6: Designing Body of the Page
You can put the content only after exporting a theme. Only you can set the typography of all the elements like headings, paragraphs, metadata, meta links, tables, comment form etc. going to be used in content as follows:
Now, move to the ‘Body Tab’ and design the ‘Scroll Up’ button.

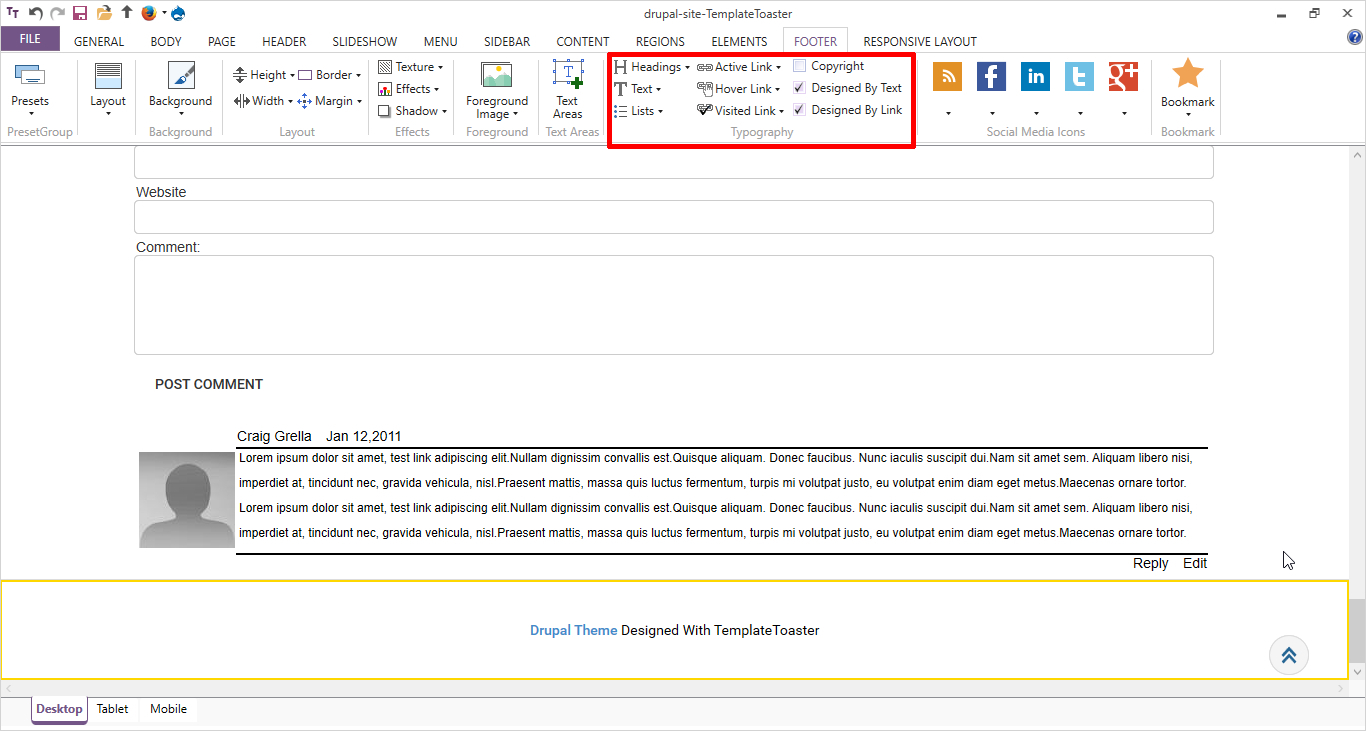
Step 7: Designing the Footer
In Footer section, you can put the ‘Designed by Text’ & ‘Designed by Link’ and social media icons if you want. You can also format it by using ‘Format Tab’ that opens when you double-click it. If you want to style more, you can make use of foreground image & text areas too.
You can create Drupal theme for both Drupal 7 and 8 in the same way as explained above, the only difference lies in exporting.
Step 8: Exporting the Theme
After you create Drupal theme, you can export the theme by clicking on the Export option (Drupal icon) from Quick Access Toolbar at the top right of the screen. Then fill the export particulars and select a version 7 or 8 on the desired location as shown below:
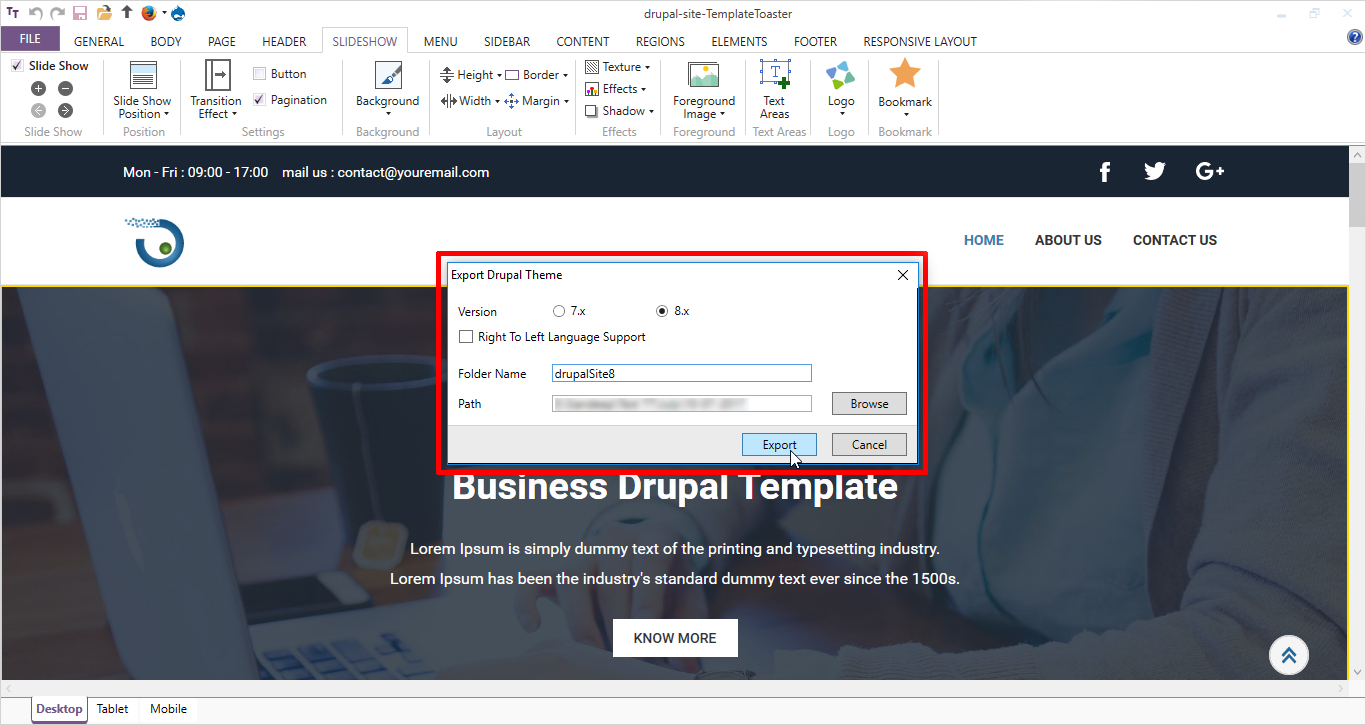
Screenshot for Drupal 8
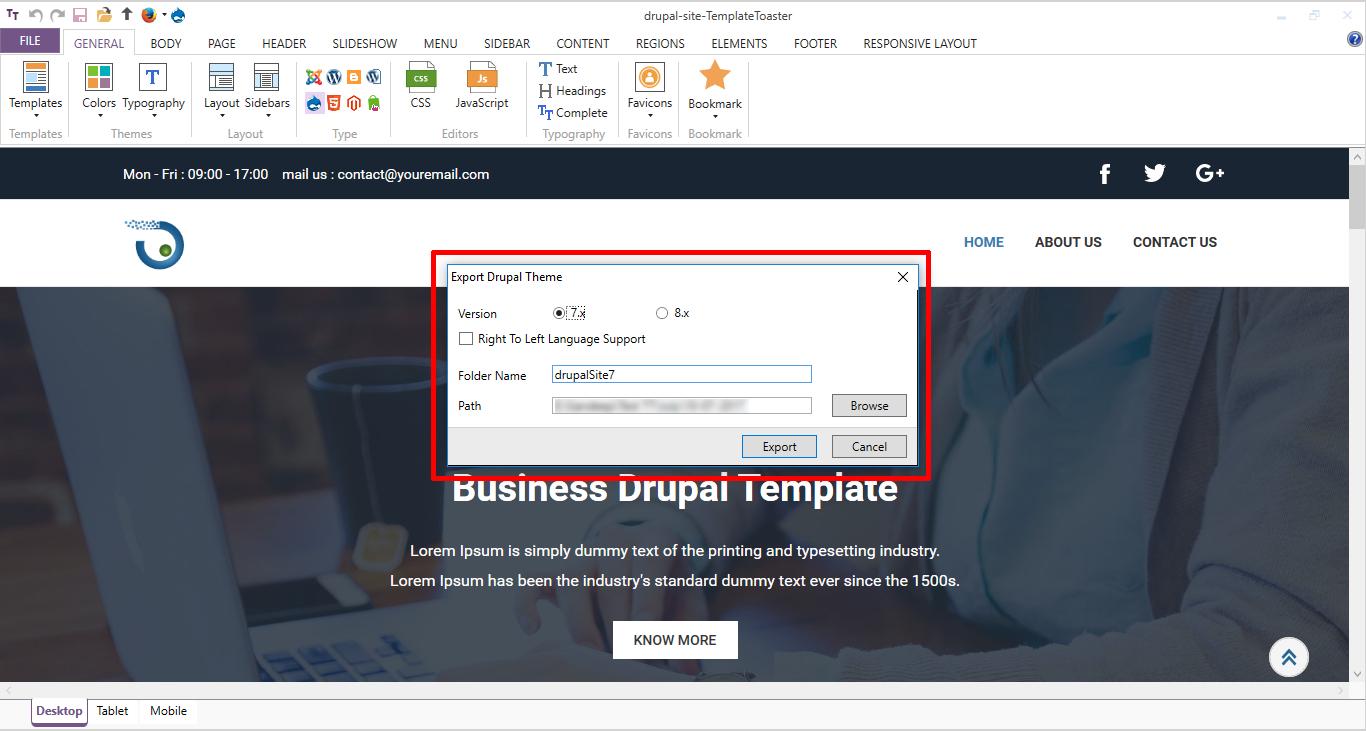
Screenshot for Drupal 7
Step 9: Installing Drupal 8
If you already have Drupal, you are ready to go. But if not, you can follow these instructions to Install Drupal 8 and Install Drupal 7.
Upload Theme
a. For Drupal 8
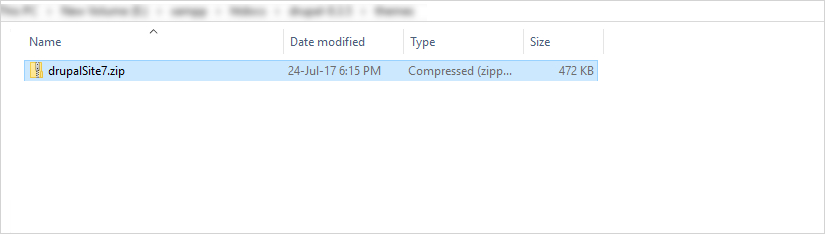
You can upload your theme after exporting it. Compress the theme folder you exported from TemplateToaster into a .zip file.
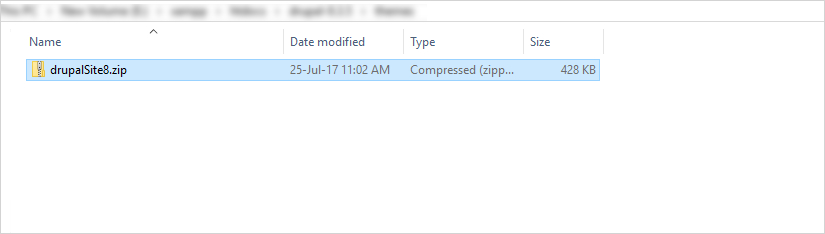
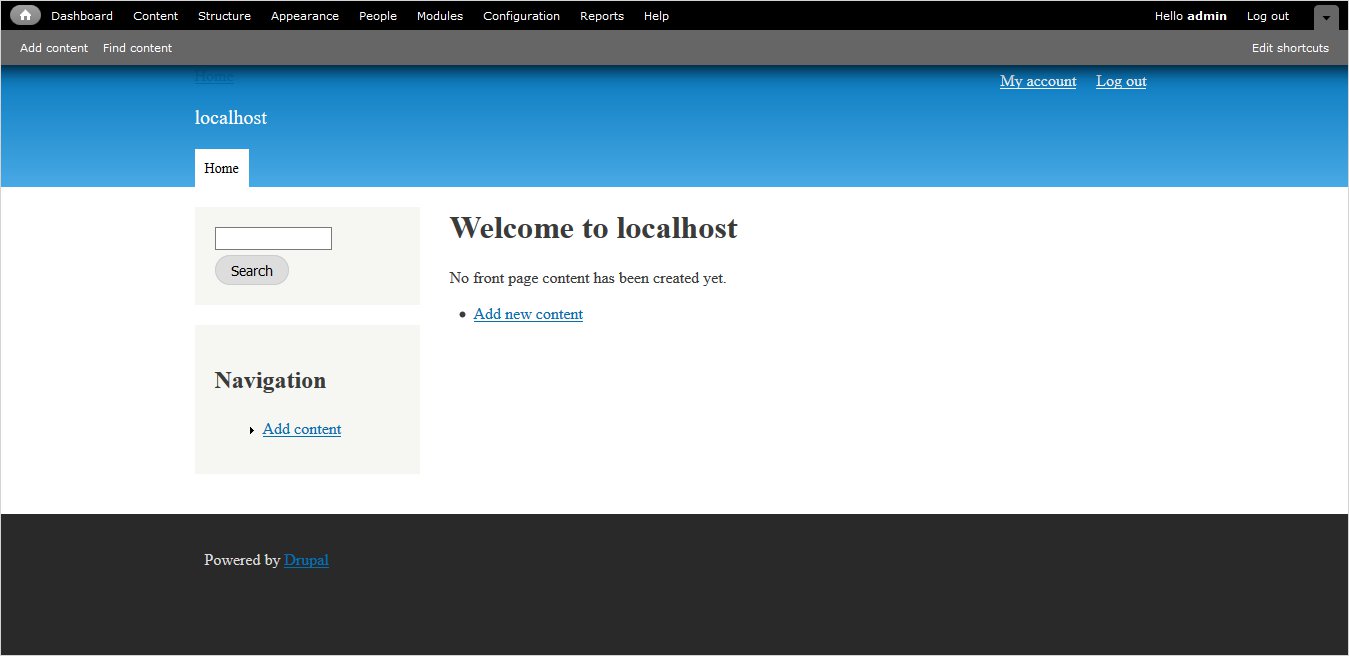
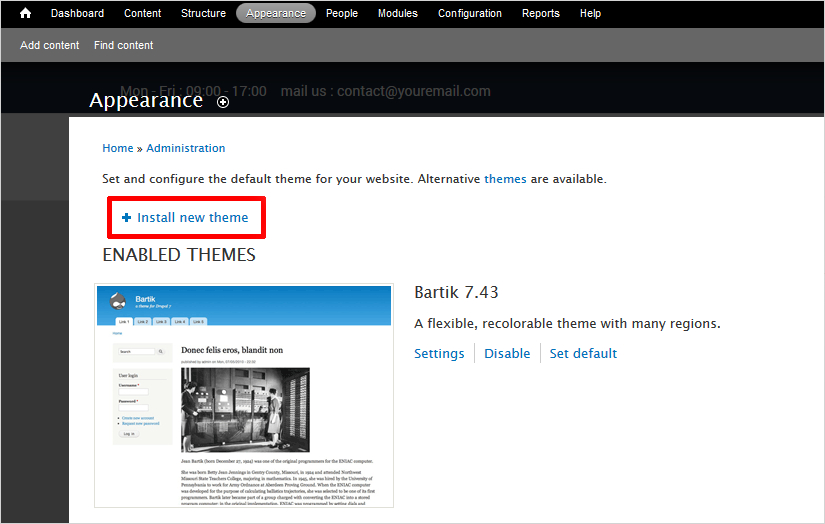
Go to Drupal Dashboard and move to Appearance → Install new theme.
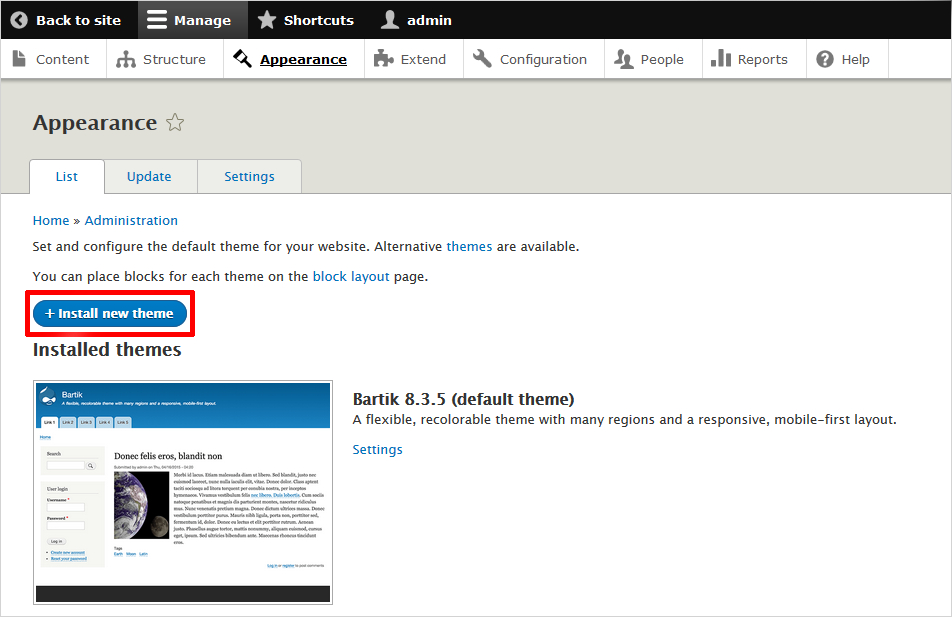
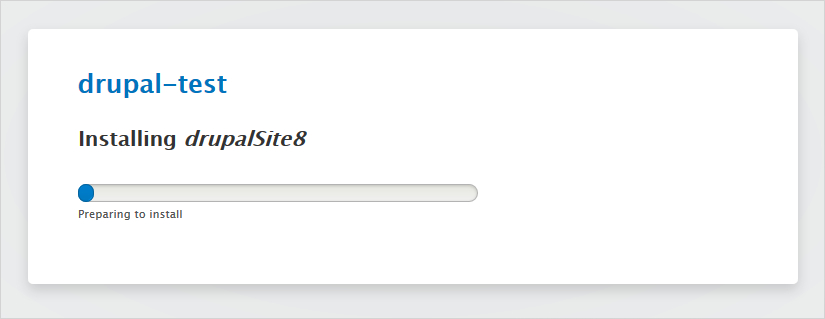
Now, you can browse the compressed file in “File Upload” dialog and open it.

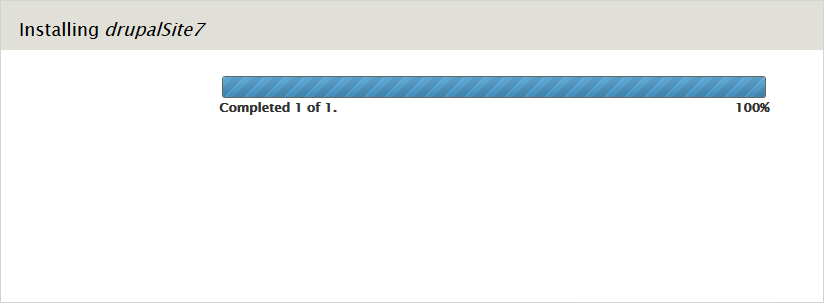
Drupal 8 theme will start uploading as shown below
Once uploaded, you can install the same theme by clicking ’Install newly added themes’
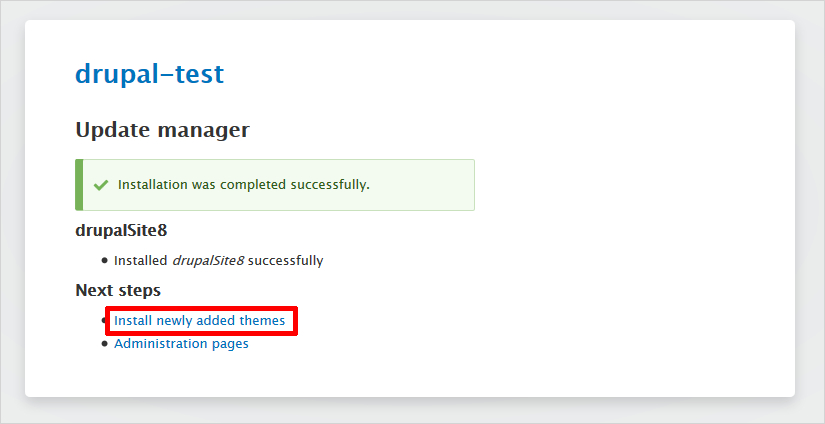
Now, you can see the list of uninstalled themes. From there, select your theme and ‘install & set as default’ as shown below:
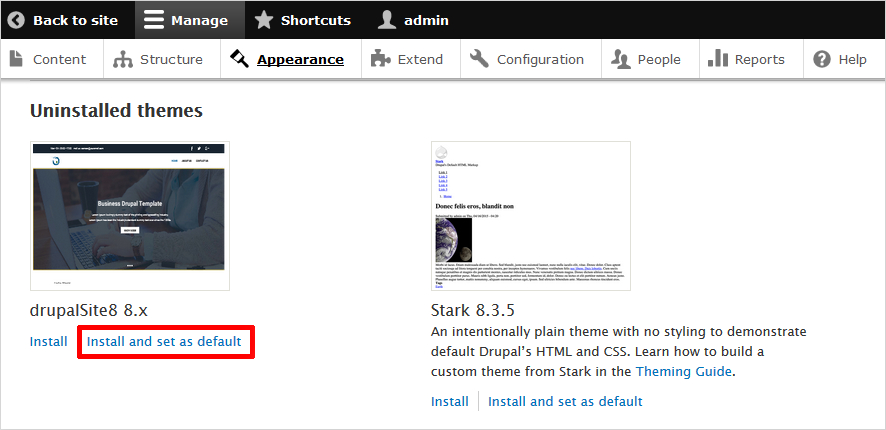
You have successfully uploaded and installed your Drupal 8 theme.
b. For Drupal 7
If you need to upload your Drupal 7 theme. Compress the theme folder you exported from TemplateToaster into a .zip file.
Go to ‘Appearance’ in your dashboard and click ‘Install new theme’.
A ‘File Upload’ dialog will open to browse your exported file. Browse and open it.

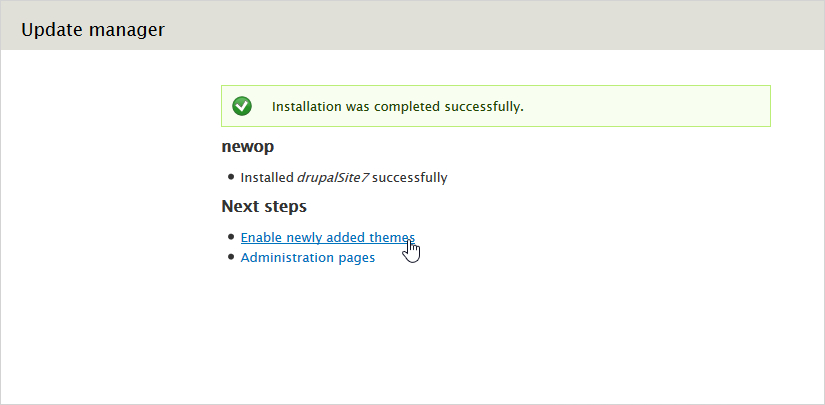
This will install the Drupal 7 theme.
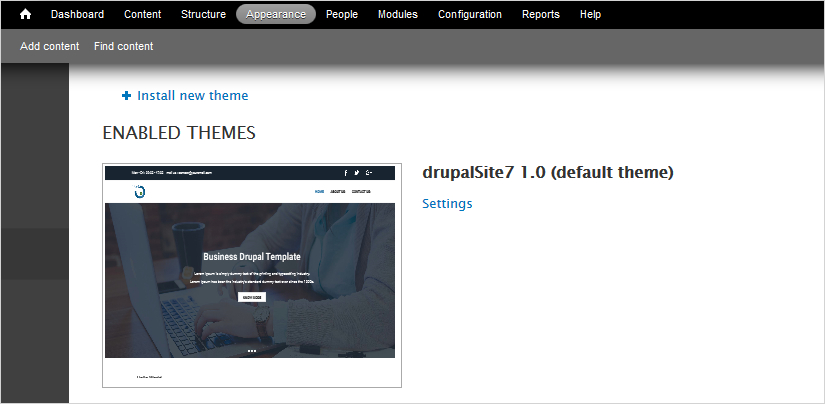
When the installation is complete, you need to click ‘Enable the newly added themes’ as shown below:
Finally, you can see your theme in ‘Enabled Themes’.
Final Thoughts
Drupal is one of the most powerful website building platforms on the internet. While building a theme with Drupal you should have some basic knowledge of PHP, HTML etc. But, with TemplateToaster Drupal Theme Builder you don’t have to worry about coding which allows you to create Drupal themes with ease. Also, the free Drupal themes designed in TemplateToaster offline website builder are highly responsive making the process smoother. You may read about how to add Recaptcha in Drupal.
If you have any questions or suggestions, you are always welcome!!
Build a Stunning Website in Minutes with TemplateToaster Website Builder
Create Your Own Website Now
You’re code is messed up! See “step 2” at line 4 – should be “core: 8.x” (see below). Nice post though!
You have…
“name: themename
type: theme
base theme: false
Core 8.x libraries:
– themename/global-styling-and-scripts
regions:
header: Header
primary_menu: ‘Primary menu’
secondary_menu: ‘Secondary menu’
page_top: ‘Page top’
page_bottom: ‘Page bottom’
highlighted: Highlighted
featured_top: ‘Featured top’
breadcrumb: Breadcrumb
content: ‘Content'”
..and it should be:
“name: themename
type: theme
base theme: false
core: 8.x
libraries:
– themename/global-styling-and-scripts
regions:
header: Header
primary_menu: ‘Primary menu’
secondary_menu: ‘Secondary menu’
page_top: ‘Page top’
page_bottom: ‘Page bottom’
highlighted: Highlighted
featured_top: ‘Featured top’
breadcrumb: Breadcrumb
content: ‘Content'”
There is no need to be a professional coder with years of experience – anyone can create a site by following the necessary steps and using simple and accessible software.
Hi, Your theme should be created in themes folder in your drupal root directory for drupal 8.
The first step was for drupal 7