How to Change the Font Size in WordPress – Tutorial for Beginners

When you’re getting started with WordPress, there are a lot of things that are simple to do but you don’t know how to do it. You don’t have to hire a professional every time you need to make some changes when you can do it by yourself by just following simple instructions. Here is a tutorial about how to change the font size in WordPress. I am going to show you how to change the font size in WordPress using three different methods so you can use the one you find easiest.
3 Ways to Change the Font Size in WordPress
- Using the Gutenberg Editor
- Using an advanced plugin – Like TinyMCE
- Also, with the help of CSS – The Classic Way!
Change the Font Size in WordPress Using the Gutenberg Editor
The latest version of WordPress comes with a Gutenberg Editor. This editor was launched with the purpose of integrating CMS to edit media-rich content easier. It is similar to a basic page builder platform that lets you drag and drop any media file into your posts. You can change the font size using this editor pretty easily.
To change the font size using Gutenberg editor, follow the given instructions
Follow These Steps to Change the Font Size in WordPress Using the Gutenberg Editor
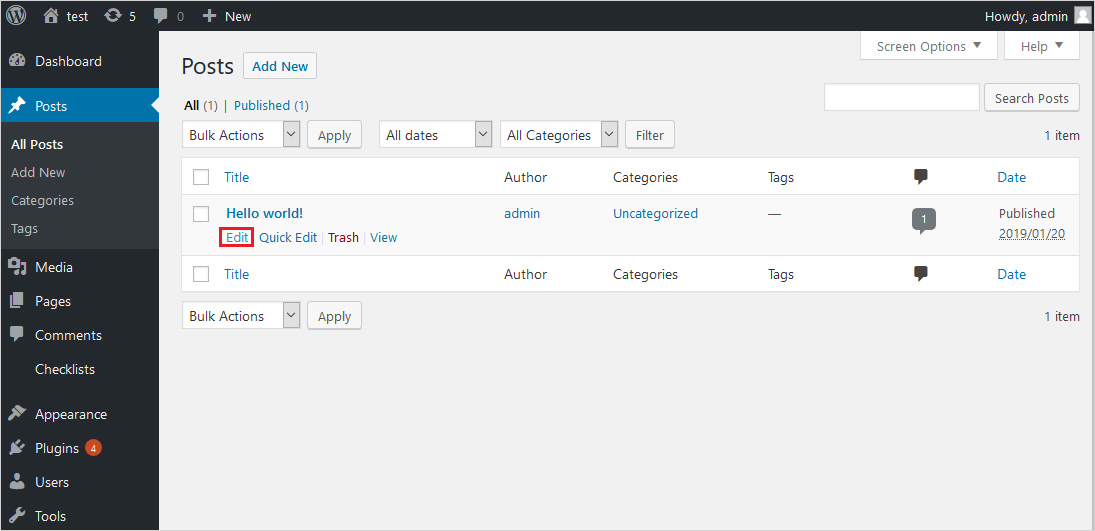
Step 1: Select the post or page you want to make changes in, or simply Add New.
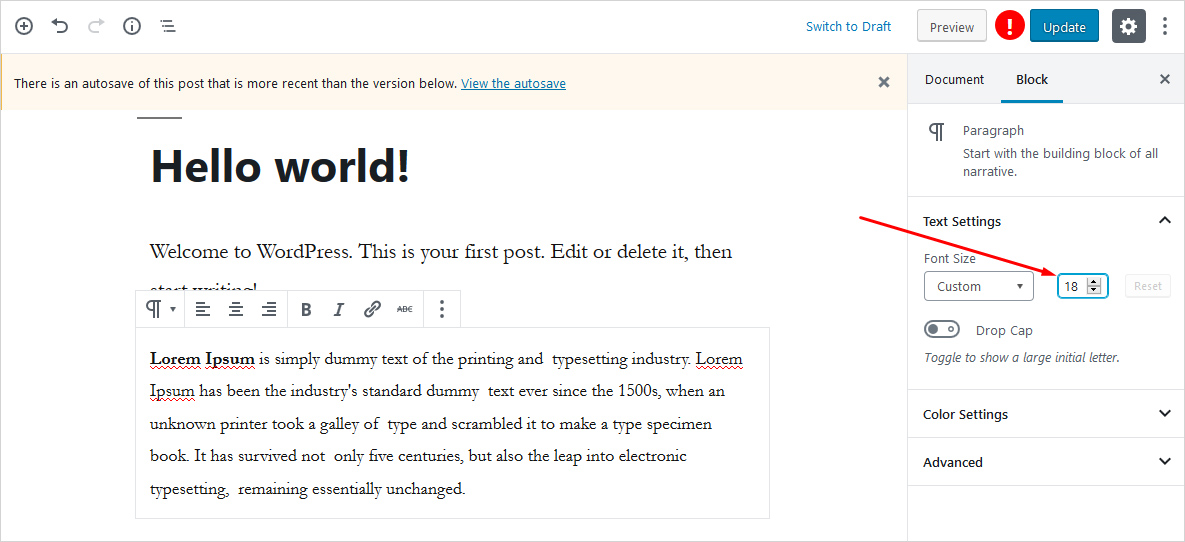
Step 2: Click on the block containing text you want to edit, then enter the number manually.
Final Step 3: In case you don’t want to enter the number manually, you can also set the options given on the right side of the screen and pick the options from: small, normal, medium, large, and huge.
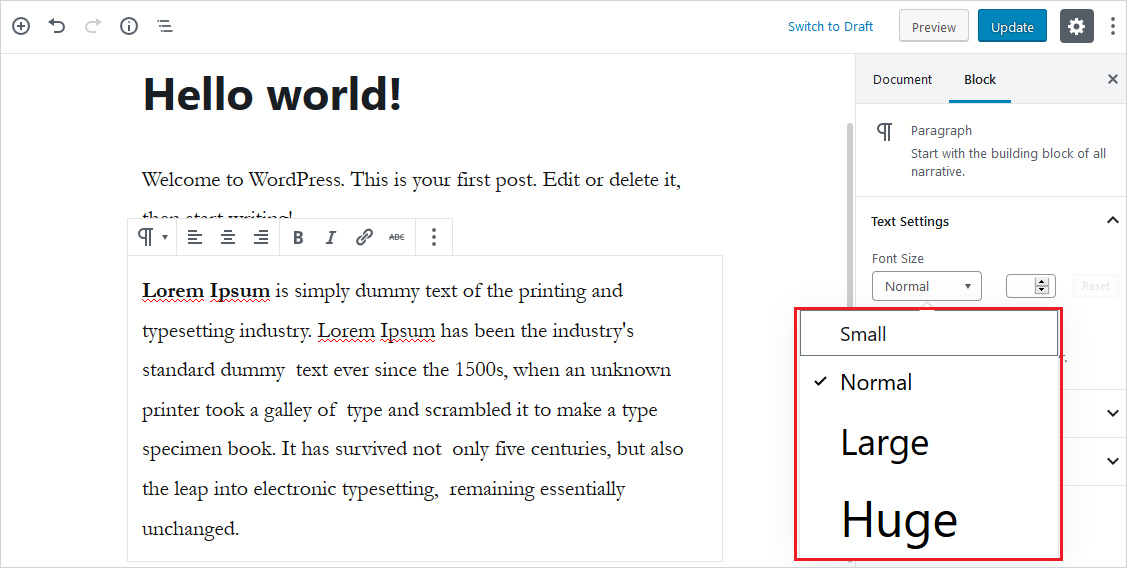
That’s it, it’s done!
Change the Font Size in WordPress Using an Advanced Plugin – Like TinyMCE
You can also use a plugin to change the font size that is specifically designed for this purpose. TinyMCE advance is the best and free plugin available to accomplish this task. It makes it pretty easy to edit media-rich content by offering you new editing options to your content editor after you add it to your existing editor.
Before getting started with it, you need to install this WordPress plugin and set it up. After that, navigate to the Settings page, where you will find two tabs: Block editor and Classic editor. To only use the classic editor, go to advanced settings and leave the block editor unticked on both sides.
Follow the Given Instructions to Change the WordPress Font Size Using TinyMCE
Step 1: Open the post or page you want to edit or go to Create A New Post. It will redirect you to the classic paragraph editor.

Step 2: Select the paragraph, lines, or the text you want to change, and click on the Font Size.
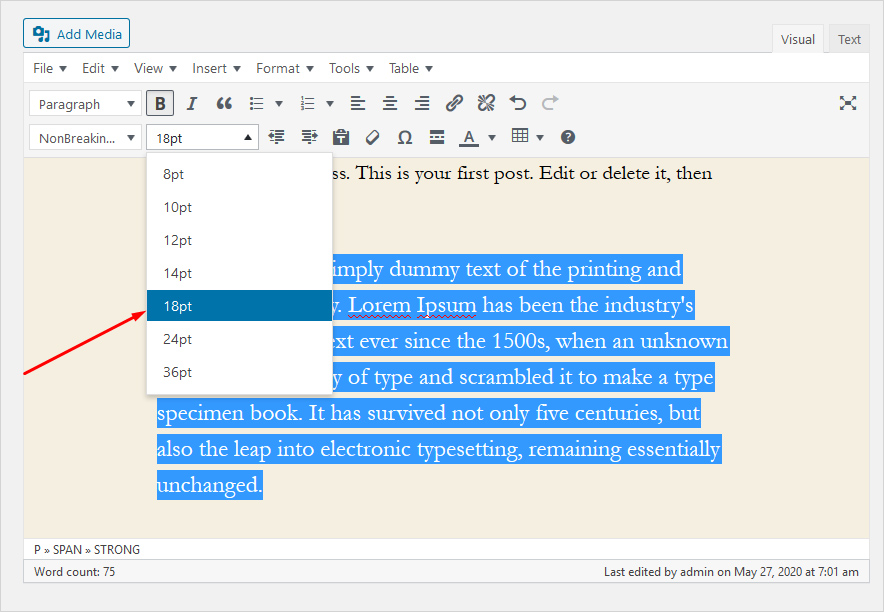
Step 3: After changing the font size, click on Save Changes and see the results.
You will notice that TinyMCE is not as often used, considering it is quite easy to use and offers a lot of options. It is because these kinds of plugins tend to add more code to your website, making it bloated. Hence, your page takes longer to load. A web page should load as quick as possible for a better user experience and favorable SEO. Therefore, it’s better if you avoid this method. Because as tempting as it may look, it will end up making your website slower.
Change the Font Size in WordPress Using the CSS – The Classic Way
Making changes using CSS can be trickier and is not beginner-friendly. This is why most people go for plugins instead to make such edits. However, with plugins or the default WordPress editor, you need to change your text every time you add a new post or modify an existing post.
If you are tired of changing your font text every time you edit a post, then you can make your font size permanent in every post by making changes in the CSS instead. This is the classic method, because it is often used by professional developers, more effective, and doesn’t bloat your source code. However, changing font size using CSS is not as complex as you think.
Just Follow the Given Instruction to Make the Changes in Your Font Size the Classic Way
Step 1: Navigate to Appearance → Customize on your WordPress dashboard.

Step 2: Click on Additional CSS.
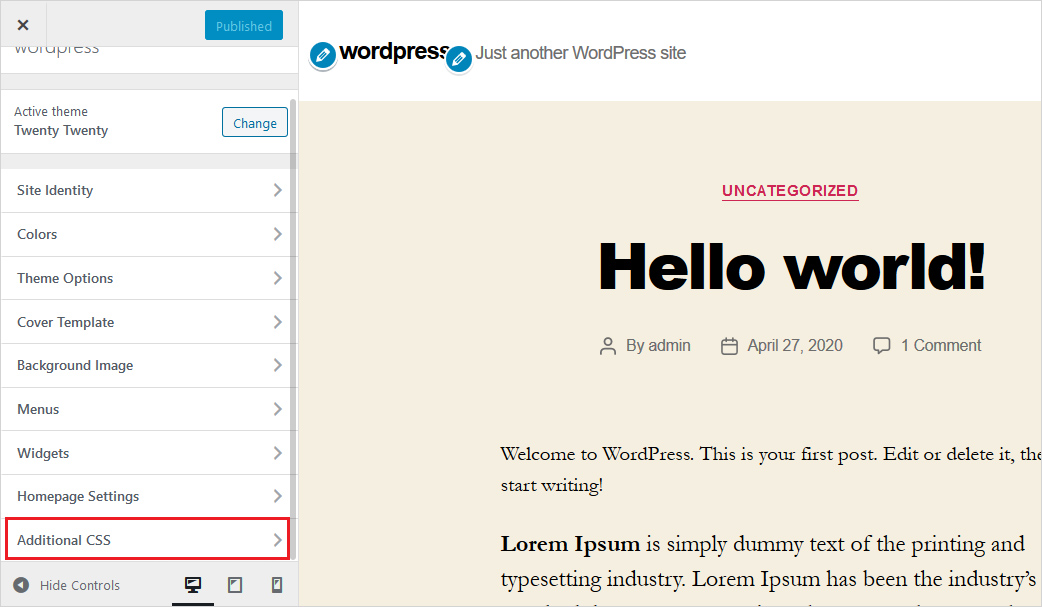
and Step 3: Add the following code to change the entire text
body {
font-size: 1.25rem;
}
Step 4: Add the following code to change the paragraph’s font
p {
font-size: 25px;
}
Step 5: Add the following code to change a certain heading’s font size
h2 {
font-size: 2.5em;
}
and Step 6: Add the following code to edit sidebar font size
.sidebar li {
font-size: 12px;
}
Step 7. Add the following code to modify footer font size
.footer {
font-size: 150%;
}
Step 8: Add the following code to customize a certain screen sizes’ font
html {
font-size: 18px;
}

@media (min-width: 900px) {
html {
font-size: 20px;
}
}
In Conclusion
When it comes to WordPress, it offers some rich options to customize your content as you like. It is highly customizable, which makes it the most popular CMS, powering about 30% of the entire internet. In this article, I have offered 3 different ways to change the font size of your content. First one is using a media-rich content editor, which will make the edits with some clicks here and there. Another one is using a plugin, install it and click on the options to make the edits as you like. Last one is the classic way, mostly preferred by professional developers. By adding code to your CSS, you can make the changes permanent. I hope that this article was helpful to you. Let me know your views in the comments.
Related Reading
Build a Stunning Website in Minutes with TemplateToaster Website Builder
Create Your Own Website Now
How to change font size of the whole website.