How to Clear Cache in WordPress: A Complete Guide (2025)
Caching plays a crucial role in improving the performance and speed of your WordPress site. However, outdated or corrupted cache can sometimes cause display issues, preventing you from seeing the latest updates or changes on your website. Knowing how to clear cache in WordPress is essential for ensuring your site runs smoothly and reflects real-time updates. Whether you’re troubleshooting a design change or optimizing your site’s functionality, clearing the cache can resolve many common issues. If you’re just starting your journey to create a website, understanding how caching works will give you an edge in managing your WordPress site effectively.

How Does Cache Work?
When you visit a website, your web browser requests the server to load various elements of the requested site including CSS, image files, HTML, JavaScript files, etc. the more elements a web page has, the more time it will take to respond.
The speed of your site plays a vital role when it comes to performance. It offers a great user experience by increasing the page loading speeds and reducing the page response time. Caching is a process of optimizing the speed of your WordPress site. Whenever you visit a site, your browser stores the static files of that website, including images, stylesheets, HTML, and JavaScript files. With this, when you visit the website next time, it will load faster, ultimately increasing the performance, speed, and user experience. In simpler words, your browser would create fewer requests (for dynamic content only) to the server and fetch the cached static files faster.
Types of Caches in WordPress
Caching is a crucial mechanism for enhancing your WordPress website’s performance. By storing static copies of your site’s content, cache reduces the need to repeatedly fetch data from the server, thereby speeding up load times. However, understanding the types of caches used in WordPress is key to managing them effectively. Here are the most common types of caches:
Browser Cache
Browser cache stores static resources, such as images, JavaScript, and CSS files, on the user’s local device. This allows returning visitors to load pages faster since their browser doesn’t need to re-download these elements each time. While browser cache improves user experience, it can sometimes display outdated content if changes are made to your site. Clearing browser cache ensures visitors see the latest updates.
Server Cache
Server-side caching refers to caching mechanisms implemented at the hosting level. This includes methods like object caching, opcode caching, or full-page caching. Hosting providers such as SiteGround and Bluehost often offer built-in server caching tools. By caching pages directly on the server, this type of cache significantly reduces the load on your website’s database, improving overall site speed.
WordPress Caching Plugins
WordPress caching plugins, like WP Rocket or W3 Total Cache, create static versions of your site’s dynamic pages. These plugins store cached pages and serve them to visitors, bypassing the need for repeated PHP processing. This is one of the easiest and most popular ways to implement caching in WordPress. However, if the cached content isn’t cleared after updates, users may encounter outdated information.
CDN Cache
A Content Delivery Network (CDN) cache stores copies of your website’s content across multiple servers worldwide. This reduces latency by delivering cached content from a server closest to the user’s location. Popular CDN providers like Cloudflare, KeyCDN, and StackPath offer caching options that improve global website performance. Clearing CDN cache is often necessary when updating files, ensuring visitors receive the most current version of your site.
Why Do We Need to Clear Cache?
No doubt, caching sounds like a good thing. Considering it decreases the response time and helps websites load faster, ultimately offering a better site performance. So what possibly can be the reason to clear cache? Basically, when you make edits to your site, you sure will want your audience to see the changes you made. However, if your audience is still seeing the cached files, they will see the outdated version of your site. As a result, your audience will not be able to benefit from the latest edits. Moreover, when WordPress launches an updated version or plugins launches an updated version for better performance or improved security. In this scenario, you will have to clear cache from WordPress to make the web browsers fetch and cache the latest version of your site and other changes you made.
Methods to Clear Cache in WordPress
1. Clear Cache From WordPress Caching Plugin
WordPress can create a cache using caching plugins to improve your website performance. In that case, you can use various plugins solely designed to manage the cache. The two most popular options are:
a. Clear Cache Using WP Super Cache Plugin
WP Super Cache is a plugin offered by WordPress developers, widely used for caching purposes. This plugin makes cache functions easier. You can clear the cache in the following steps.
Step 1: Go to your WordPress admin panel
Step 2: Navigate to Settings and click on WP Super Cache
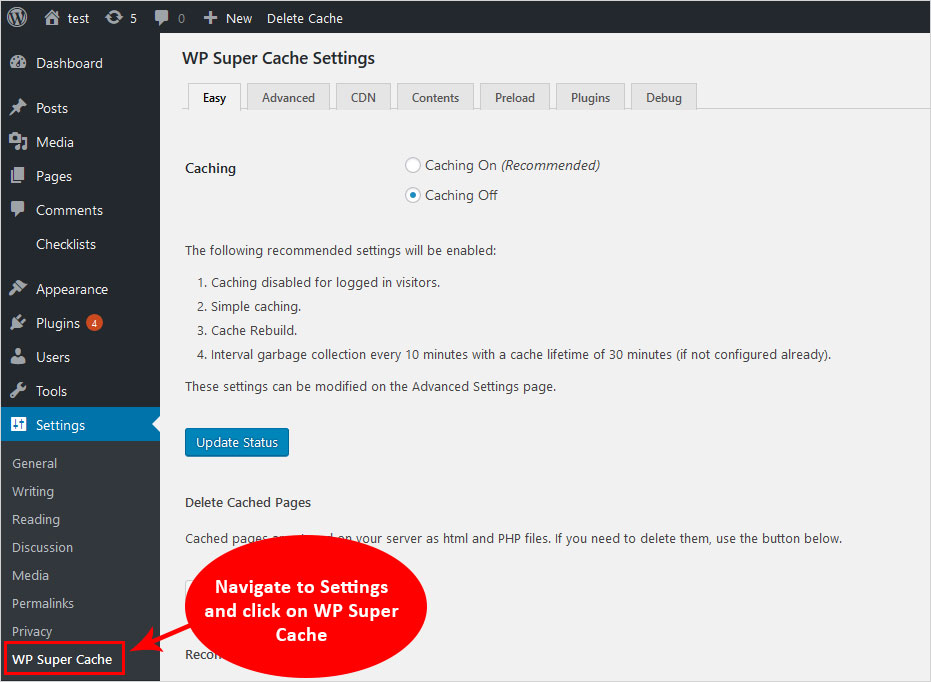
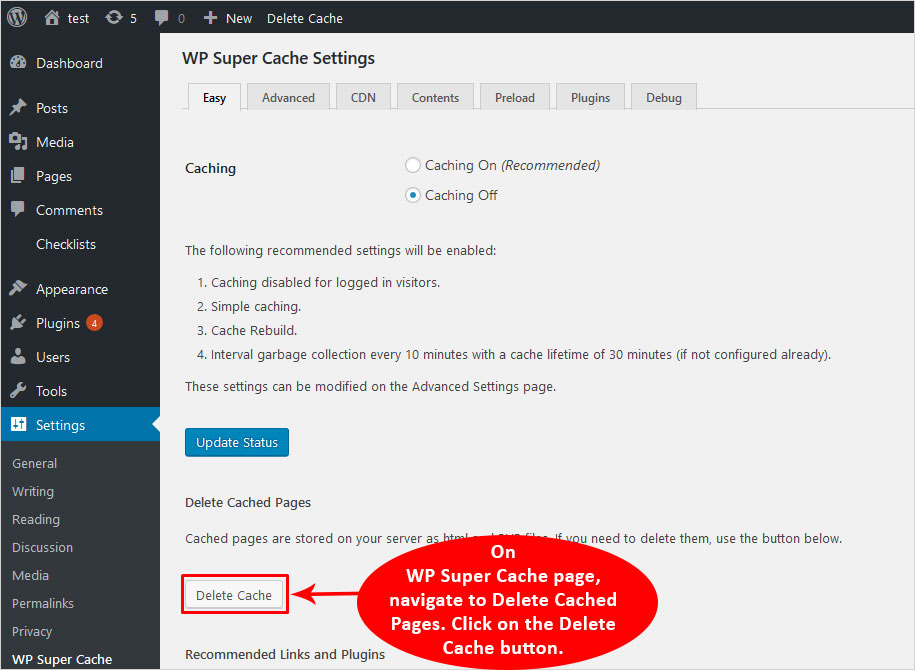
and Step 3: On the WP Super Cache page, navigate to Delete Cached Pages
Step 4: Click on the Delete Cache button.
b. Clear WordPress Cache Using W3 Total Cache Plugin
W3 Total cache is one of the top caching plugins used by some of the notable blog sites like mashable. It is known for its bandwidth-saving and customization features. To clear WordPress cache from this plugin, follow the given instructions-
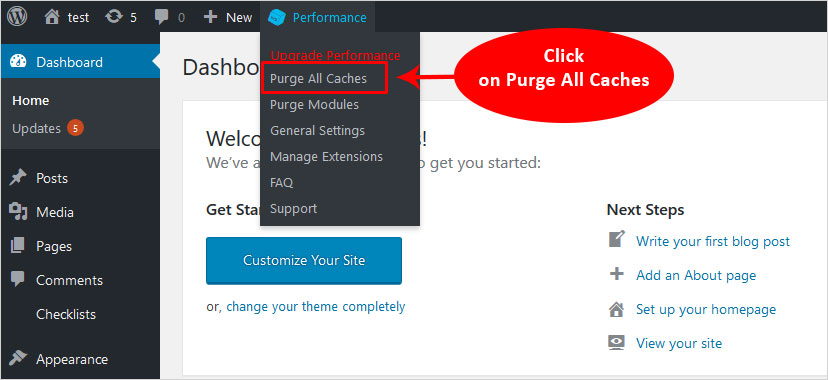
Step 1: Go to your Dashboard
Step 2: Navigate to Performance
and Step 3: Under this page, click on Purge all caches. This option will be given at the top of the performance page.
2. Clear Browser Cache
When you visit a website frequently, your web browser tends to keep a cached copy of that site to fetch the site faster. Nonetheless, your web browser can only copy static files including stylesheets, JavaScript files, and images. However, it can lead you to see an outdated version of a web page, which is the reason you need to clear your web browser. Remember that clearing your web browser won’t have any effect on what your visitors see. The outcome of this step will solely affect your own browser only.
a. Clear Firefox Cache
To clear cache from your Firefox web browser.
Step 1: Click on the hamburger menu and select Options
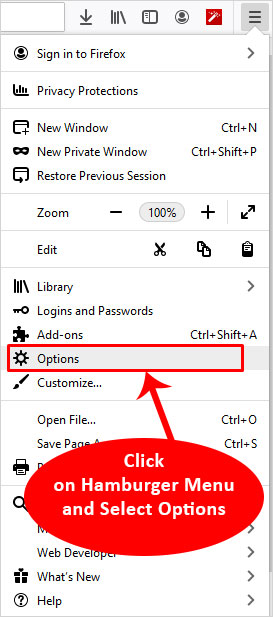
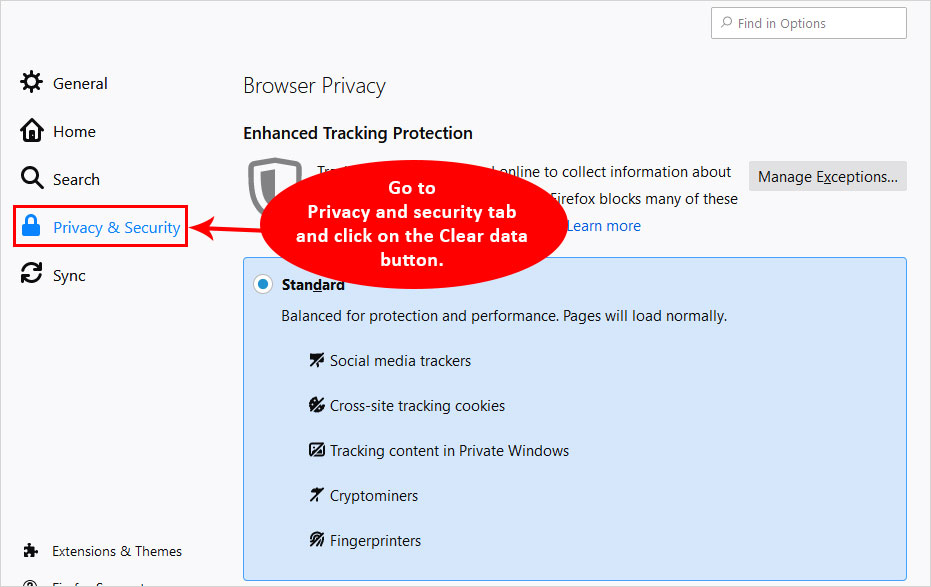
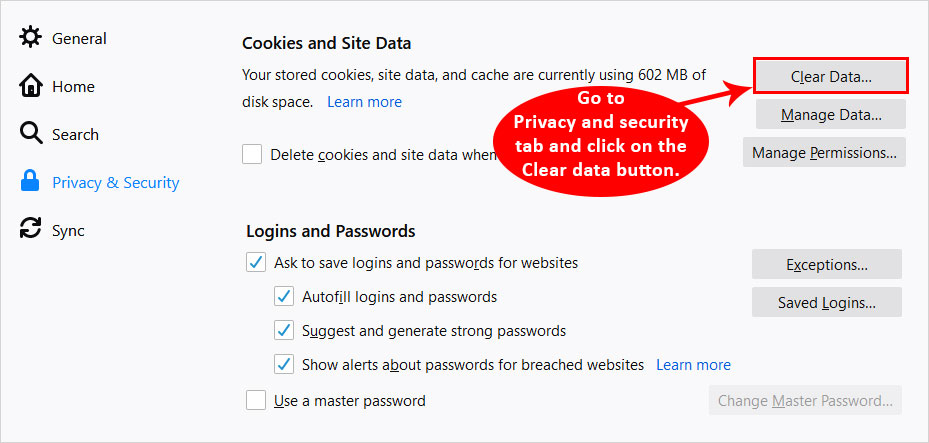
and Step 2: Go to the Privacy and Security tab and click on the Clear data button.
Step 3: A pop-up will appear, check the cached web content option, and click on Clear.

b. Clear Google Chrome Cache
To clear cache from your Google Chrome web browser,
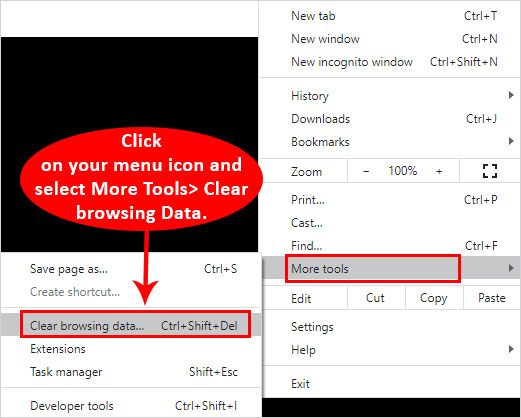
Step 1: Click on your menu icon and select More Tools → Clear Browsing Data.
and Step 2: After that, a pop-up will appear on the screen that will allow you to select the data you want to delete.
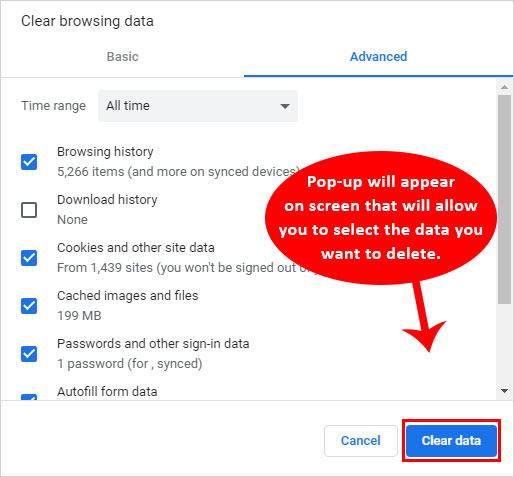
Step 3: Select cached images and file and click on Clear browsing data.
3. Clear Cache From Your WordPress Managed Hosting
Most WordPress managed hosting providers offer built-in caching features. The steps for clearing cache can vary depending on the web hosting provider you use. Therefore, if you wish to clear the cache from the hosting provider, you can check the support documentation of your provider. However, you can also find the steps to clear cache from some best WordPress hosting providers including Bluehost, SiteGround, Kinsta, and WP Engine.
a. Clear WordPress Cache From Bluehost
Bluehost is the leading web hosting in the industry and is also endorsed by WordPress.org.
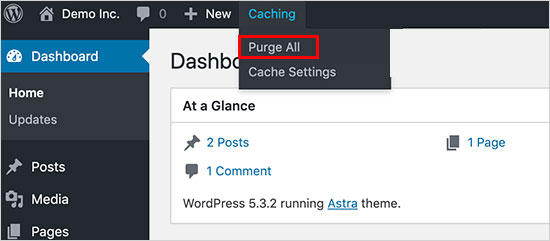
To clear cache in your Bluehost web hosting which is using WP Total Cache, go to your WordPress admin panel.
Step 1: Locate the Caching option on the top of the admin toolbar.
Step 2: By clicking on it, you will see a drop-down menu.
and Step 3: Click on the Purge All option to clear all cached files from your WordPress cache.
b. Clear WordPress Cache From Kinsta
Kinsta is a dedicated managed WordPress hosting provider. Following are the step-by-step instructions to clear cache from Kinsta.
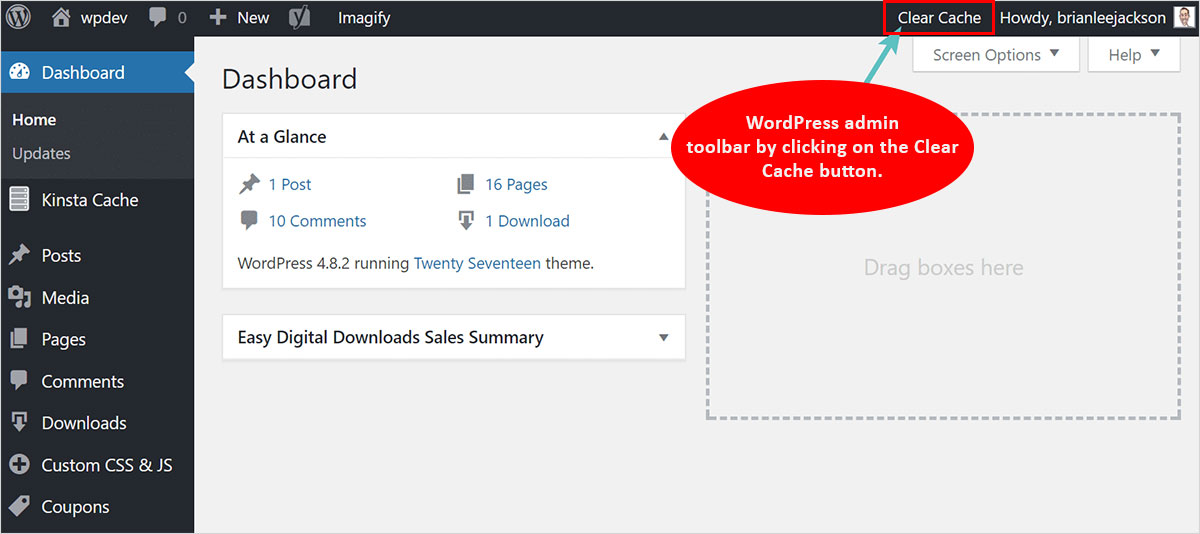
Using WordPress Admin Panel
You can clear the Cache using the WordPress admin toolbar by clicking on the Clear Cache button.
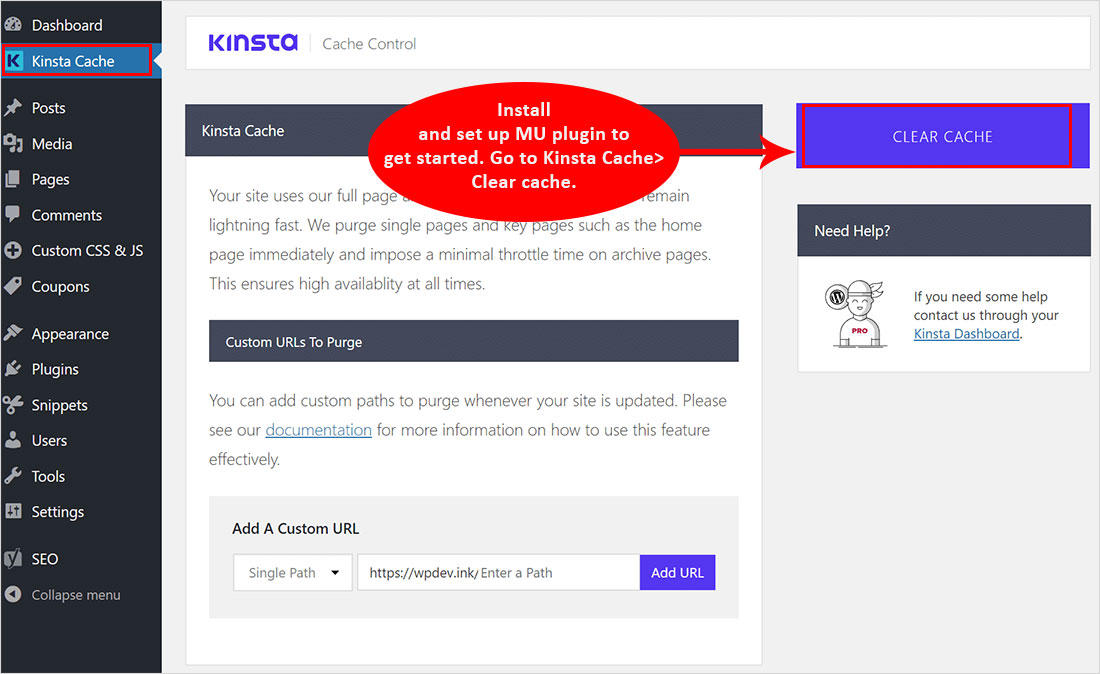
Using MU Plugin
It offers great web hosting services to WordPress sites with its compelling WordPress-compatible features. To manage cache features, Kinsta offers a dedicated Plugin, MU (Must Use) Plugin.
Install and set up the MU plugin to get started. Go to Kinsta Cache →Clear Cache.
c. Clear WordPress Cache From Siteground
SiteGround is another leading web hosting provider that offers built-in caching options to optimize the performance of your website. There are two ways to clear the cache of your WordPress site.
- Using SiteGround Hosting Dashboard
- Using WordPress Admin Dashboard
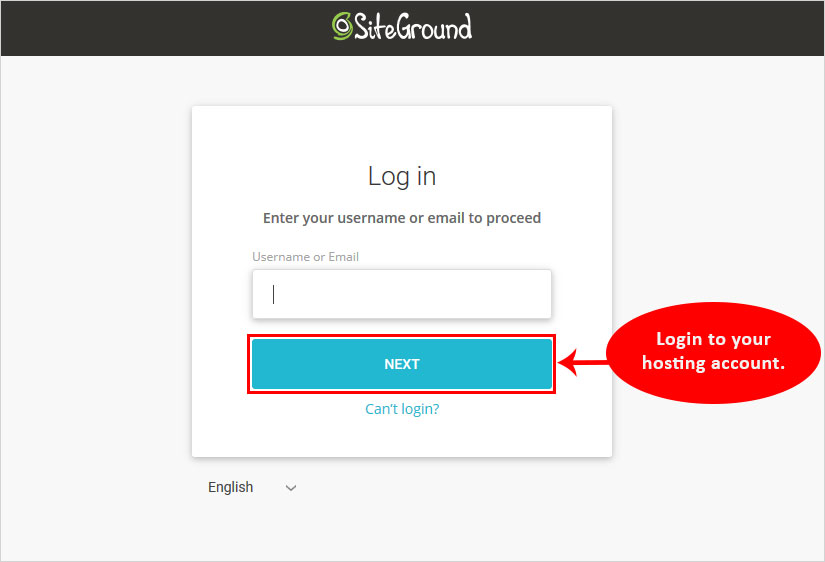
To Clear WordPress Cache Using SiteGround Hosting Dashboard:
Step 1: Log in to your hosting account.
Step 2: Navigate to the Speed → Caching page under the site tools.
and Step 3: After that, navigate to the Dynamic Cache page and click on the menu icon next to your domain name and click on the Flush cache option.
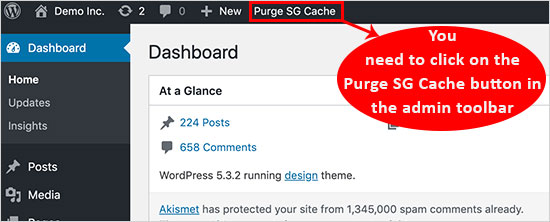
To Clear Cache Using WordPress Admin Dashboard:
Step 1: Install and activate the SG Optimizer plugin.
Step 2: After that, you need to click on the Purge SG Cache button in the admin toolbar and it’s done.
d. Clear Cache From WP Engine
WP Engine is a dedicated managed WordPress hosting provider. Similar to SiteGround and Kinsta, they also offer built-in caching options, which makes managing caching features easier. To clear cache from WP Engine
Step 1: You need to go to your WordPress admin area.
Step 2: Then, navigate to the WP Engine’s menu icon and go to General Settings
and Step 3: Click on the Purge All button.

3. Clear Cache From Your CDN
The ultimate goal of a Content Delivery Network is to store the cached copy of your site on various servers scattered across the world to offer optimized speeds to your audience regardless of the distance. The steps for clearing cache can vary depending on the CDN provider you use. Therefore, if you wish to clear the cache from the CDN provider, you can check the support documentation from your provider. However, you can also find the steps to clear cache from some popular CDN providers including Sucuri, Cloudflare, and StackPath.
a. Clear Cache From Sucuri
Sucuri is a popular CDN provider, which offers much more than just CDN services, including backup and security solutions. Sucuri offers a straightforward way to clear cache, which can clear cache within seconds.
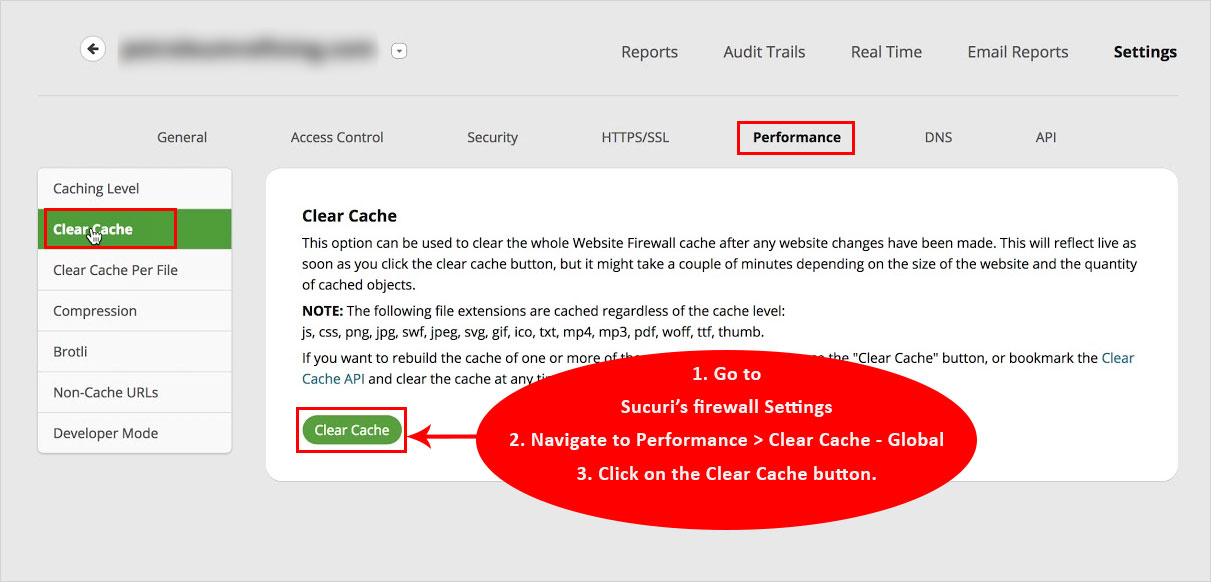
Step 1: Go to Sucuri’s firewall Settings
Step 2: Navigate to Performance →Clear Cache →Global.
and Step 3: A pop-up will appear, describing what you are about to do and how it can affect you.
Step 4: Click on the Clear Cache button.
b. Clear Cache From Cloudflare
Clearing cache in Cloudflare takes a couple of seconds as it’s a straightforward method similar to Sucuri.
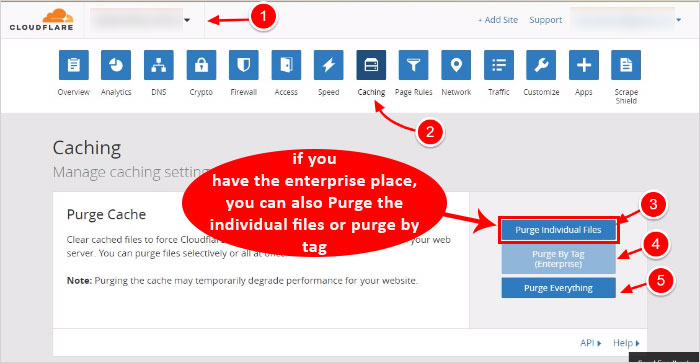
Step 1: All you need to do is log in to your Cloudflare account
Step 2: Select the website for which you want to clear the cache.
and Step 3: Hit the Caching button.
Step 4: Furthermore, if you have the enterprise place, you can also Purge the individual files or purge by tag, as shown below.
c. Clear Cache From Stackpath
StackPath was formerly known as MaxCDN and is one of the leading CDN providers in the industry. To clear cache from your StackPath CDN, follow the given instructions.
Step 1: Log in to your Dashboard and navigate to Sites from the menu.
Step 2: A screen will pop up, click on the manage button.
and Step 3: On your left menu bar, click on Manage Cache.
Step 4: Next screen will let you select the files you want to purge. You can either purge the files individually or select Purge all files.
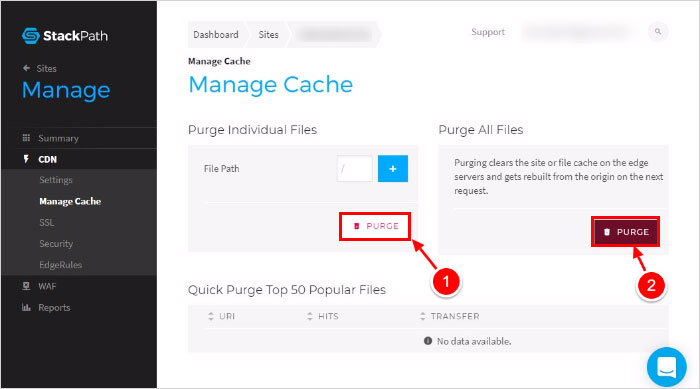
You just cleared cache on your StackPath CDN.
FAQs About Clearing Cache in WordPress
How often should I clear my WordPress cache?
It’s not necessary to clear your cache regularly unless you’ve made changes to your site (e.g., updating content, themes, or plugins) or are troubleshooting an issue. Automating cache clearing through plugins can help ensure a smooth experience.
Will clearing the cache affect my website’s visitors?
No, clearing the cache won’t affect your visitors negatively. Instead, it ensures they see the most up-to-date version of your website. However, if caching is disabled for a long time, it may temporarily slow down load times for users until the cache is rebuilt.
How do I know if the cache is cleared successfully?
You can confirm the cache is cleared by refreshing your website in an incognito browser window or clearing your browser cache. Additionally, tools like GTmetrix or Pingdom can show whether updated content is being served.
Do I need to clear both WordPress cache and browser cache?
Yes, in some cases, clearing both is necessary. WordPress cache ensures your website updates are applied server-side, while browser cache ensures those updates are visible to users on their devices.
Can clearing CDN cache improve website speed?
Clearing CDN cache ensures the latest resources are delivered to users, but it might temporarily increase load time until the cache is rebuilt. However, it won’t significantly affect long-term performance since CDNs are designed for speed optimization.
Is there a way to clear cache automatically in WordPress?
Yes, many caching plugins, such as WP Rocket or W3 Total Cache, provide options to clear cache automatically when changes are made to your site. Additionally, some hosting providers offer automated cache management tools.
Will clearing the cache delete my website data?
No, clearing the cache doesn’t delete your website data. It only removes the temporary cached files stored to improve performance. Your actual website content, files, and database remain unaffected.
How to Clear Cache in WordPress – In Conclusion
Caching sounds great and it improves the overall performance of your site. However, an outdated cache file can have the exact opposite effect and can prevent your audience from discovering the changes you’ve made to your site. In this article, I have explained steps to clear cache using WordPress plugins, from web browsers, web hosting providers, and CDN services. If you’re struggling to see the latest changes on your WordPress site, try deleting your cache using the aforementioned steps.
Related Reading
How to move WordPress site from localhost to live server
How to move WordPress to a new host
Build a Stunning Website in Minutes with TemplateToaster Website Builder
Create Your Own Website Now
Clearing Cache also clears the posts of the website?
No clearing cache doesn’t delete the post.
Well, I am using the WP engine and was a bit confused to clear cache files in it, now I got everything, thanks for the lovely article.