How to Create Custom Header in WordPress?
Of course, everyone would want their website to look more appealing. You want your website to be one of a kind, and not just another website on the web. Do you wish your website to stand out from the rest? Do you want every page of your site to look distinct and appealing? What if I say that all of this is possible and you can do it yourself? And that key is – Custom Header!! Yes, you read it right. Let’s see how to create a custom header in WordPress.
The website design is incomplete without a custom header and footer. In fact, it won’t be wrong to say that the custom header plays a major role in providing a good user experience. It allows seamless navigation, but also the essential tools for promoting the website and placing the CTA. Custom headers are one of the most flexible and useful functionalities provided by WordPress. As it allows you to customize the top section of your website. Thus you can customize the look and feel of your website with the help of custom header template designs.
A header is the most important visual element of your site that occupies the topmost position. It is the first thing a visitor sees whenever lands on your website. The header of your site is your website’s identity that remains the same throughout all the website pages. You can use it to ink a good long-lasting impact in a visitor’s mind. You can stand out and win the user’s trust by creating remarkable self-portraying custom headers. A custom header in WordPress is a feature that allows you to customize the header image along with adding text, widget etc. to it. You can also adjust these elements as per your need to feature the best image of your website. Here at Templatetoaster website builder software, check how to create custom header with WordPress theme builder.
What is a WordPress Header?
A website header is the top section of your WordPress website. Mostly the header is consistent throughout the website. However, there are websites that have different headers for different sections on the website. So, by customizing the header section of your website you can give a unique design and look to your website and also make it more user-friendly.
Besides, the headers can also paly a crucial role in promoting your business and improving the brand identity by integrating elements like brand logo, colors, typography, and more.
Headers also come with functional elements like site search, navigation, shopping cart, CTA buttons, and more to improve the overall user experience and improve the conversion rate.
Why Do You Need Custom Header for WordPress?
The header is one of the most important elements of your website. It is a gesture that conveys a lot about your site. Usually, it holds a picture or video to grab the visitor’s attention.
A custom header in WordPress gives you more control and flexibility. You can rotate, resize or crop a header image in addition to the repositioning of the logo, text or widgets. You can design it to contrast your website look. Also you have to use it as a proposition to the target audience. Try to quote your tagline in the custom header in WordPress. As you may not have second chance to make the first good impression. A well-structured header should answer why you are unique, what’s all that your site features etc.
So, a custom header is important as it works as a face of your website. It should be able to communicate the crux and mood of your site to the audience. You can have a different WordPress custom header per page. For example, you can add features of your product in the header for About Us page and rest of the pages without features. It can work wonders !!
What Can You Really Customize?
Notably, you can modify anything in the website header, meaning you can easily customize the font size, color, image size, and more. You can also effortlessly add a widget section, apply various styles for different pages, change the logo position, add a call-to-action button, modify the navigation menu, and more. This flexibility might lead you to hire expert WordPress developers for precise customization.
So, if you are convinced that you need to customize the header of your WordPress website, here is how you can add a custom header to WordPress site.
How to Add a Custom Header to WordPress?
The default WordPress themes allow you to use custom headers. You can put your own custom header images as per your preferences. Setting a WordPress custom header image takes a few efforts. It basically involves two steps to add a custom header to the default WordPress themes as follows
1. Source and Edit your image
First of all, select an enticing image. It should be simple and unique. You can get lots of free images on the Internet. For more details, you can read about websites to get free images. Once you source your header image, you are just left with editing it.
You can use some of the useful desktop editing or web-based free editing tools. You can rejuvenate the chosen image with GIMP, paint.net etc. Get your custom header WordPress image done.
2. Upload the Custom Header
To upload the header image, log into your WordPress dashboard. From the left pane, navigate to Appearance → Header.
It will open a Header Media pane on the left of the screen. Go to Header Image and click Add New Image button.
It will open the image gallery to choose the image. You can also browse your custom image here. Select the image, crop it if required. Set it as the custom header image. You are done.
How to Customize Header in WordPress with Twenty Twenty-One Theme?
Once you upload the WordPress theme custom header image, you can edit it for applying video, text, widgets, social icons etc. You can use any default WordPress theme. Here, you will get example code to edit custom header in Twenty Seventeen theme.
1. Add a Text Area to the Header
With default theme, you can only change the website title. But to add text area, you have to write some code in header-image.php file. You will add the following code to get a text area in the header
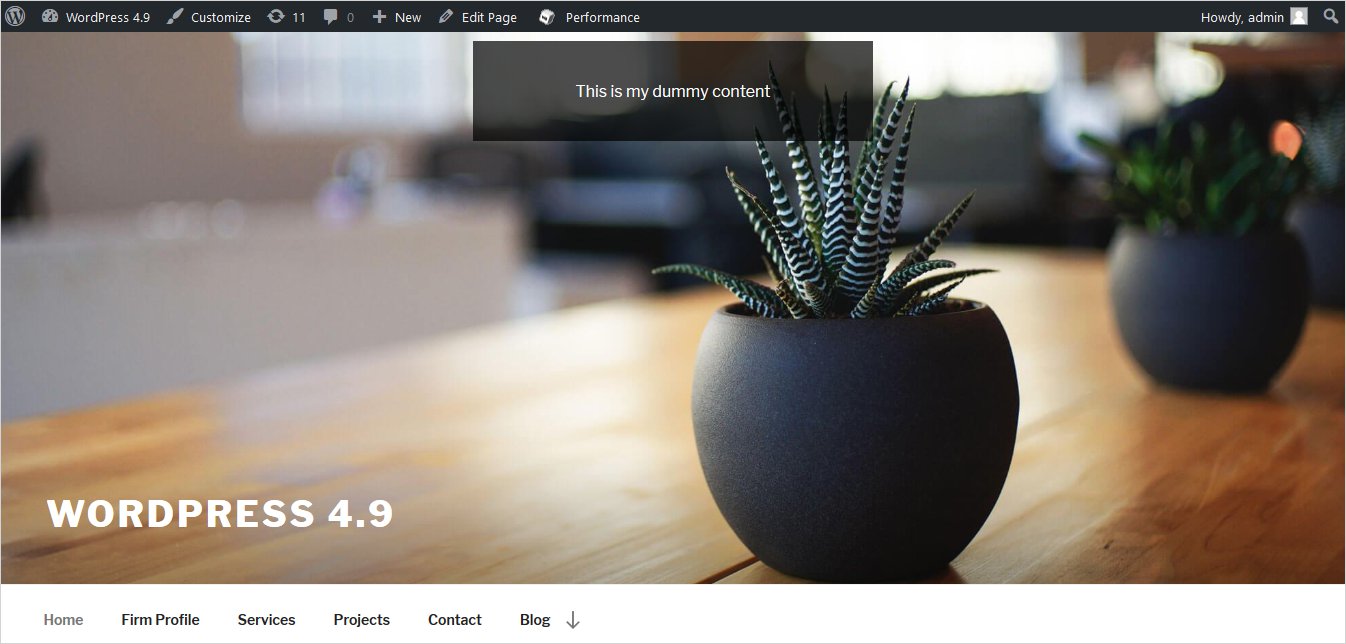
<div class="custom-header">

<div class="custom-header-media">
<?php the_custom_header_markup(); ?>
</div>
<div class="custom_textbox">
<div class="custom_textbox_content"><p>This is my dummy content</p></div>
</div>
After adding this code, you will see a separate text area in the header as shown below
2. Add Social Icons
To add social icons to the header, you will add following code to site-branding.php after wrap class.
<div class="social_links">
<ul>
<li>
<a href="" class="custom_facebook_icon">
<img alt="customfacebook" src="http://localhost/wordpress/wp-content/uploads/2018/01/facebook.png" />
</a>
</li>
<li>
<a href="" class="custom_twitter_icon">
<img alt="customtwitter" src="http://localhost/wordpress/wp-content/uploads/2018/01/twitter.png" />
</a>
</li>
<li>
<a href="" class="custom_googleplus_icon">
<img alt="customgoogleplus" src="http://localhost/wordpress/wp-content/uploads/2018/01/google-plus.png" />
</a>
</li>
</ul>
</div>
You also have to add CSS if you want to style social icons in your own unique style.
#masthead .wrap {
position: relative;
display: inline-block;
vertical-align: middle;
}
.social_links {
float: right;
padding-right: 60px;
}
.social_links li {
display: inline-block;
margin-right: 15px;
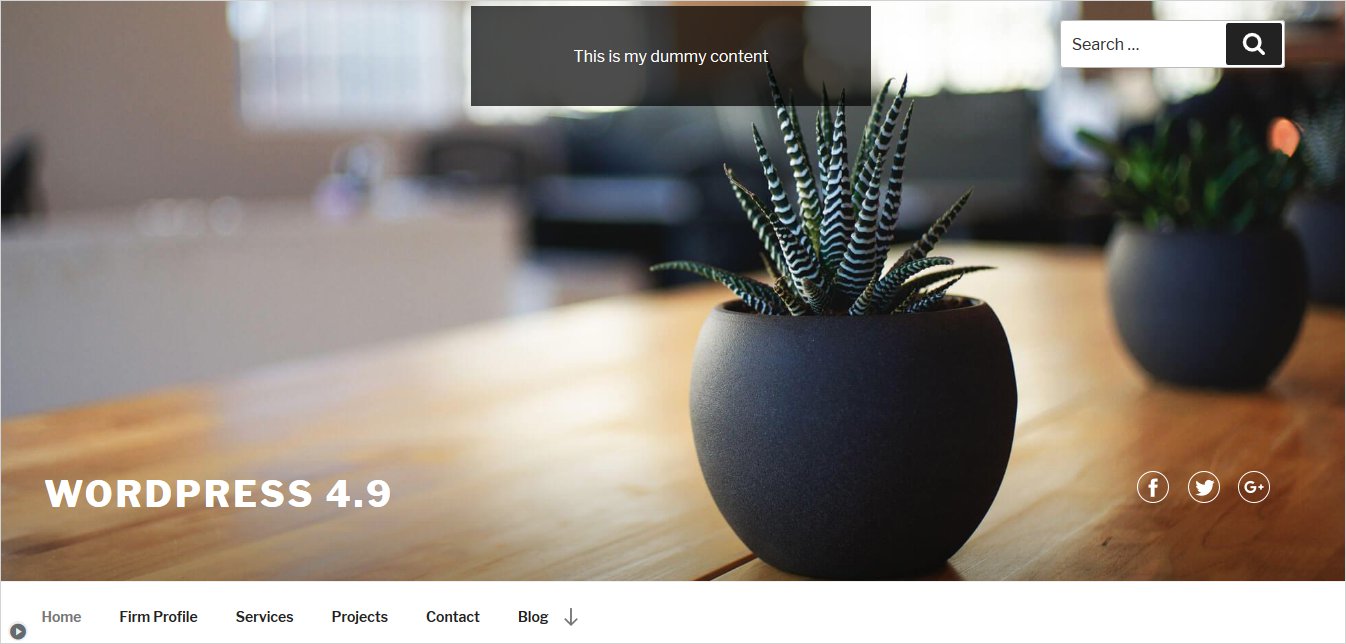
}It will give you the required results as shown
![]()
3. Add a Widget to the Header
If you want some widgets to feature your website, you will define a function in function.php file. You can add this code at the end of the file.
function custom_widgets()
{
register_sidebar( array(
'name' => 'Custom Header Position',
'id' => 'custom_header_position',
'description' => __( 'An optional widget area for your site header', 'testtt' ),
'before_widget' => '<aside id="CustomWidget" class="custom_widget">',
'after_widget' => "</aside>",
'before_title' => '<h3 class="widget-title">',
'after_title' => '</h3>',
) );
}

add_action( 'widgets_init', 'custom_widgets' );
Once you did it, you will add this HTML code to header-image.php file to show the specific widget on the frontend.
<?php

if ( is_active_sidebar( 'custom_header_position' ) ) : ?>
<div id="header-widget-area" class="custom-widget-area widget-area" role="complementary">
<?php dynamic_sidebar( 'custom_header_position' ); ?>
</div>
<?php endif; ?>
Now, you will move to Appearance → Widgets. From here, you can add any widget to your Custom Header Position. For example, the Search widget is added by simply dragging it to Custom Header position.
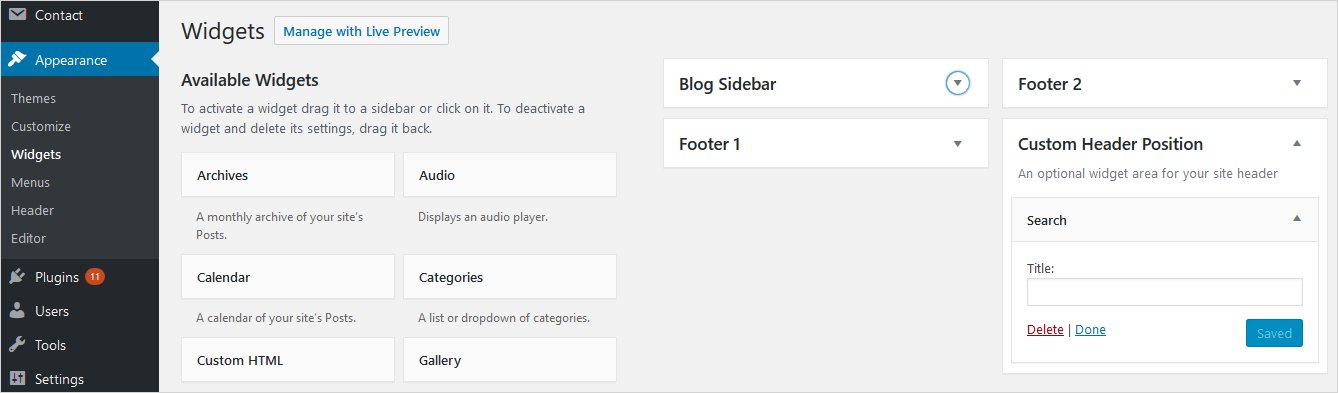
The resultant header will look somewhat like this
4. Reposition the Logo
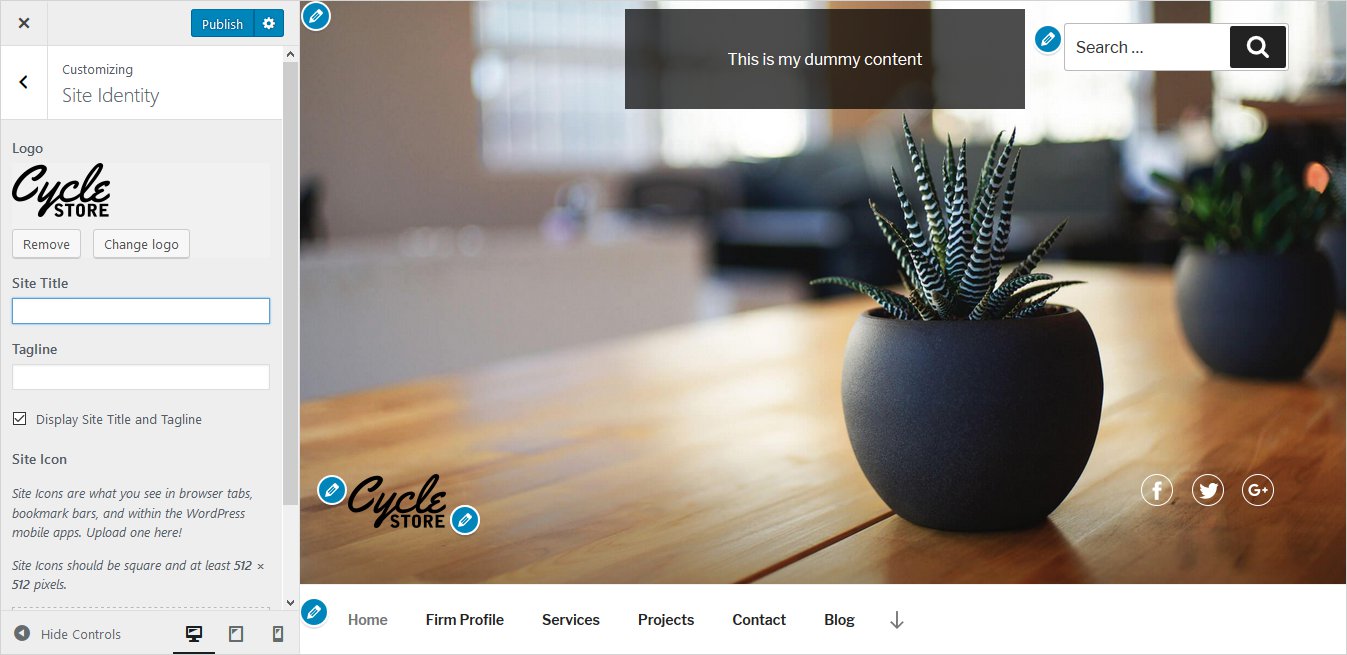
You can add a logo to default WordPress options. Navigate to Appearance → Header → Header Media → Logo Section. Here, set a logo by clicking Select Logo option.
![]()
But to reposition it, you need to write additional CSS. In Twenty Seventeen theme, you will get a logo in bottom-left position by default as shown below
Here, you will see an example CSS to add the logo to the center position. Likewise, you can set it anywhere in the header.
.custom-logo-link {
padding-right: 2em;
position: absolute;
left: 500px;
top: 0px;
}![]()
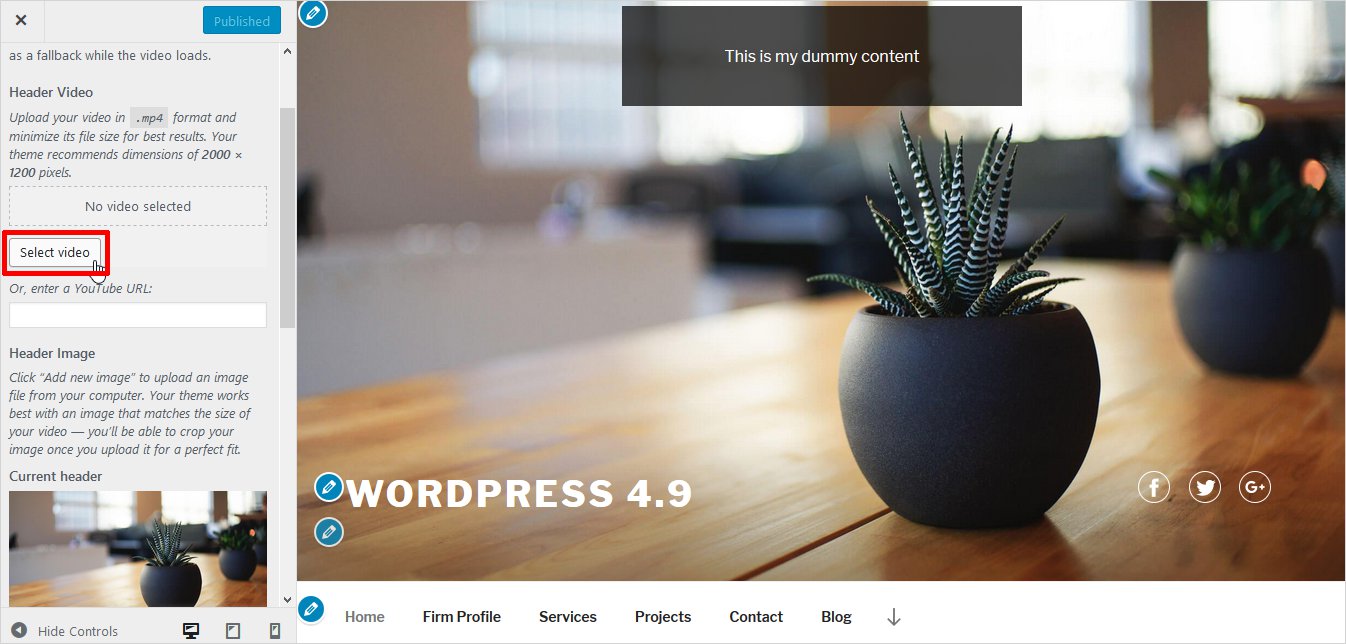
5. Add Video to the Header
Finally, you can also add a video to your WordPress Header. Thankfully, there is no need to add code for this. WordPress provides you a default option to add video or background image.
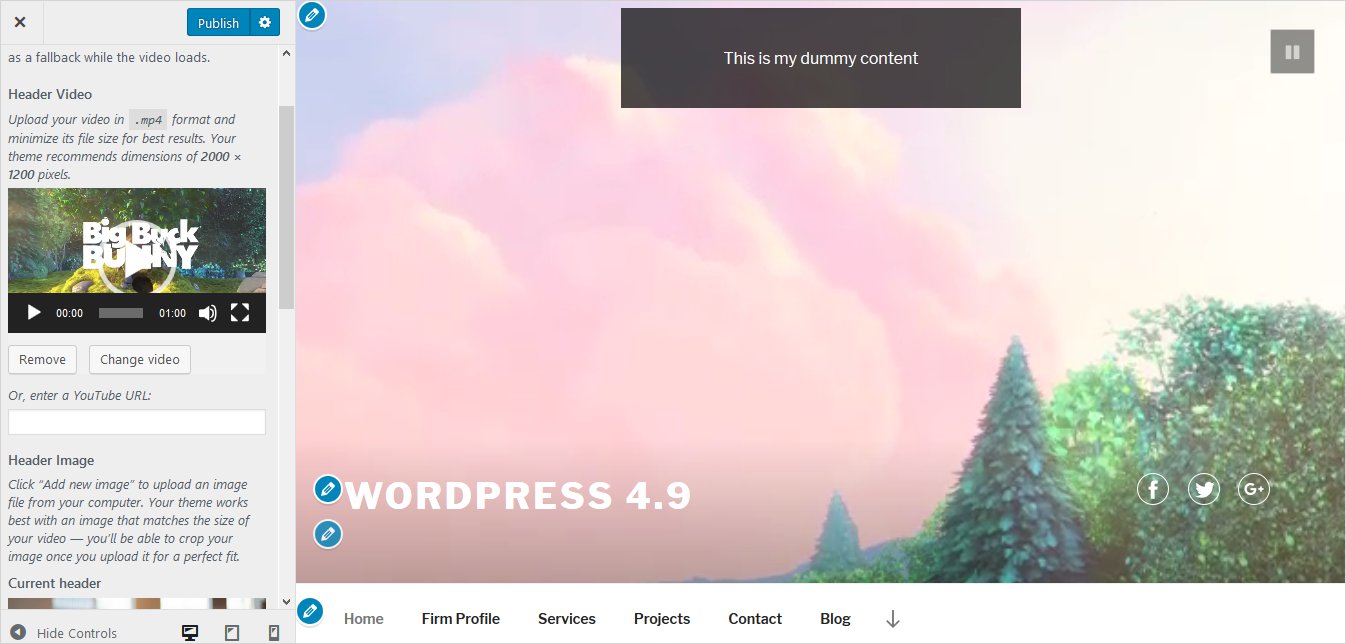
For adding video to the header, navigate to Appearance → Header → Header Media → Header Video. Here, you will click Select Video button as shown below. Then, you can browse the video you want on the header from your computer. Alternatively, you can also give URL of the video if it’s online. Just publish it.
Your Header Video will look like this
Similarly, you can add a Background header image by selecting any Header Image from Header Media section.
You can have different WordPress custom header per page, say some with a background image, some with video or Widgets etc. It all depends on your choice and creativity.
How to Create a Custom Header in WordPress from Scratch with TemplateToaster?
You should have good knowledge of PHP, HTML, CSS to work with template files. If you are a beginner and don’t know how to write code, you can rely on TemplateToaster WordPress Theme Builder. You need no coding to create WordPress custom header template. Just a few clicks to drag & drop interface and you are ready with your custom header. Let’s see how to add custom header to WordPress with TemplateToaster
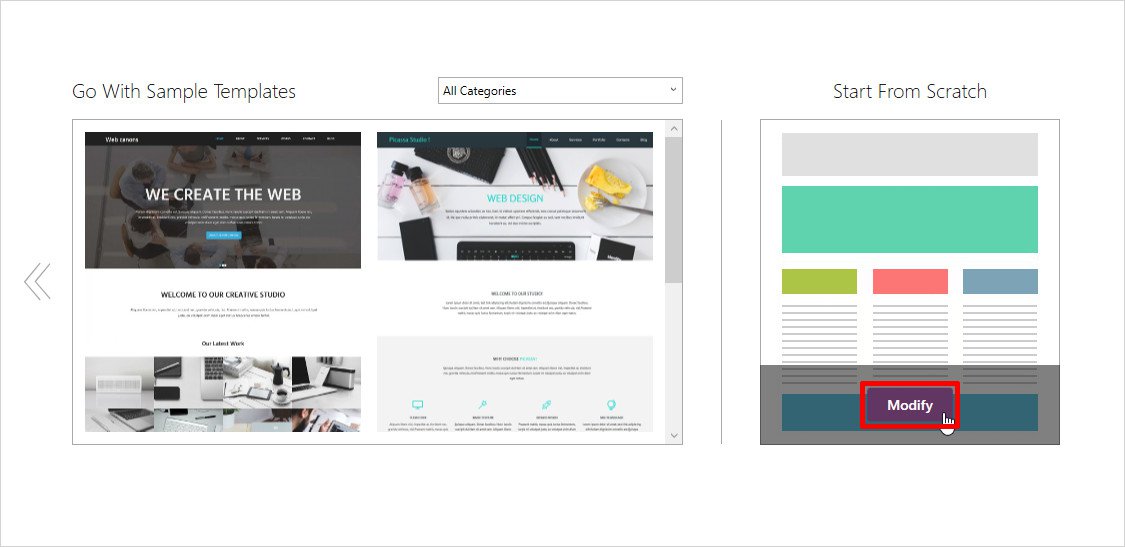
First of all, download and install TemplateToaster website builder. After successfully installing it, you will get the CMS selection screen as shown below. Select the WordPress here
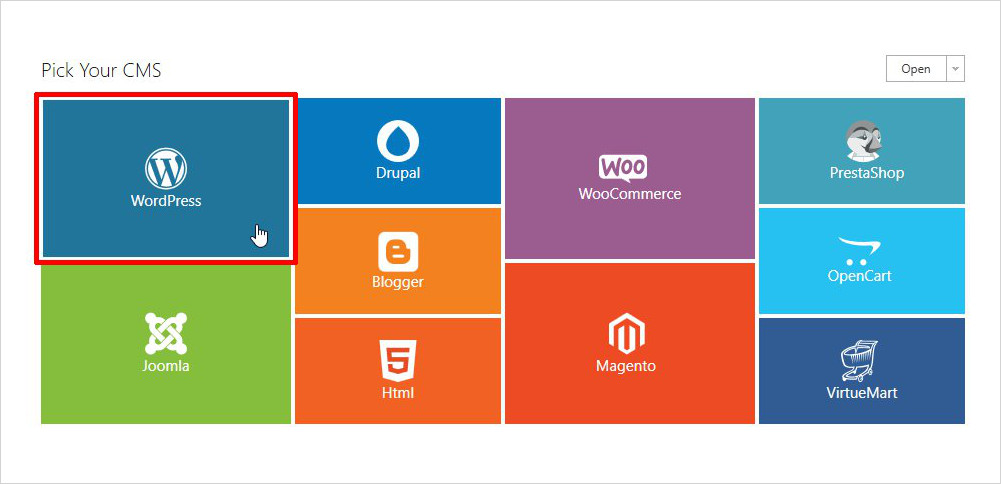
Then, you will get next screen to create a template from scratch or use a sample template. You will select Start from Scratch and click Modify.
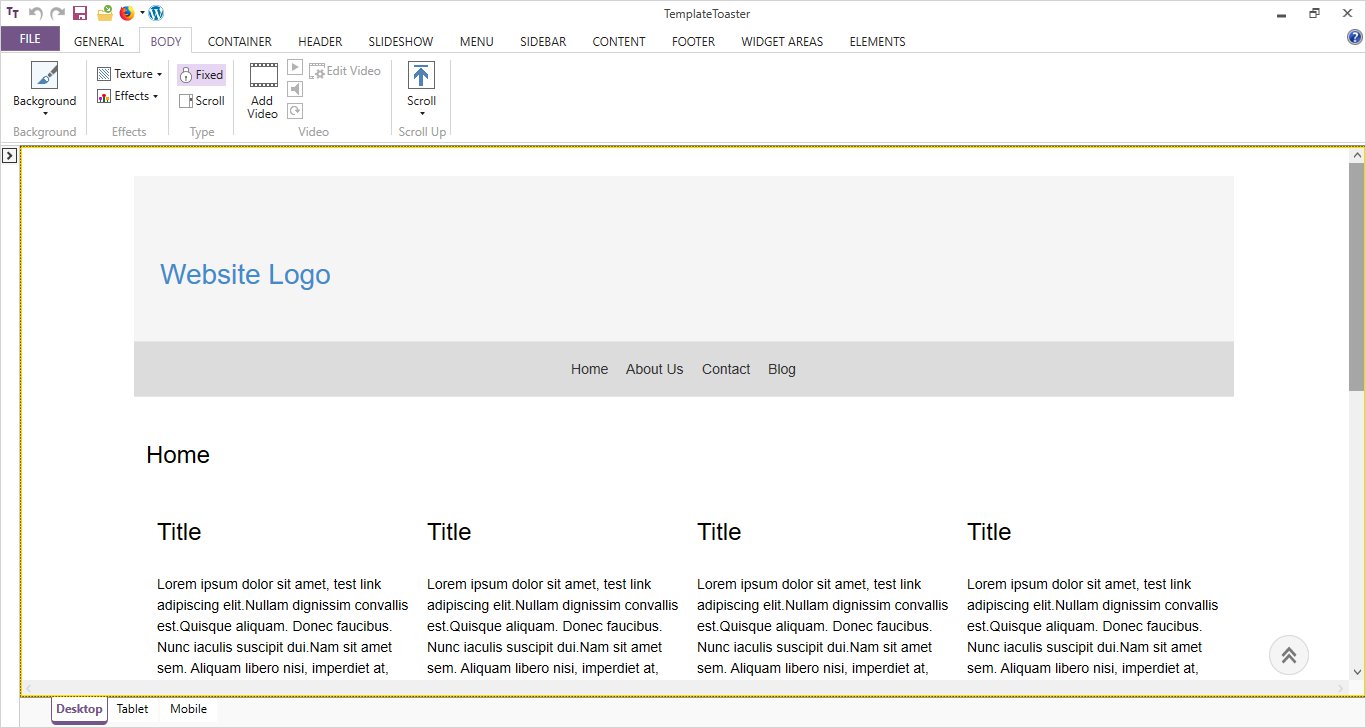
Then, you will be redirected to the main interface of the software from where you can start designing your custom header.
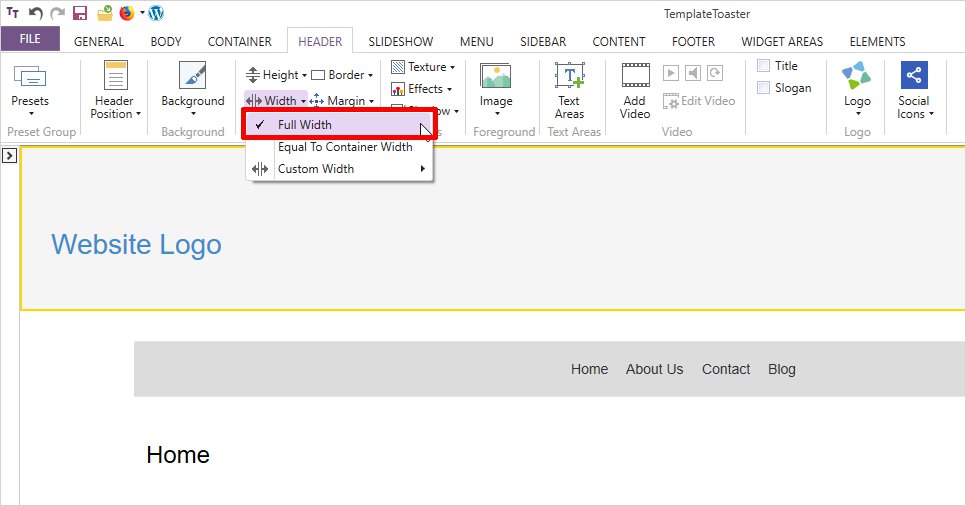
1. Full-Width Custom Header
You will get the main interface screen of the software as shown below. From here, you can set a full-width header. Go to Header → Width → Full Width.
2. Reposition the Logo
From Header tab, click Logo option. It will open a logo icon gallery. You can select a logo image from sample library or you can browse your own custom image. It will set the logo.
![]()
When you double-click on logo image, it will open a Format tab as shown below. From here, you can give a link to logo image or set its position. You can reposition by giving custom left and top positions or select a position shortcut. For example, here a vertical-center position is selected for the logo.
![]()
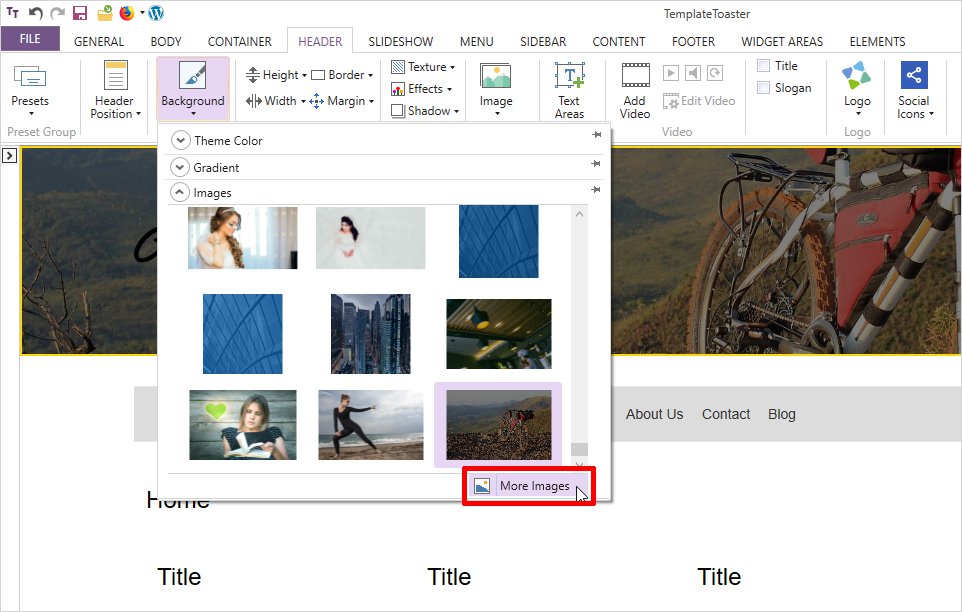
3. Adding Background Image
You will select Background option from Header tab to set a header background image. It will open an image gallery. You can also browse your own custom header image from More Images option.
Similarly, you can add a Foreground header image by clicking Image option from Header tab.
4. Add Text Area to the Header
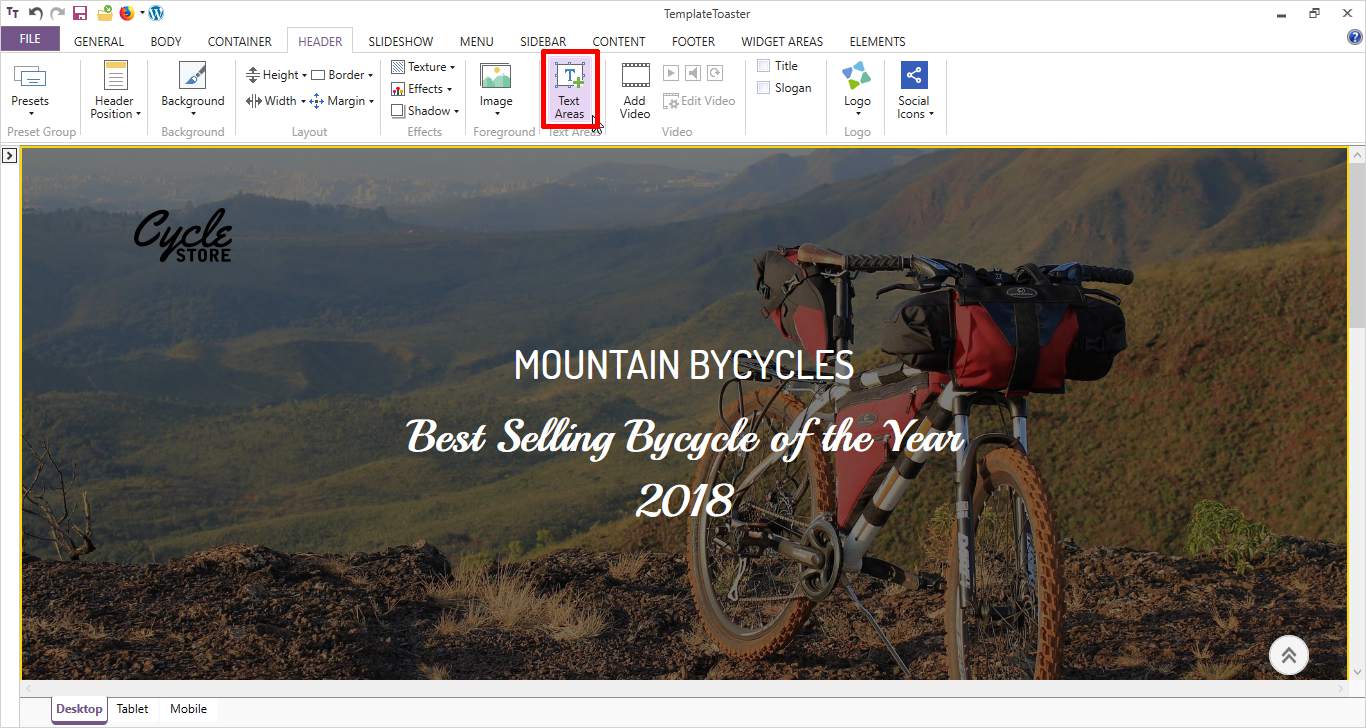
If you want to display the tagline and relevant information on the header, you can use a text area. In the text area, you can add plain text, button, list etc. Click Text Areas option.
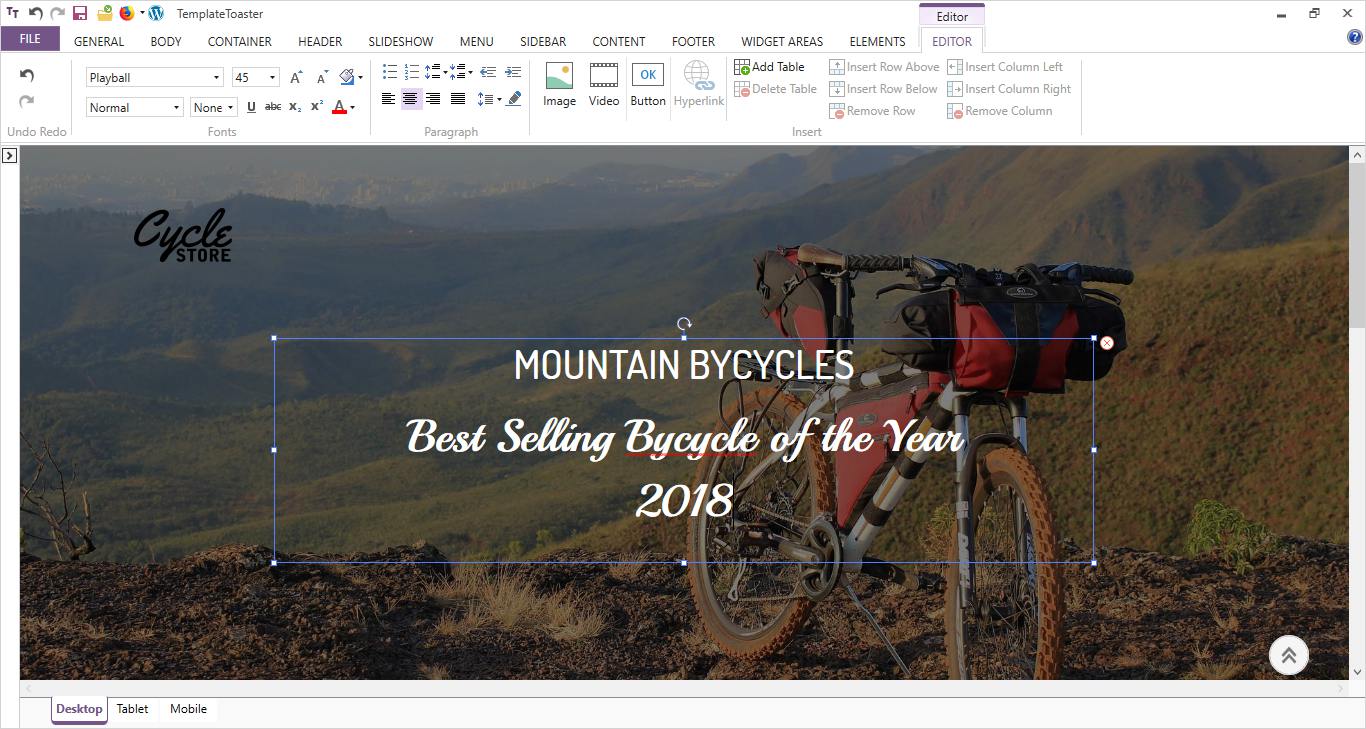
Add content and style it by double-clicking. As a double-click will open an Editor tab to edit content.
5. Add Widget to the Header
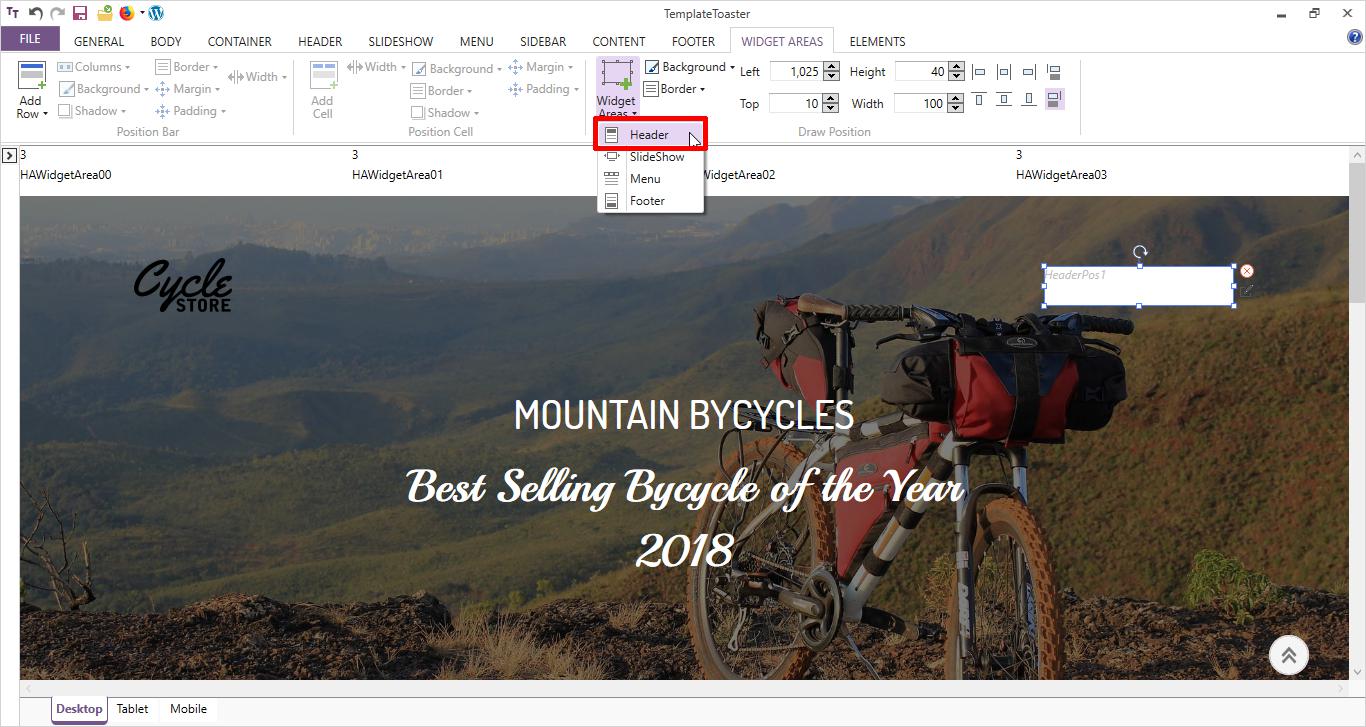
You can add a widget area to the header in a single click. Go to Widget Areas tab and click Widget Areas → Header option. You can also set typography for this widget and can reposition it anywhere in the header just by dragging. You can add content to it after export.
6. Add Social Icons to the Header
Adding social media icons to the header is really simple. From Header tab, click Social Icons option. It will open a social icon gallery to select an image as per your need. You can also browse your custom icon here.
![]()
All the social media icons are available here. You can keep icons according to your requirement. You put social media icons on Facebook, Twitter, and Google + here.
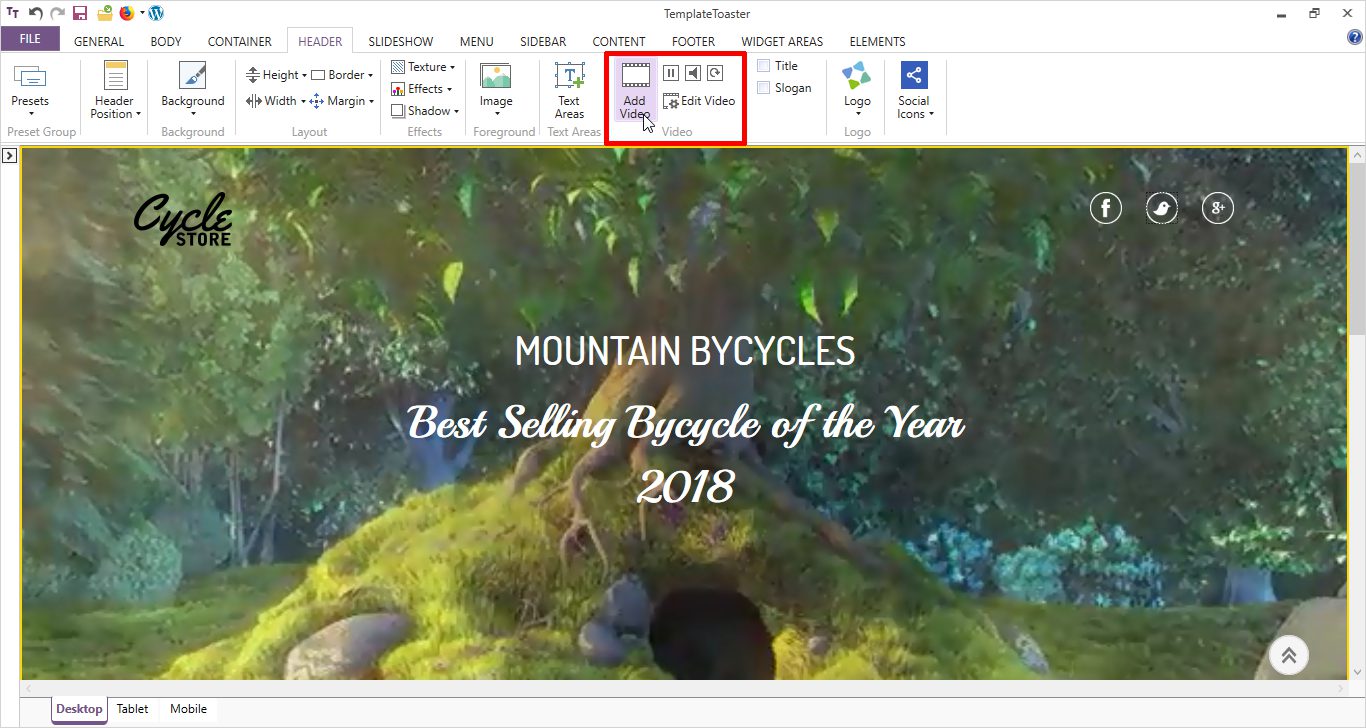
7. Adding Video to the Header
To add a video, click Add Video option. From here, you can easily upload a header background video.
Final Words
As we know, WordPress header plays a crucial role in providing a good user experience, and in overall success of a website. It helps you promote your business, direct users to the main content, promote important information, add social profiles, and more.
By now, you have learned about how to create a Custom header in WordPress. It will definitely change the outlook of your website. The solution you opt is entirely your choice. Hopefully, you liked the post, and now you will be able to easily add custom header in your WordPress website. If you have queries, you can post in the comment section below.
Build a Stunning Website in Minutes with TemplateToaster Website Builder
Create Your Own Website Now
Nice…
Hello,
I’m trying to do step 3 “Add a Widget to the Header” but I can’t find the header-image.php anywhere. I’m editing from the wordpress dashboard.
Any help would be really really appreciated.
And thanks for this post!
Header is the main part of every website, because it shows bout the main elements of our business.
This is an amazing feature given WordPress to customize Header as per audience.
It is mandatory to add social icons it helps to add our website with social media.
Hey there, thanks for posting such a wonderful article, it is really very informative.
I am a bit confused that how to add video in Website’s header, can anybody explain it?
I guess we should add social site’s icons in the footer section isn’t it?
We can put our slogan on Header images it will represent the main feature f our business.
Thanks for providing that kind of article sot the beginners so that they can enhance their development as well as designing skills.
Which plugin is best for wordpress header page?
You can also use Elementor to Create Custom Header in WordPress.